Our merry band continues its adventures but has to be cautious as Dibble is still laid off sick.
Day 8 we head to Camberwick Green to deliver the post. We get lost on the way having foolishly asked the locals for directions. There are plenty of herbs and vegetables for provisions but Pugh 2 damages his axe chopping them all up. Day 9 we arrive at Camberwick and discover that the Post Office will only pay us in worthless vouchers. They do, however give us useful insights into the working of the bandit gangs (they should pay for envelopes not send instructions on the back of picture postcodes). We consider the bandit threat somewhat diminished. We put in some time for weapons training.
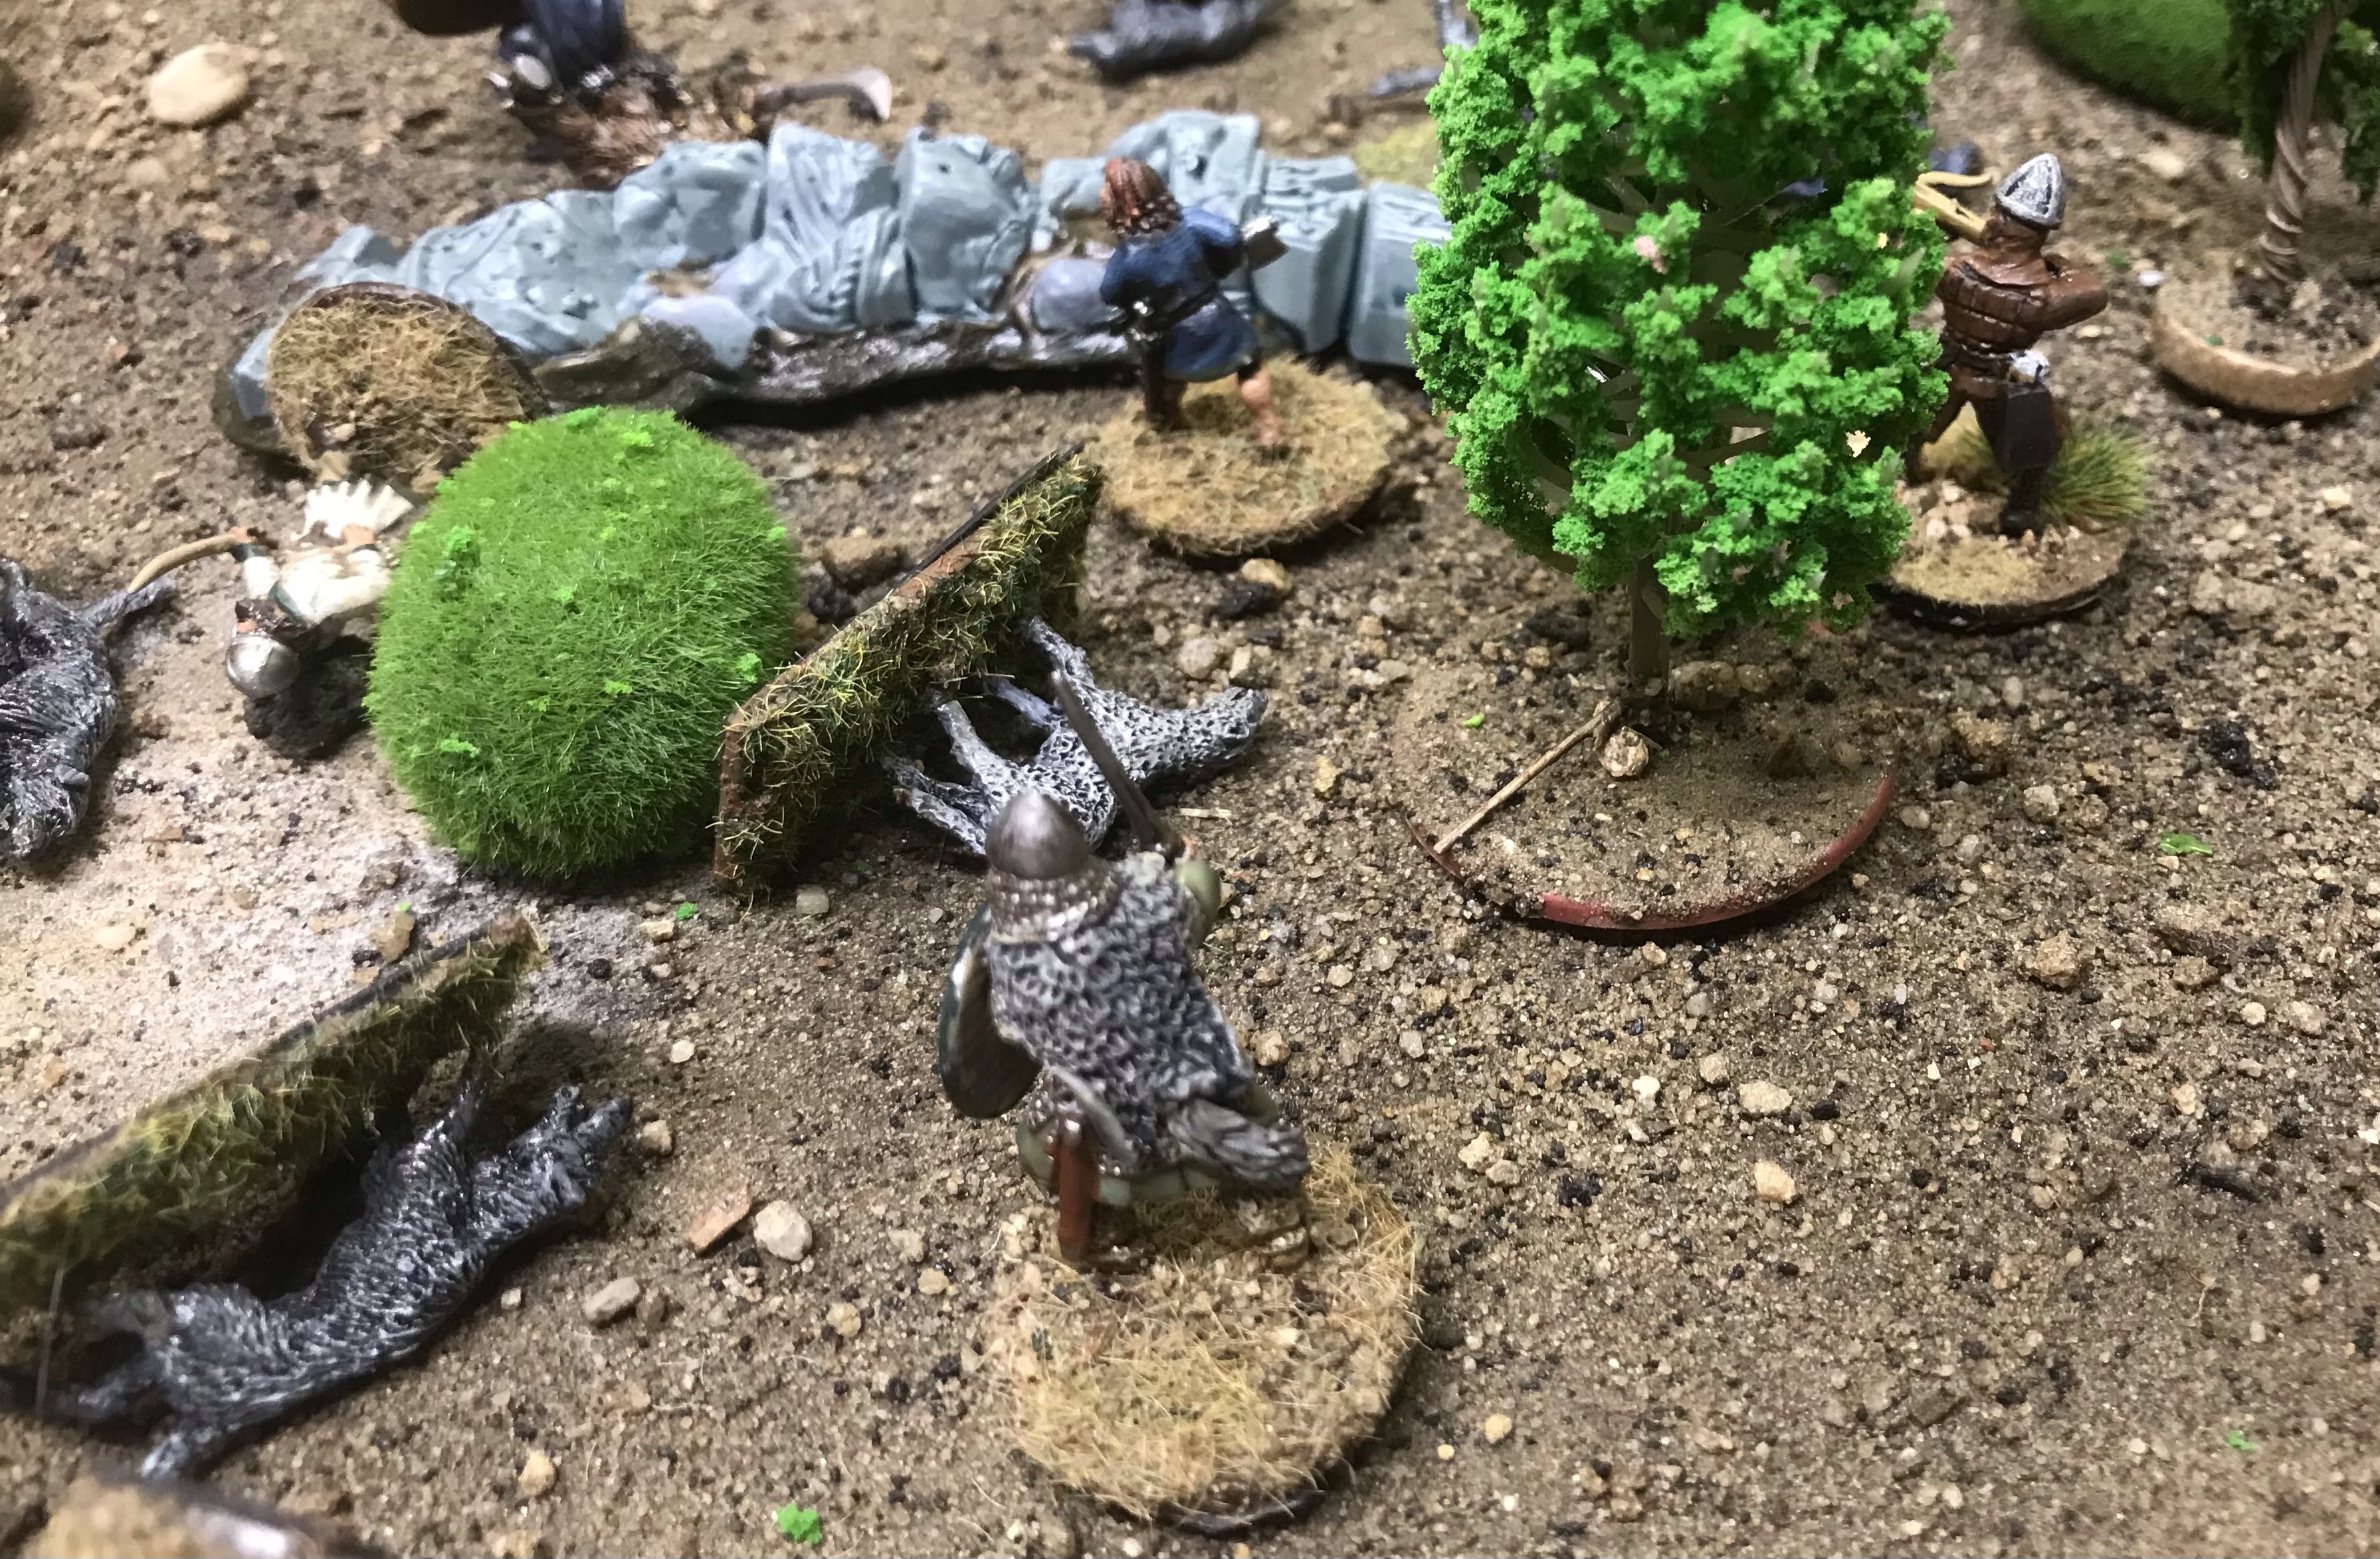
Day 10 we set out to raid an undead camp, hoping they make an easier target than the bandits. We fail to get there in a day and camp up. Captain Flack is getting the hang of swinging his sword about. Day 11 we chance upon the undead, 8 basic zombies, a faster one and a great hulking one. Having bothered to read the scenario rules we discover that we have a slight element of surprise.
These zombies are not too quick, we sneak up, try to keep a good distance away and pepper them with arrows. Captain Flack has also brought Dibble’s throwing knives. The deddites are going down pretty fast but are closing in on us. Captain Flack retrieves some decent armour by the blue sphere thing.
We take some light wounds but nothing serious. Only 2 zombies are left and they cannot catch us.
A decent haul in armour and some cash to boot. We camp then head back to Trumpton in the morning. Day 11, weapons training and lessons from a traveling scholar. We splash out and buy a crossbow for Cuthbert and lend Pugh1 the surplus longbow.
Day 12 we have been contracted to chase off a nest of dust hounds threatening Trumpton. That cannot be too hard; we’ll head off leaving Dibble behind as he is still not well. This should be another camp raid but having run 2 recently we opt for an encounter battle. The wolves don’t look too much work although the one standing up and wearing trousers could be a problem.
The wolves keep to cover but have to get across the last patch of open ground. Concentrated shooting sees the big bad wolf go down.
The other wolves get in close. A careful reading of the melee rules reveals that fighting evasively is not as good as we first thought: Barney is out.
Another Pugh goes down but we break the spirit of the wolves and they run off.
It is not far back to town, plenty of kudos but not a lot of loot. On a positive note Barney and Pugh were only knocked out, they are back in action as (finally) is Dibble.
We have been picking the lowest ranked enemy in each encounter because a random selection can throw up some pretty tough cookies. It almost feels that with a few more easy runs like these we might be able to handle the heavy stuff. It does seem that the rumours of missile weapons being rather good have turned out to be true. It is nice to win but in future we will make sure to use lashings of line of sight blocking terrain.
Five Leagues from the Borderlands is a roughly octo sized hard back book from Modiphius. It is also available as a PDF but the need to flick back and forth between tables and text scattered throughout would make it tricky to use on a digital device, so a PDF would be best printed out. The postage costs from Modiphius (at least in the UK) for the printed book are high and a better deal can probably be sourced from another seller.
The system is basically a set of generation tables and a simple combat system set in a typical fantasy world. Other ‘Five‘ games such as Five Parsecs from Home have a similar outline but different setting. Running the combat games on a 2’ square board means there is not too much hassle with their taking over the house. Some additional space to lay out the charts and play sheets is pretty much essential. Plenty of Saga and fantasy models are on hand to fill the scenes. This will also be a chance to get out some Dungeons and Lasers terrain features.
Here we see our merry band with the models that will represent them.
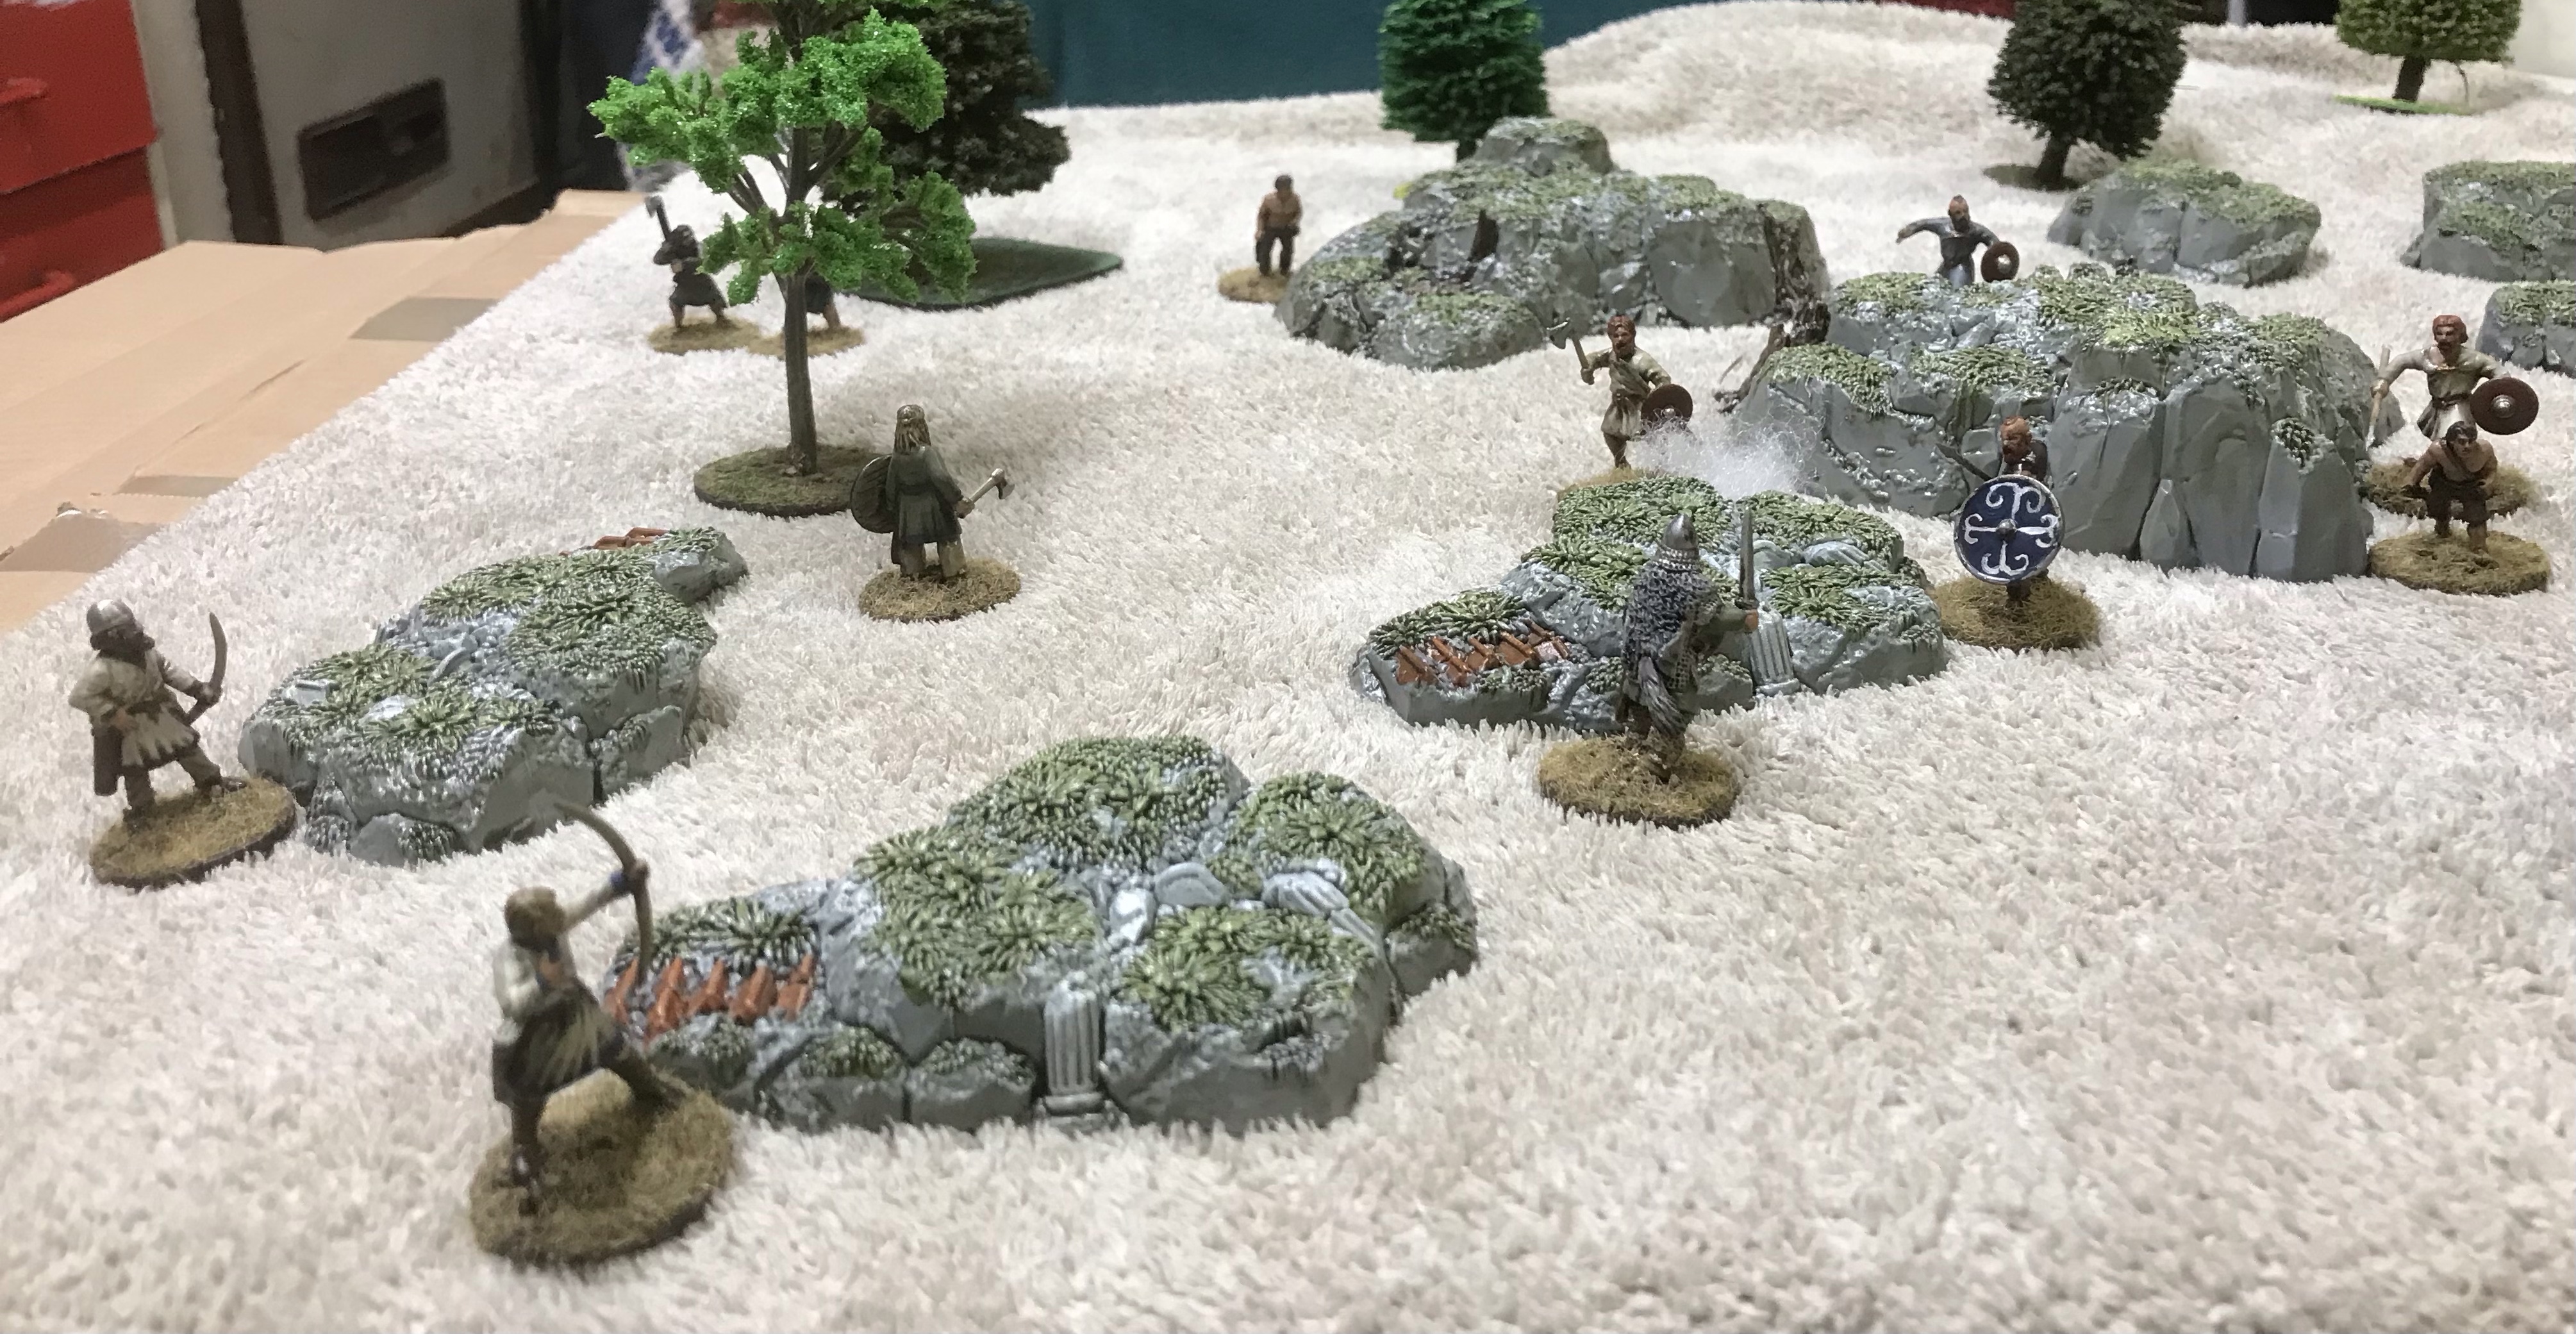
Now follow through a week of table rolling and model moving. Day 1, we head for the metropolis of Trumpton but are delayed by bad weather and have to camp in the wilds. We scavenge some rations from hunting. A day late we arrive at Trumpton, have to shell out 2 Gold for our upkeep but pick up a handful of Springweed berries (helps makes you move more quickly in battle). Day 3 we get our act together and head out to put an end to the shady bandits (the ruin within) who are ruining the local economy. We pass through rocks that could be a good site for copper mining but while investigating are attacked by a mob, 7 of them and although mostly unarmoured pretty much as (un)skilled at fighting as we are.
The battle rolled up is to scout the area so getting to the top of the 2 biggish hills seemed a good interpretation. The turn order consists of rolling a D6 per player figure. If this rolls less than or equal to agility then a model can act before the enemy, otherwise the enemy go first under a rudimentary AI. All our lads are agility 1 but there are 6 of them. The plan was thus to roll the 6 activation dice hoping to get at least a single 1. Then use that activation to get out of the way or perform a key action (such as getting up on those hills). This plan only failed on 1 turn.
We have better armour (just) than the brigands but otherwise are about as capable, the combat plan is to avoid melee and shoot if possible. We have 2 shooters, only a 1 in 6 chance hitting anything in cover at long range but dropping to a 3+ hit at point blank in the open. The brigands have 2 slingers but we easily outrange them. Our magician (Dibble) has a slow spell which is some help in the sneaking about strategy.
We wound a brigand with bowshot and try to work around the edges of the board. Captain Flack has scouted the closer hillock and is pulling back.
The Pugh twins take out an enemy slinger. Our Captain does get attacked but pulls back, fighting defensively.
One of the Pughs gets onto the far hill and we all pull out having done what we have to. Another slinger gets shot.
We checked out the hills and all stayed alive so call that a win although some running away was required. We forage enough food for the day and settle down for the night.
Day 5 we make it to the bandit camp, there are only 5 of them but one fits the description of a known troublemaker; our lads are to the East of the camp. Whatever shed those hairs must have been pretty big (we try not to think about it).
The bandits loose off some ineffective long range shots and charge in. Our archers parry and pull back while Captain Flack and the Pughs come to the rescue.
We shoot down their leader and take out his mates in hand to hand. The bandit bowmen head off but not before shooting down Dibble.
We camp in the ruins and head back to Trumpton for day 7. We earn a little cash and our keep by helping out in the fields. We spend half our limited funds on better armour for Pugh 2. Dibble visits the quack and is pronounced off duty for 6 days.
After 1 week we have a little more money than we started with but not enough to buy anything useful. We must be fitter as most of use now move more quickly. The bandits have been hurt (dropping a threat level) but we are a man down. We are considering a job taking a letter to Camberwick Green for a paltry 1 Gold. It will cost more than that to stay there but we will get to see the famous windmill.
Jumping back to the real world here are a few thoughts on the system so far. Some errors may have been made with the tables and some results have certainly been fudged to make them better fit the narrative. The party is short of cash and experience. If enemies are to steadily increase in threat then some tweaking of the tables will be needed to at least try and keep up.
Some seriously old and disgracefully painted 6mm Orcs take on some slightly newer and infinitely better painted Imperial Guard at Epic Armageddon. The last published set of 6mm Epic rules from Games Workshop. Although officially long out of print the rules are still on-line. The Brumbaer list builder is a useful tool as it not only calculates the points but pulls up the relevant stats and army rules. Most of the Orks in play here are the relatively primitive minis put out at the time of the first Space Marine game. The Guard are the chunkier better detailed minis released much later. Fans will notice that 2 of the buildings are from then original Adeptus Titanicus. The Imperator Titan is not in play but happened to be in the box and makes a nice terrain piece.
We have run Epic at the club before but it must have been around 2016. Before that I played at Britcon 2008 coming resoundingly bottom. My opponent had also not played for a while but had the appearance of knowing what he was doing. The rules are not particularly hard but where our Orks fell down was in a total lack of research into what the various units were good or at least less bad at. Orks work best in large units so the Guard had more units on table giving them greater flexibility. The only Ork unit to do well was the Ork Air Force (the OAFs) who benefited from the complete lack of anti-air in the Guard army. We played 1850 points which seems to cunningly prevent buying any Titans. It would have been better to up the points so Titans could fit in. They look good and because they are a points sink might result in less models on the table.
We all line up neatly. It is not getting to get any better for our Orks.
The stompa mob is the best shooting unit here and it fails its order roll. Spoiler alert it failed every single one of its order rolls during the game. This meant that it hardly ever had anything to shoot at. Imperial Guard skimmers soon took some shots off it (the OAFs did manage to chase them off).
In the centre our main mob gets into good(ish) positions around the buildings but loses close combat to a puny unit of Rough Riders and is shot up by the big Leman Rus unit. Our mob in the woods decides to shoot at the Rough Riders but with only middling results.
Considering our middling shooting and that a Leman Rus hits about the same in melee as your average Ork we try charging into them. Hits are even enough but the Leman Rus have double-save armour. We draw one round of combat and are crushed in the follow on.
The Rough Riders push through to the objective on the Orkish rear line. Our mob by the woods come out to shoot them up and prevent a Guard victory accomplishment. That works out but the Guard have enough other accomplishments to claim a win on turn 3. Looking at the state of the Orks there is not much they could have done to turn it round.
We finished the game in 2 ½ hours with only a few intervals of rules head scratching and searching. Most of the book is fluff and lists which can make tracking down some special rules tricky. The lesson seems to be in knowing what your army is good at but having an air force or some anti-air can’t do any harm (that might cause my Eldar some issues).
Two more goes with Bloody Big Battles as the 4′ square board was all set up and ready.
Maida often crops up as a scenario being one of the few full Napoleonic battles still small enough to work out with the average battalion level rules. Bloody Big Battles was written with an aim of 1,000 troops to a single stand. Maida is easily on the small side for this sort of conflict. It runs on a mere 3′ by 4′ board.
We have 2 big lines of hills, the French have to move off theirs, get and keep 2 units on the British side. The river and bridges to the side of the board are redundant as there is no way either side can take advantage of them in the 4 turns of the battle.
The game is running in 15mm with figures based and last used for Bataille Empire. The loss markers will be used for disruption and shattered. At this scale it is relatively easy to distinguish skirmisher stands. To completely prove the point rifle stands have been used for the British.
The French hope to concentrate on the British left and have relatively good activation rolls.
Continuing their stroke of luck they push the British off the crests of 2 hills but those British units are still in relatively good shape.
It all gets to be a bit of a mess with units trading disruptions. The French on the centre hill are flanked. British reinforcements are coming to support the left hand hill.
The French try to hold on but are pushed back for a British win as they now hold the crests.
To be honest as soon as the terrain was down it became apparent that there was little else to do here but move up and hope for the best. The French were lucky to do as well as they did.
Moving on in time to 1866 the Prussians face Hanoverians in 1866. Not owning any forces of Hanover for this time period Austrians are standing in for them. The overall look would be about the same except for those white coats. In both armies skirmisher stands are in overcoats and line in jackets although that is hard to see at this scale. At 6mm the system has more of a peas in a bucket look than 15mm. The units still take up more ground area than would appear in ‘real life’. The rivers and roads are also far too wide but need to be wide enough to handle storage plus have some weight to stay in place.
There are some unusual scenario rules that prevent the Hanoverians moving South of the river until the Prussians have failed to move to attack their forces. This aims to simulate the Prussians feinting the Hanoverians and trying to disguise their true lack of strength.
The obvious start is to move up and shoot from a safe distance. There is not much the Hanoverians can do beyond trying to maximise their firepower.
Firing lines develop along the river line which offers light cover.
The Hanoverian cavalry should have stolen the show now but was driven back by artillery fire from the battery to the Prussian left from a ‘cannot fail’ flank attack on the disrupted Prussian infantry.
The dice gradually turn in favour of the Hanoverians who have more boots on the ground. The Prussian line thins. In order to keep to the ‘advance’ special rules the Prussians push units across the river. Artillery is much more destructive in this period compared to 1806; more so as the guns were treated as full batteries not half batteries as stated in the scenario rules. A good plan is to shoot at the gunners with the rifle line, driving them off while taking the lumps from the less dangerous opposing firing line.
The Hanoverians shoot holes in the Prussian line but fail to activate for full movement speeds to rush through the gaps along the roads south. The result is that they fail to occupy 2 otherwise empty villages giving the Prussians a win. The leading cavalry stand for example on the road at left below could easily have taken the village in its path as a full move coupled with a road bonus meant a wapping 36″ of movement.
The 1866 battle worked out reasonably well. Having 2 sides shoot out 3″ apart (just about in effective range) could be argued as realistic although the results were highly dice dependent eventually the bell curve falls in favour of larger numbers.
Following the Leeds bash and an investment in craft felt and the Bloody Big Battles rules we have a go at 1st Bull Run. This is one of the smaller battles on the Bloody Big Battles IO site; only needing a 4′ square board. Here it is running with 15mm bases for Fire and Fury in their start positions.
Here is the official game map for the battle. There is some coincidental resemblance between the 2 although the trees on the gaming table tend to move around rather more than would be ideal. Even allowing for some distortion in scale the CSA unit labelled Evans is too far up the hill to shoot on anyone coming along the road below. An obvious Union plan is to rush along the road and sit on the 2 closest objectives (red stars). Unfortunately the poor quality of all the troops involved makes this a hard ask.
Having visited the actual battlefield it is fair to say that while the maps bear some resemblance to historical maps of the site they have less in common with what is actually there. The site is a National Park and will have been kept in a state resembling that at the time of the battle. The ‘river’ Bull Run is easily fordable along most of its length in July although it will stop guns and heavy wagons. The streams are scarcely worth mentioning. Only the scrub and trees to their sides being something of a barrier.
The majority of the field is pleasant rolling open grazing land.
Note that there is no guarantee as to troops turning up exactly where and when the scenario designer planned due to minimal study of the scenario rules before or during the battle. Considering the confusion of the actual battles this will be deemed acceptable.
The Union move down the road at half speed so decide to turn to face the confederates on the hill rather than exposing a flank. The supporting artillery stupidly deploys on the road causing a back up of troops behind it (rookie error).
The Confederates cannot hit anything from up there so come down. Both sides end up disrupted.
The CSA are moving up both roads and forming a useful looking line behind the stream. The unit on the hill is booted off and the rest of the Union army begins to sort itself out.
The Union charge across the stream but are pushed back. As some consolation their opponents are low on ammo. Artillery starts to find itself some nice spots but at anything above point blank (3″) it is of limited effect here.
The main line is stagnating but the Union make a push across the Southern ford
Bald Hill is taken but more CSA troops are coming up and the Union is pushed off it. The final whistle sees the USA only holding a single objective signalling a CSA win. If Bald Hill had been held this would have been a draw.
As all the toys are out we run it again with rather more thought as to who turns up where. The Union get across the stream with relative ease but the CSA line has firmed up and they hold the hills for another win.
Saturday July 1st 2023 saw a Bloody Big Battles day at Hicks Hall, Burley Leeds. The Leeds Wargames Club own the hall due to legacy from a past member. It’s a pretty impressive place, in good decorative order and lots of space to leave games set up.
We all took part in 2 games each of about 3 1/2 hours. My morning game was Sedan with the brave pantalons rouges trying to get out of the mess their command had got them in to. Here we see nos amis starting to deploy. The boche are going to come in from literally all sides, a few are already in place to the left of table.
A close up some of the Armée d’Afrique, Baccus models.
Sedan is a tough nut for the French. In 1870 they lost about as badly as possible. I had command of the left and organised a slow withdrawal while my colleague to the right kept the retreat route open. Luckily the boche came on slowly and I managed to send a few units off to hold the route out clear. The boche came on en-masse down there but were of poor quality and took a thrashing.
It finally came down to holding 2 objectives, a town towards the top of the board which the Prussians threw waves of troops at but were all beaten back. Also a village at bottom right where we were initially beaten out but managed to push up some cavalry to screen it while the German (they may have been Bavarians) force nearby refused to move up. If they had our horse would have been mutton. The final result was a draw, more than good enough seeing where we started from.
Bloody Big Battles worked particularly well for this period. The chassepot were good enough to menace the German guns. The Dreyse rifles generally rubbish unless the Prussians got properly stuck in. Their allies with early breach loaders did better at shooting. The relatively long range of all weapons kept the field open. Cavalry looked good for prancing around but you don’t want them to fight.
The afternoon turned to Napoleonics and Lutzen, I took the French again. We start out thinly scattered with Prussians and Russians piling on.
As the game continues more and more of our lads show up pushing the allies back.
A closer look at our lads.
I had to run for a train before the final whistle but it was looking at another draw.
In both games the victory conditions were tight making the games competitive although from a military point of view one side was clearly on the back foot.
Although the rules author (Chris Pringle) was on-site there were no copies on hand to buy but the experience was enticing enough to send off an order to NorthStar.
Getting the rules is a trvial part of setting, figures and terrain are the rub. At these scales terrain is a major element as it needs more than many other rules. In the Sedan game the hills are wood cut to size, the roads and rivers chalked onto the mat. This makes the whole set up restricted to a single battle. This is part of the battle map for Lutzen, created by Mark Smith.
The roads and rivers are felt. These were probably cut from small felt squares. A better effect might have been to cut strips from 60cm width bolts of felt cloth.
Another battlefield at Leeds was 2nd Bull Run. Apparantly the trees are made by cutting up a bath mat. The roads and rivers are mounting board.
A handy ‘get out of gaol’ solution is to choose a battles based in a flat desolate area like this from the Sikh Wars.
In the base rules the included battles are all from the Franco-Prussian War but are pretty big affairs, probably not the best place to start. There is a large collection of scenarios at the Bloody Big Battles IOGroup including the Lutzen example above. From a skim of some of those available a likely force size would be 72 infantry, 12 horse, 6 guns and 5 generals for each side to cover a few suitable battles. Units are usually in 4s and 6s. A few battles will run on a 4′ square board with far fewer bases. Possibly not the recommended battle size but enough to get the hang of the system and hopefully playable in a 2-3 hours.
Most of the models in use were Baccus 6mm on square bases although almost anything could be re-purposed. The Baccus figures are detailed if somewhat stylised. Irregular have a nice range, well posed but often crudely sculpted. They do not take well to re-basing so will be likely to show up on long thin rectangles. Heroics and Ros are thinner but like Baccus not based. Their artillery are much better than those of Irregular. Other scales could equally well be used. 10mm or 12mm is tempting especially with the new Warlord plastics although these will need cutting and re-basing. They are moulded standing very close together so expect to lose some models in the cut.
Skirmishers are an important element in most infantry units. They give a buff to combat but are the first stands to be lost as casualties. Most infantry have 1 or 2 skirmisher stands in the appropriate time frames. In the games played here skirmishers were on regular infantry bases but had different poses. This could pose an issue if re-purposing an existing collection where all bases are much the same.
Several games including Lutzen made use of unit markers. These are not strictly necessary if you can work out which unit is which from their tiny 6mm uniforms. The markers did not work too well as they easily became detatched from their parent units. If labels are to be used they need sticking to the relevant unit, possibly with post-it notes. They hold little crucial information unlike in Fire and Fury or Volley and Bayonet so are best skipped if possible. There was some need for status reminders. Disorder was common, often removed so not required for every unit. Spent was less often needed. Other markers such as low on ammo or unable to fire could be covered by a single marker type. Plastic counters were used in Leeds but for anyone working close to the ACW time frame some manufacurers make suitable markers for Fire and Fury.
The Tracian models shown in the Age of Alexander book are in their traditional tribal dress but looking at evidence from modern Bulgaria there is a good case for running selected Greek figures as Thracians. The historical thread is that as Macedonian and Successor influence spreads then the Thracian tribes adapt Greek weapons and costume. It can even be argued that to provide sufficient ‘loyal’ manpower the Successors hired Thracian mercenaries and settled Thracians in military colonies; resulting in Successor and Thracian equipment influencing each other.
This assumption is based on a number of tomb paintings in Bulgaria dating around the 3rd century BC that give a good idea of at least how some Thracians looked like around the time of the Successors. Possibly the mother load is at Kazanlak but there are other tombs with military and domestic images from the same period. The images from the tombs indicate an obvious Greek influence and show that Greek or Successor models can be repurposed as Thracians in Saga. In particular those with lighter armour and bearing Thoreophoroi (θυρεοφόροι) style shields together with shieldless cavalry.
The Thoreophoroi style of weapons and armour is nicely described with original illustrations and modern interpretations at ‘ancientbattles‘. This all seems a fair match for the later style Thracian javelin warriors. The 28mm Polemarch successor Thoreophoroi and Thracians with rhomphia seem to the same base sculpts except that the Thracians wear greaves. The Aventine Thoreophoroi can also be converted to rhomphia wielders by swapping out weapons with the only major difference from their Thracians also being a lack of greaves.
The Rhompia (ῥομφαία) is still good to go (possibly more so if it is a more recent weapon development) for the later Thracians. We have this from Plutarch of events about 168 BC but written around 110 AD and quoting an earlier source possibly Publius Cornelius Scipio Nasica Corculum who was there:
First the Thracians advanced, whose appearance, Nasica says, was most terrible,—men of lofty stature, clad in tunics which showed black beneath the white and gleaming armour of their shields and greaves, and tossing high on their right shoulders battle-axes with heavy iron heads.
Plutarch, Aemilius Paulus Chpt 18, section 3
Looking at the original Greek we have at the end of this section ὀρθὰς δὲ ῥομφαίας βαρυσιδήρους ἀπὸ τῶν δεξιῶν ὤμων so rhomphia rather than battle axes.
The Thracian board is unusual in that it depends on plunder. The gist is that a Thracian unit without plunder wants to get some so is looking to attack. A Thracian unit that already has plunder is keen to hold onto it so is better in defense. In Saga terms some advanced abilities are better with plunder and some better without. Luckily Thracians can remove plunder with ‘We Obey’ (instead of moving) or their INSATIABLE ability.
To keep with the timeline of Greek influenced Thracians here they will face up to Asian Successors in a similar match up to the game at Iron Man in Leeds. In that game the Tracians did not make optimal use of plunder (assuming such a goal is possible) and were run over by the Successors. There have been a couple of clarifications to the Successor board in the latest FAQ but only to confirm what had been the most logical interpretations. The Thracian board has a clarification to top row Saga combat dice bonus.
Thracian Warriors can run with rhomphia or javelins. The rhomphia are buffed by RHOMPHAEAE and the javelins by ELUSIVE so having 1 unit of each makes best use of the board. On the other hand javelins get a free missile shot and melee attack at +1. This seems a better deal than the heavy weapon +1 in attack or defense as both types are penalised -1 melee armour.
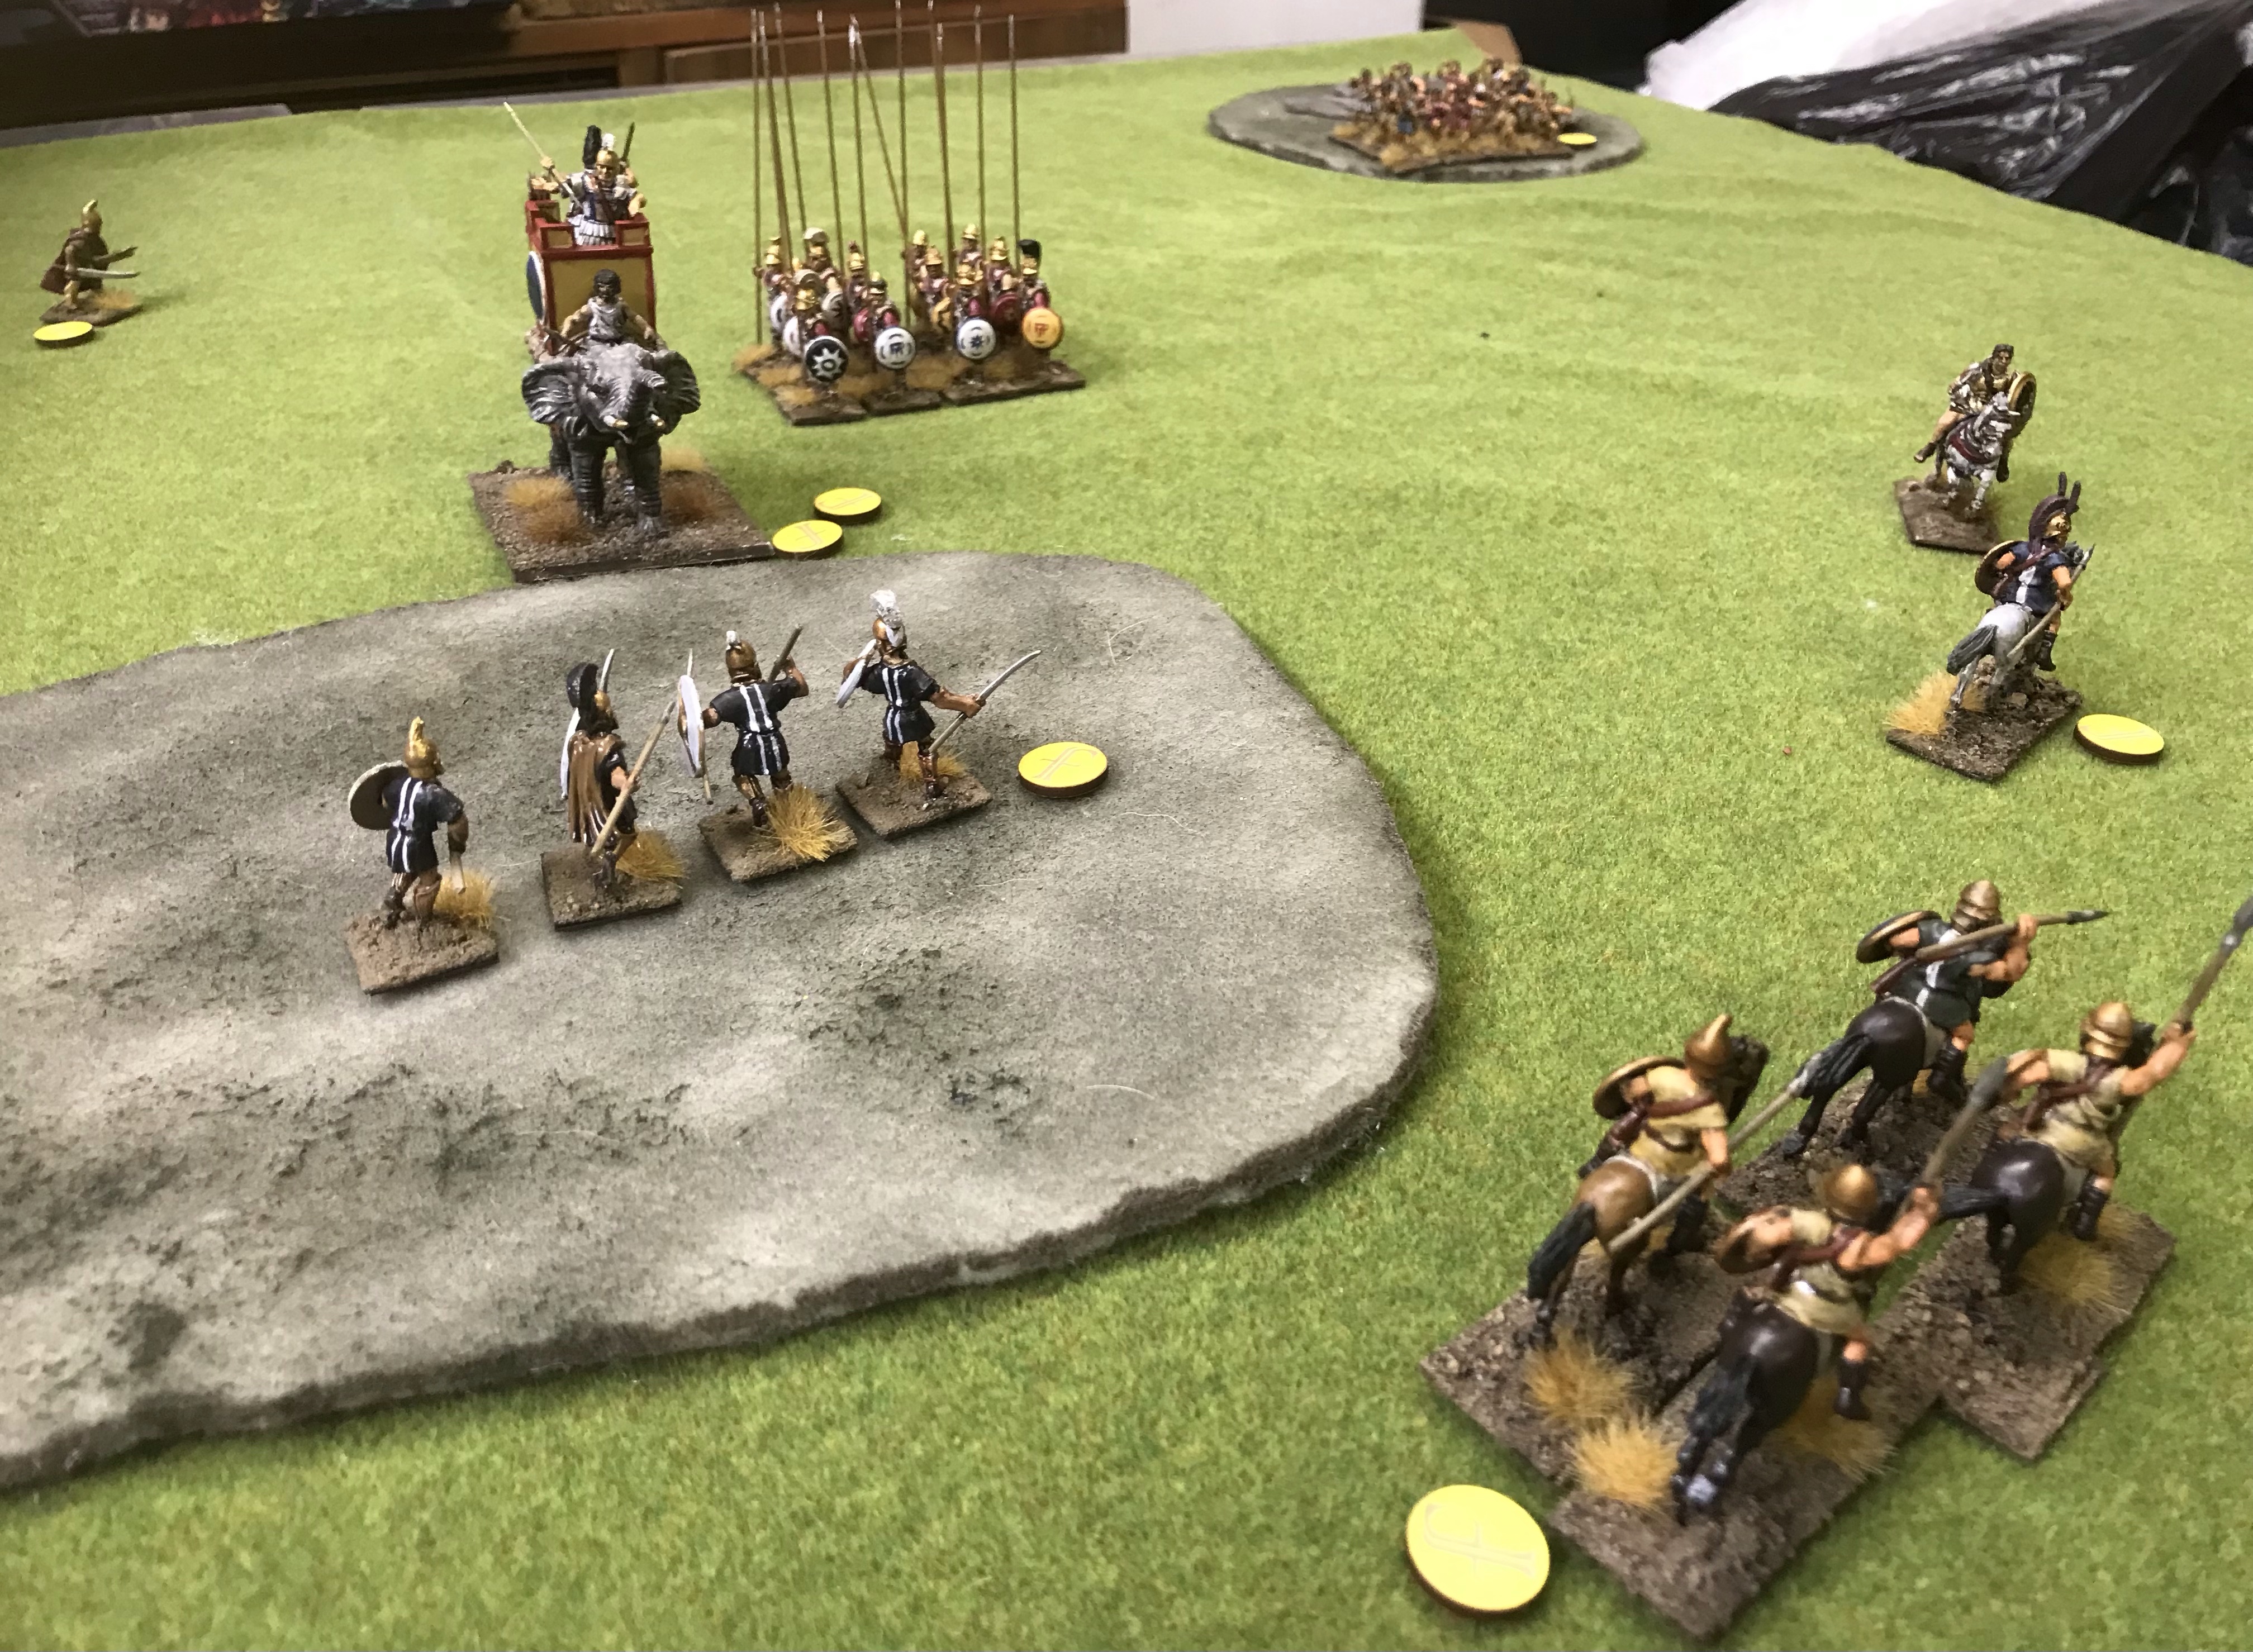
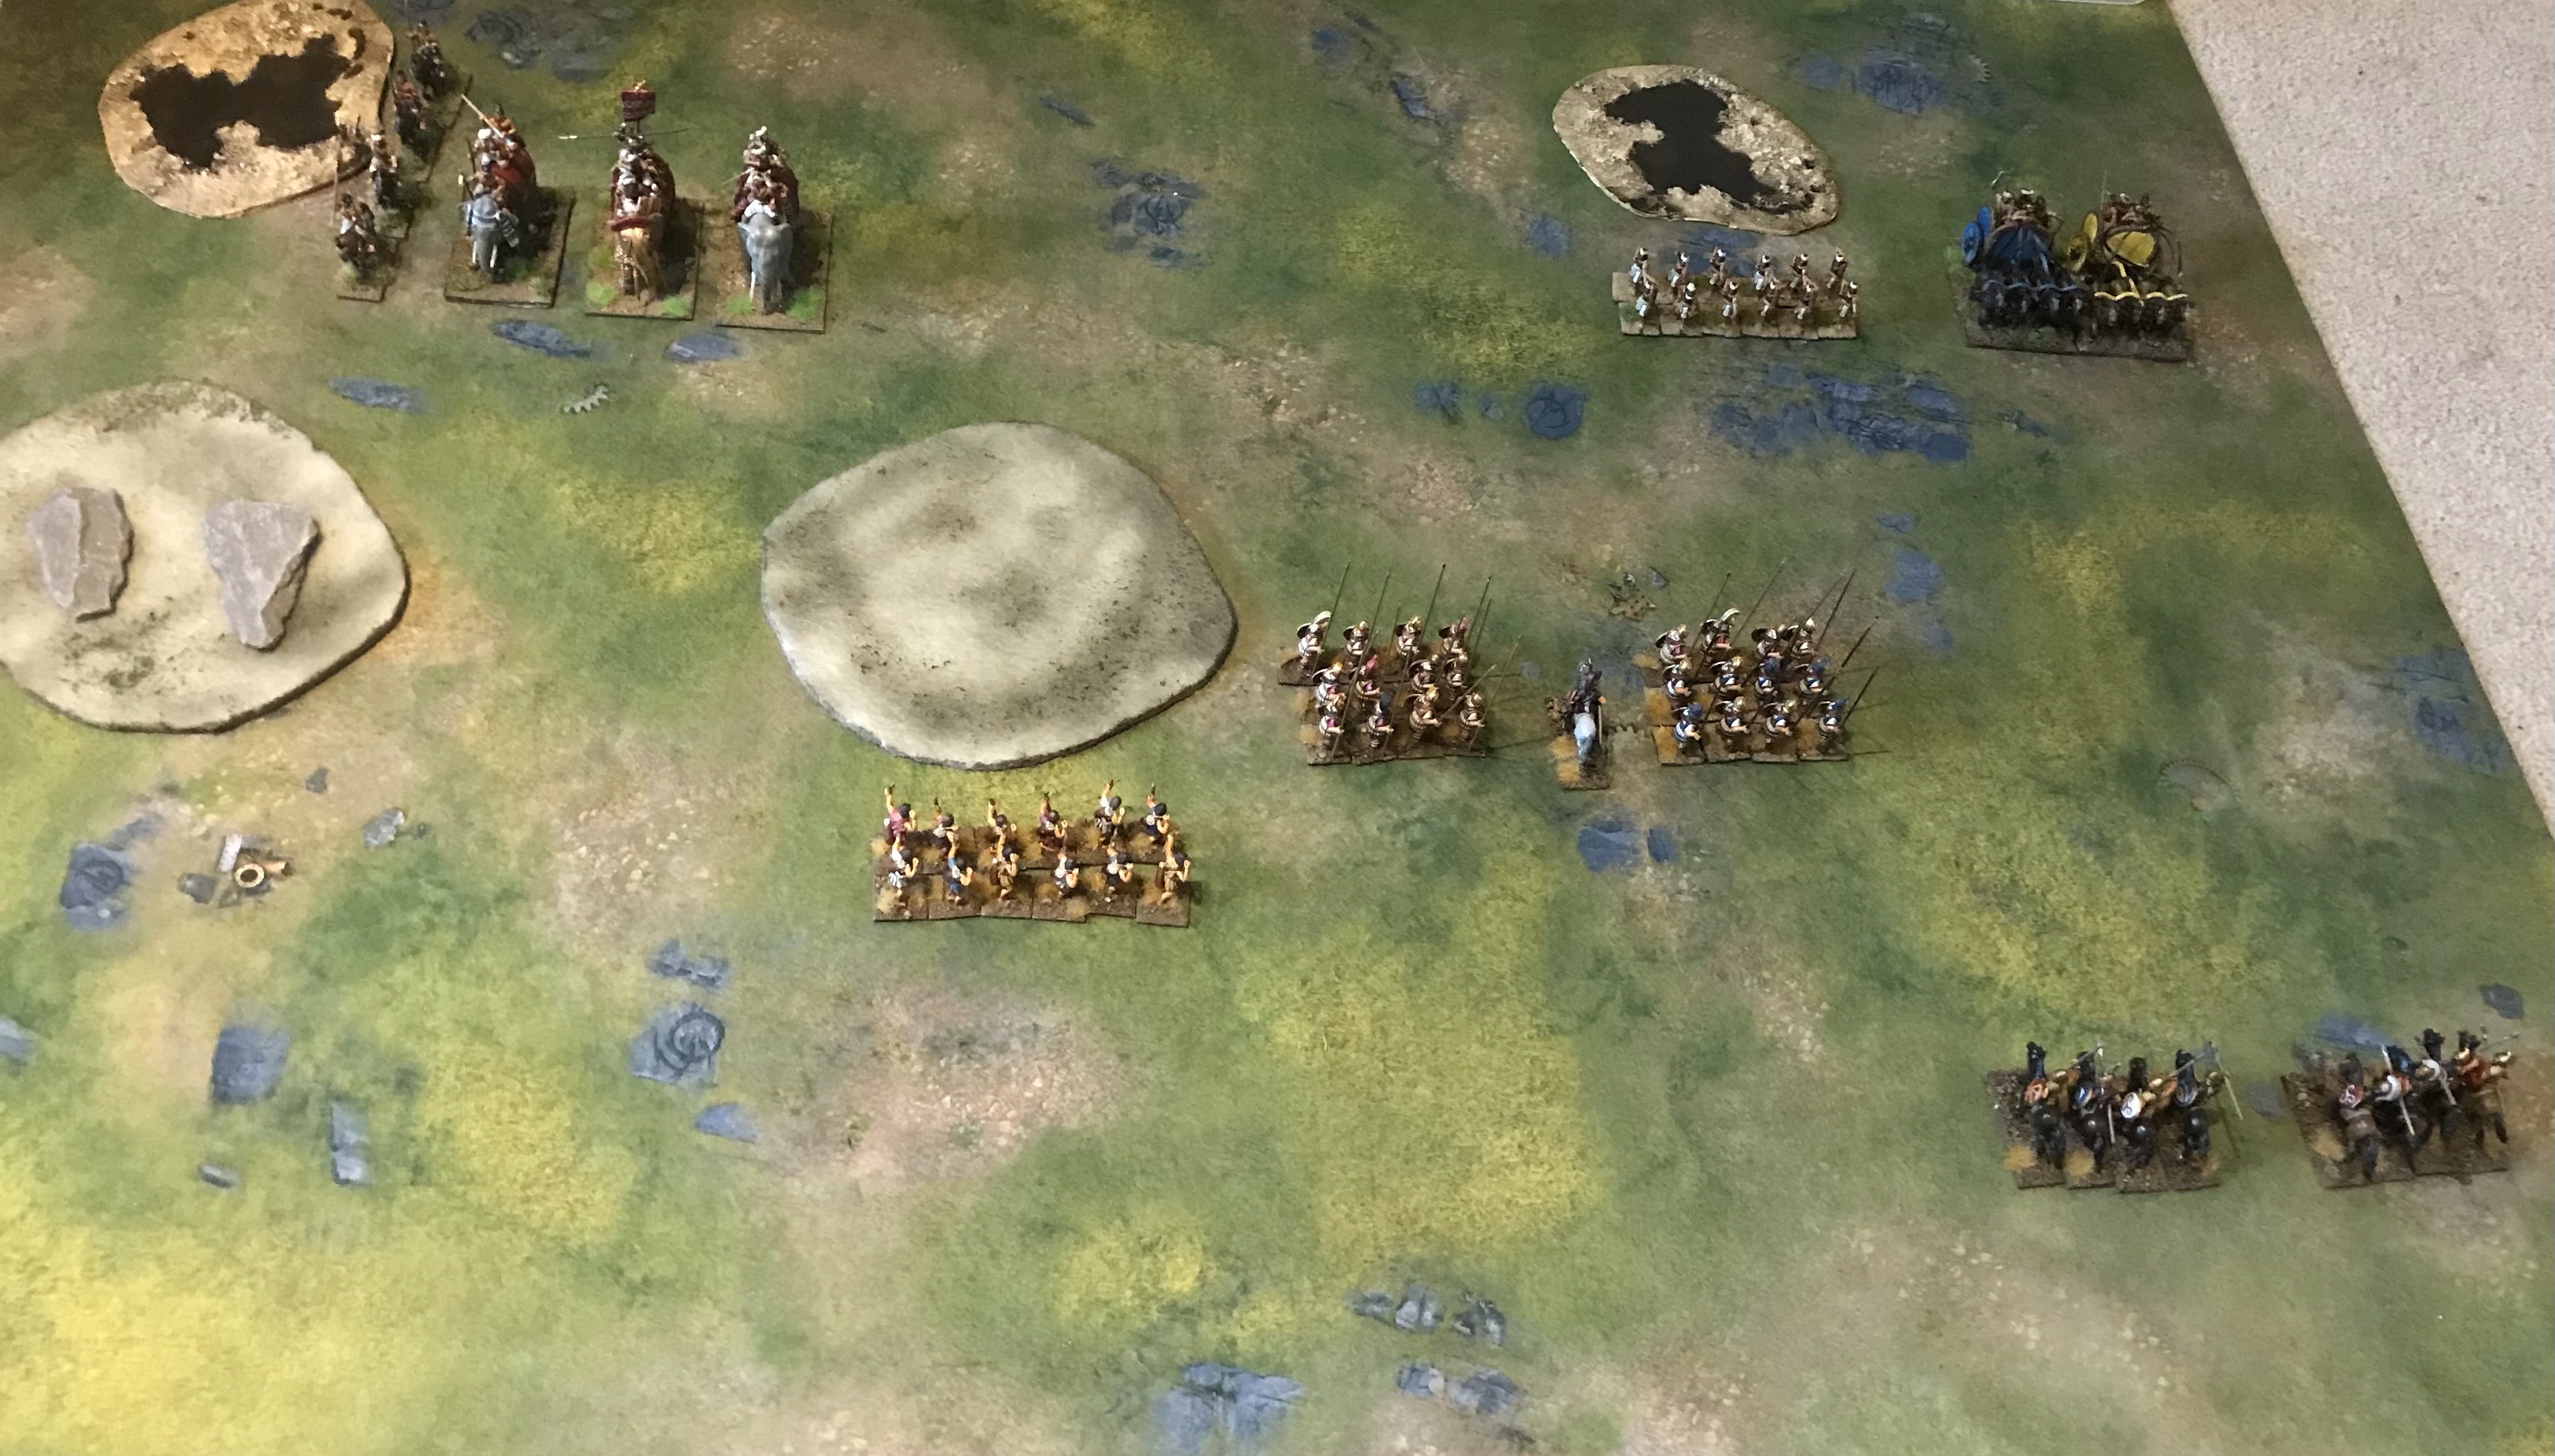
The Thracians are the defenders here and have attempted to maximise terrain to disrupt the Successors. There is a large patch of uneven ground, small areas of woods, rocky ground and marsh. The phalanx do not like poor going, the levy and elephants don’t care so much.
The Successors are using the scroll variant and can fairly shift with HEGEMONY which will activate 3 units, 1 of which must be a phalanx. They shift up as far as they dare.
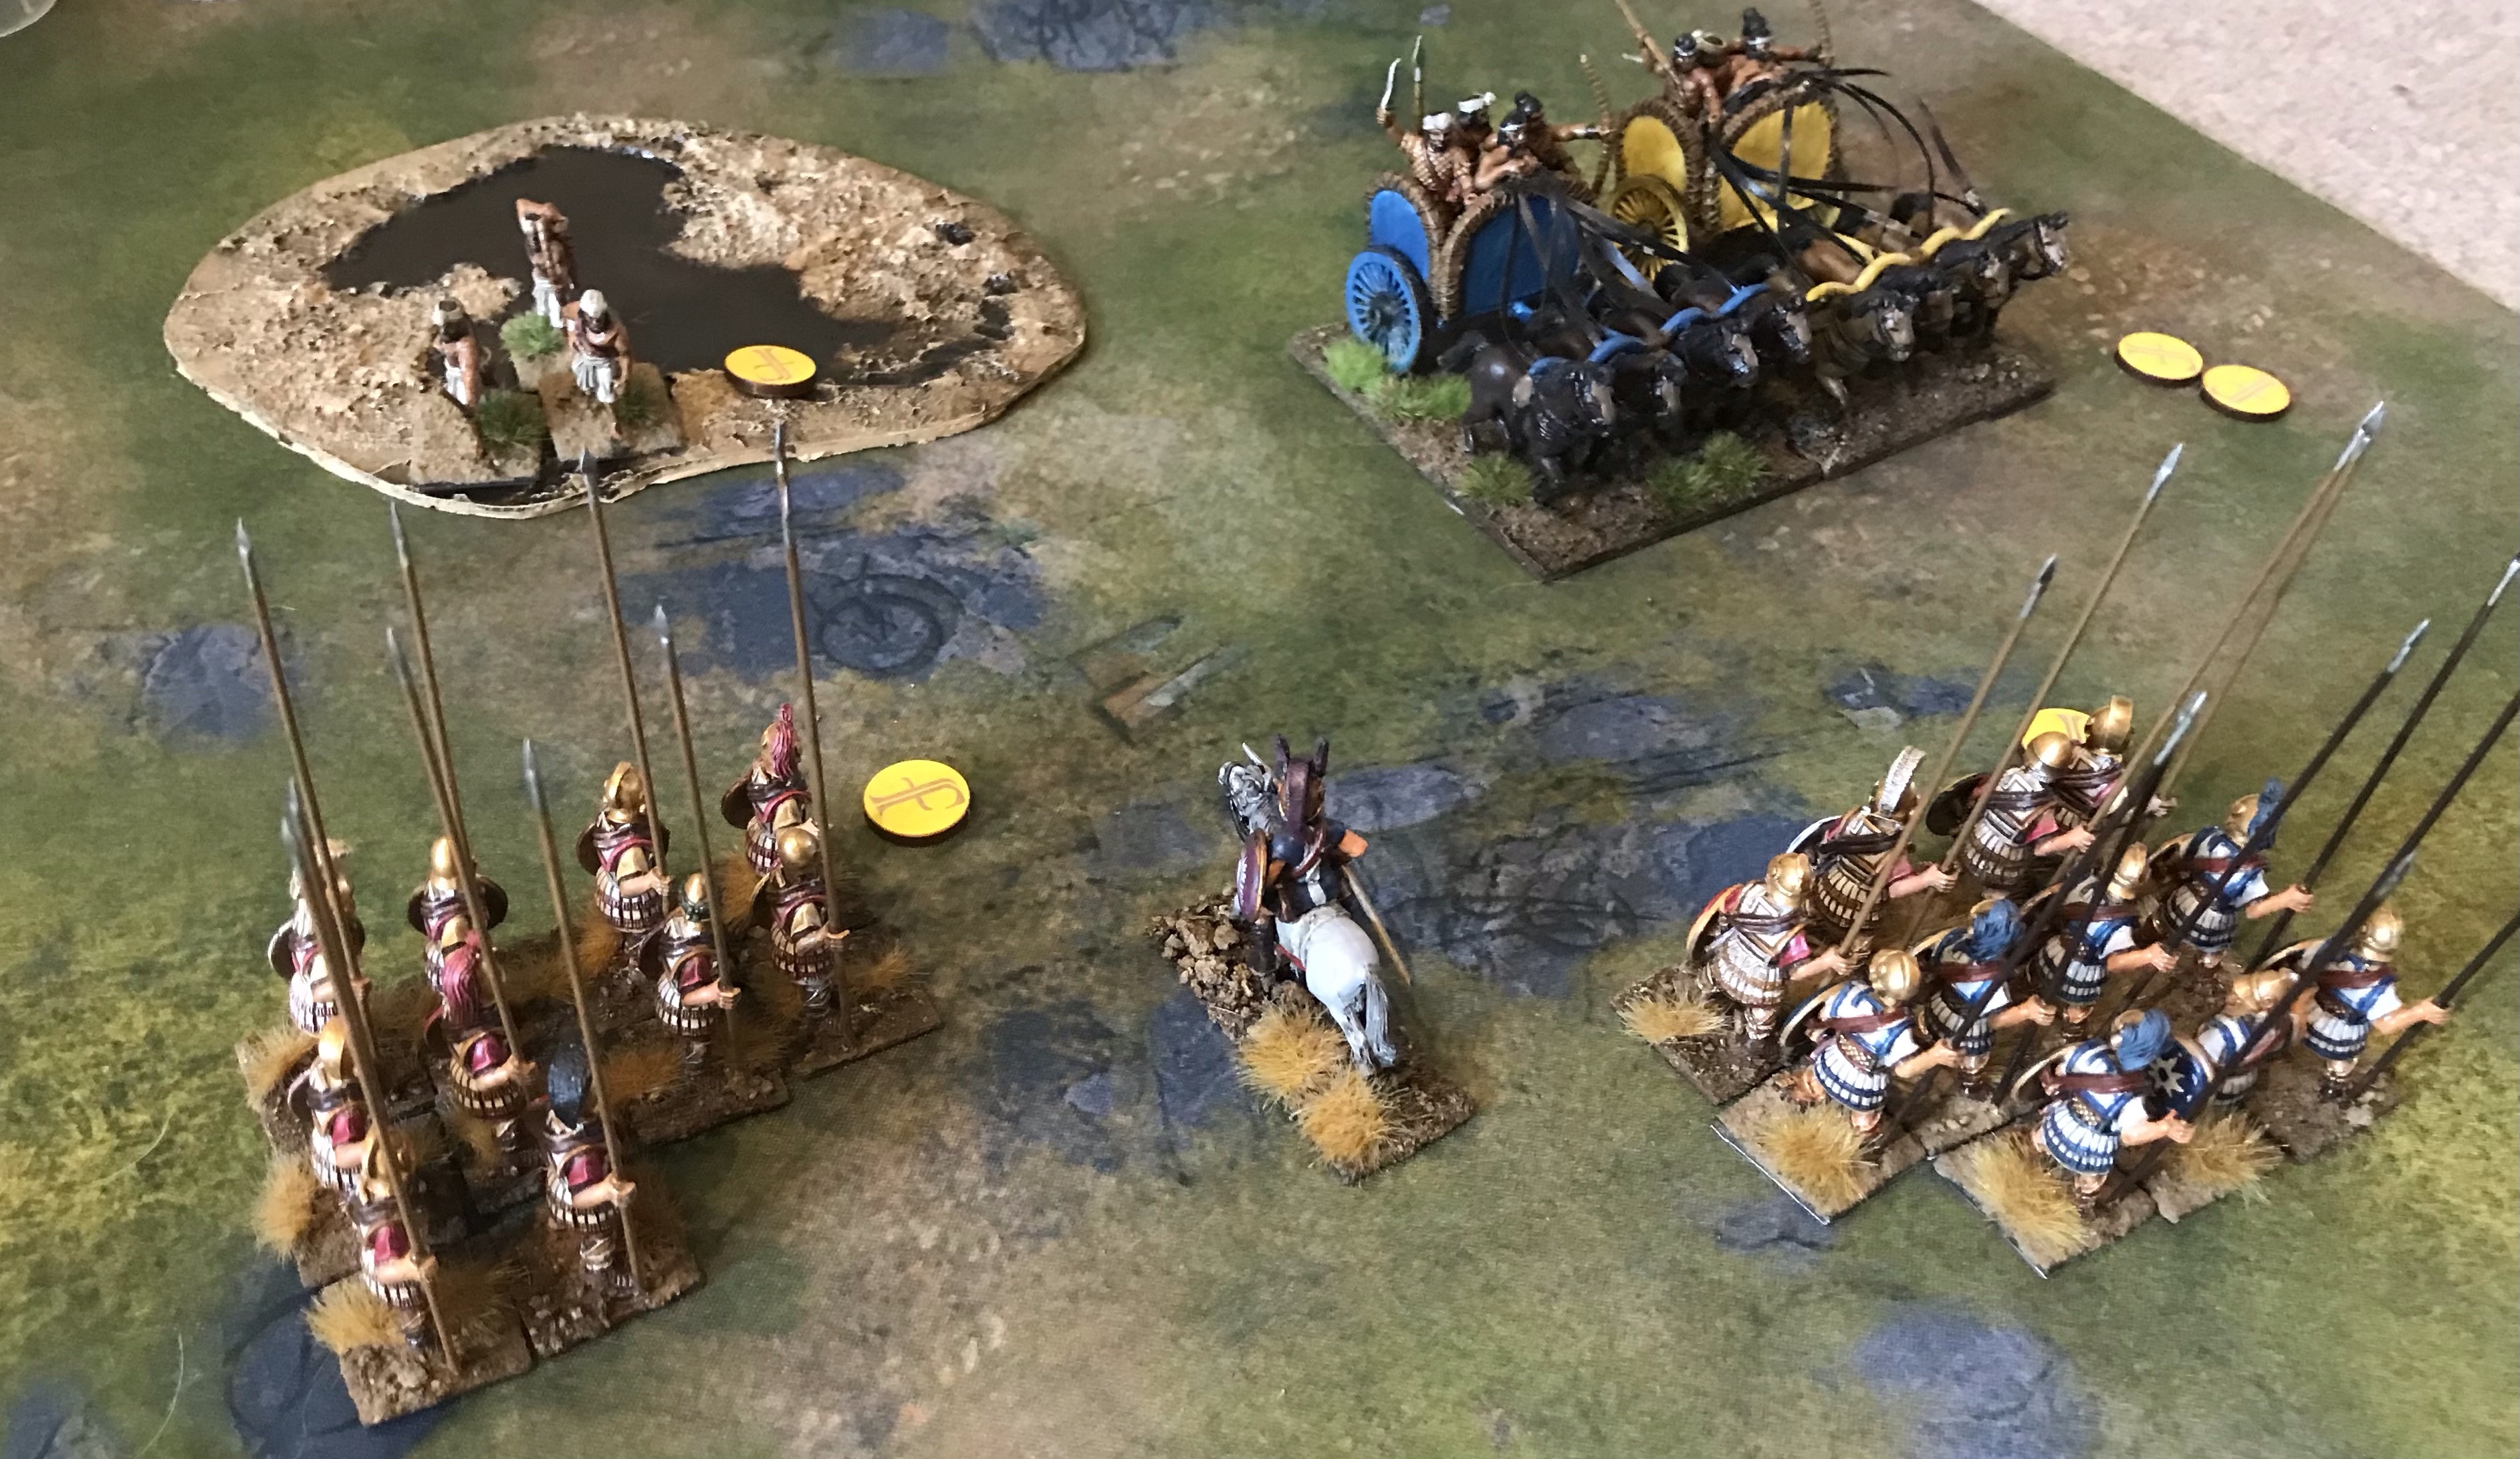
The Thracian plan is to get round the Successor flanks and harry their centre. The Successor levy have unwisely moved to the edge of the uneven ground and a rhomphia unit catches them but only kills 5 so they still generate a Saga die. Worse still as Levy the Thracians do not gain a plunder for winning. The Thracian javelin and bow units shoot with limited results.
One phalanx charges the Thracian mounted warriors and beating the odds manages to lose. The other phalanx and elephant send the foot javelin unit off for an early bath.
The rhomphia units fancy their chances but one bounces off the elephant although leaving it with 3 fatigue. The other unit pushes the Successor Levy further back. The mounted javelins knock out 2 mounted cataphract Hearthguard.
The Successors tidy up. PANTODAPOI will remove a fatigue at the end of a turn, resting (which could be part of HEGEMONY) will remove another at the beginning so the elephant can drop back to 1 fatigue.
The Thracians finish off the Successor Levy and with some exceptional dice rolling and a couple of Saga dice combat bonus wipe out an entire phalanx by bow shooting.
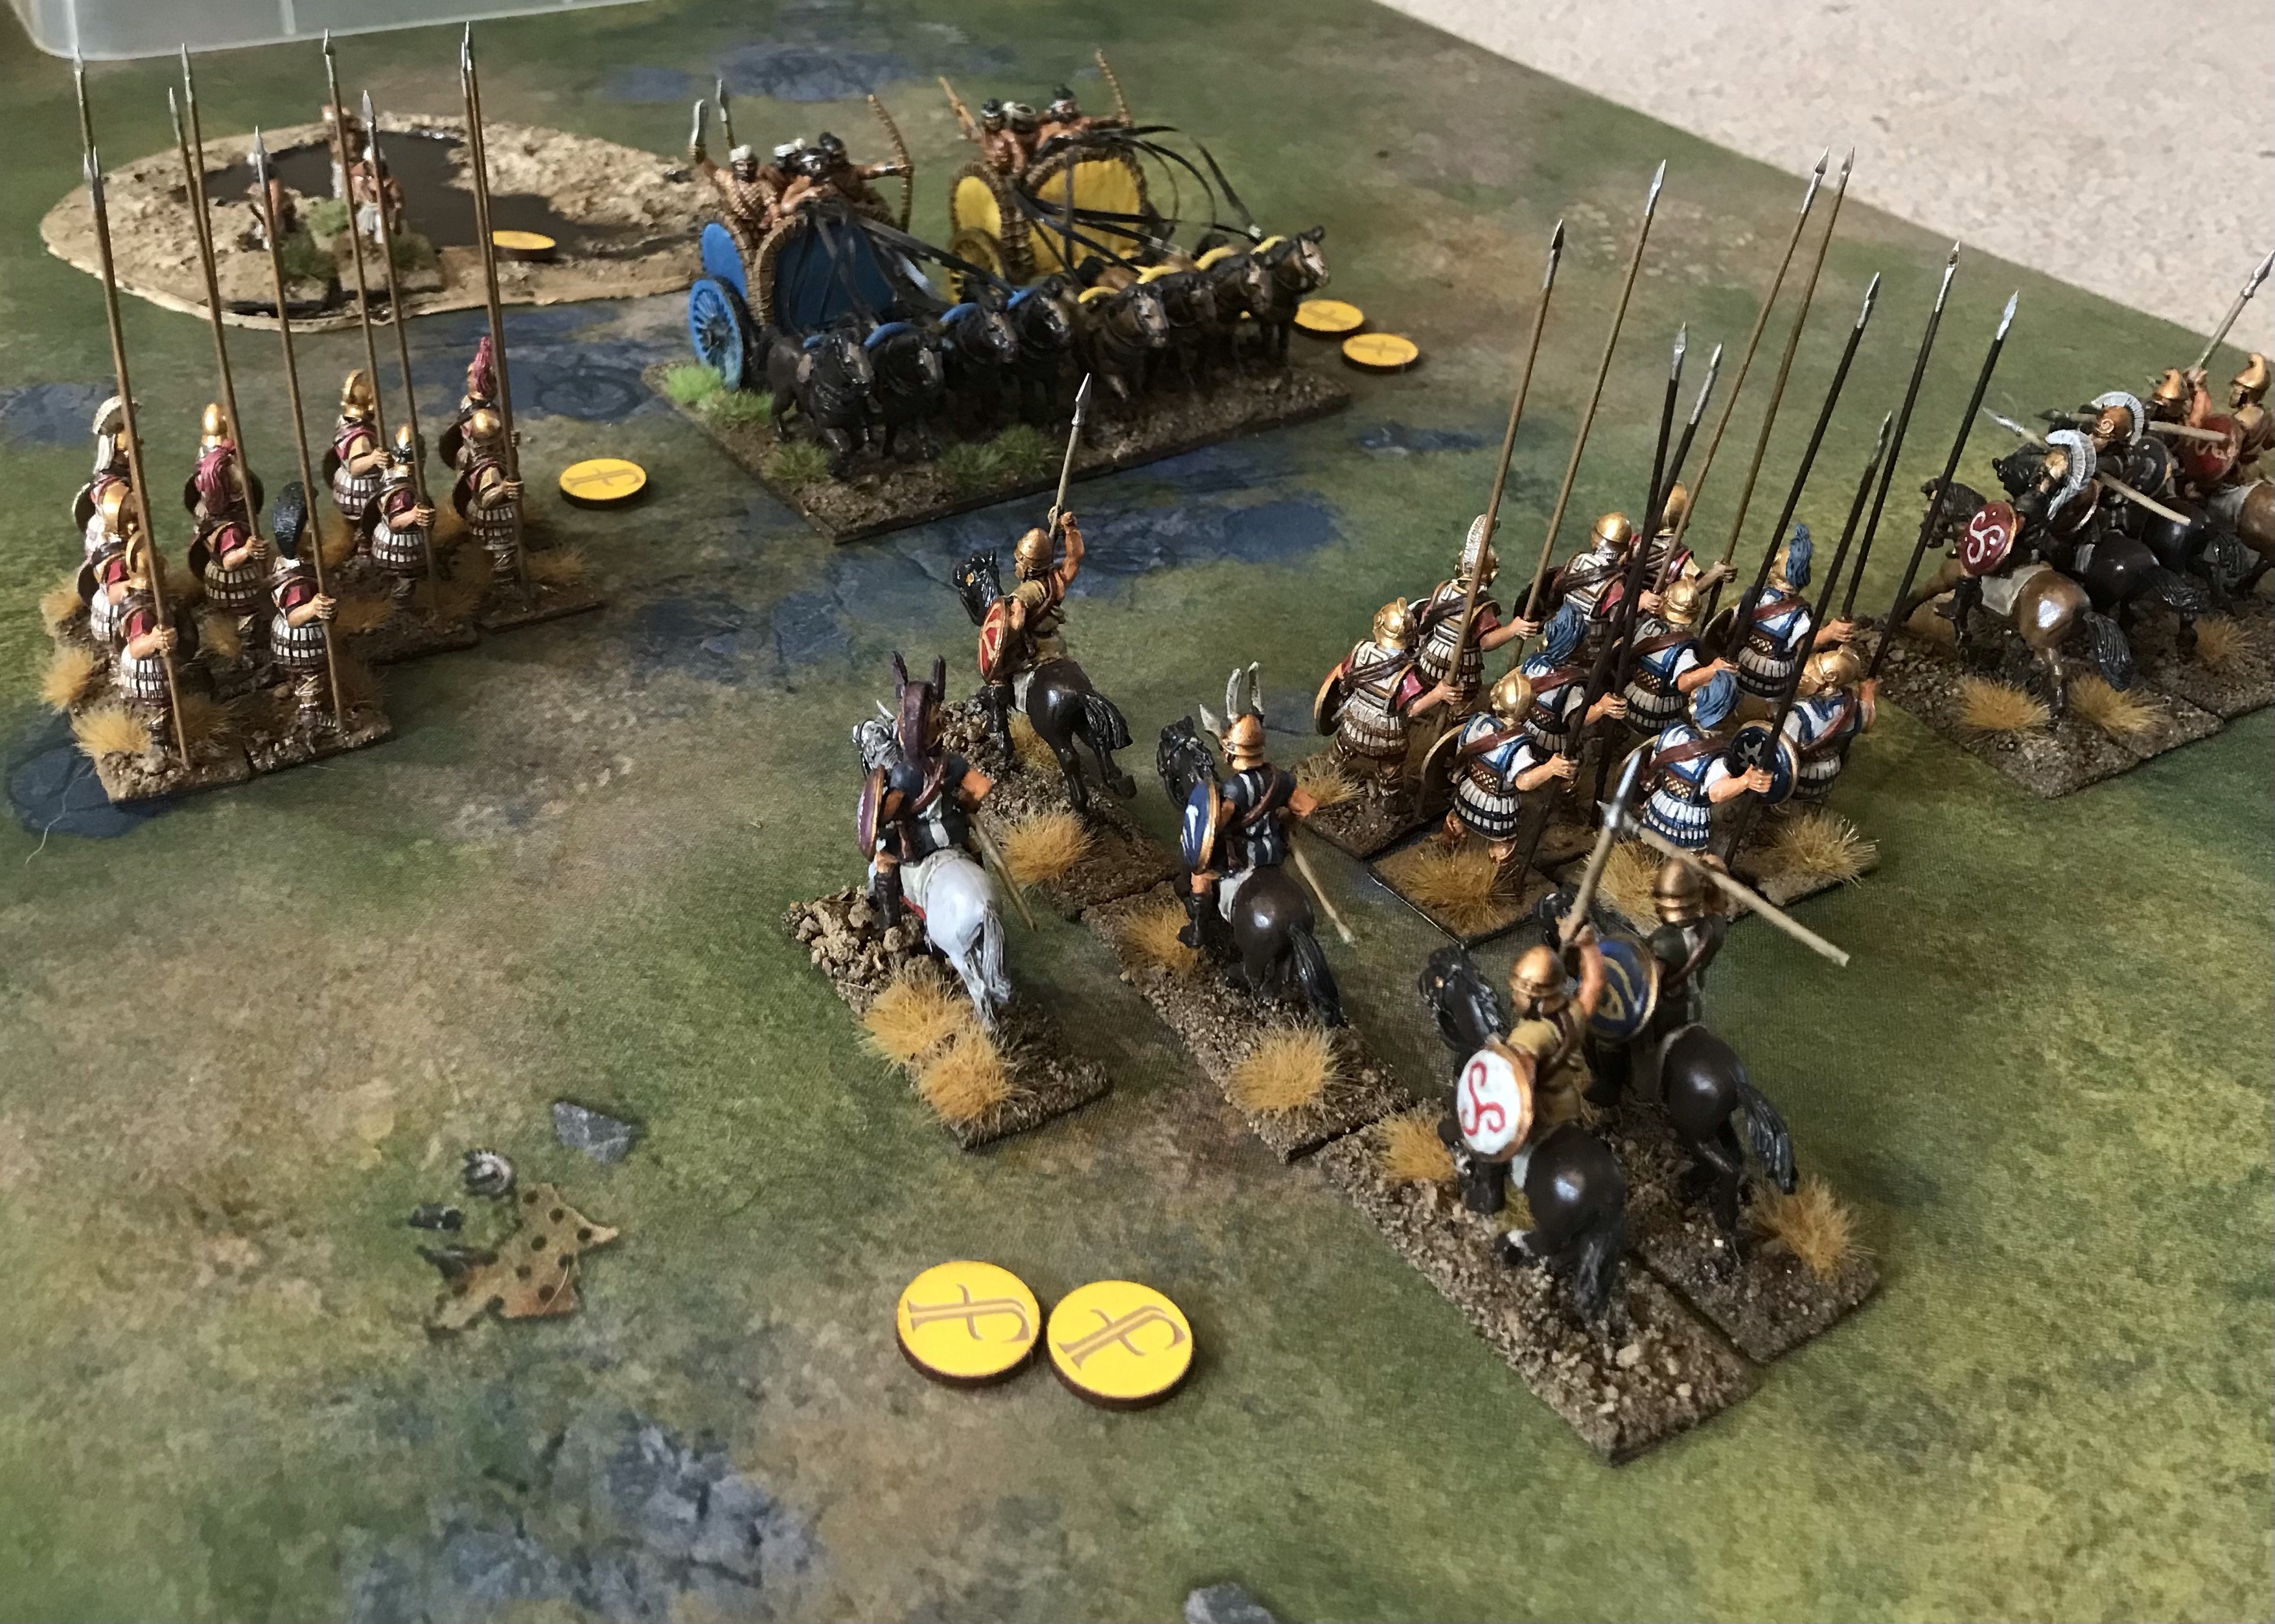
The Successors are running out of targets so about face and go after the Thracians to their rear.
Some mounted Warlord and Hearthguard action ensues. The rhomphia unit has a go at the elephant and whiffs it.
The Successors tidy up their fatigue again and have a go at the Thracian Warlord. This does not work out and the Thracians get their first and only pillage marker of the game.
The Thracians make a bold move with their 2 remaining Saga dice and take out the opposing Warlord.
A Thracian win although the Successors could probably have pulled it off if they had finished off a lone rhomphia model and pulled back when they had smashed the Thracian centre rather than turning and trying to take them all out but what would be the fun in that?
Progress has been middling with the war in the East. The local Greeks are getting uppity so the Macedonian home guard now square off against the Greek City States.
A brief digression on the rules changes in 2022. With a bit of cutting and gluing these will fit on top of or at least close by the errata’d rules sections in the base rules book. Most changes are minor but the free shooting of javilins and composite bows have been clarified. These and the shooting of sarissa are free activations that cause no fatigue but the red box on page 30 still stands. ‘An activation that does not cause fatigue does count when working out whether later activations cause fatigue.’ The implications of these rules together is that a javelin unit could shoot or a sarissa poke once with no activation die required. If the unit were to move then shoot there would be no fatigue. On the other hand if the unit shoots then moves there will be a fatigue because the shooting still counts. This chaining of fatigue and non-fatigue action crops up in other situations notably when the Greek City States activate their line of battle as a single line. There have also been changes to the battle boards and army rules but thankfully none for either the Greek Cities or Macedonians.
The core to the Greek army is a line of battle. That is a cluster of phalanx units that are all within VS of each other. This give a number of useful Saga board benefits. The phalanx units are generally hoplites but some of the city state boards give the bonus to other unit types as well. If the line of battle breaks into smaller groups then the relative benefits will be fewer. Hearthguard and larger units count as more for the size of the line of battle but that only affects ORACLE. All other abilities depend on the number of units in the line not the size of each. This makes the size of the line less important than it may appear and could benefit having more smaller units in the line but not too small as a unit needs to generate a dice to act as a phalanx. The Greeks are about to learn this the hard way here.
It makes sense for any opponent to try to break up the line by inflicting casualties on the central units so these no longer generate Saga dice, do not count as phalanx and drop out of the line of battle, making 2 shorter and less effective lines. This will encourage putting the best units in the centre of the line of battle not in their historical place of honour on the right. Uneven or dangerous terrain will also break up the line. Unfortunately for the Macedonians they too want a relatively uncluttered board for their phalanx and cavalry. To get good with these factions might involve working out how to deal with bad terrain and use it to their advantage rather than hoping it goes away.
The Macedonian list will stick to the same load out as the Indian and Persian games. There must be a better force choice but keeping to a consistent army makes it easier to get a feel of how their board handles. With some commitment to the cause Victrix Greek Heavy cavalry that had previously been modeled as javelin and shield have been re-built as Macedonian lancers. The Greeks run as Athenians which makes their Hearthguard deploy as a single unit. The Macedonians also maximise a unit of 8 Hearthguard; both with a base of 16 melee dice.
The armies line up, avoiding the bad terrain. In the latest rules the 1st player gets a full dice pool but the 2nd player has 3 dice to roll and put on their board before the game begins.
Both sides move up.
The Athenians are not quite close enough to get into melee on their turn without pulling a fatigue first. This may have been a mistake. Sitting just in sarissa range of a phalanx can hurt. The only loss so far is a bowman to javelin shooting.
This is rough, with a combination of shooting from the bowmen, a poke from the white tunic sarissa, a charge from the red jackets and then another poke from the reds and an entire unit of 12 hoplites is off for an early bath.
The red jackets are pushed back by the Athenian hearthguard.
The Macedonian hearthguard charge into the other unit of 12 hoplites, 1 survives. With only 1 decent phalanx unit many of the Greek battle board abilities are of little use. The writing is on the wall.
The Greeks go for the Macedonian warlord but only push him back.
It is only a matter of time. The Macedonians tidy the line and engage in some prodding.
The Greek hearthguard push through and take out the Macedonian warlord with the help of some javelin shooting
The Macedonian hearthguard return the favour and its game over.
At last we seen Macedonian units doing what they are supposed to do. Some effective prodding by the sarissas and serious melee work from the mounted units. The Greeks have little choice but to close in and that is what Macedon wants. This was not so easy against enemies who stood their distance and shot or kept running away. Mounted hearthguard can be very powerful especially if their board has the right buffs (Macedon does, SLAYERS, XYSTON and PRIDE) but can suffer badly from bowshot due their missile armour of 4.
As for the Greeks units of 12 are wasted in battle lines FORM LINE will move the lot with 1 die of any face and MARATHON will let it run once without generating a fatigue. Save the dice for combat abilities rather than moving. ASPIS is almost always worth putting up if the enemy has any missile units and the die can be spared. Alas in this battle a poor choice of big phalanx units and a lack of rolling rares (to activate ORACLES) meant that the Greeks were constantly low on Saga dice.
Star Wars Legion can be seen a a source of free resources or a hefty money pit. There is not a lot of give in the middle. The rules are available on-line and all the unit attributes and scenario cards can be printed out from the Tabletop Admiral list builder. The system uses D8s and D6s with special symbols but a crib sheet for the pip icons could be created. The only element that is close to esential are the measuring sticks which consist of 2 straights with a rotating joint. These fit around the circular bases and enforce turning angles and distance between turns so would make a useful aid in any home-grown game system. At a pinch a set of sticks (there are 3 movement speeds) of appropriate lengths could fill in.
At the other financial extreme the minis are expensive and being 35mm do not fit in well with most other ranges. Each figure pack comes with cards for the unit stats and expansion cards some of which can be used on other units as well as those in the pack. A strict tournament setting would require players to provide cards for all the units on the field and their upgrades. This would lean towards needing to buy figures that are unlikely to be in play merely to unlock enough juicy upgrades to use them on additional units. All these card images are on Tabletop admiral so it would be hoped that this can be avoided unless there are sufficient event freebees to make it worthwhile towing the line even with a possibly sub-optimal list. There are 2 boxed core sets each with 2 armies, dice, rulers, cards and so on but these are not enough to field a pair of workable armies even at the smaller 500 point skirmish level game. Another option is the battleforce boxes that have just about enough content for a full 800 point force but no dice or measures. Buying a single core set in addition to a battleforce will be enough for a full army with a duplicate commander and a small set of units for a second faction.
This can all be avoided by proxying models from other sources as long as the base sizes between 2 opposing sides are consistent. The rules are relatively easy to follow but list building could be a big element of success. In a game such as Saga almost any list that roughly follows the benefits of its battleboard should do OK. In Star Wars Legion certain upgrades benefit others so just throwing down a set number of points may not work out. There is a lot of on-line discussion about what goes with what and some thought needs to go into the best upgrades to buy. These will soak up a lot of points so a small number of heavily buffed units may suffer against greater numbers of cheaper units.
The scenario system helps out here and is one part of the game that deserves attention. It is possible to win by destroying all the opposition but a more probable outcome is that some other factor will determine victory. 3 sets of 4 cards are laid out before the game. One set is the scenario, another the deployment zones and the 3rd game conditions such as limited visibility. The cards are in 3 rows of 4 and the players take turns in removing a card from the left until 4 cards in total have been taken. The remaining 3 leftmost cards then form the game scenario. This does give the players some chance to scope the game to the list they have bought. For those wanting to splash more cash various official objective packs include models and additional sets of 3 cards. This can allow a player to skew the deck by removing some of the scenario options available in the base game. Luckily all the cards are on TableTop Admiral so cash is not strictly necessary.
Another clever pre-game element is the command cards that each player uses. A game lasts for 6 turns and each player has a hand of 7 command cards. One card can always be re-used but almost all the others are played at the start of each turn and are spent. The cards determine the number and type of orders that can be given at the start of each turn. The core sets have 4 common cards and each leader or battleforce on the table adds another 3 to choose from. Most cards have some additional effect beyond giving orders, usually some special power linked to a leader. The choice and timing of playing order cards has an impact on gameplay. A force will have at least 1 leader but the limit is the points invested in them. A leader costs more than the most expensive ground units. Some work best with others, Chewbacca certainly benefits with Han Solo around. A command card allows up to 4 units within a set distance of the issuing leader to be given an order token for the turn. Players alternate activating units starting with the player who ordered fewest with the command card. When activating a player can either choose an ordered unit or have another random unit to act. The random factor is created by pulling a chit of 1 of the 6 units types and choosing a unit from within that category. With a little list work and careful issuing of orders the random factor can be reduced. For example all the un-ordered units might be of the same category.
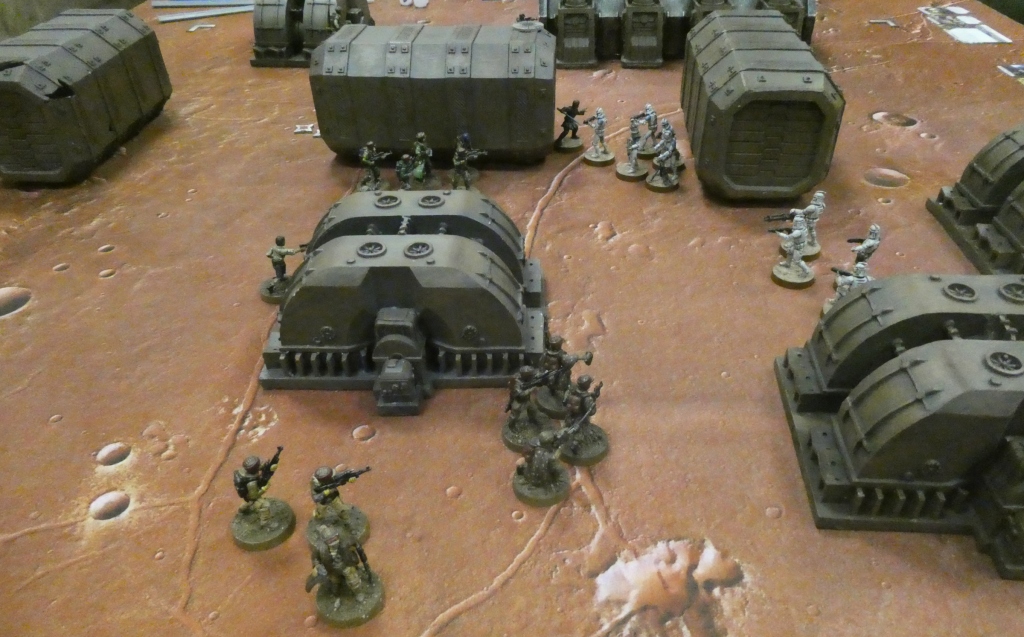
This all works rather well. Combat is a simple roll to hit and roll to save with 3 strengths of hit dice and 2 of defense. 1 of the die face categories is a ‘surge’ which better units are able to convert to a hit, critical hit or save making the same die roll more efficient for some units than others. Movement involves measuring for the unit leader then piling the rest of the unit within short range around it. Line of sight is based on what the unit leader can see but any model needs line of sight to shoot. A model that is fully out of sight cannot be harmed by shooting no matter how deadly the dice rolls. The unit leader is the last model to be removed within a unit. If the model has to be removed to satisfy a casualty then it simply swaps with another out of sight mini.
The system compares favourably with 40K in gameplay. There is less dice rolling and less to look up although there are still a good few special rules. Lists and models are available for Rebels and Empire in the later films and Republic and Separatist in the early films. There is also a mercenary faction and Imperial remnant option. Disney is still churning out media for the franchise and Mandalorian options are available. To some extent Legion shares the unlimited universe boundaries of 40K. The publisher can bring out new units with new stats that might make older models less efficient and encourage the gamer to throw more money into the pit. Thankfully the Legion models could be proxied and there are no necessary army Codices to buy. It is a shame that no one has written up full Legion lists for other universes or pulp settings.
The Classical Indians appear in the Age of Alexander book. Historically they did fight the Persians, Alexander and Seleucus. The Greco Bactrians could also run as a Seleucid list, earlier or later Greek settlements in the East might also run under the Greek battle board. In both cases the non-phalanx ‘Greek’ figures could be represented by Indian or Persian models. Geography makes any other match up tricky. The Maurya period (322-185 BC) was a period of stable government and the best guess is that troop types over this time would change little. If we move to the Gupta era (319 to 467 AD) and a Parthian list were to appear in a later antquity Saga book there could be opportunities. Pushing the envelope and lose the Chariots these Indians could fight Sassanids or even the Mutatawwi’a from Age of Crusades.
Geography or even the march of time is often given a light touch by Ancients gamers. A Classical Indian army was popular in the old WRG Ancients days as they could field longbows and two handed swords on the same model. The WRG rules treated these in the same manner as British medieval longbows and heavy cutting weapons such as the halberd so they were useful fellows to bring along. The counter attraction under almost any ruleset, including Saga are the expensive elephant and chariot models. In Saga a 4-horse chariot is the same cost as 2 foot hearthguard; the 2-horse is an equivalent to 2 foot or horse warriors. Elephants are not so costly as they could swap out for 8 warriors but in all cases the expense is going to be more than an army relying almost entirely on foot models. On the other hand the basic foot model is only going to need a weapon, some facial detail and a white kilt so would be quick to churn out.
Unlike many armies there is no host of Osprey type books with a pile of pretty pictures to follow. Duncan Head’s Armies of the Macedonian and Punic Wars is probably the most accessible source. The older Phil Barker edition is best avoided as it contains less information and makes little attempt to justify what it does include. Classical Indian art does illustrate battles and parades but as with some Western pieces it may show a literary ideal rather than what might be seen in life. Note that at this period the Indian Mauryan Kings were Buddhist as Porus may also have been. Many of the soldiers could still have been Hindu but best not go overboard on Hindu motifs in the army.
Gateway at Buddhist temple complex, Arch Sanchi, Madhya Pradesh, India. 3rd century BC to 1st century AD.
Book X Chapter 6 of the Arthashastra gives some idea of the tactical use of Elephants, Chariots, Cavalry and Infantry from around our period. Book II Chapter 30 onwards governs acquiring and caring for elements of the army. Chariots are defined as a range of sizes with the widest being 12 purushas, 9′ plenty of width for 4 horses abreast.
The Anabasis includes details of Porus’ army and the battle at the Hydaspes. It is not stated how many horses pulled the chariots but they were heavy and slow and less than effective due to the mud.
He then took all his cavalry to the number of 4,000 men, all his chariots to the number of 300, with 200 of his elephants and 30,000 choice infantry, and marched against Alexander.
Anabasis of Alexander by Arrian Chapter XV
Arrian’s Indica Chapter XVI also includes a description of Indian dress and of infantry weapons and shields.
The Saga Indian list options are in some ways relatively accurate as they encourage a variety of troop types. Not only in the actual models that can be fielded but with benefits on the battle board from having a mix. This fits in nicely with the Arthashastra and the Saga concept of the game being more about the story than strictly historical. It makes sense to field elephants, chariots and infantry. As the infantry are Levy there are likely to be quite a few of them. Only cavalry get a short shrift. A single unit can be fielded as Hearthguard or Warriors but they have no specific advanced Saga ability benefit. They have some attraction as only cavalry and light chariots fill the Warrior slot and 8 cavalry models will be cheaper to buy than the equivalent 4 light chariots.
Only half of any Saga army can be elephants (including the general) and only half of the units in an Indian army can have resilience (not including the general).
Elephants by Newline (Metal) Aventine (3D print), Aventine (Resin). The armoured Indian elephant is unlikely and may later be converted for Successor use.
A viable list would be 3 elephants (3 units), 2 heavy chariots (1 unit), 1 Hearthguard and 12 levy. If taken as a general an elephant costs 1 point but does have better stats than ‘your average’ elephant. Elephants are best used as single models rather than units because a single elephant can take 7 hits (6 as resilience) but a pair 8 hits (6 as resilience) in a single round. Also 2 units could both rest stripping 2 fatigue, a combined unit could only rest once per turn. If running a standard Warlord at 0 points with a single heavy chariot model an extra point is freed up.
Newline heavy chariots, the reins are strips of plastic from a document wallet.
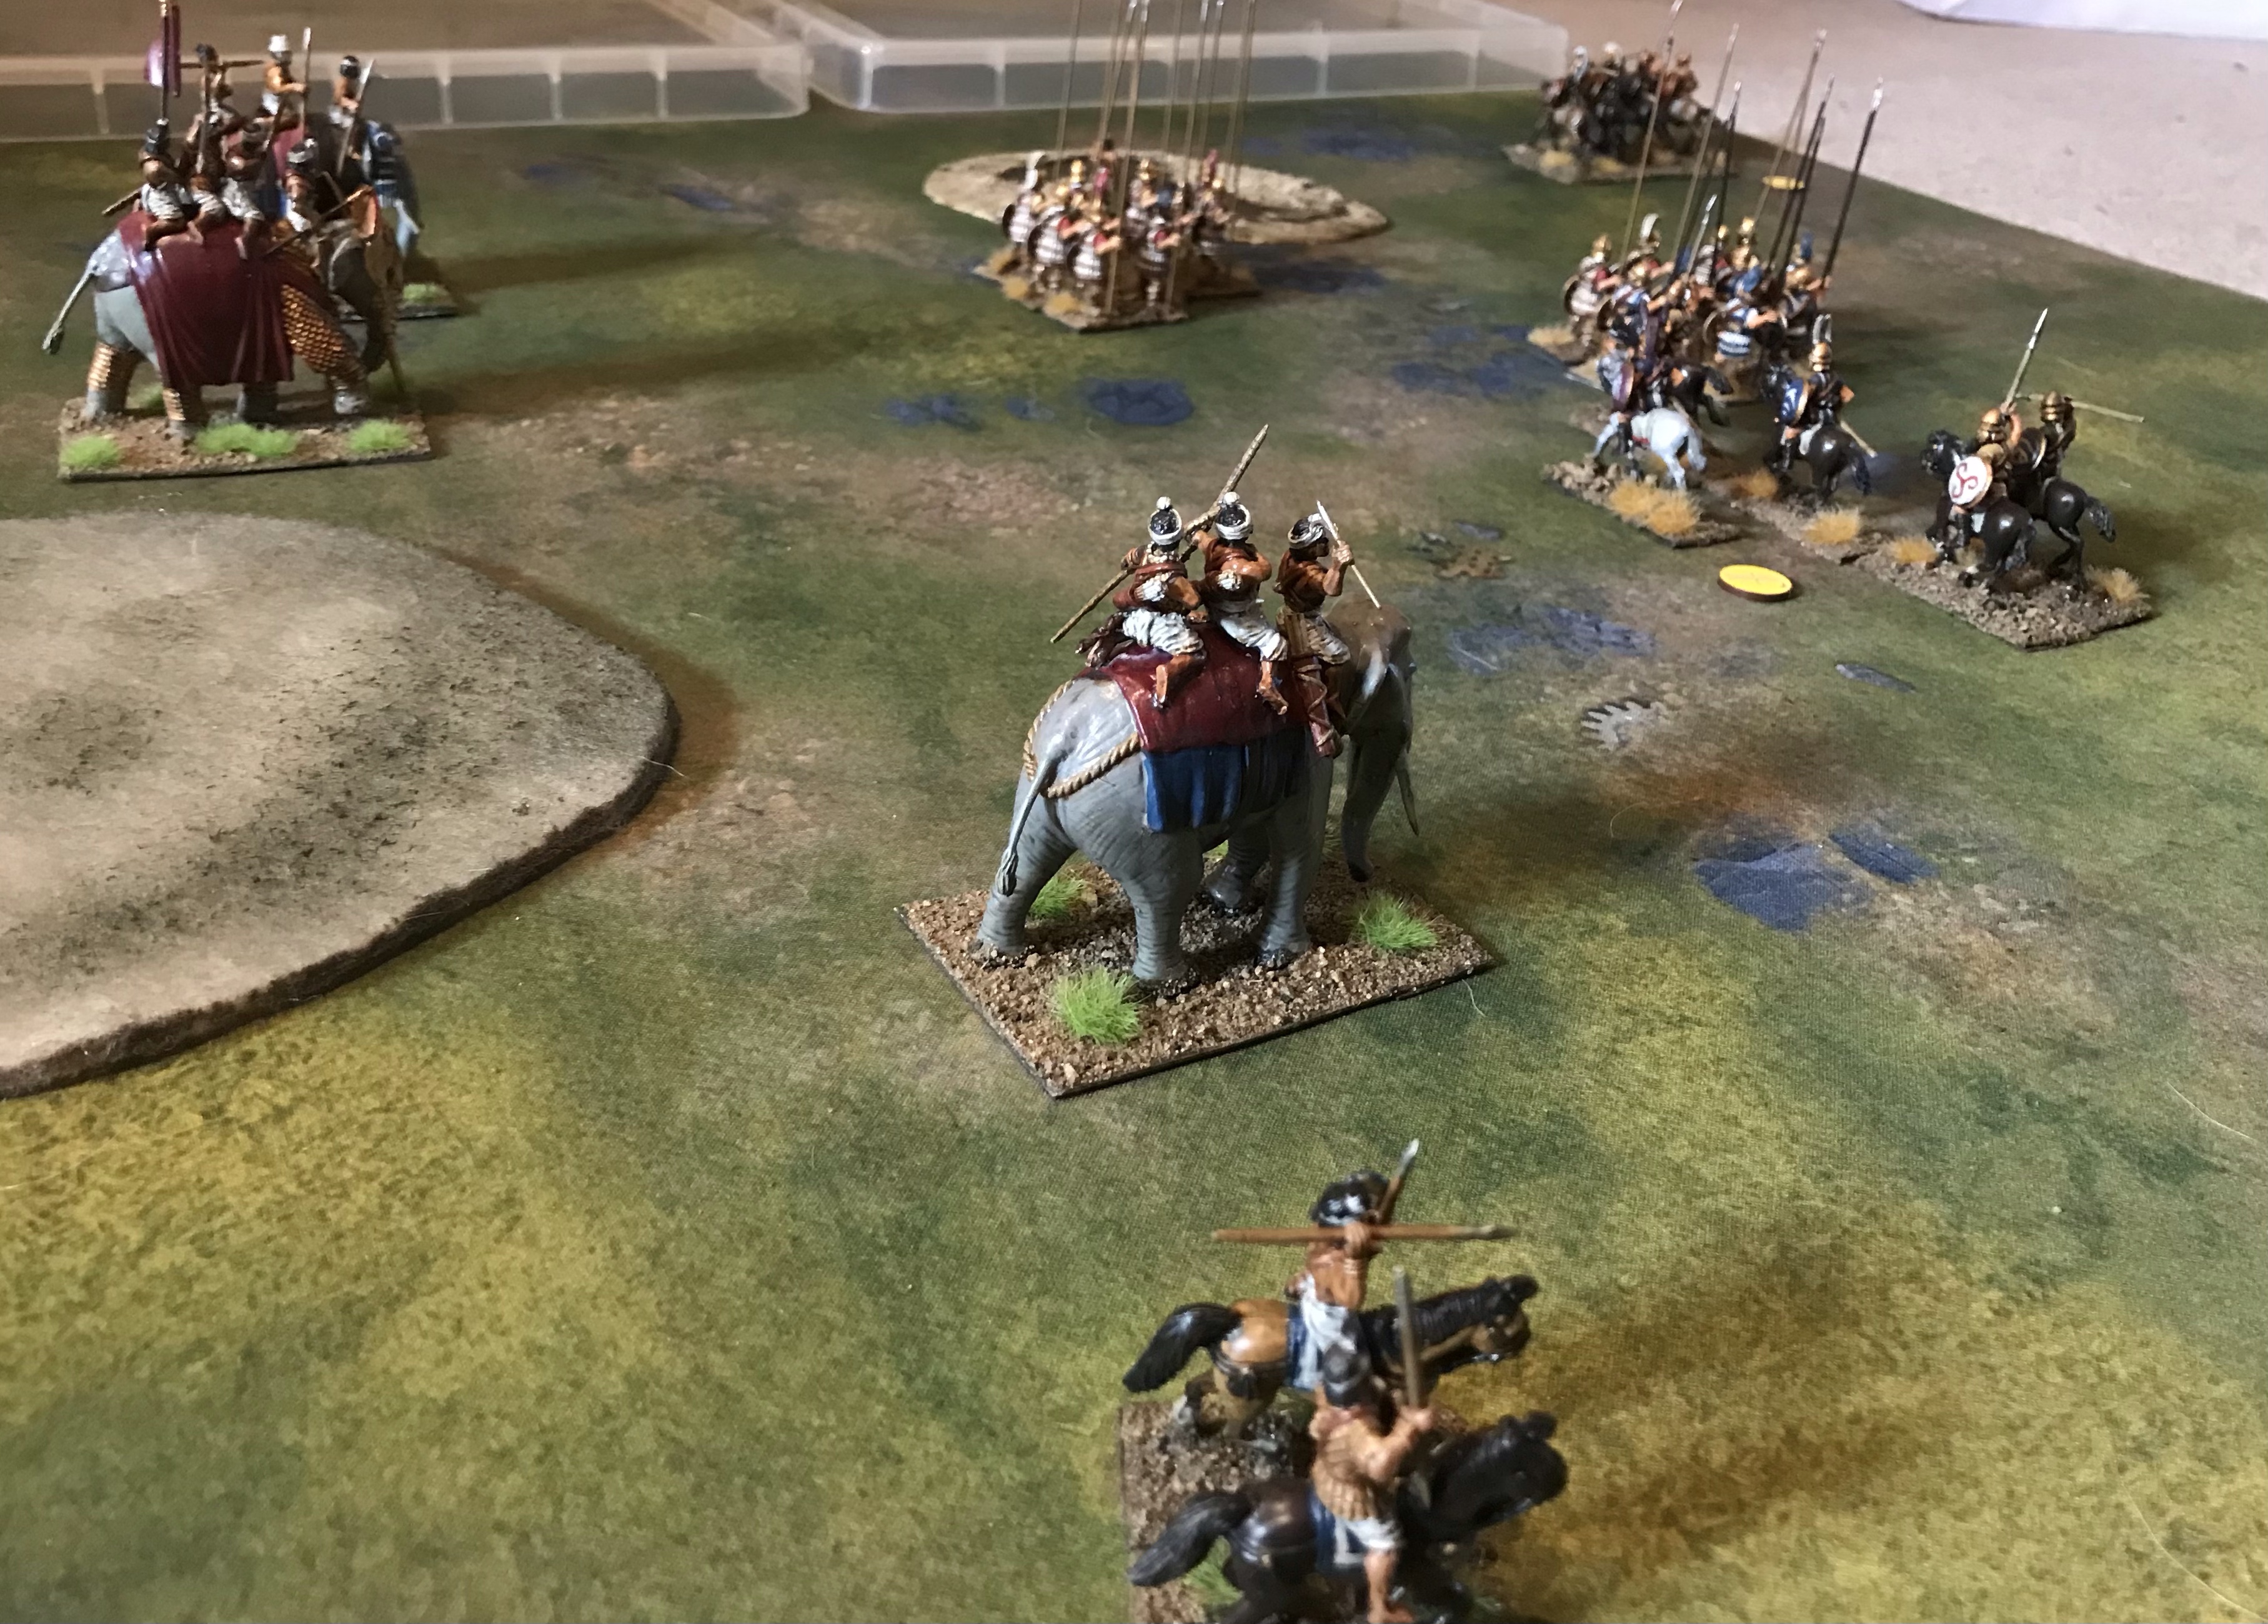
Our Indians take a run out against Macedonians who move first sliding up the slow moving phalanx. There are 2 areas of swamp and sections of rough and also rocky ground. This match up will involve some careful dancing around as the elephants are vulnerable to sarissa but the cavalry do not like elephants.
The Indians move up their elephant line with the aim of knocking out the Macedonian archers. They hit home with hearthguard cavalry but the results are middling.
The Macedonians push the phalanx up against the Indian archers and chariots. Chariots are poor in defense but with resilience and buffs from the Indian battle board can hold out well. The Indian bow retreat into the swamp. It might be argued that they gain an additional fatigue for that. It depends on a if a retreat is a move (so they probably should take an additional fatigue.)
The Macedonian archers are getting slowly mashed but manage to hang on.
The heavy chariots also beat the odds and are still on the pitch.
The Macedonian archers are gone and the elephants move in on the phalanx.
The chariots are also off for an early bath.
It would be easier if the elephants were not so slow. One does not want to pile up the fatigue on them.
Some solid sarissa action and the Indians are an elephant down their Hearthguard are also off the field.
The Indians take out a unit of mounted Macedonian hearthguard.
A sarissa assault on the Raja’s elephant does not go so well. A key tactical issue here; sarissa have a +1 vs mounted and elephants if they have no fatigue themselves. So if defending against fatigued sarissas it makes sense not to strip their last fatigue.
Game winning moment here. The Macedonian Warlord is within charge range of the Raja. The Indians can buff their defense but have resilience 3 anyway so take him out for a final score of 20 to 15 in their favour. If the Warlord had moved ‘L’ away rather than stripping his own fatigue in the previous turn he would have been safe and the game almost certainly a draw.
The Indian board compliments the elephants and chariots as REINFORCED ARMOUR, GREAT SIZE and DYNASTIES all buff models with resilience making it easier to keep them on the field. Indians are capped at 3 elephants (including the Warlord) and half with resilience (not including the Warlord) this makes it hard to field both types of chariot if the full 3 elephants are on the pitch. Even with 1 as the Warlord the maths needs 8 units for 4 resilience and at 6 points that probably means some weak units to pad out the points. The heavy chariots are much like elephants with no missiles but a unit of 2 will throw down 12 dice and 2 automatic hits if it is charging in. Although elephants can move 3 times (adding up to L) without fatigue through careful use of the Indian board the chariots can do that in 1 activation rather than 3. A missile armour of 5 (compared to 4 for elephants and light chariots) also keeps them alive unitil they get into melee).
The light chariots are missile platforms so are perfect for NO WAY OUT (as are elephants) but do lack punch in melee. A unit of 4 light chariots will cost more than the Victrix Republican Roman army boxes that make an entire army for Saga so chariots are far from an auto-choice. On the other hand any Indian army should have at least 2 elephants.
The optimum Macedonian ability ought to be SLAYER OF KINGS as it allows all misses in a single melee to be re-rolled if the defender has resilience but it is a one-off advanced Saga ability. Compare this to VARIA that allows the Indian to re-roll 1 attack and 1 defense die in every single combat. While the Indian and Persian boards have clear synergies with their troops the Macedonian board still seems to be a collection of useful abilities that may not gel with their troop load outs. There could be a benefit in deploying some or all of their Hearthguard as sarissa when facing Indian or Persian armies where the cavalry might be less useful.