Mortem et Gloriam is the precursor of Renatio et Gloriam. Both share many mechanisms and overlap in the periods covered by at least 20 years; depending on the lists chosen. Ottomans and Venetians during the Italian Wars period fit into this gap so why not try out a similar match up to that already described for Renatio et Gloriam? This time it will run with the Magna version of Mortem et Gloriam that requires less bases and a smaller playing area. There is no public version of Magna for Renatio and Gloriam although it is clear from web references that some similar set does or did exist. The rumour being that the designers are having issues fitting the strict Renatio and Gloriam formation base sizes into the smaller format. The width and depth of bases within a unit in Mortem and Gloriam being much looser. There are enough outline rules within the free PDF introduction to Mortem and Gloriam for anyone wishing to make a start. A look at similar Mortem and Gloriam Maximus and Magna army lists also gives some hints on how formations might be modified.
The Mortem et Gloriam print on demand Magna and Maximus rules are being used. In general these are pretty well produced but the web links from a digital version have been left in. Obviously these can no longer be clicked on but are still in an inconsistent font colour and have not had the useless links replaced with references to sections of the printed rules. The QRS within the printed rules are also sized far too small to make out. The downloadable versions on the MeG site on the other hand fit on the page and can still be read. A final minor point is that some of the text clearly refers to contents that came with the older boxed version of the rules. Anyone starting MeG without a rough idea of what is going on will also need the free Introduction to MeG PDF. It contains a lot of forgettable fluff but also key details on basing and the table sizes needed for 15mm Magna games.
Unit formations are less strictly defined in MeG than in ReG and the lists will be needed to not only work out how many troops to field but what size units are needed. In full, Maximus, MeG mounted units are in 4s and 6s but in Magna they are in 4s (the same size as for regular ReG). Magna infantry groups are likely to be smaller than their ReG equivalent. The Venetian Pike for example lose out. They are in 12s (3 files of 4) in ReG but drop to 6s in Magna here. These will be running as 2 files of 3 and oddly never able to claim an additional +1 on charging while in 4 ranks. MeG bases are lost on 2 hits rather than 3 in ReG so with smaller or equal size units but fewer hits we might see units lasting less long.
The MeG lists are free (unlike in ReG) and different for Maximus and Magna although the same army builder is used but with a different points total as the Magna generals are a fraction cheaper. For example the Venetian list running here is 7,940 points. If it were Maximus it would be 8,506 at the same base count although in practice it will run even more as some of the units will need more bases in Maximus. Maximus usually runs at 10,000 points and Magna at 7,000 to 8,000 points. ReG armies are 9,000 to 10,000; the deciding factor seems to be that later armies are more deadly and will run at fewer points (although the total will need to match up for a specific game).
It might be expected that with similar rules and subject matter these lists would look much the same as with ReG. This is not the case. The Ottoman Janissaries are not so well trained and have swapped their muskets for bows. The high quality if poorly armed big Ottoman mob units are also missing. The Venetians do not exhibit as many differences except they have professional generals not inspirational as in ReG. The restrictions on how many pike can be fielded in each command and the additional cost to play cards that command them are also absent in MeG. The ReG restrictions on close order infantry in flank sectors are also missing in MeG although a secure flank can be set which will affect the terrain that can be set up in it.
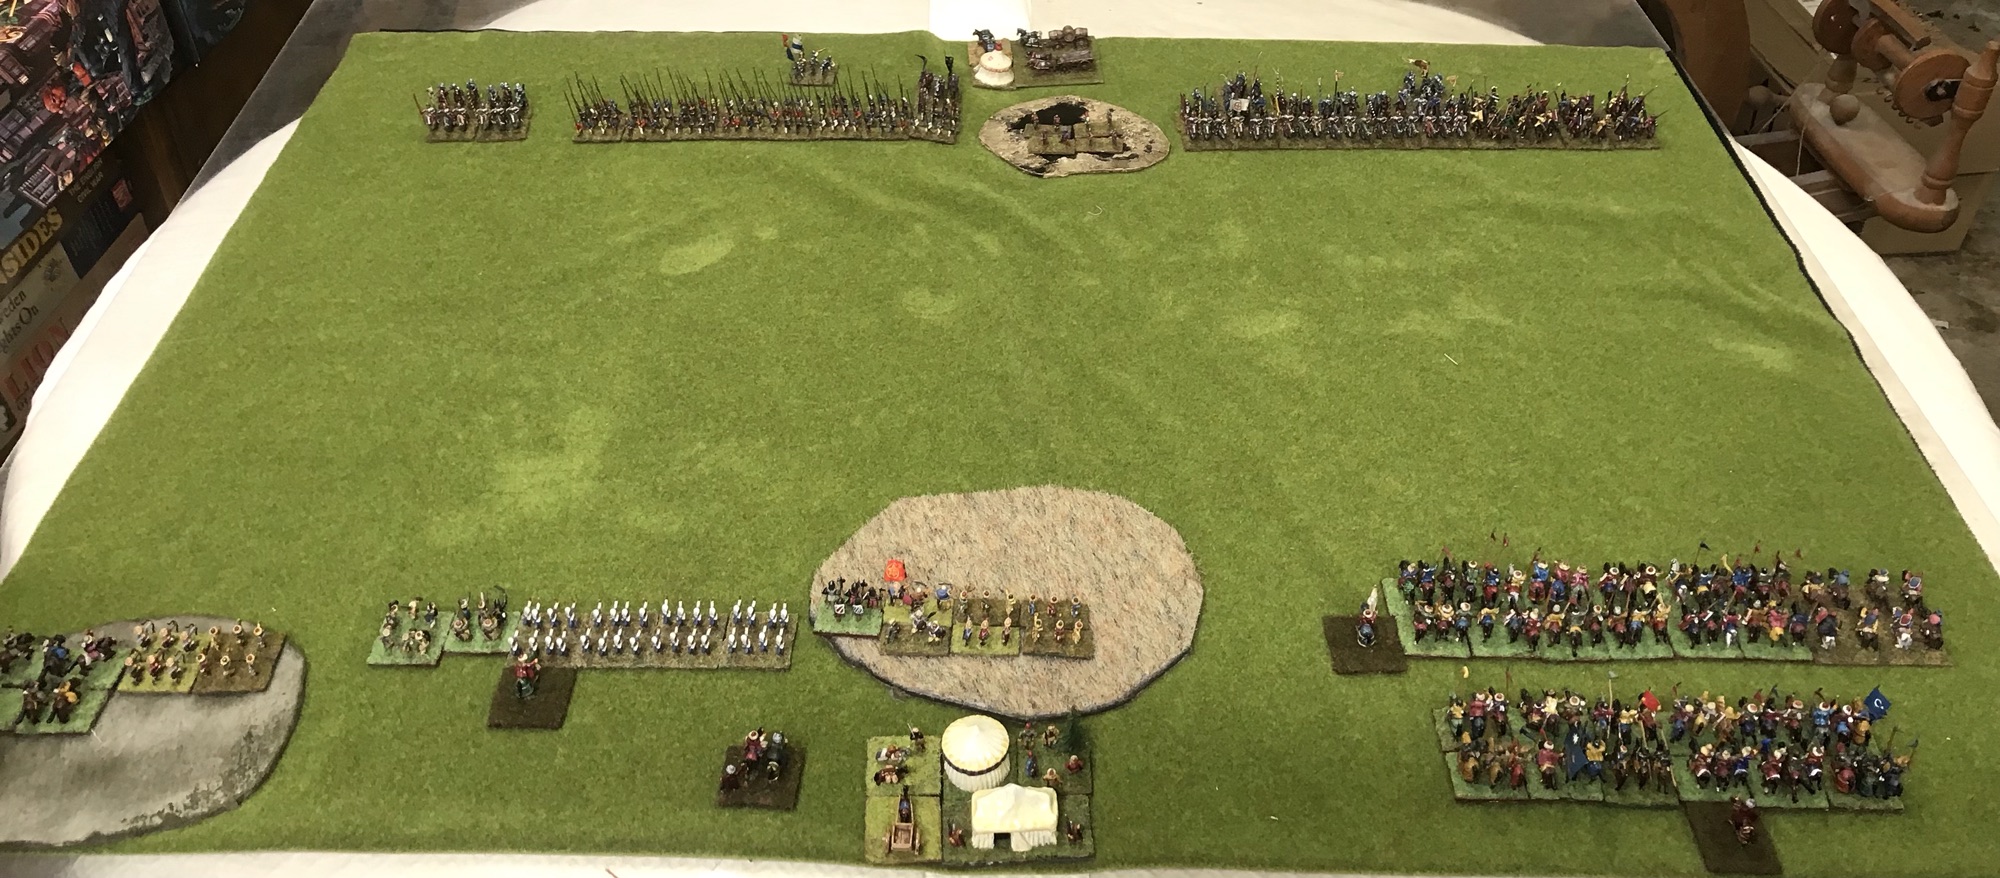
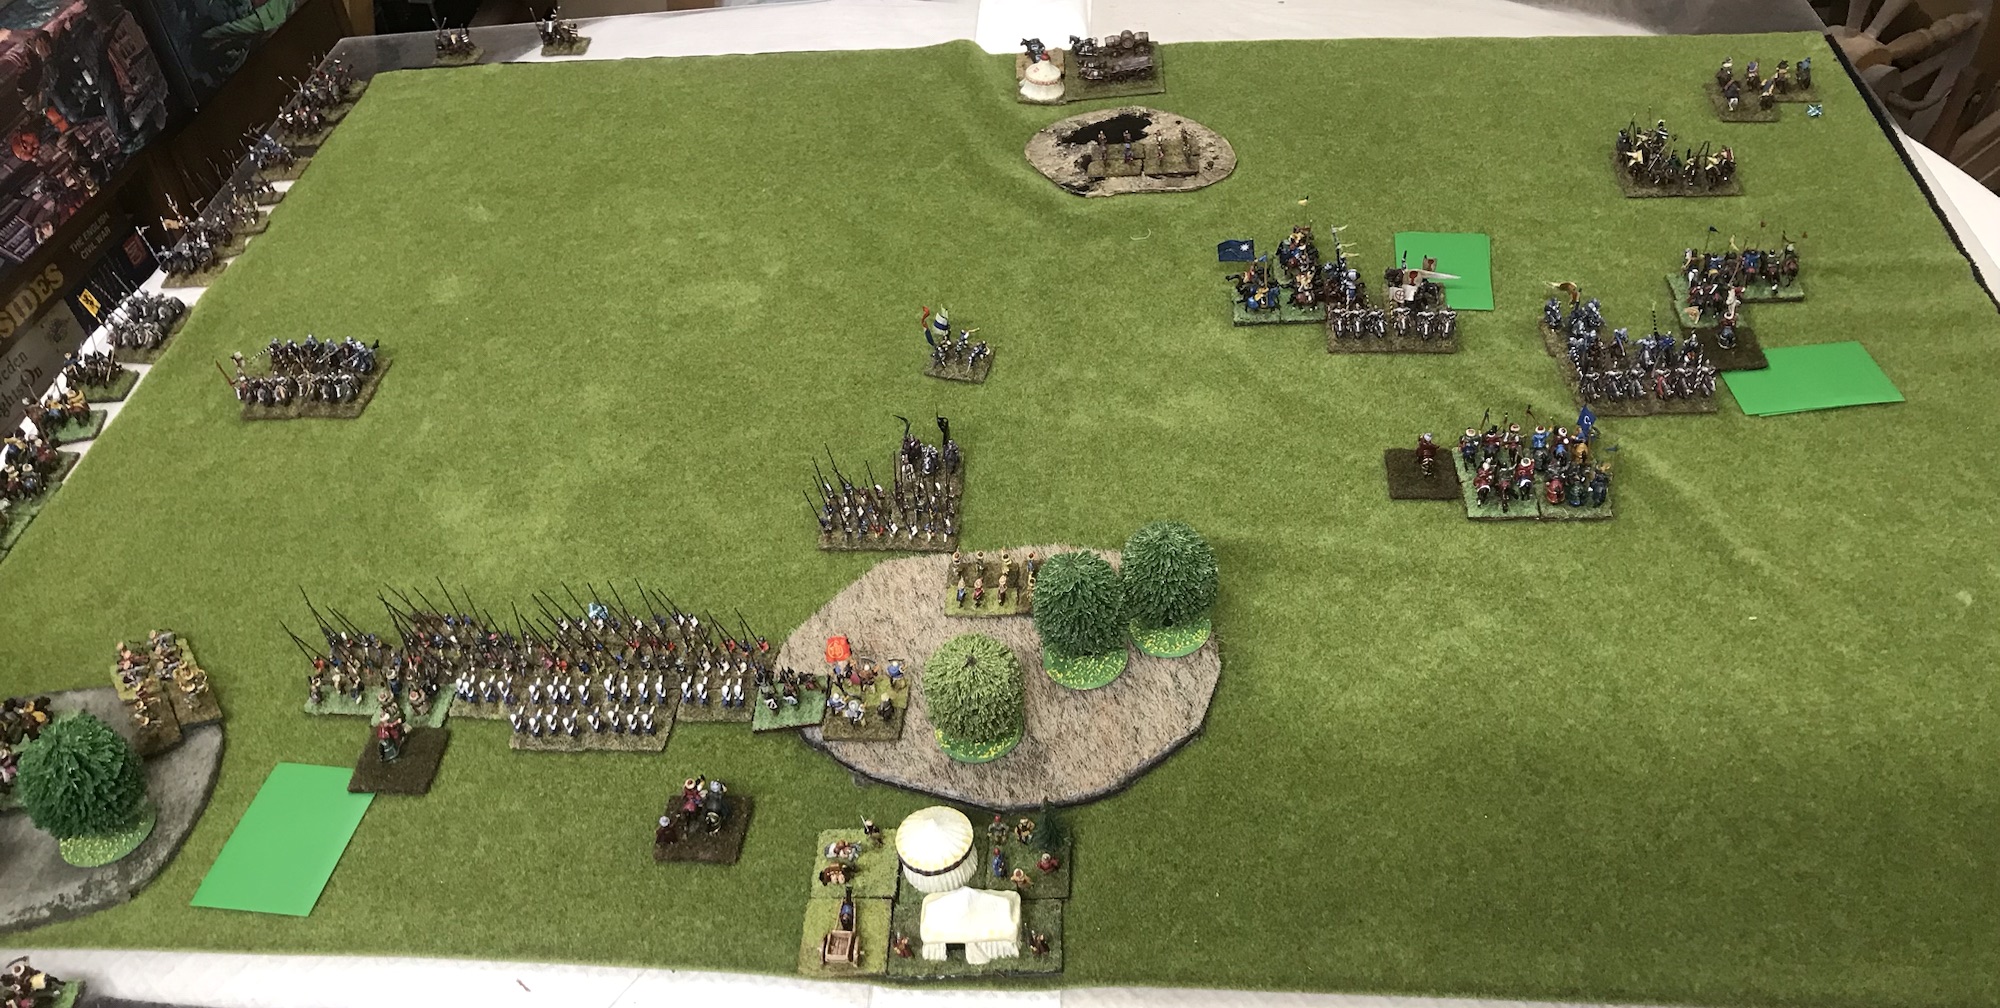
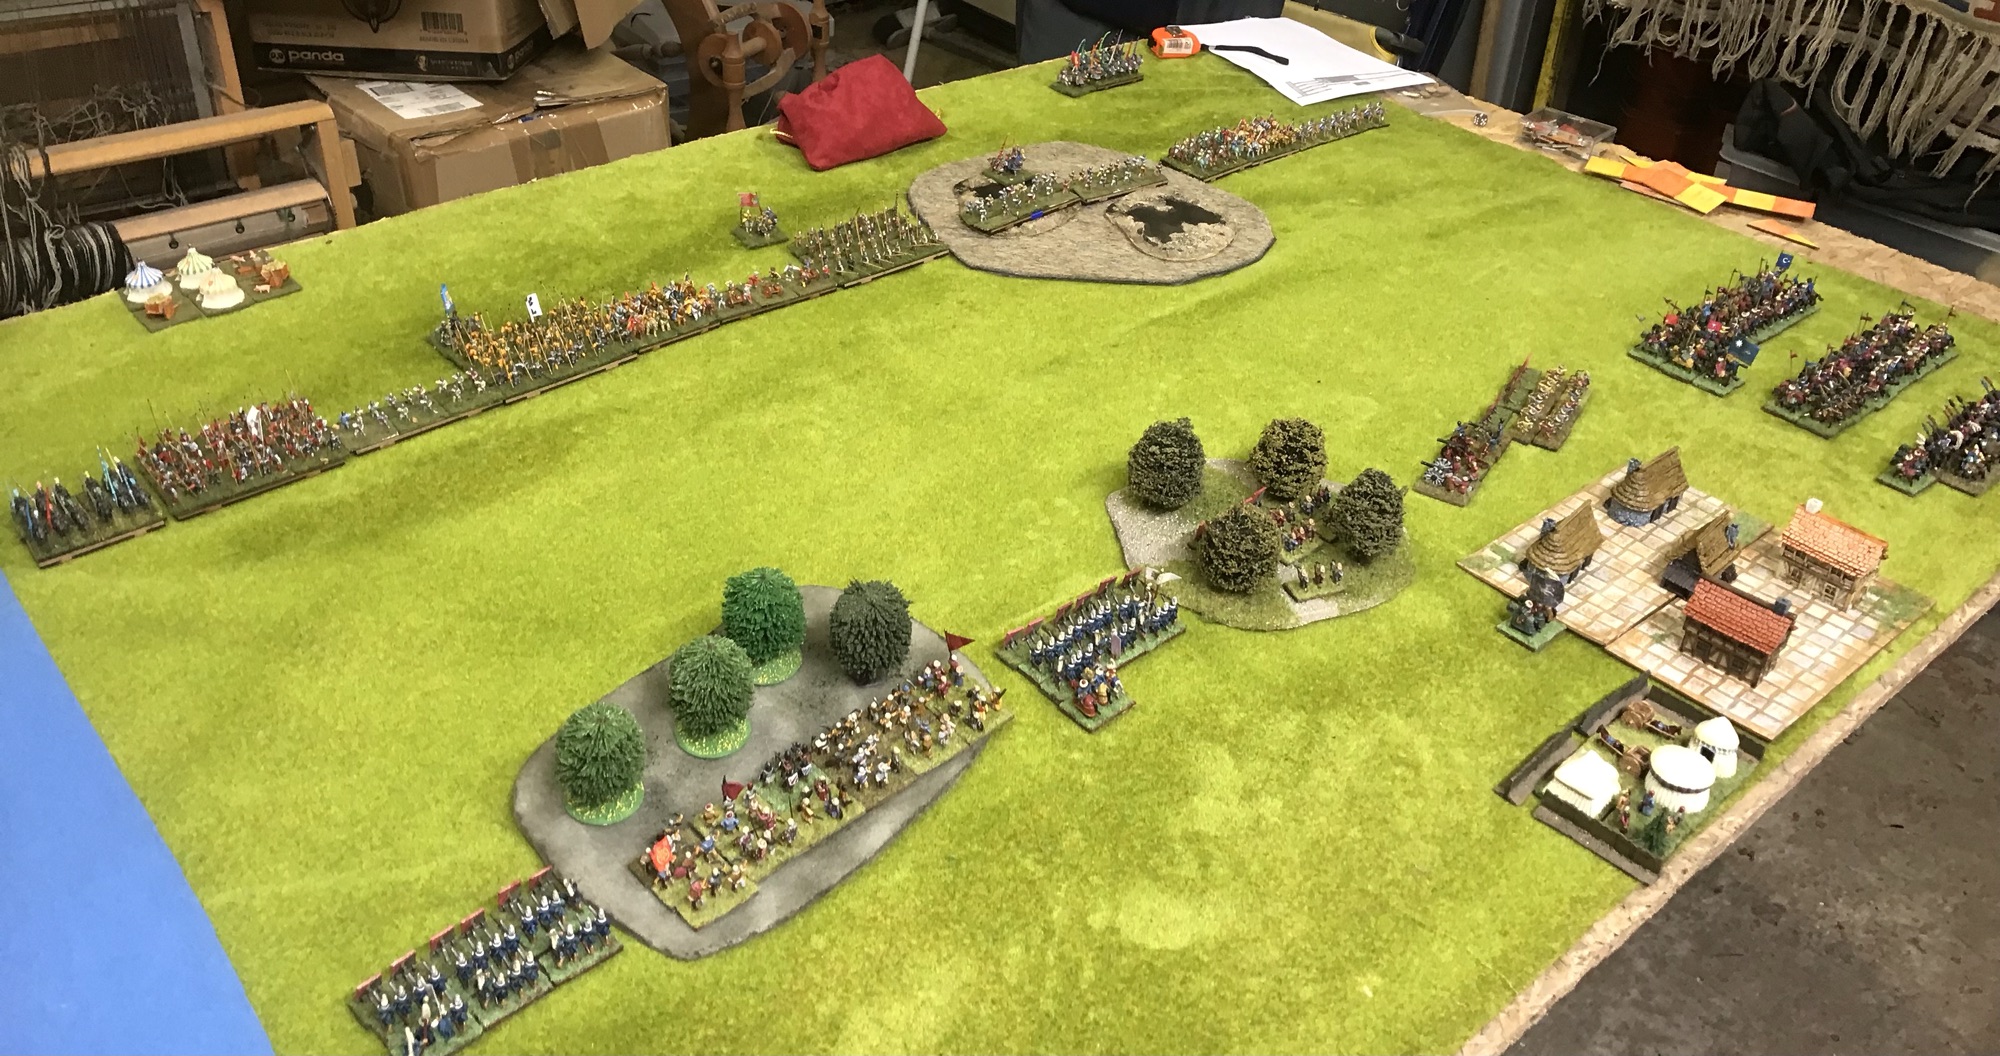
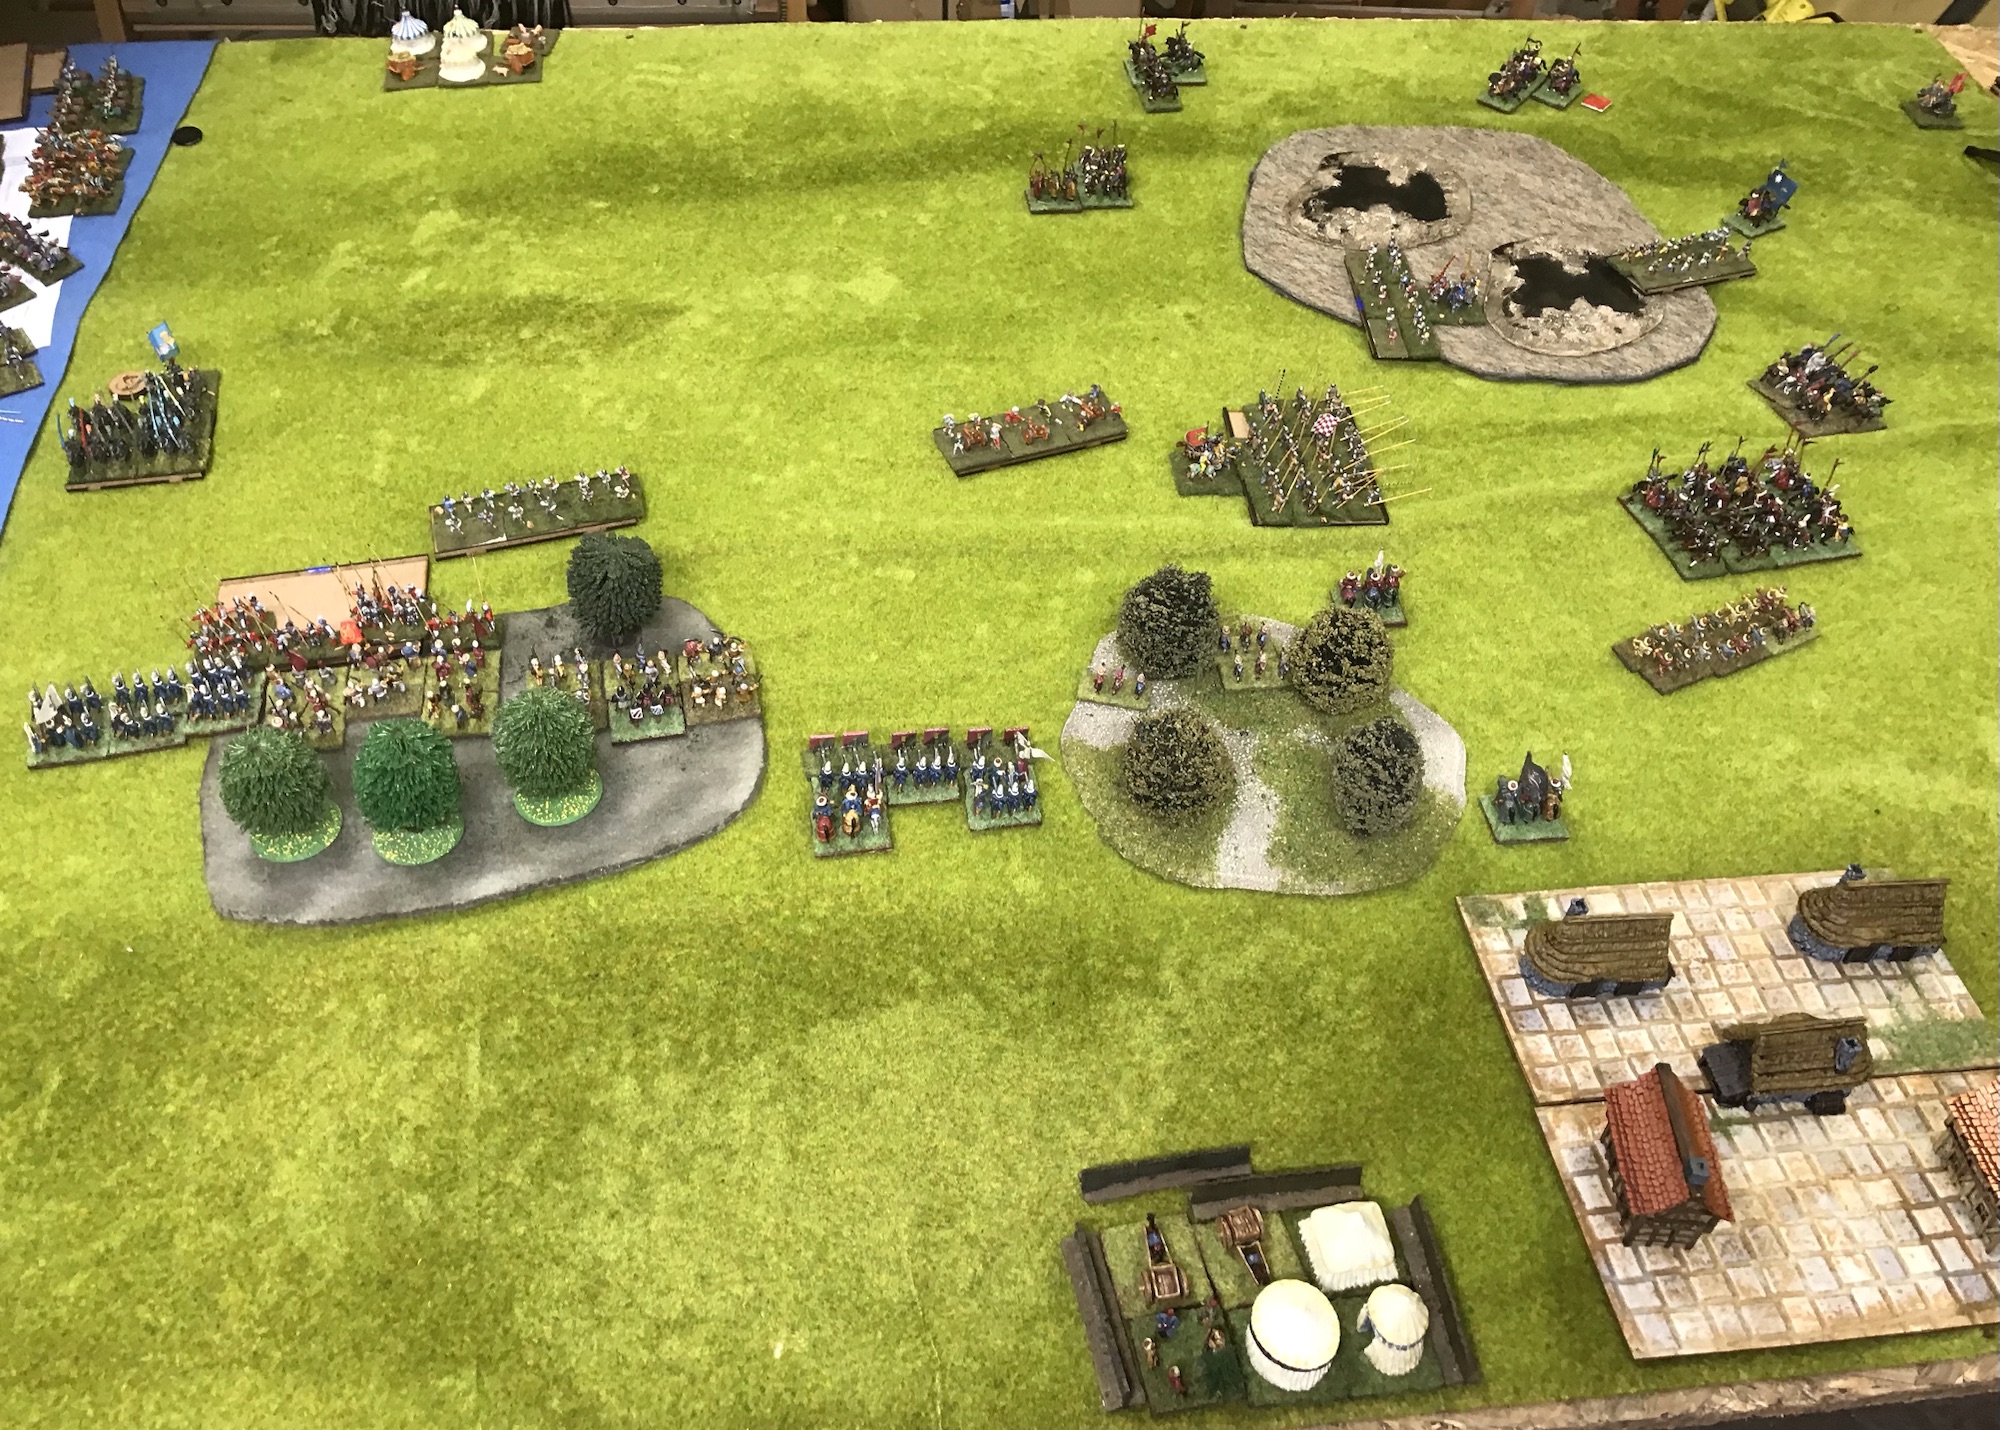
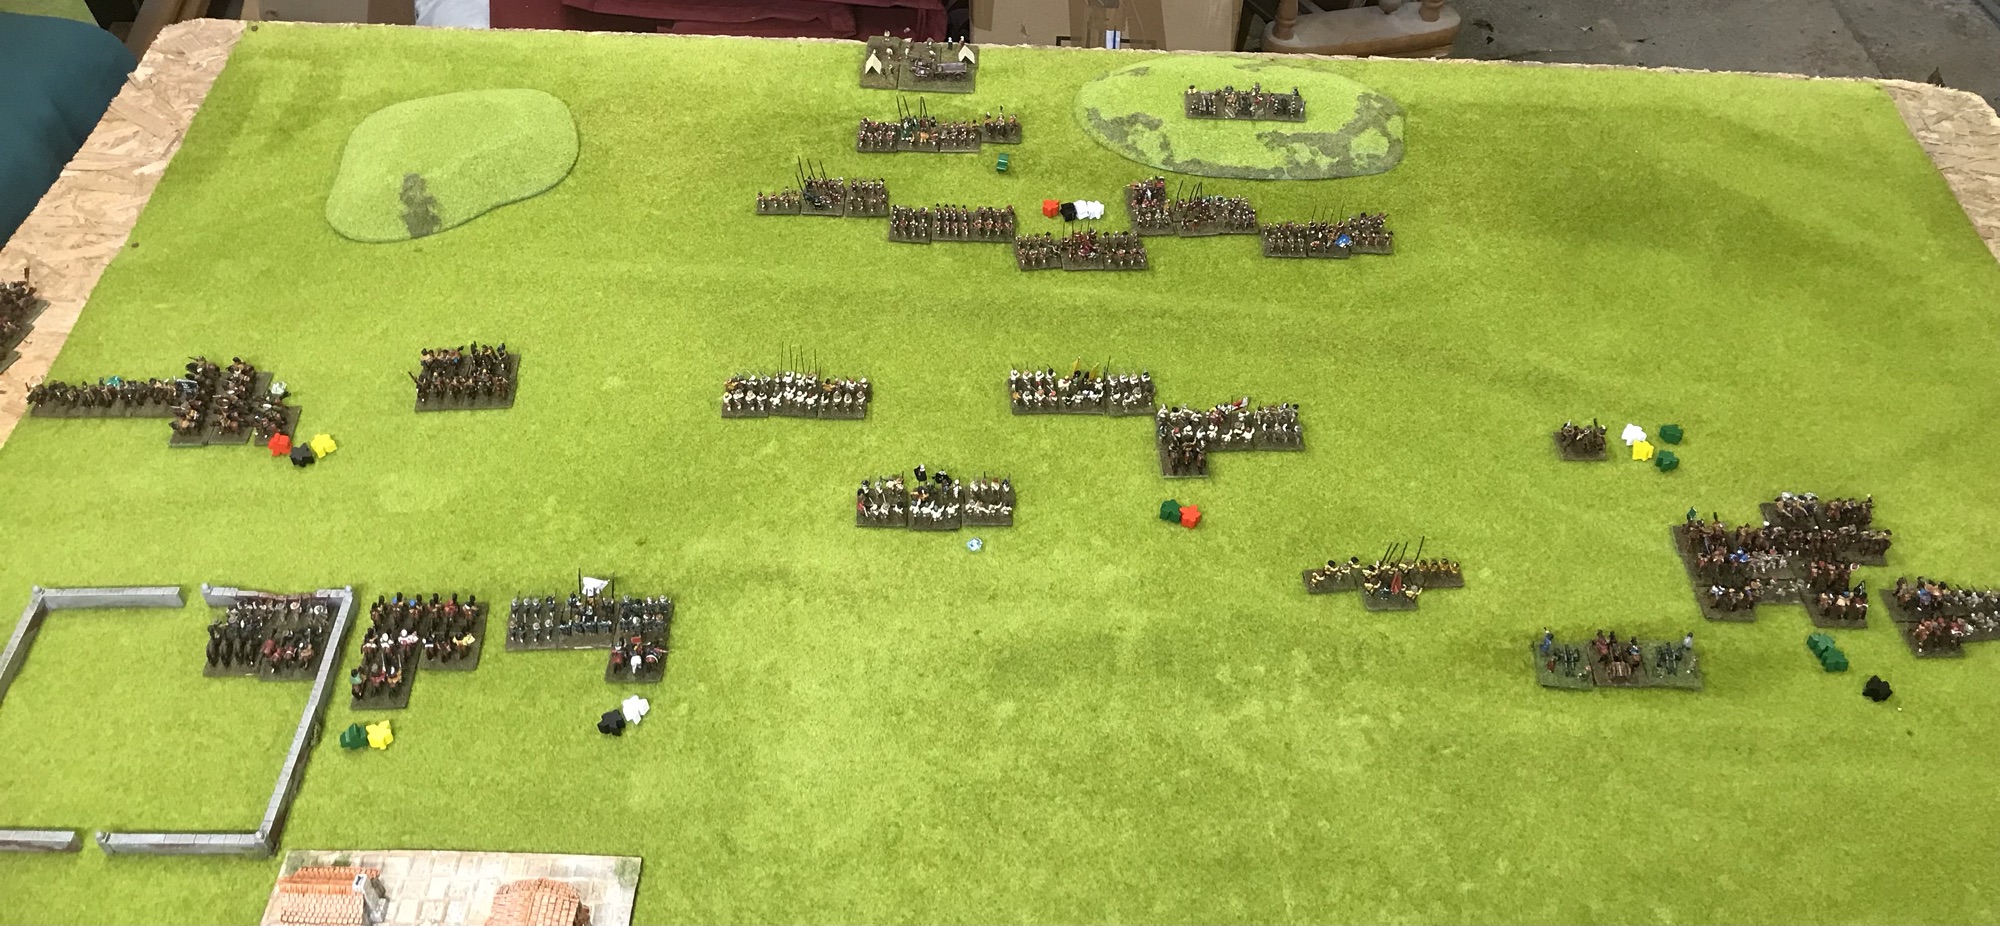
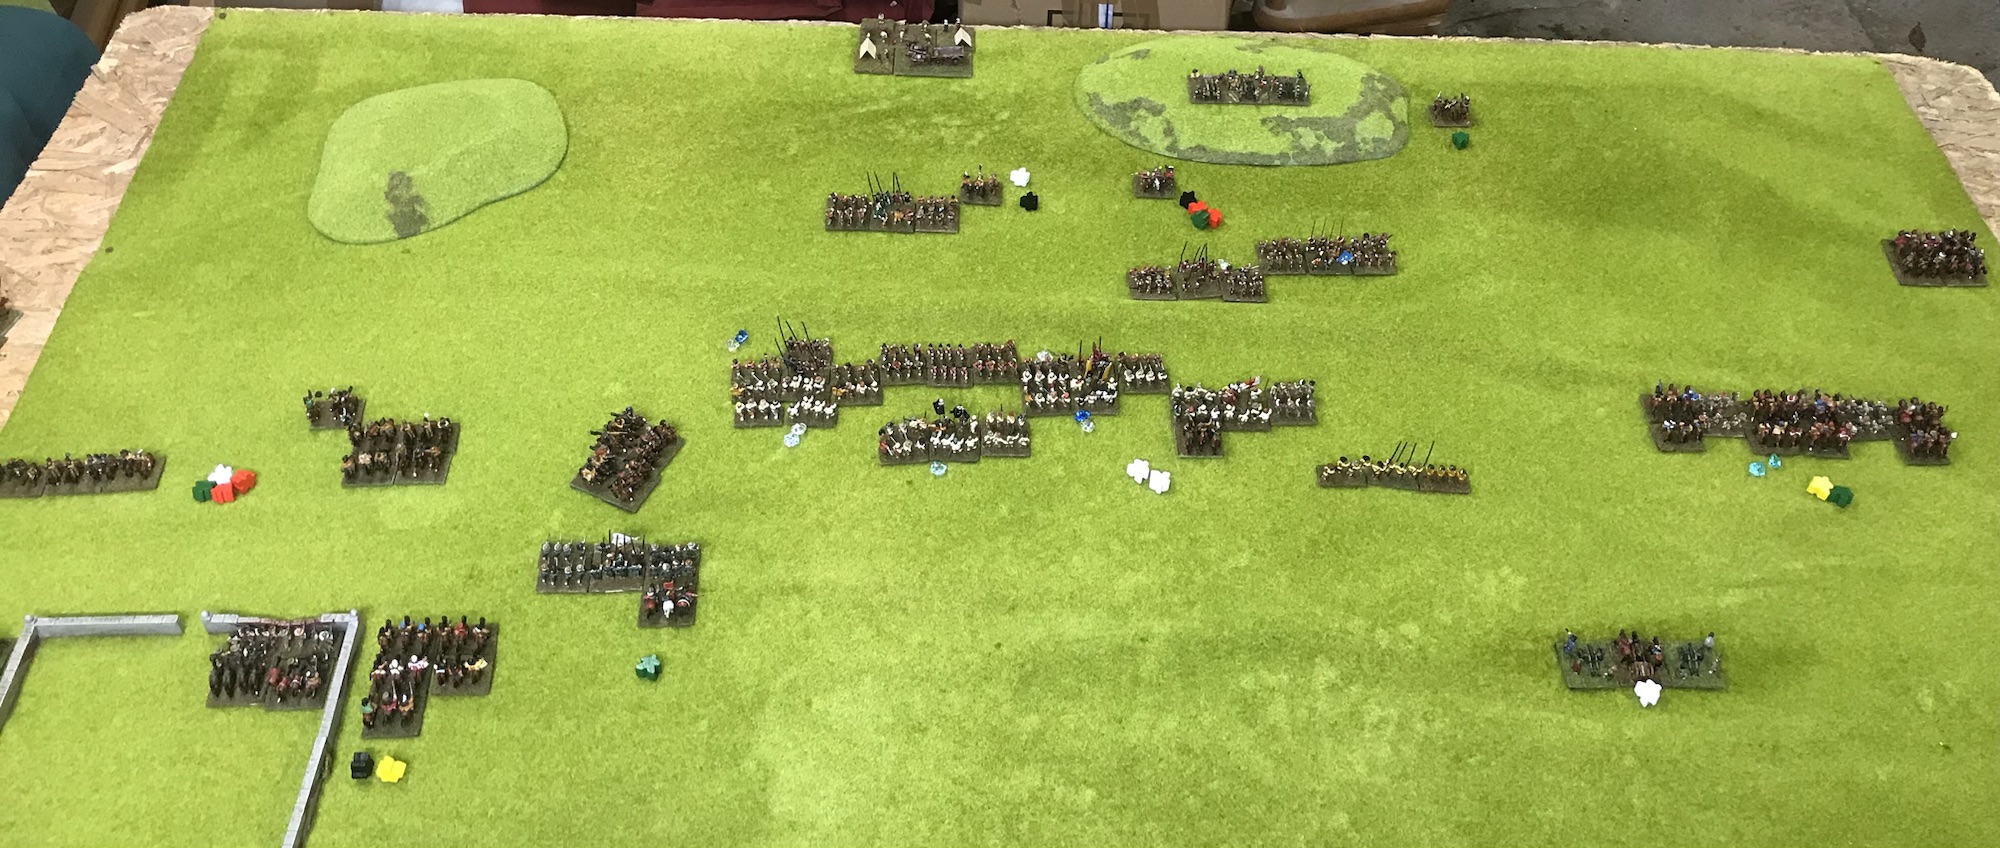
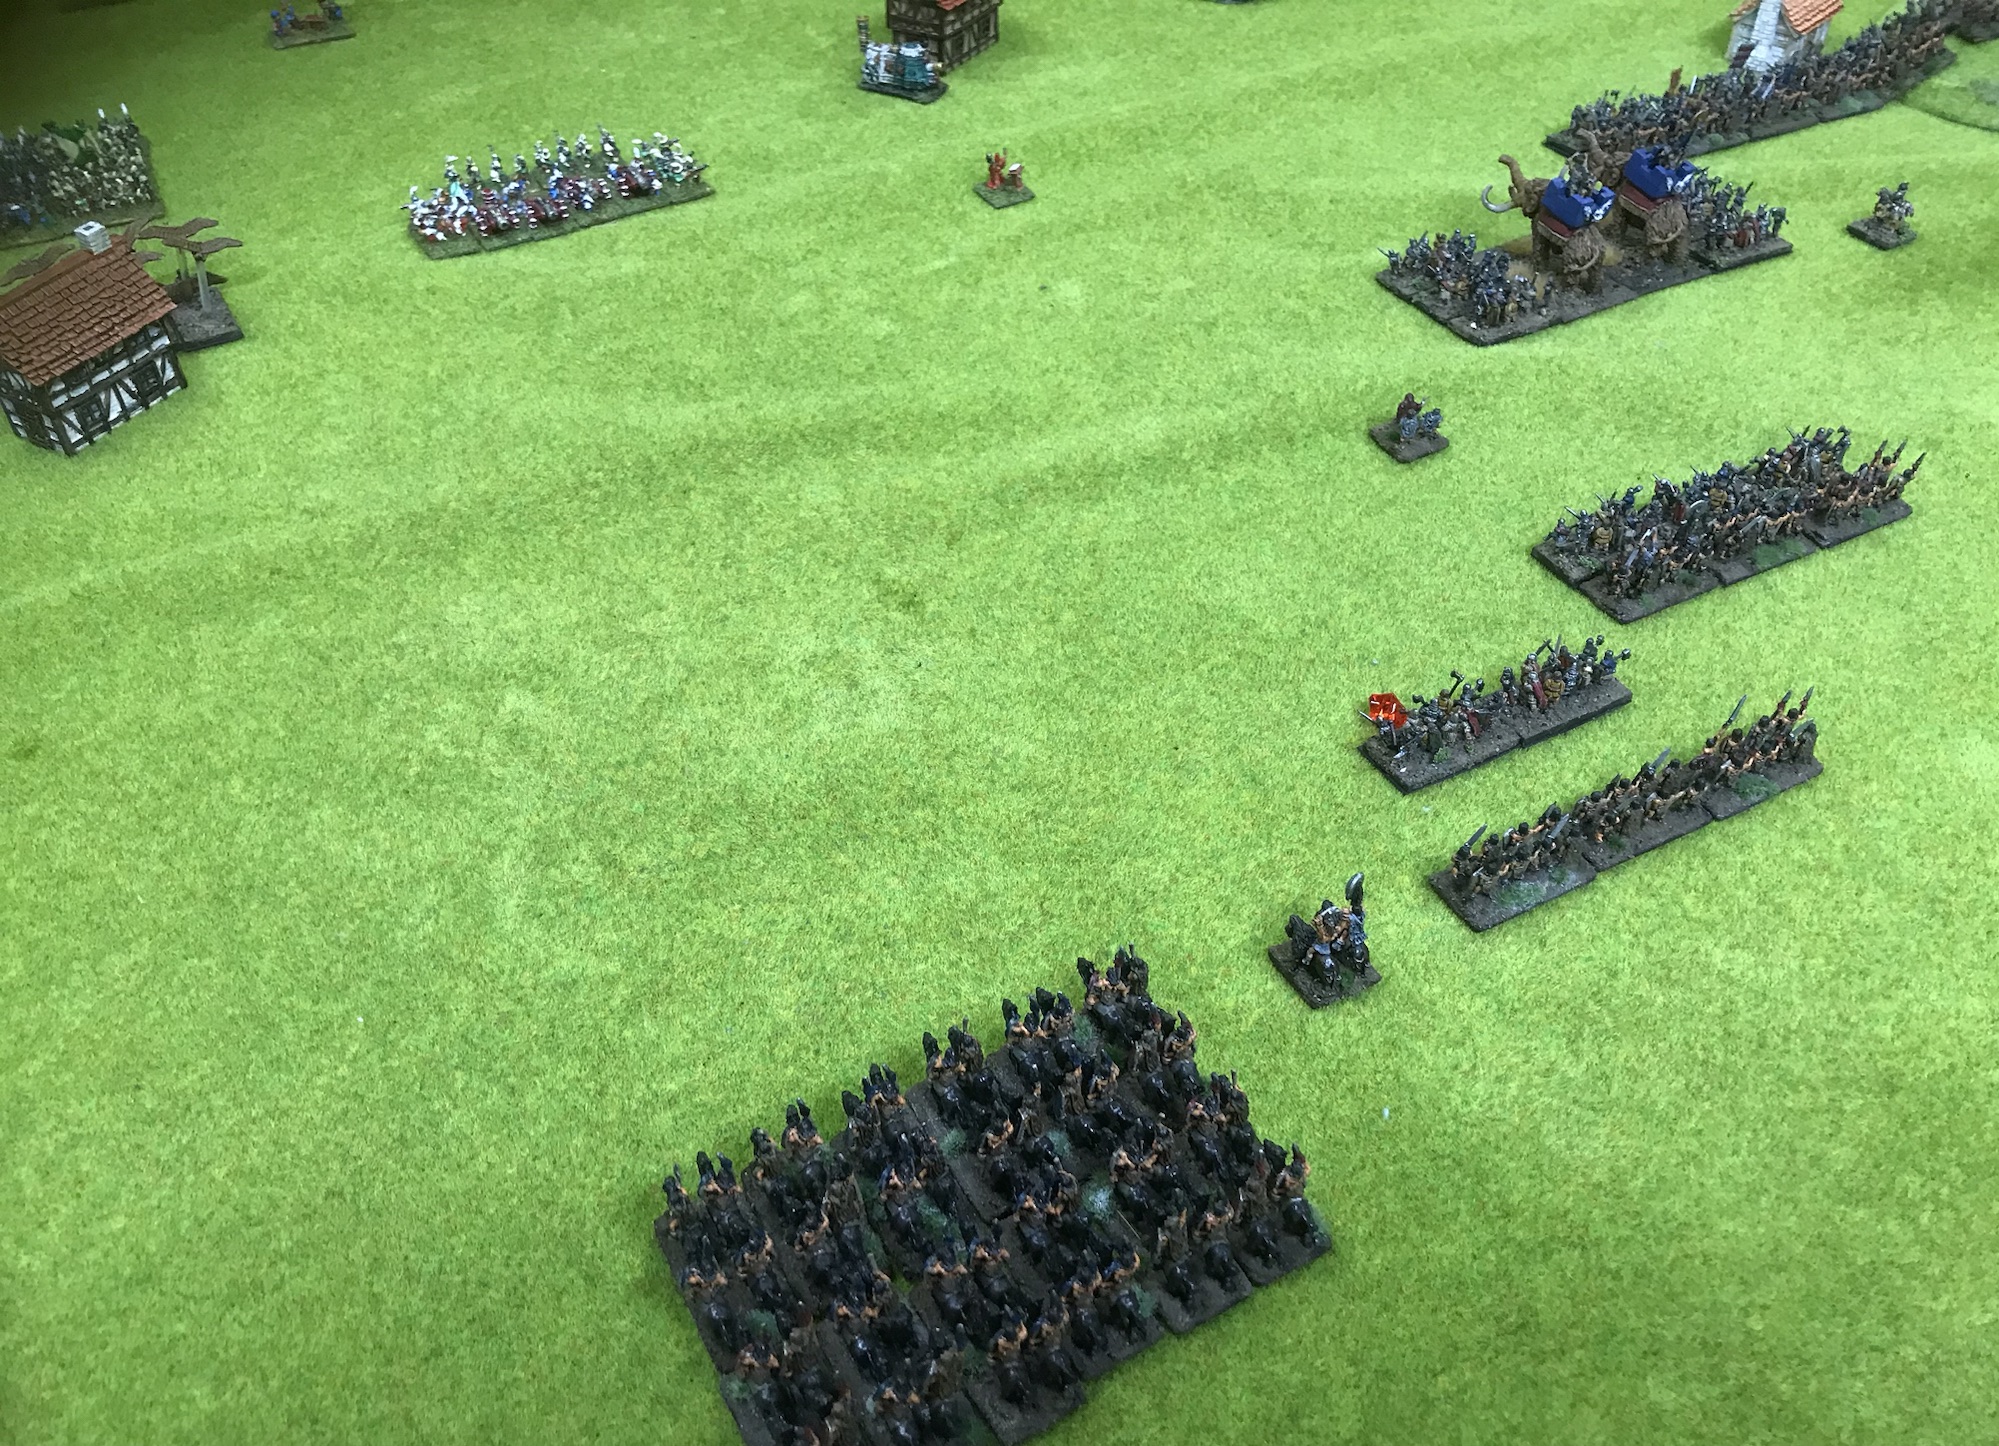
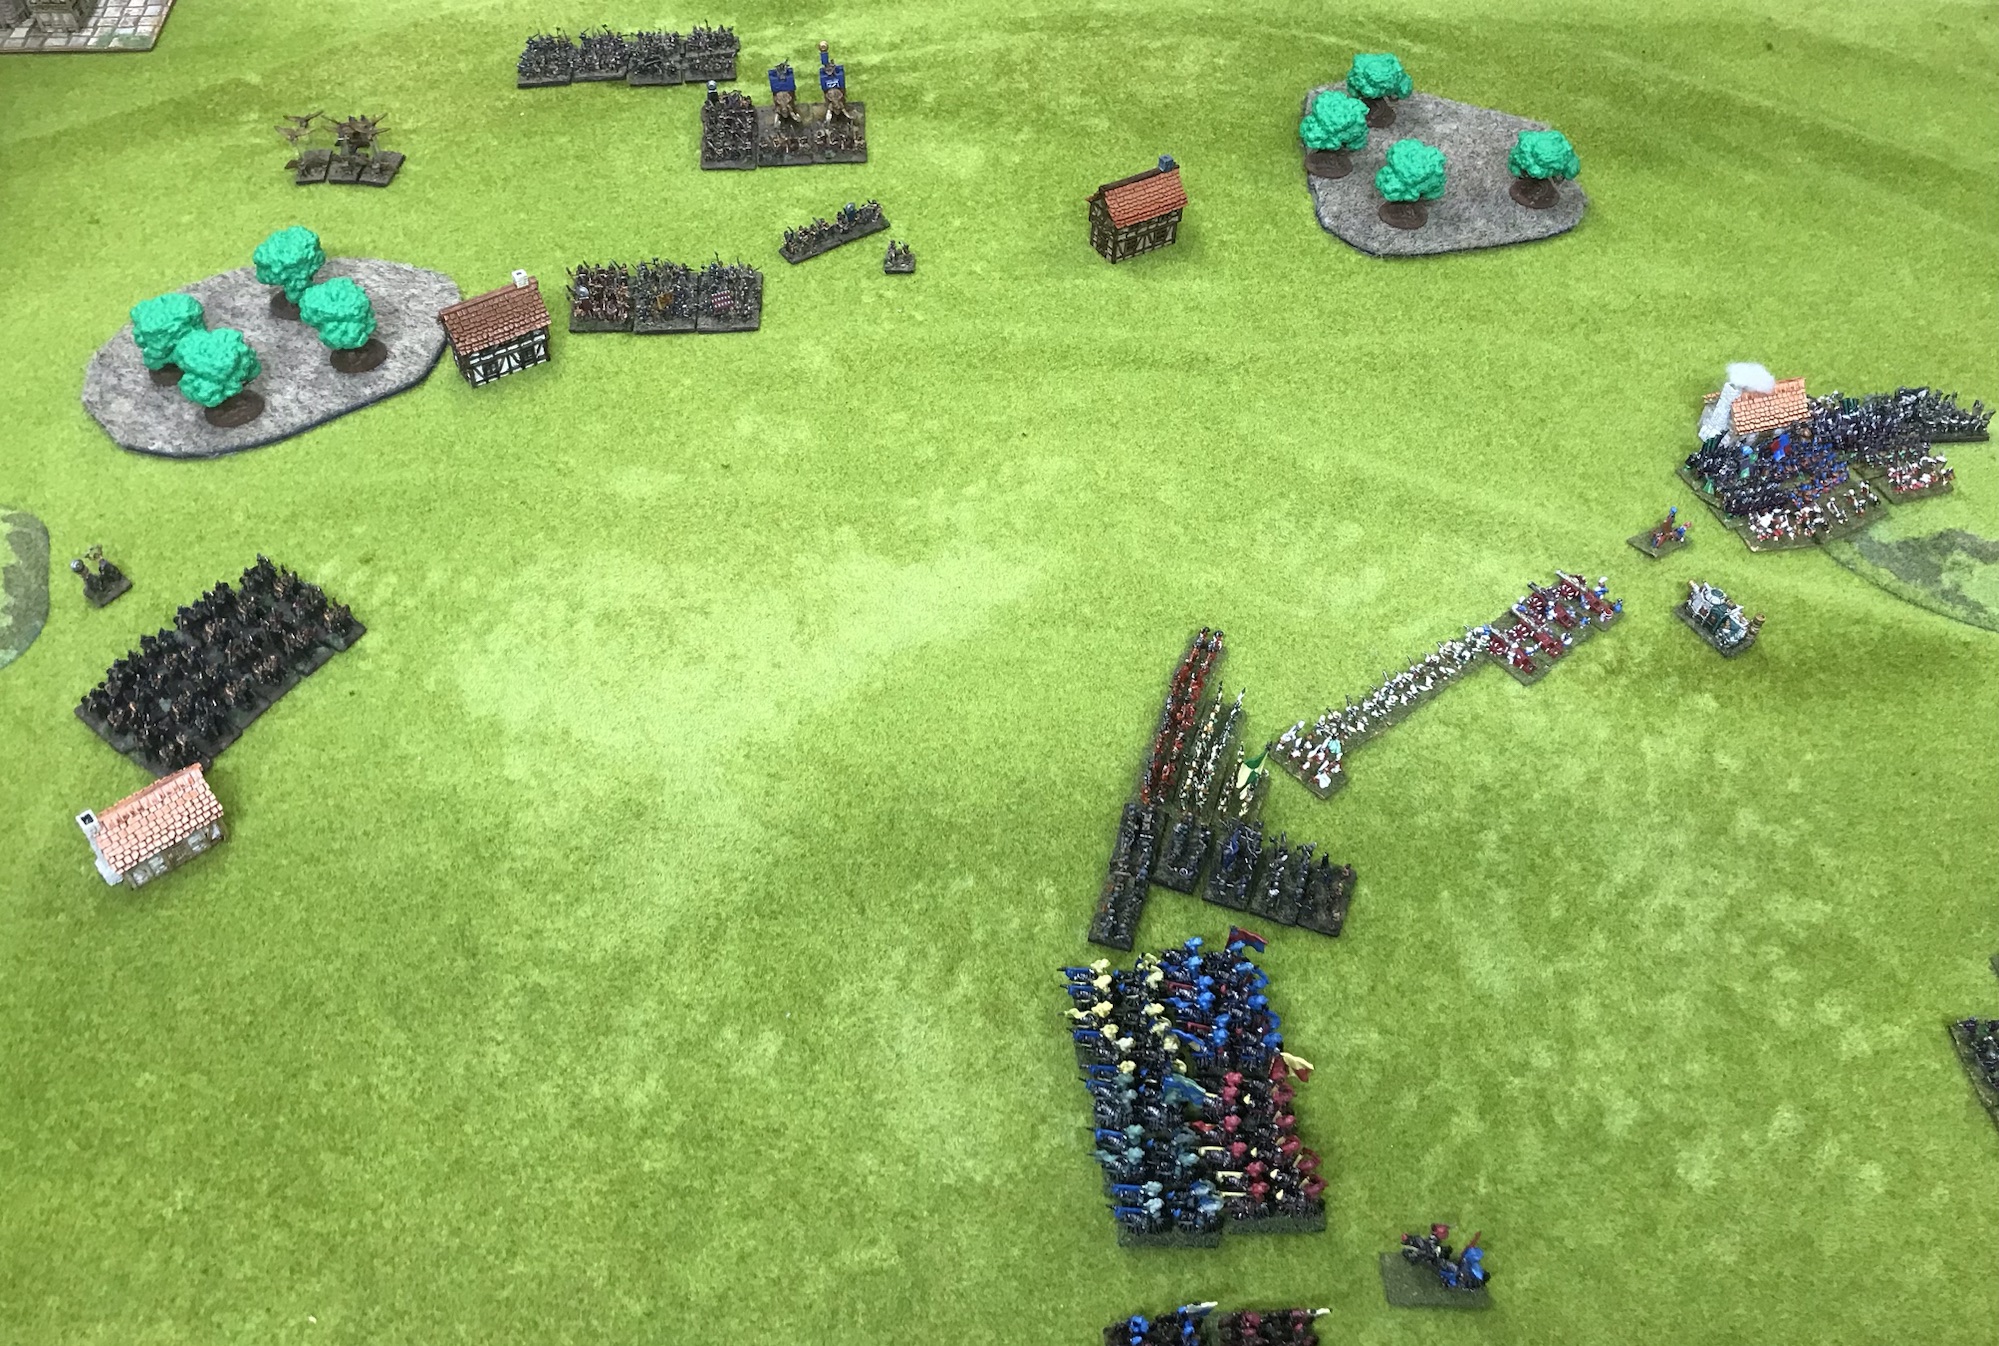
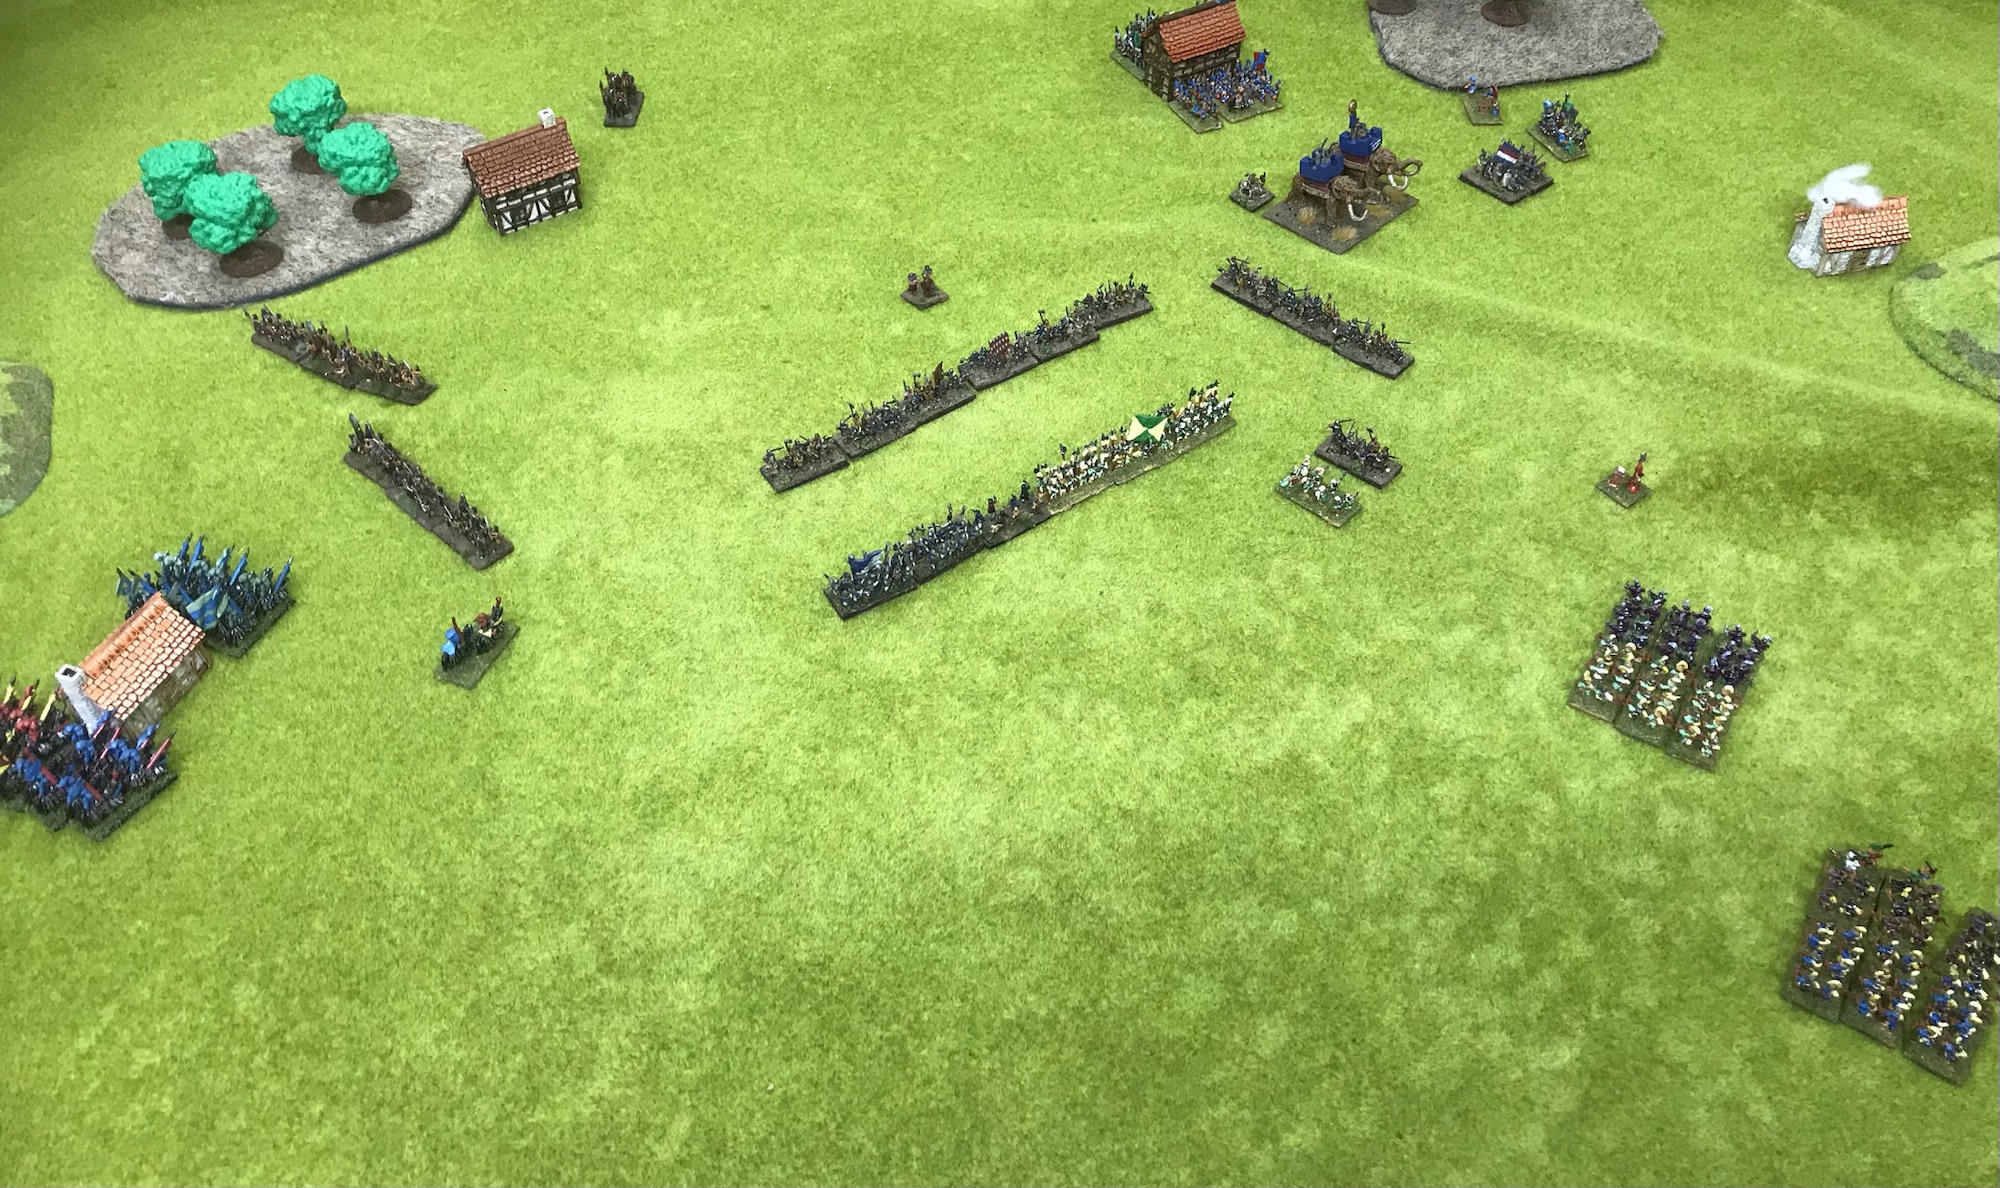
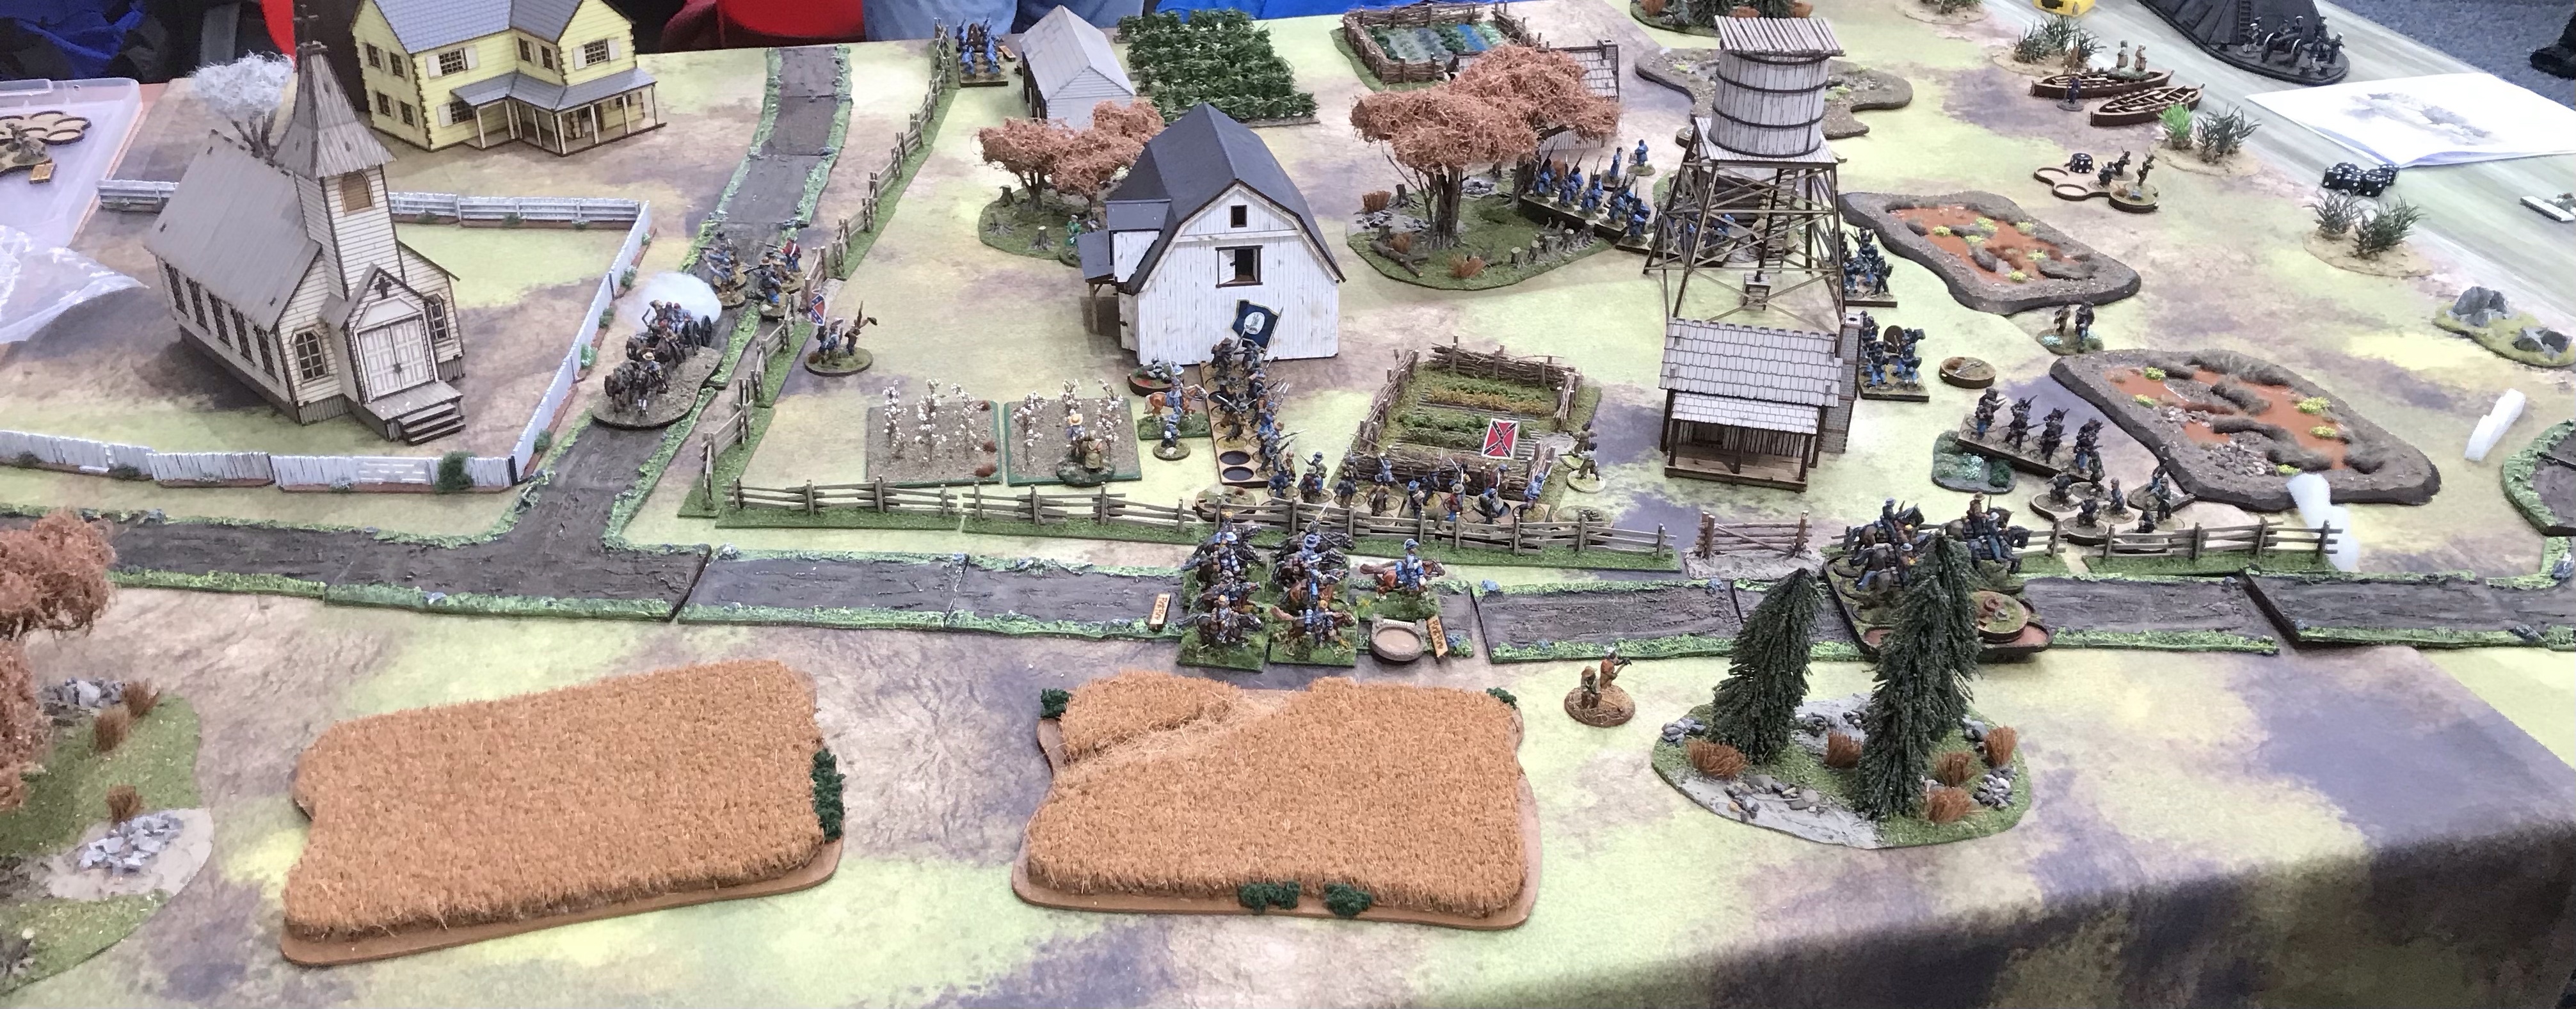
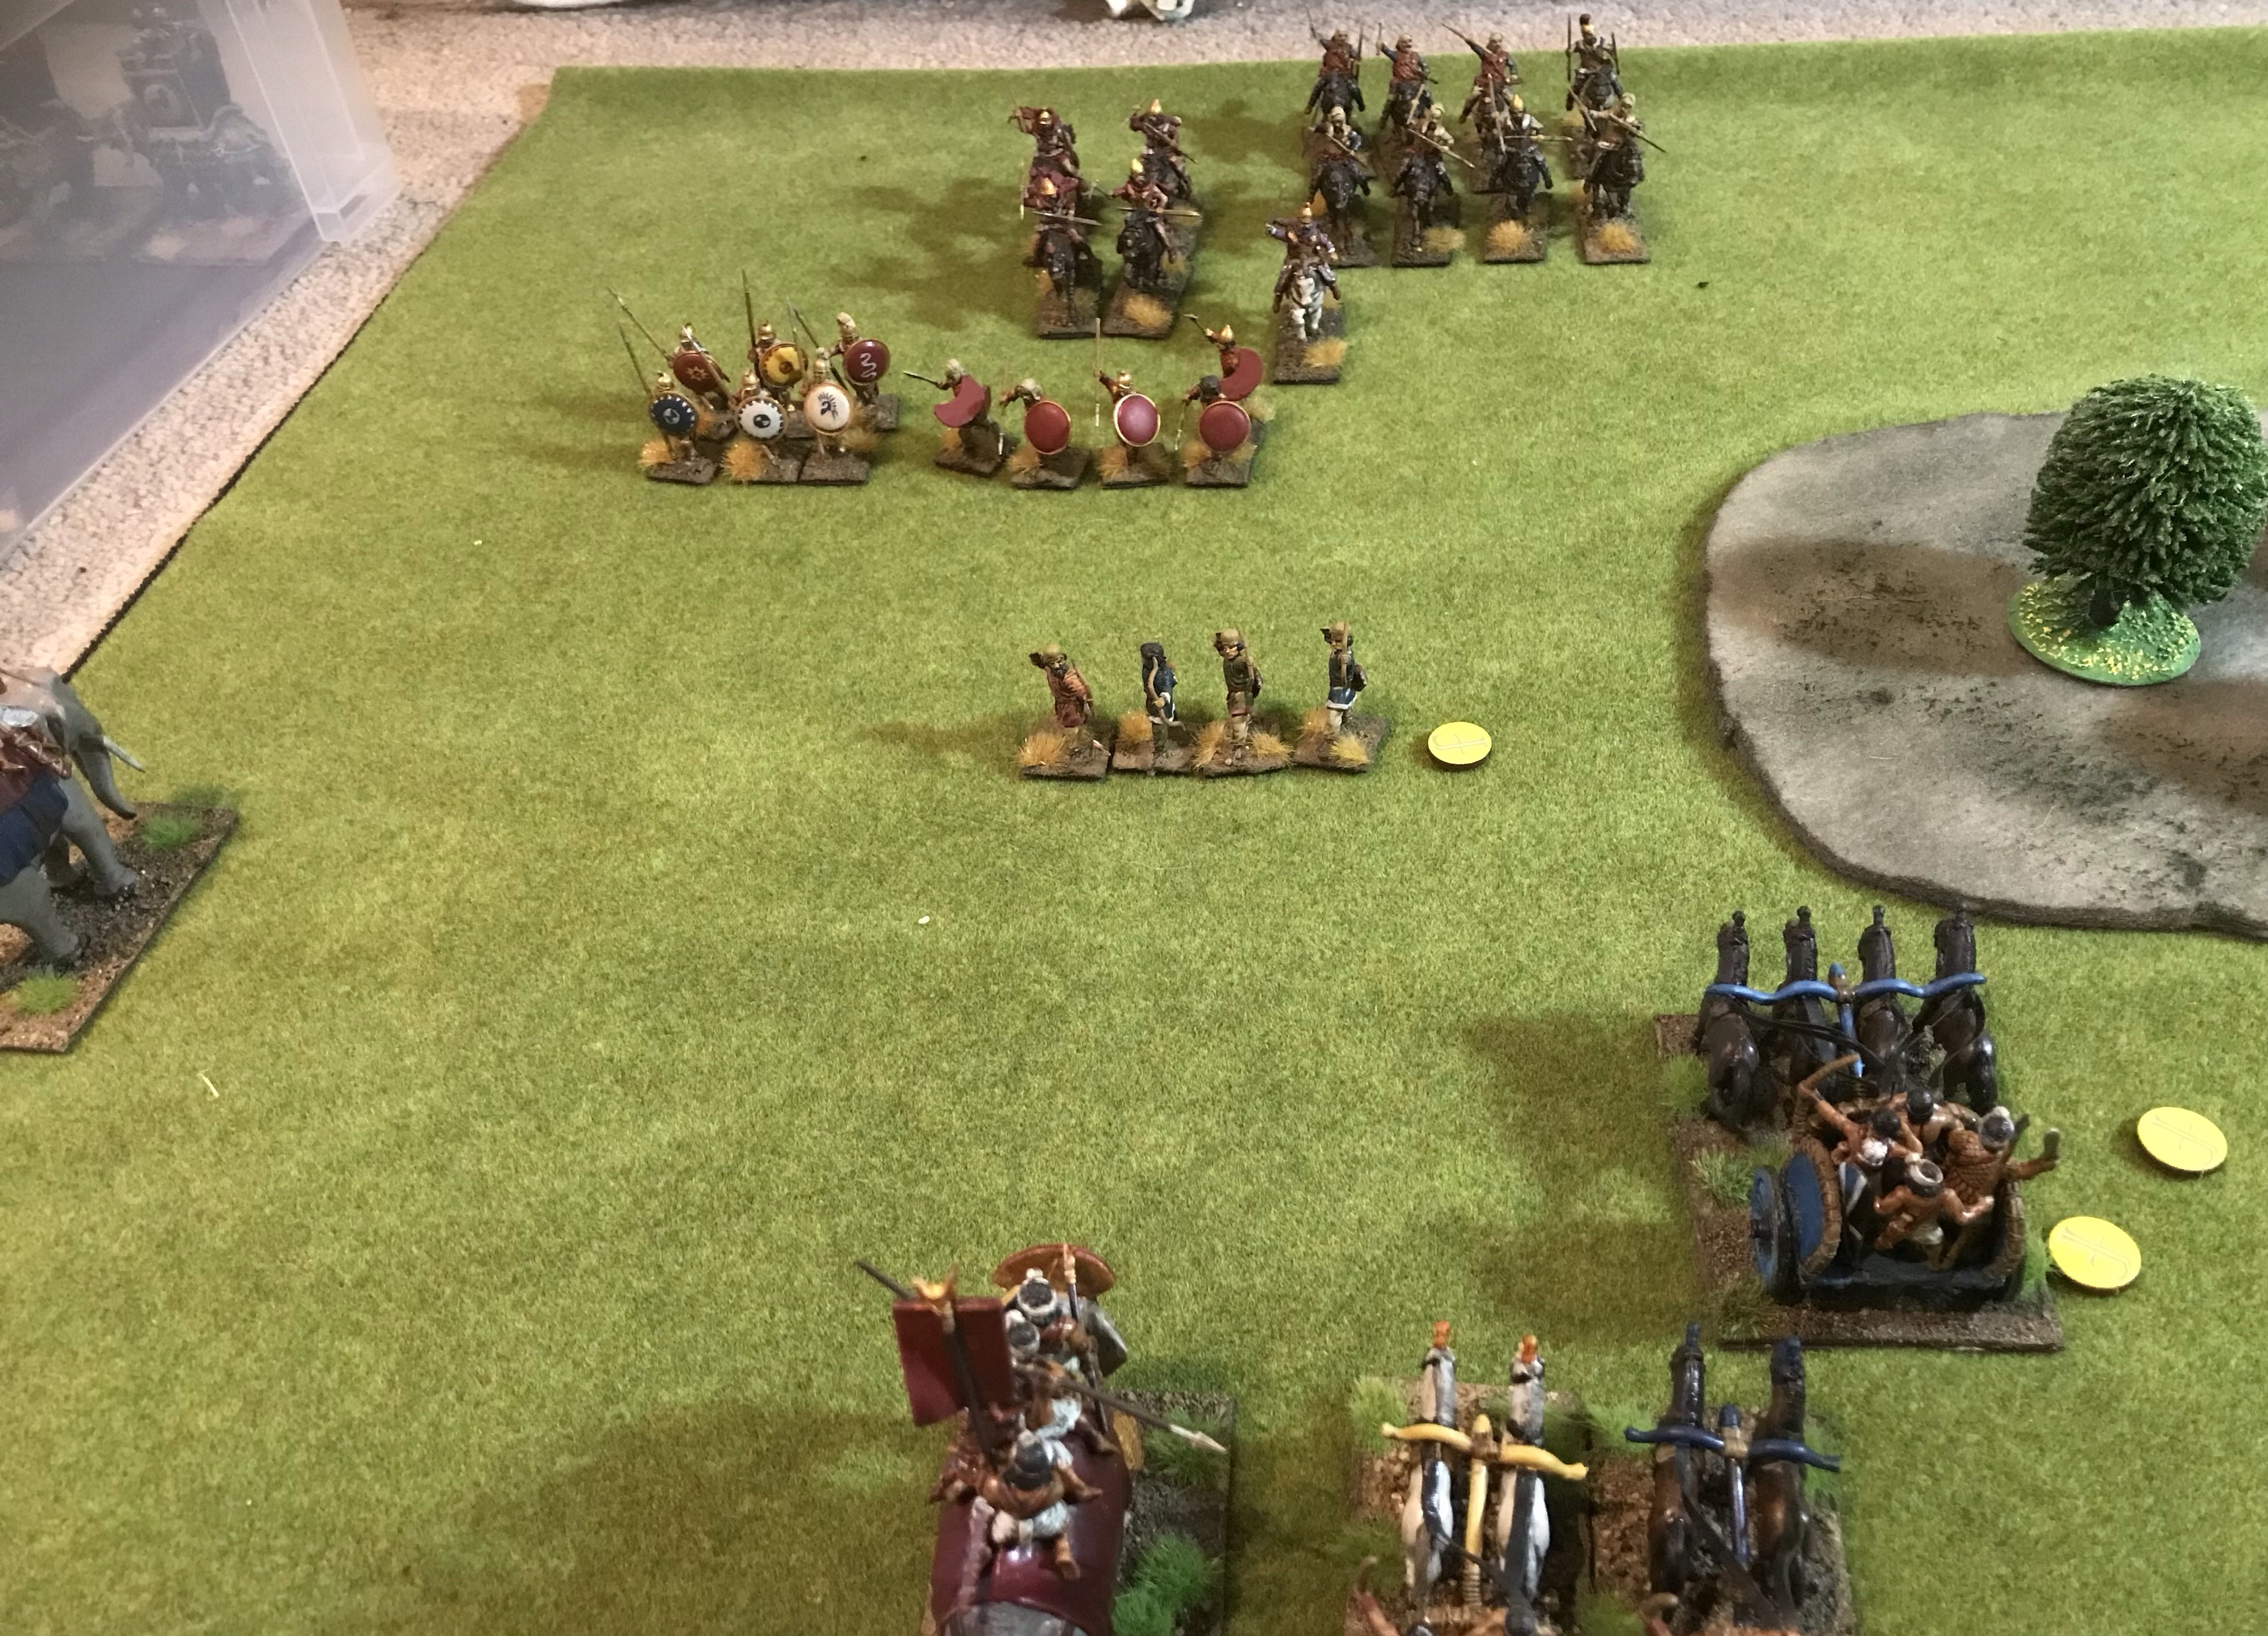
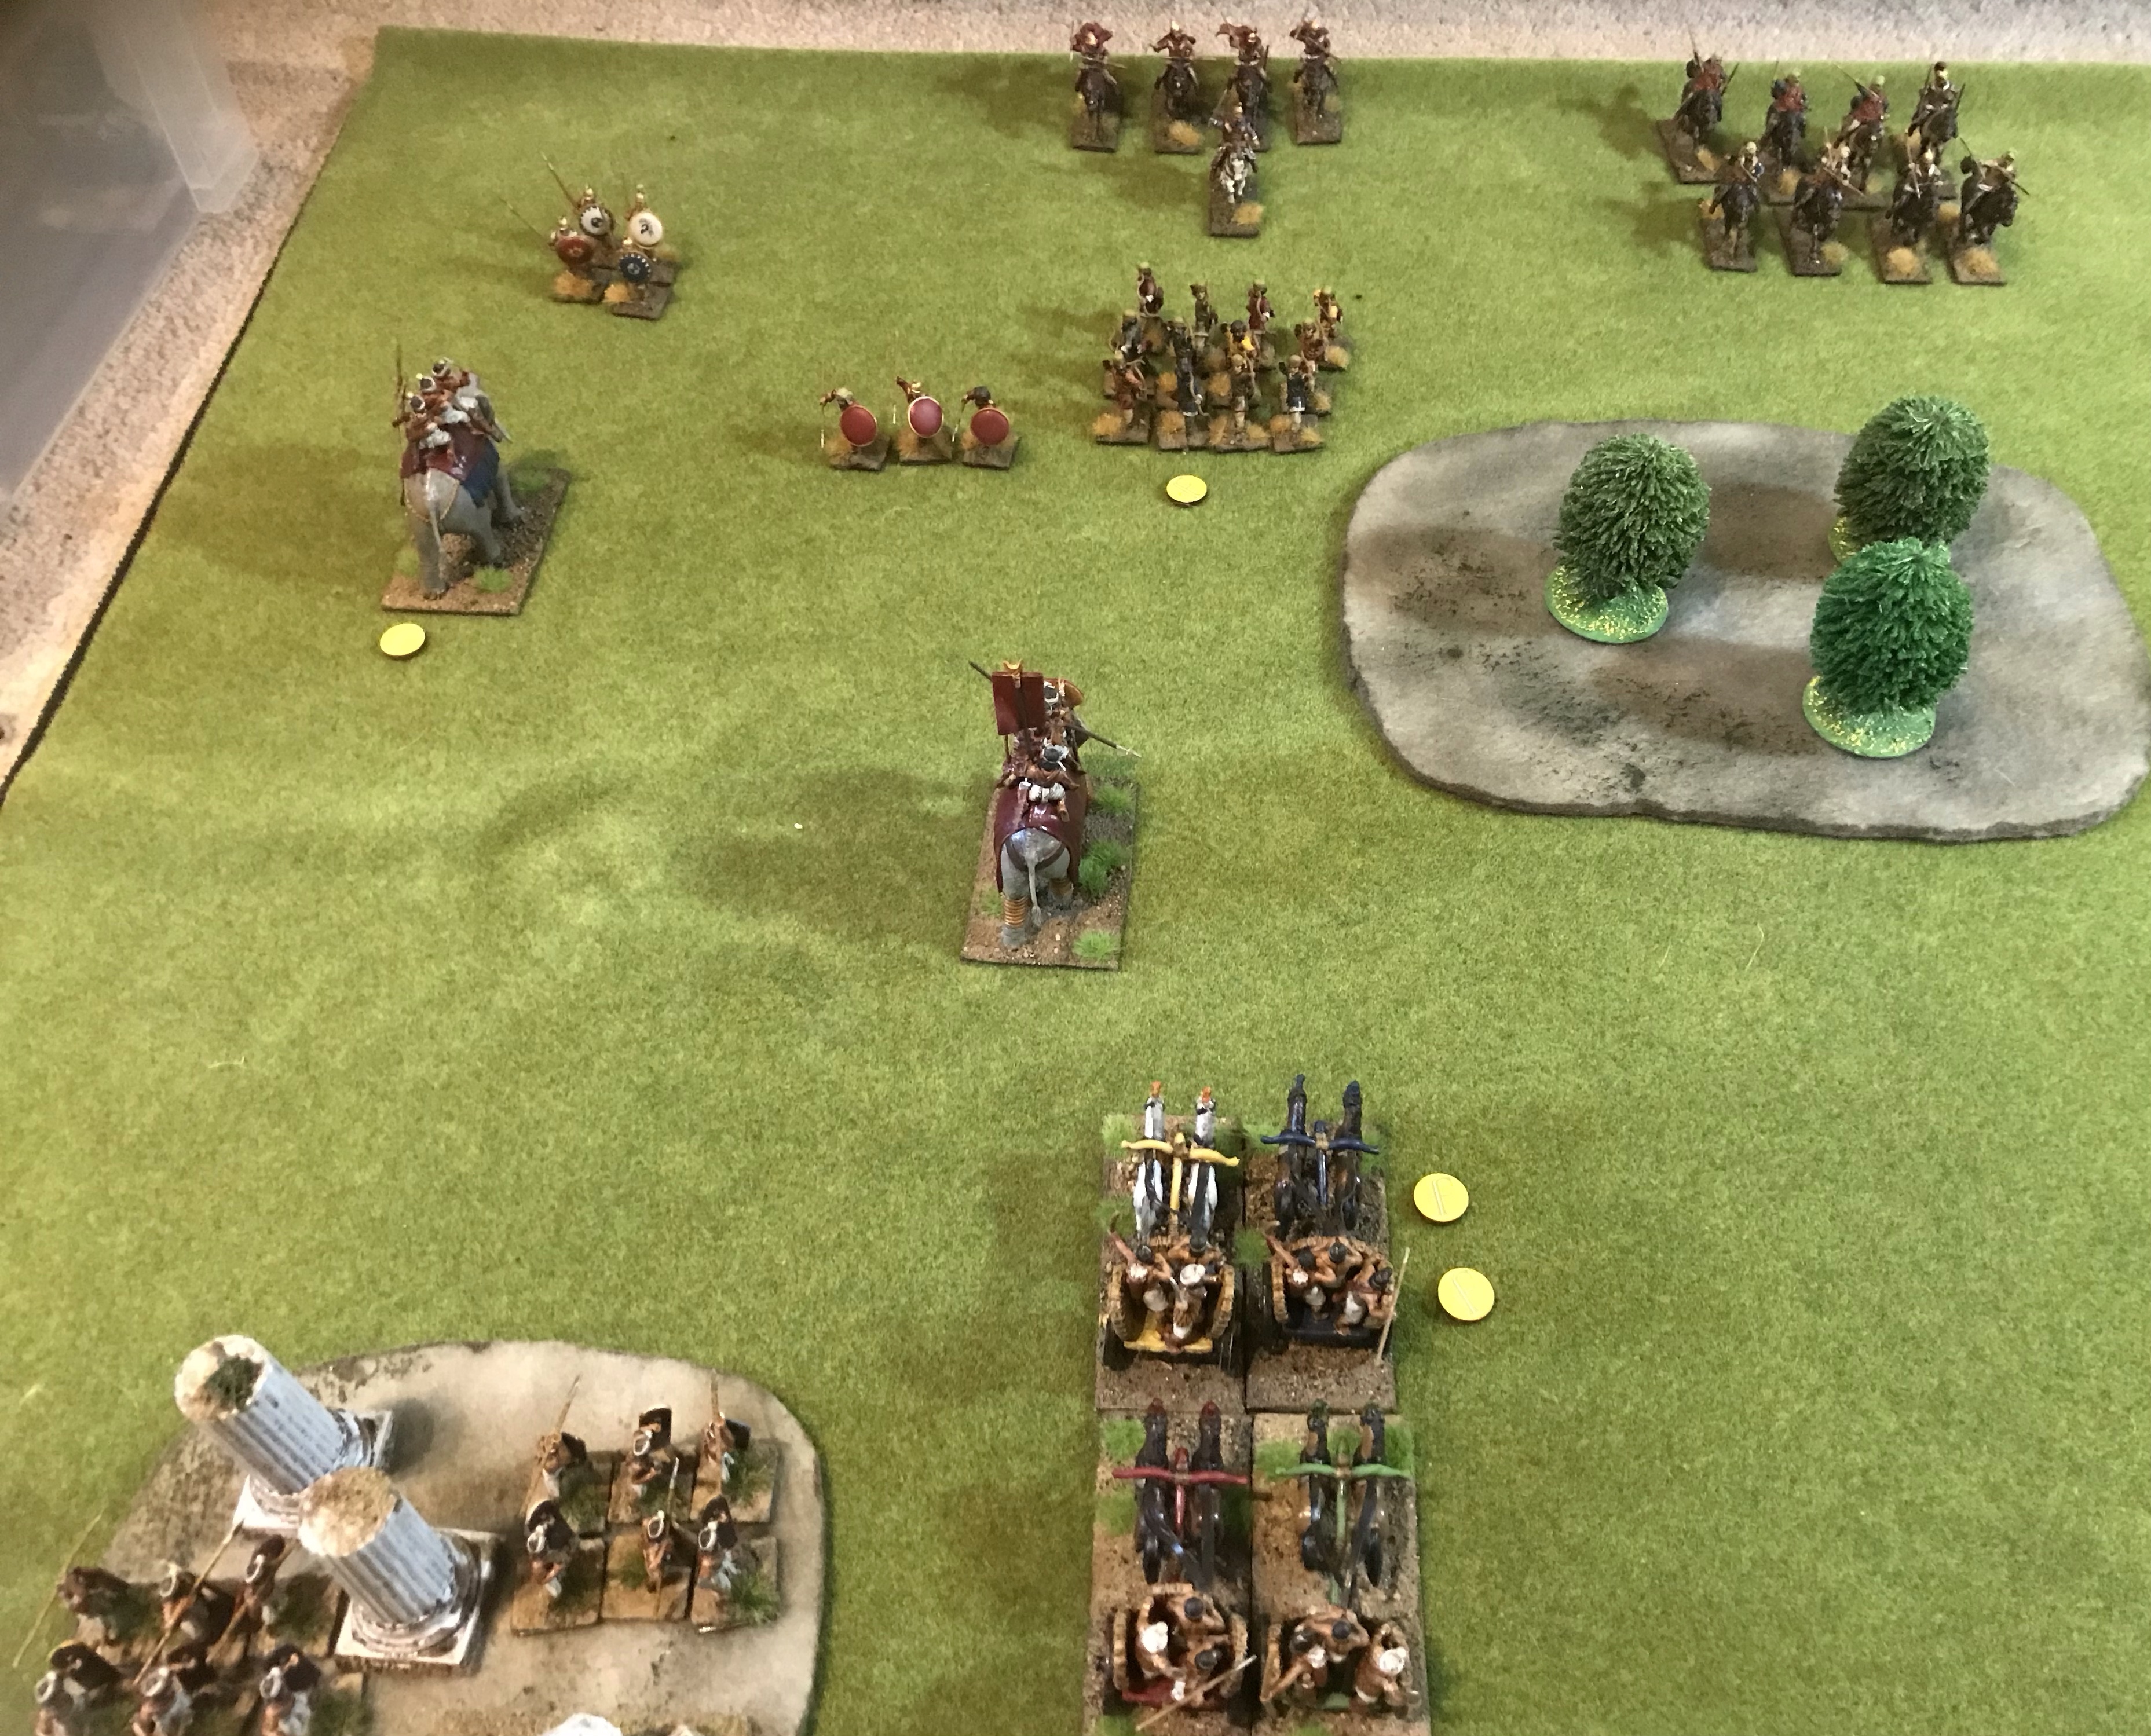
For both lists troop types chosen have been minimised to keep the game simpler. There should be 2 woods in the Ottoman (bottom of image) deployment but in the excitement the trees are missing. There is also a river just off to the left side of the table.
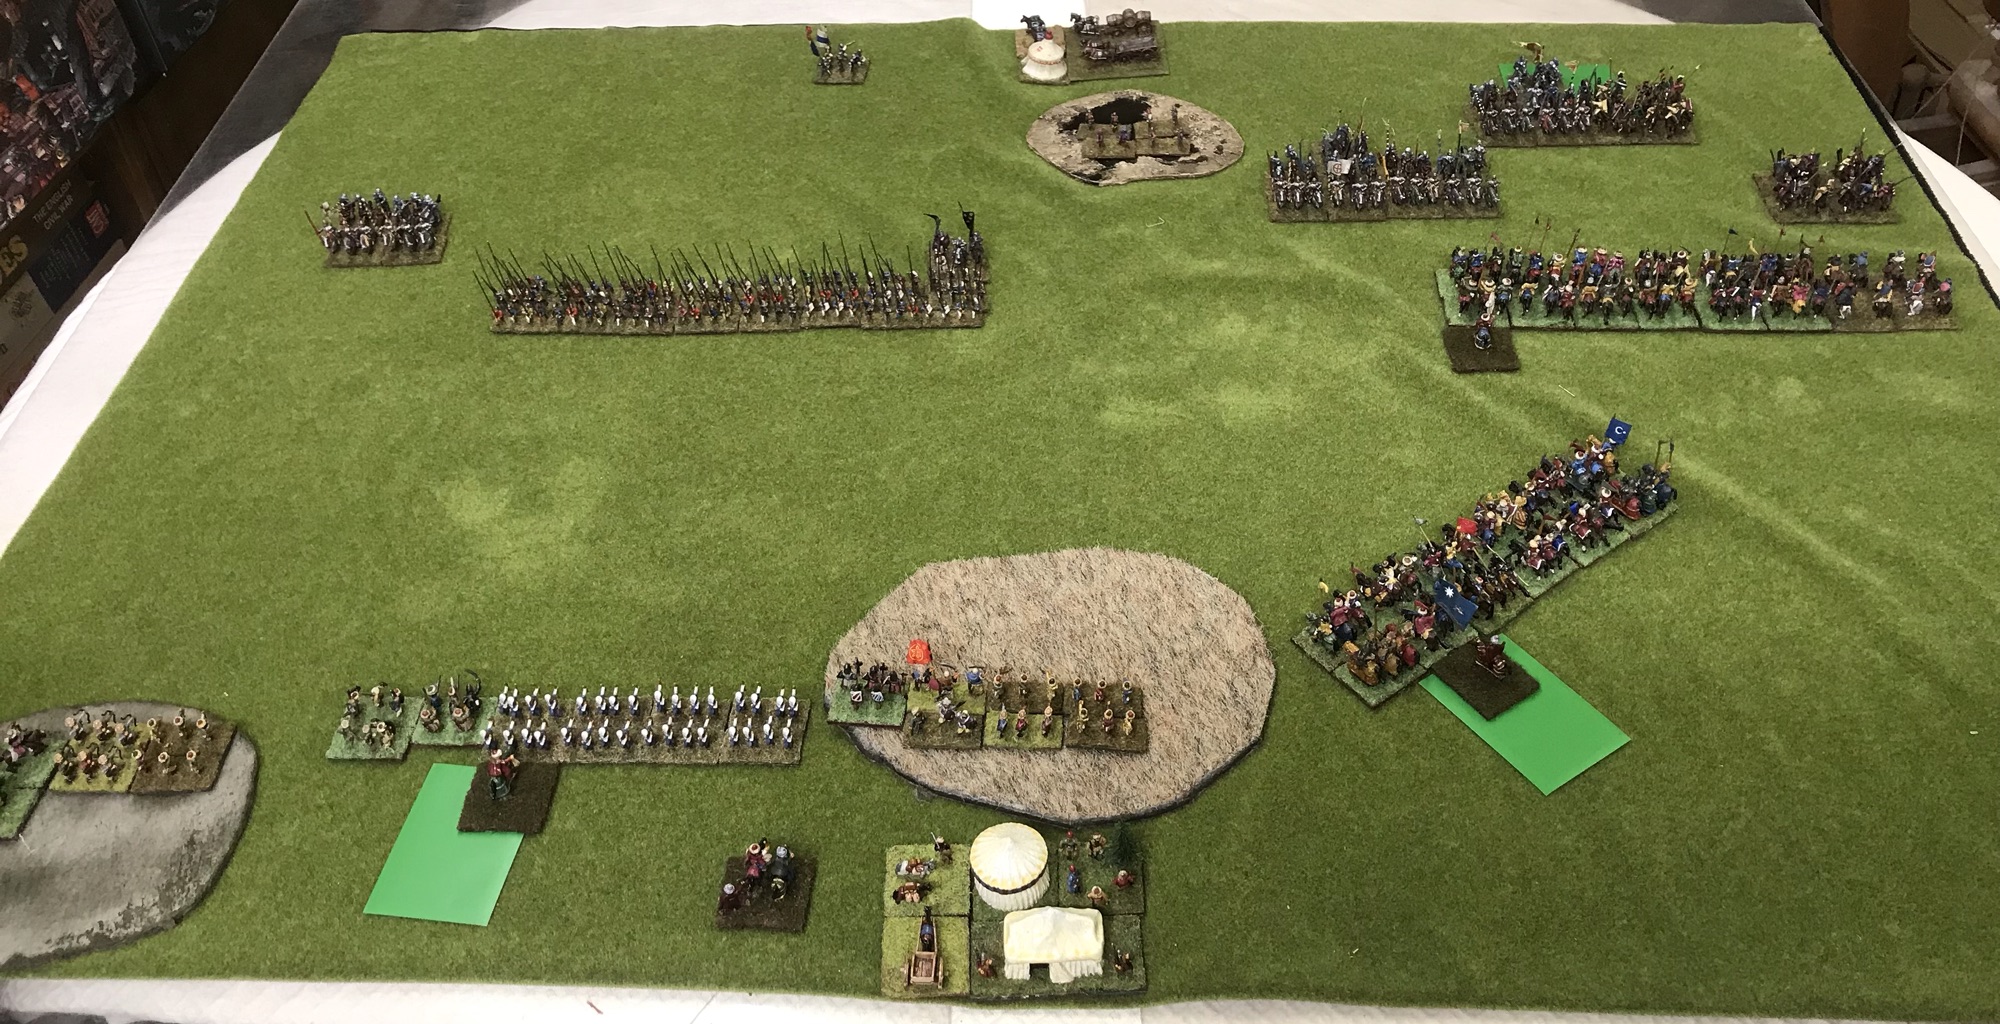
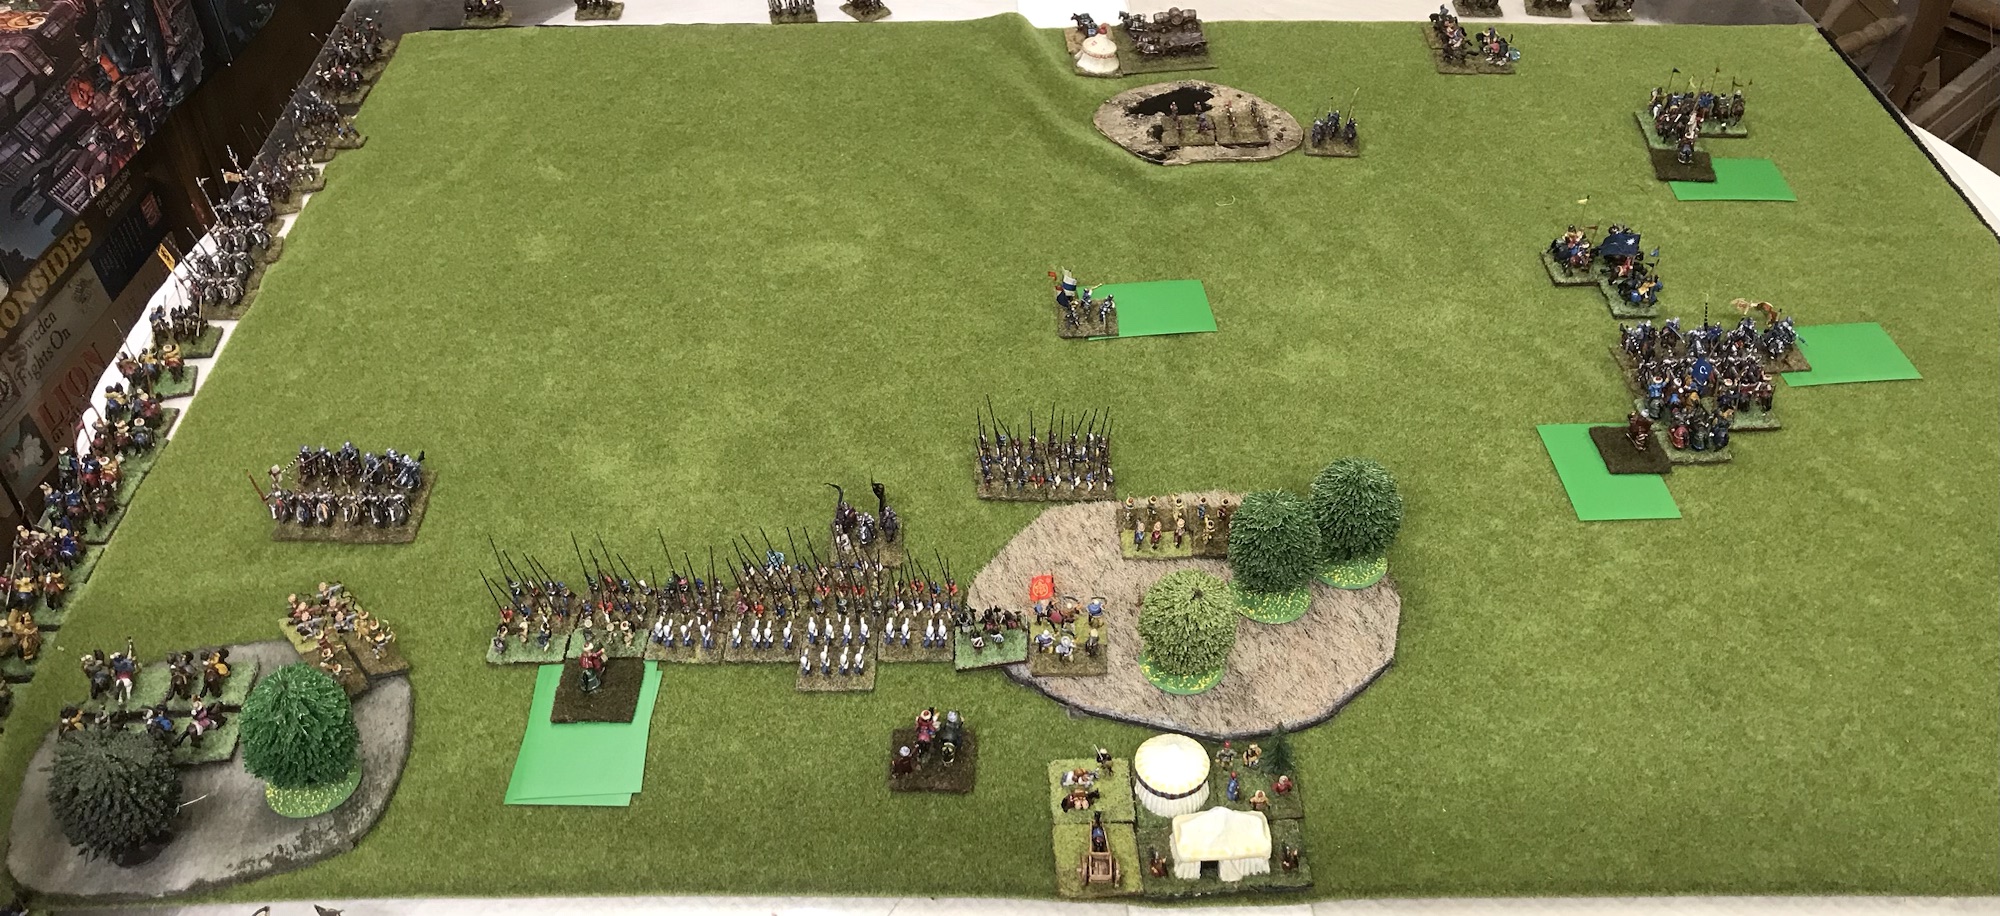
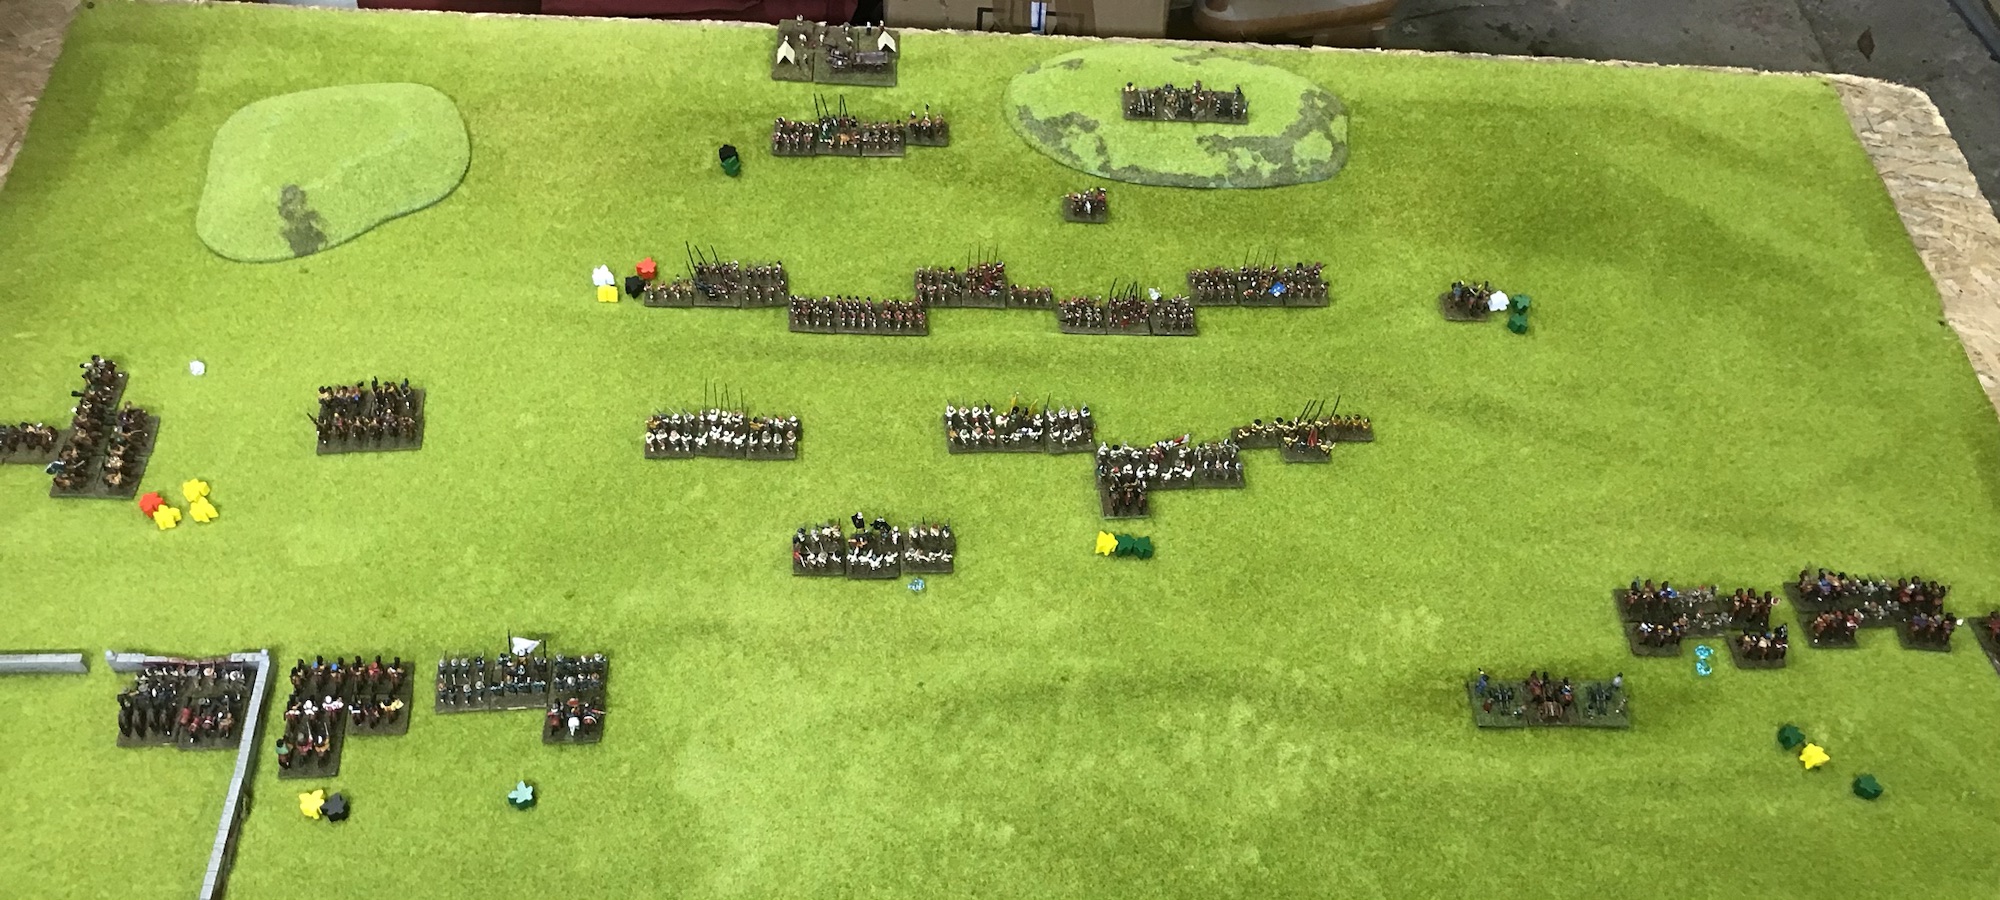
The armies appear quite far apart but with the aid of double moves quite quickly come to just outside 4 base widths away from each other. The pike blocks can move at a speed that is illegal in ReG because Keil pay an extra level of card to move in ReG. Formed units like the Venetian Keil need a ‘Red’ to double move but the Keil cannot pay a card above ‘Red’ to do that.
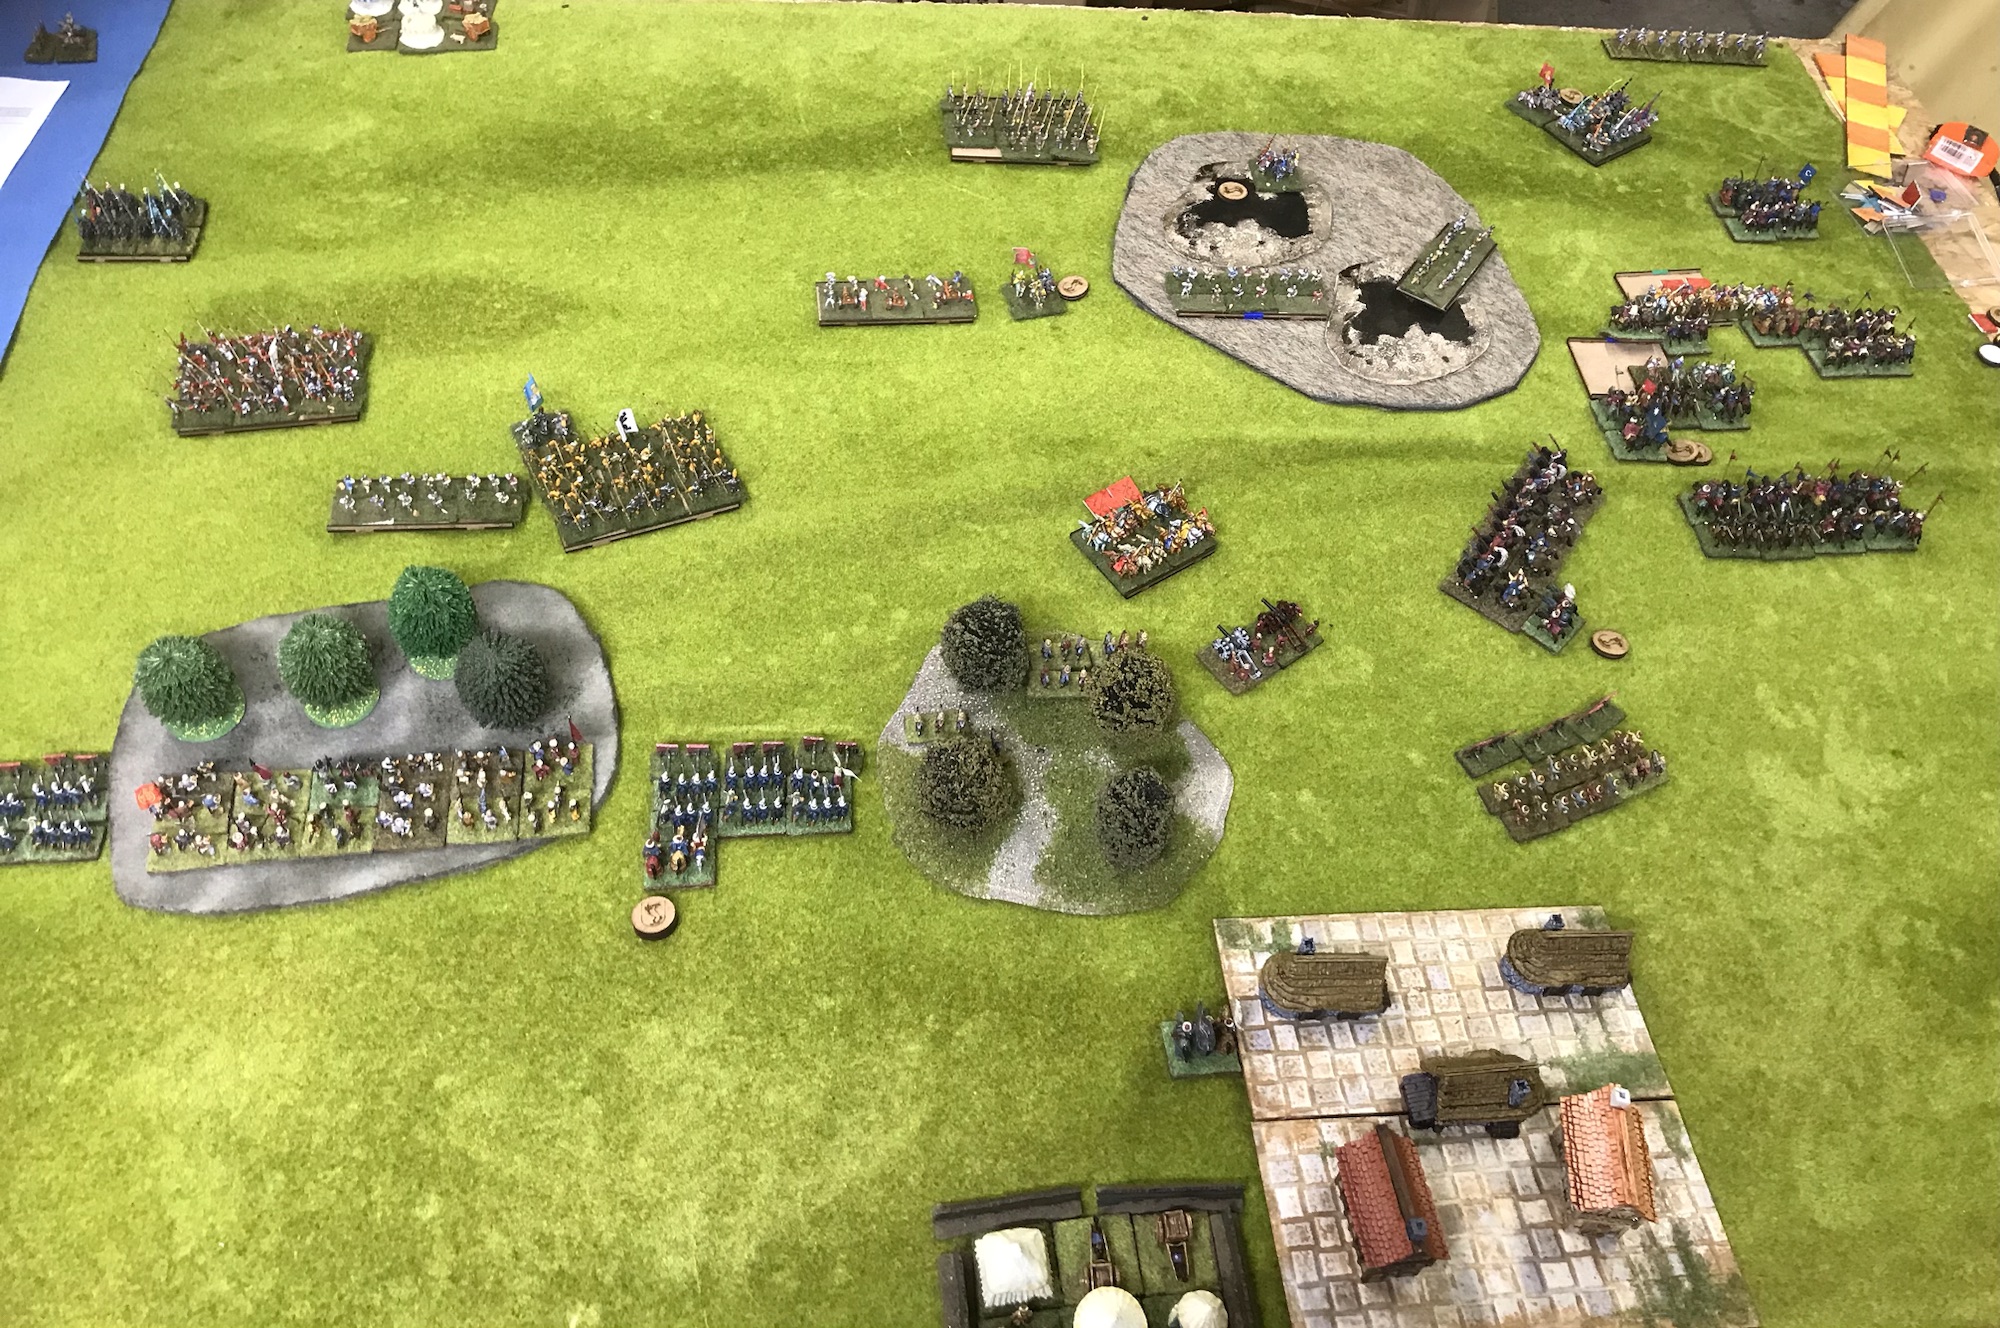
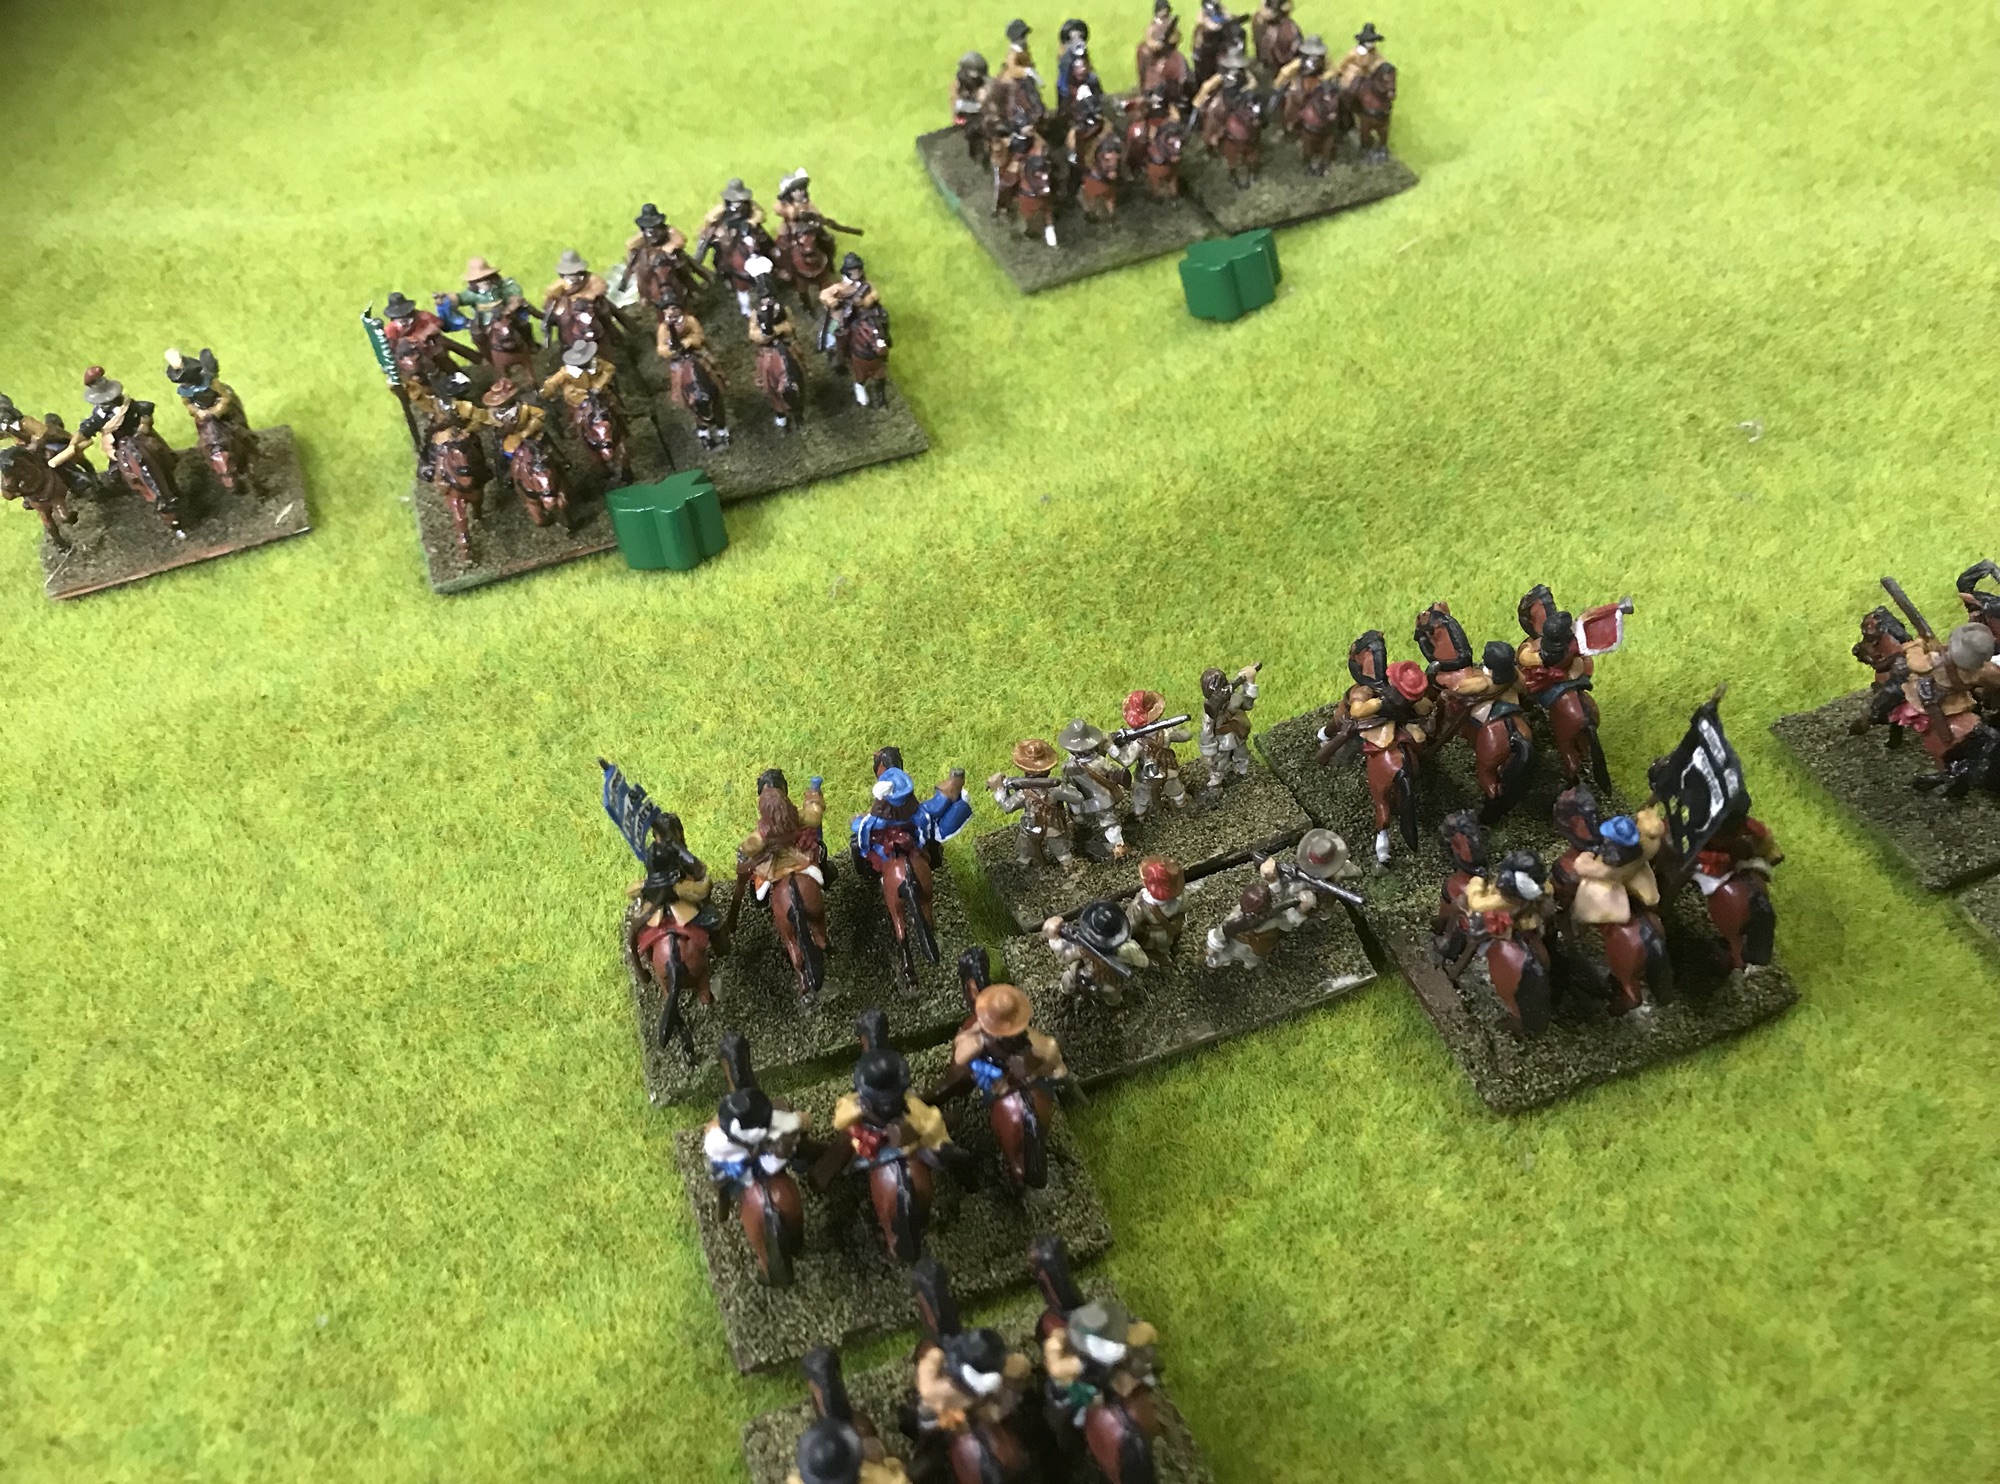
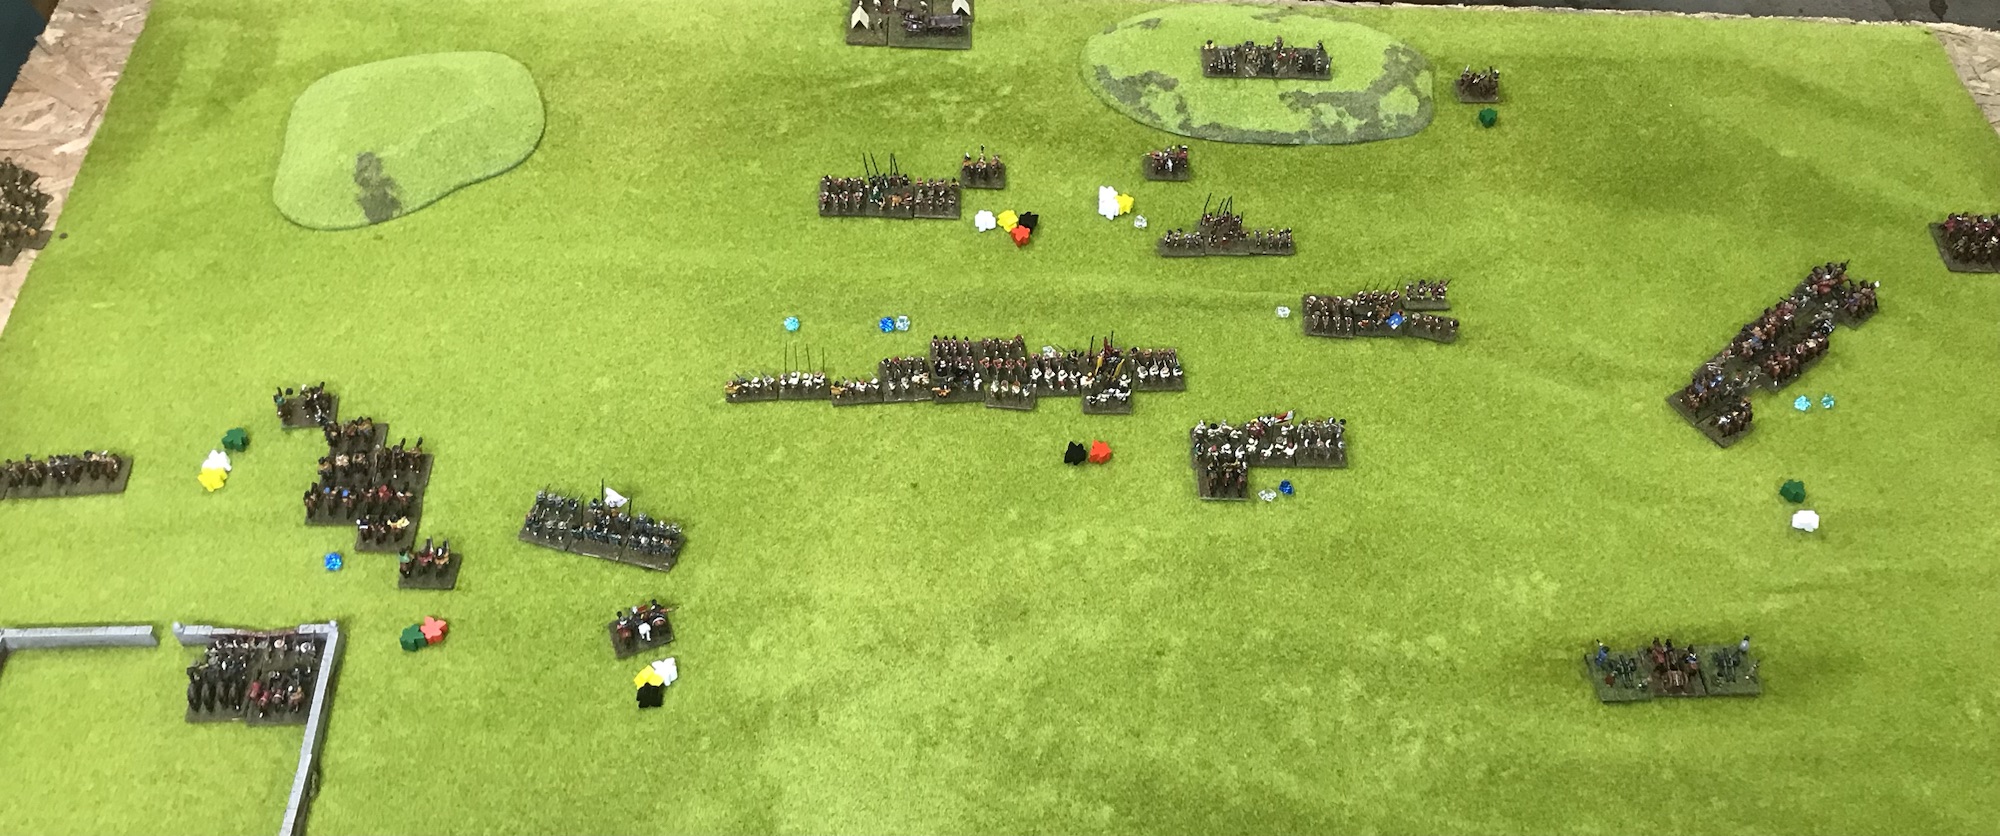
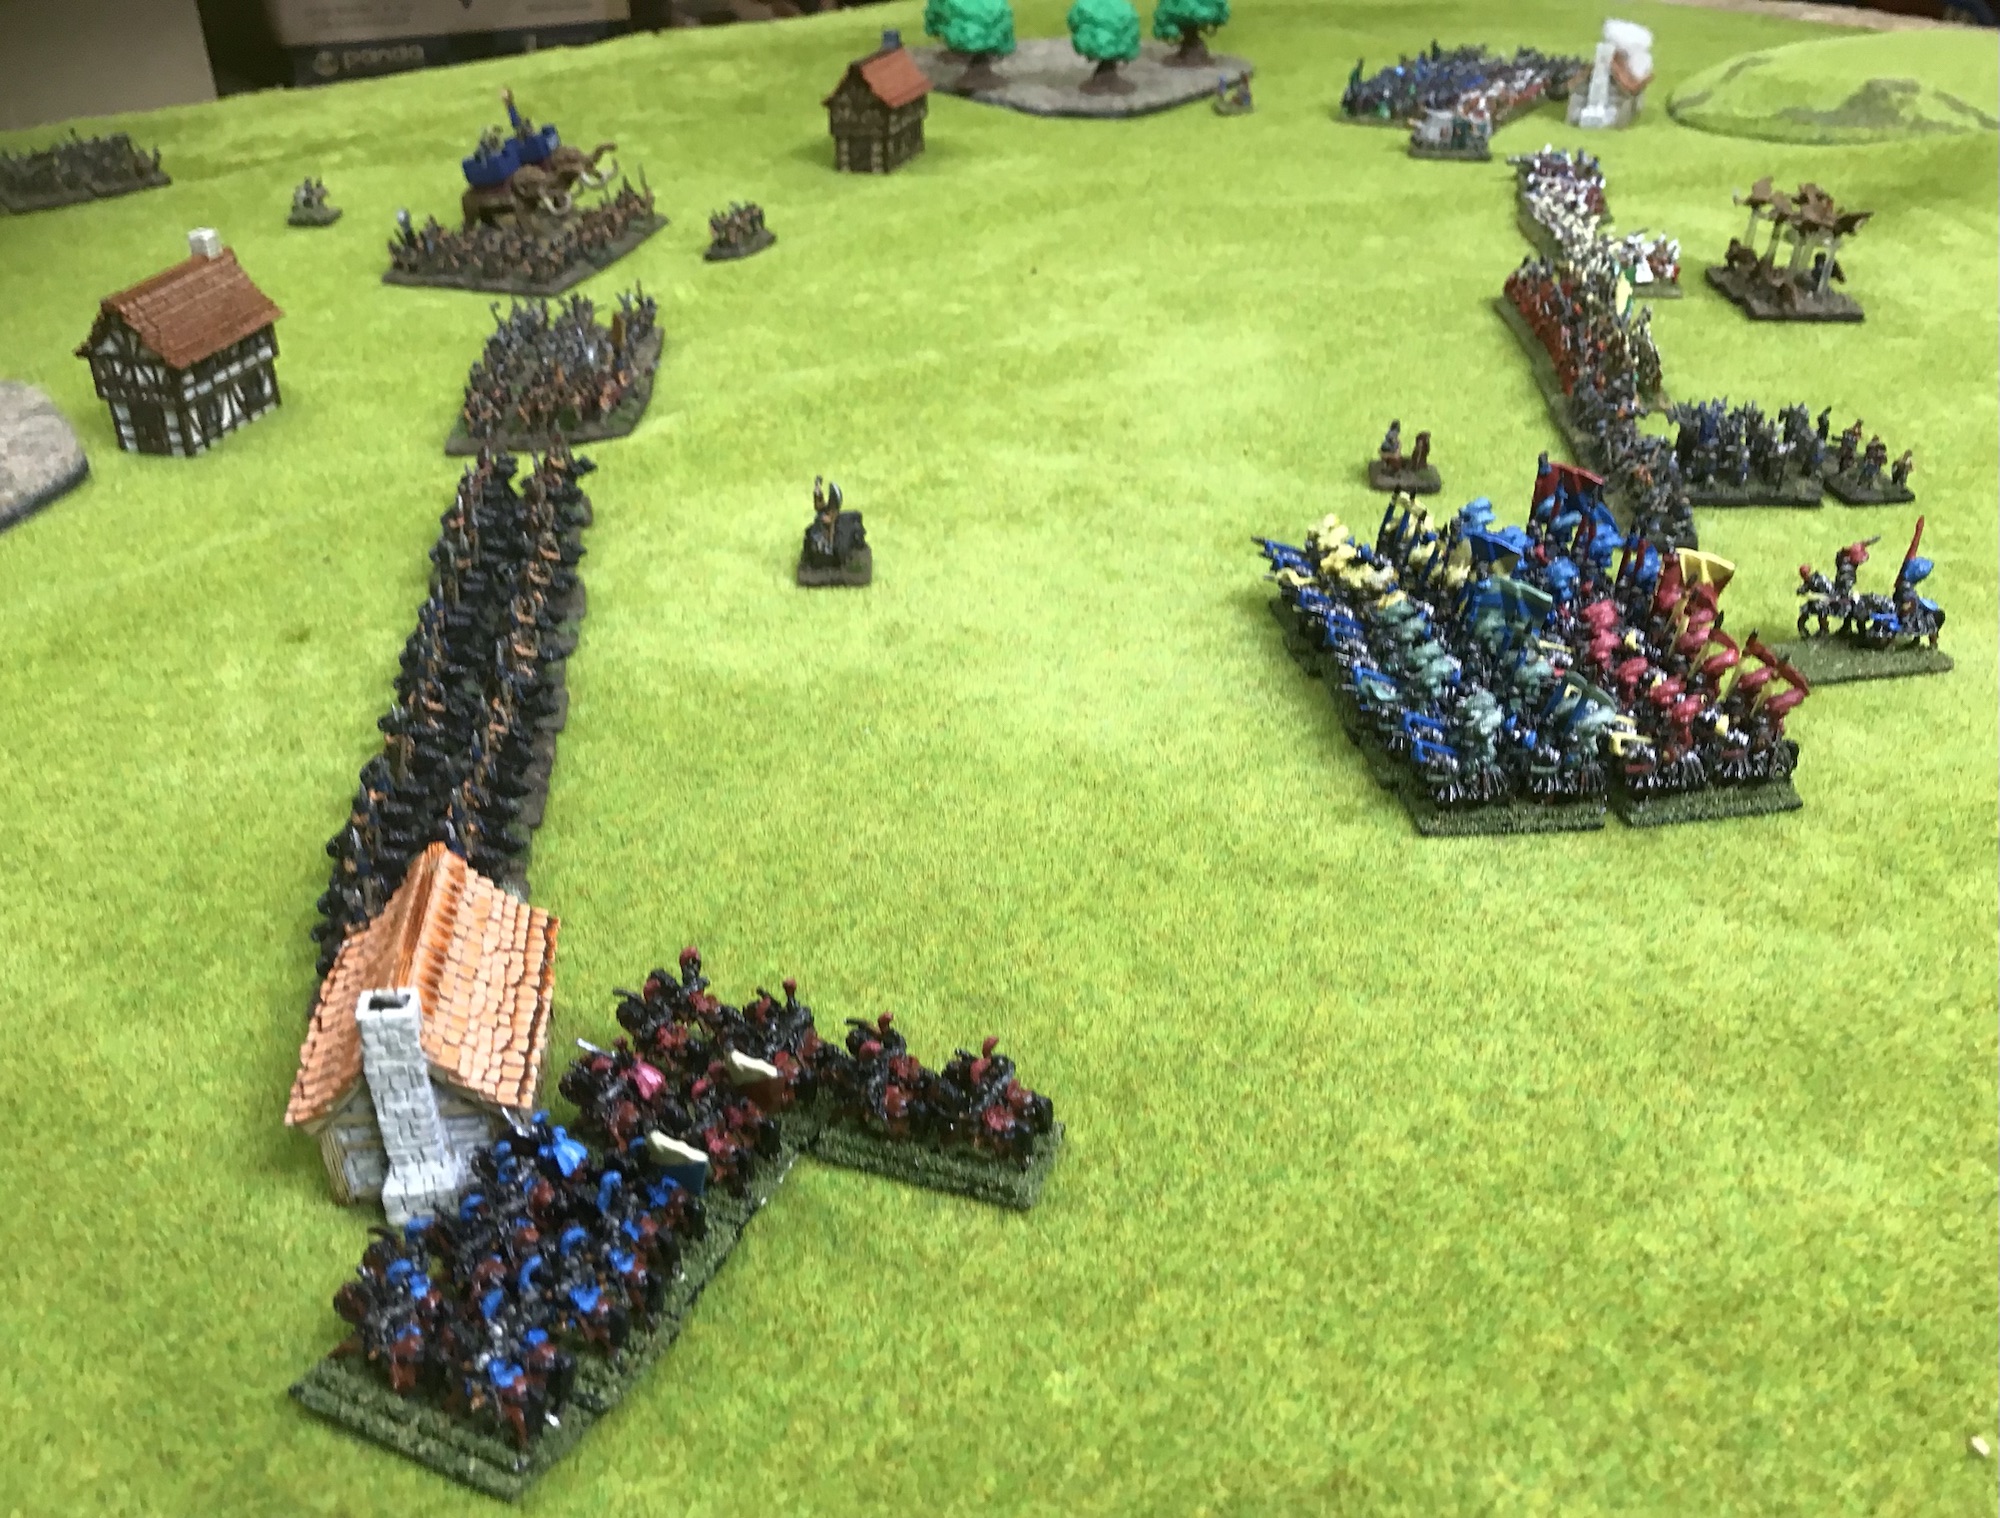
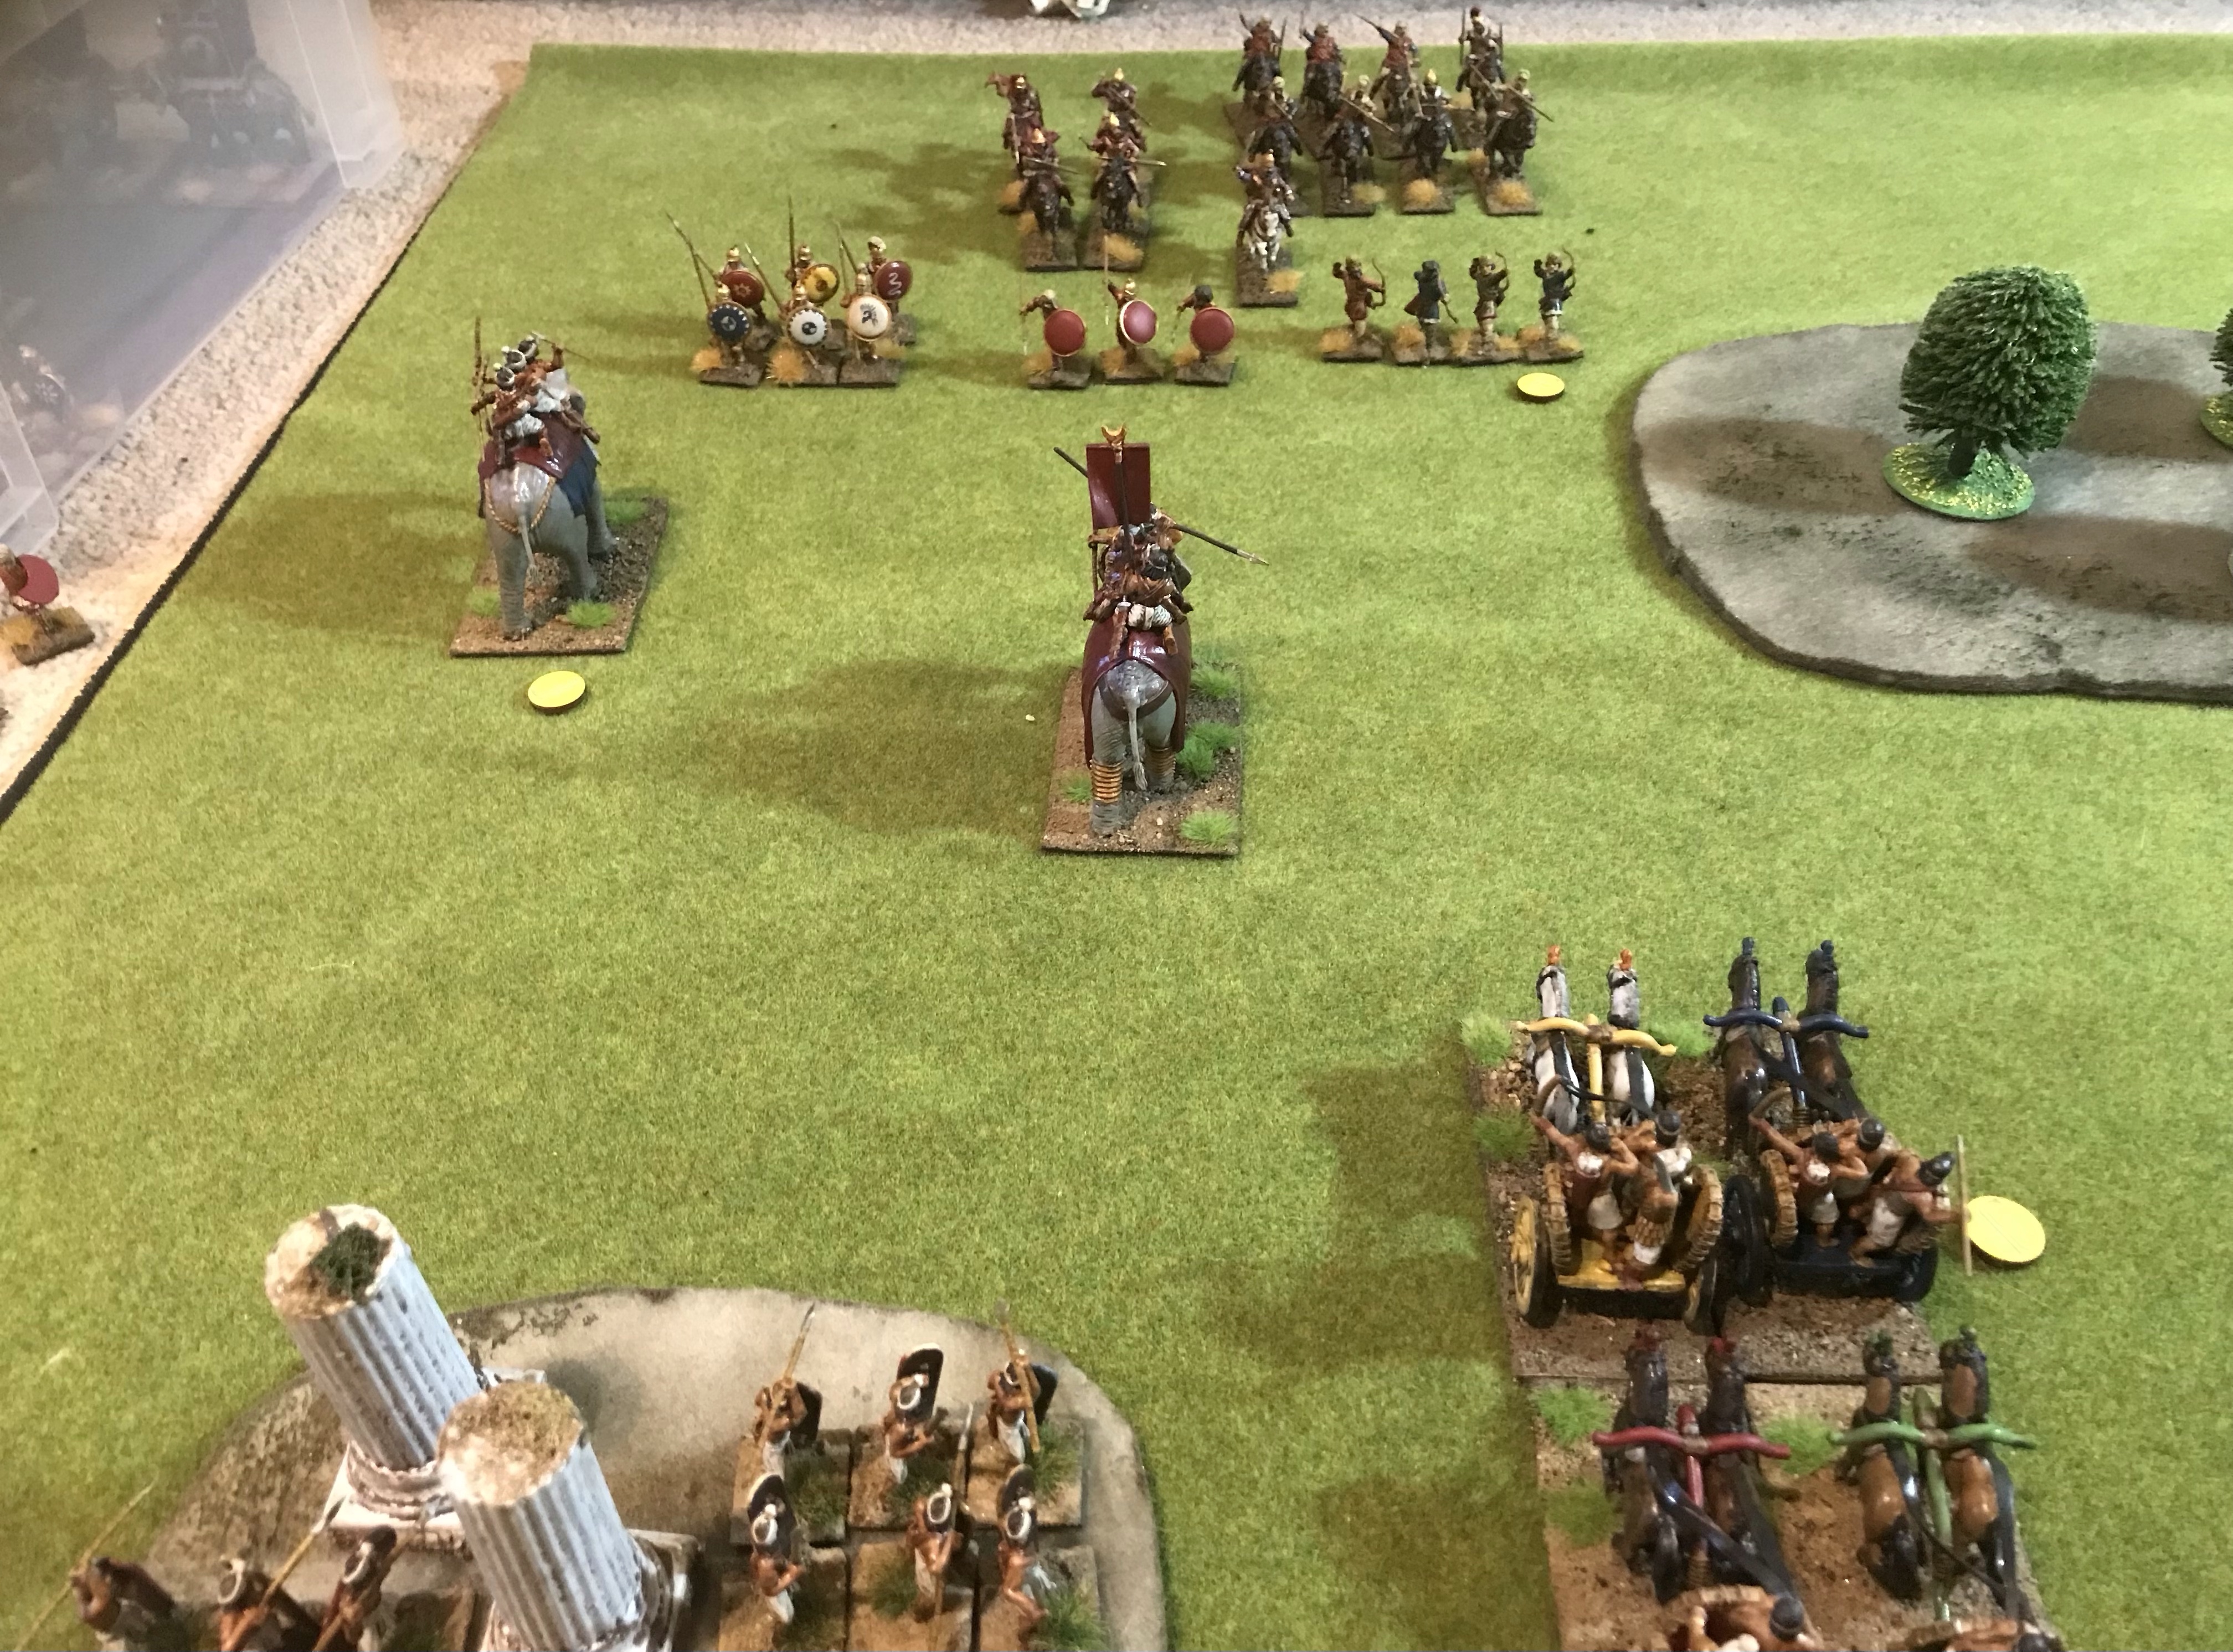
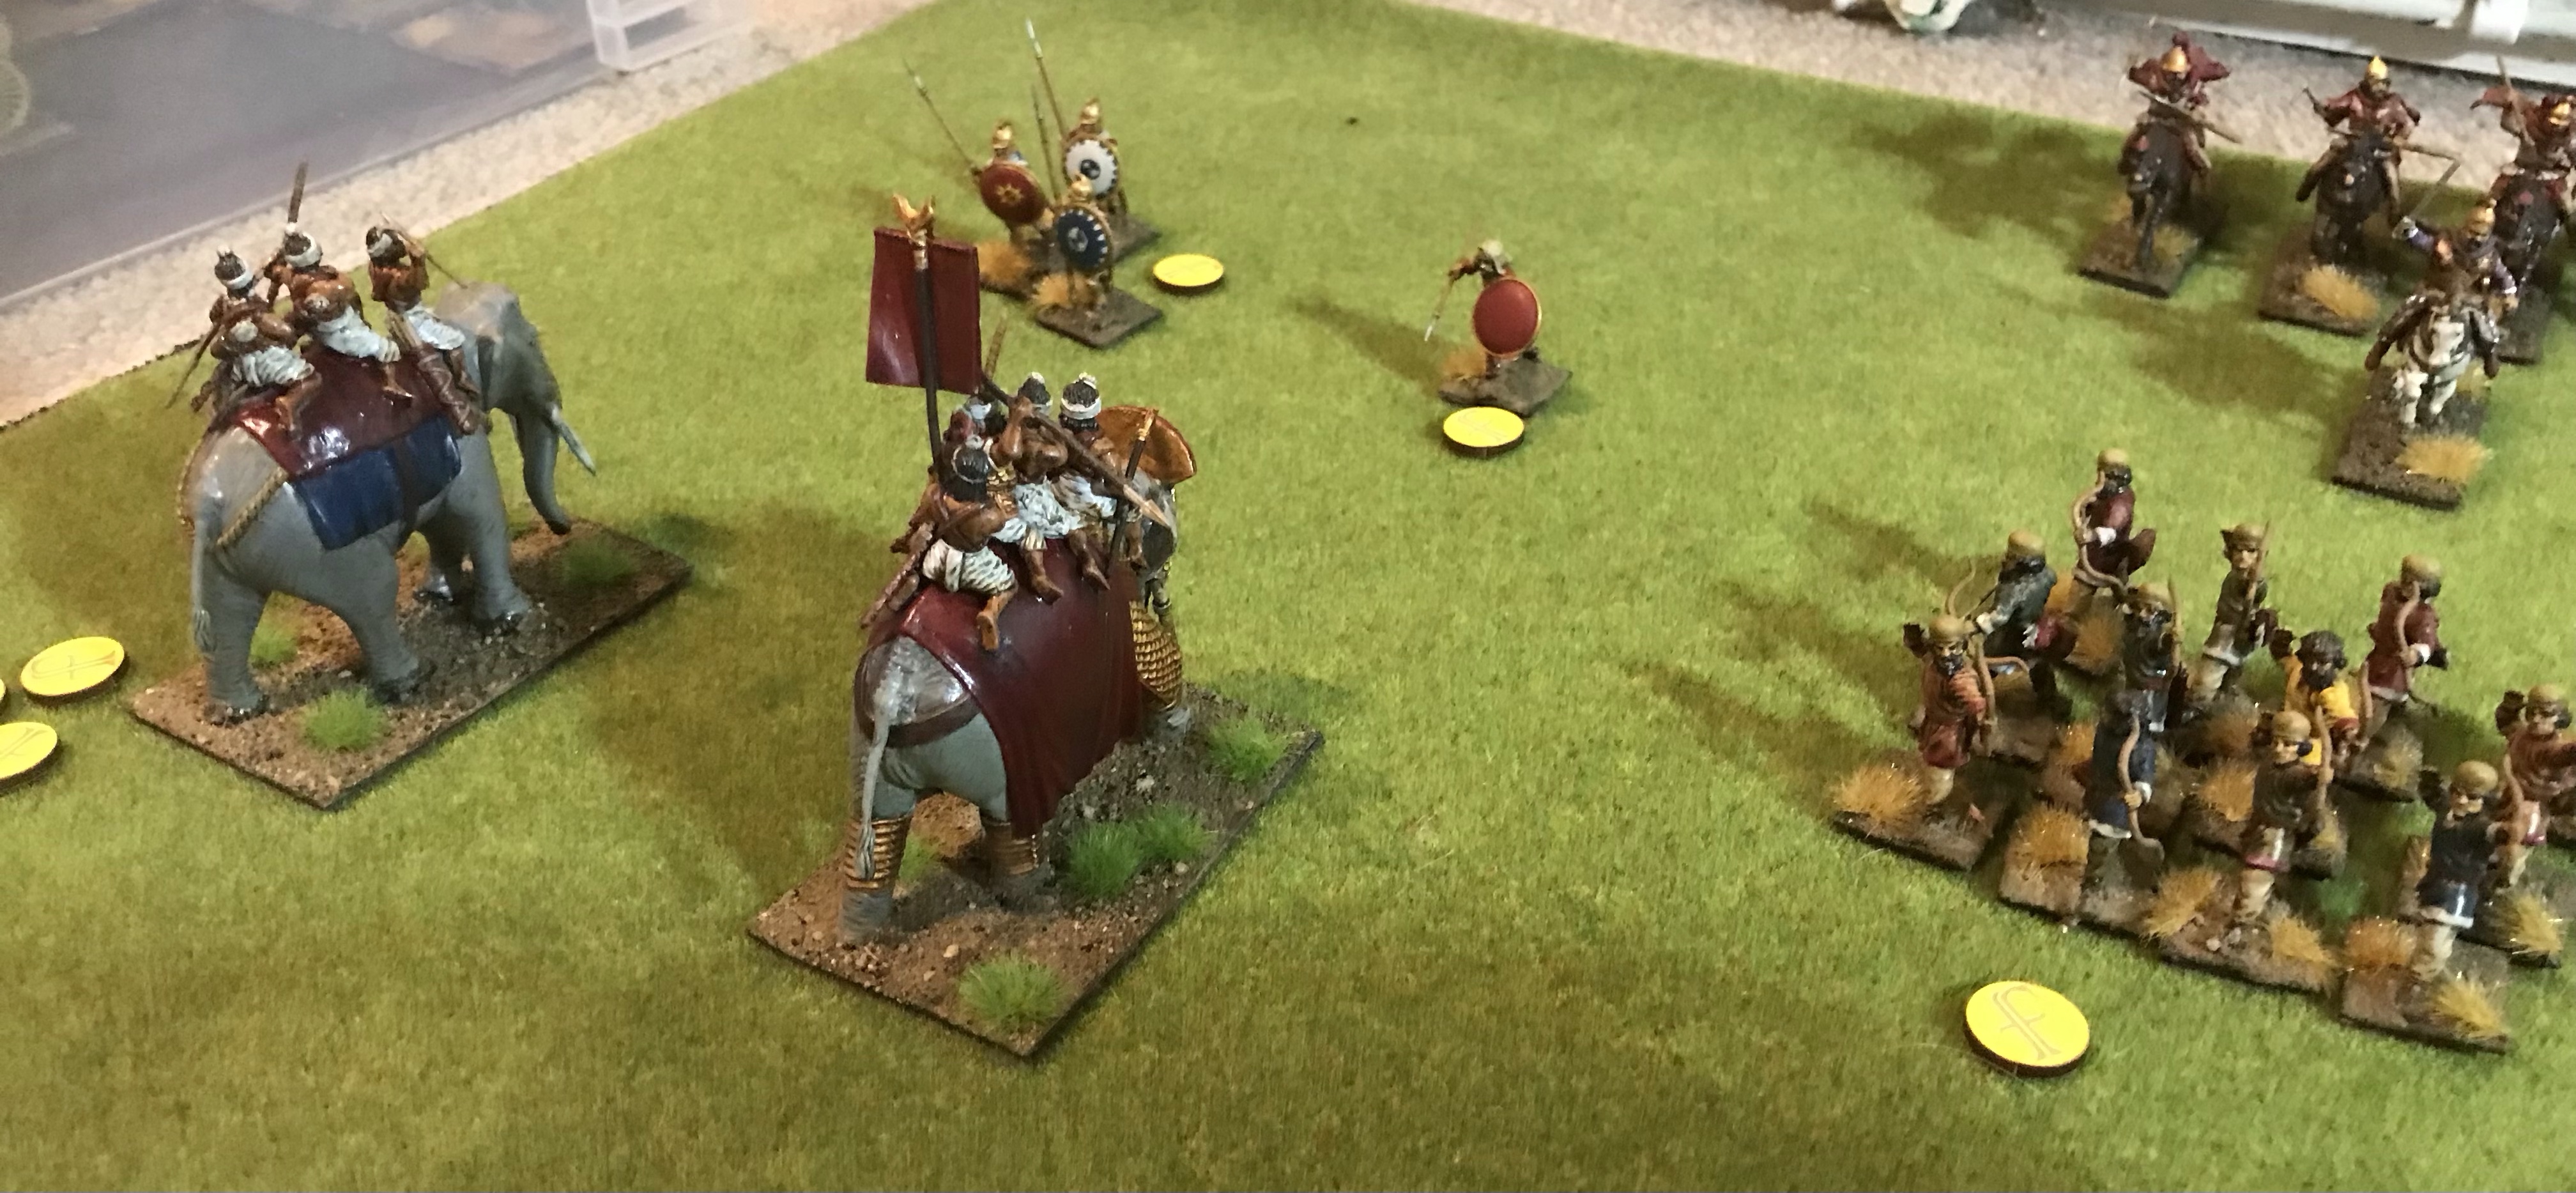
Turn 2 sees some combat amongst the cavalry. Shooting is based on a base of a ‘White’ die in MeG but a base ‘Green’ (better) die in ReG. There are also fewer opportunities where a ‘S’ result has any effect. The die colour rolled can go up and down but the bottom line is that MeG shooting will tend to be less effective.
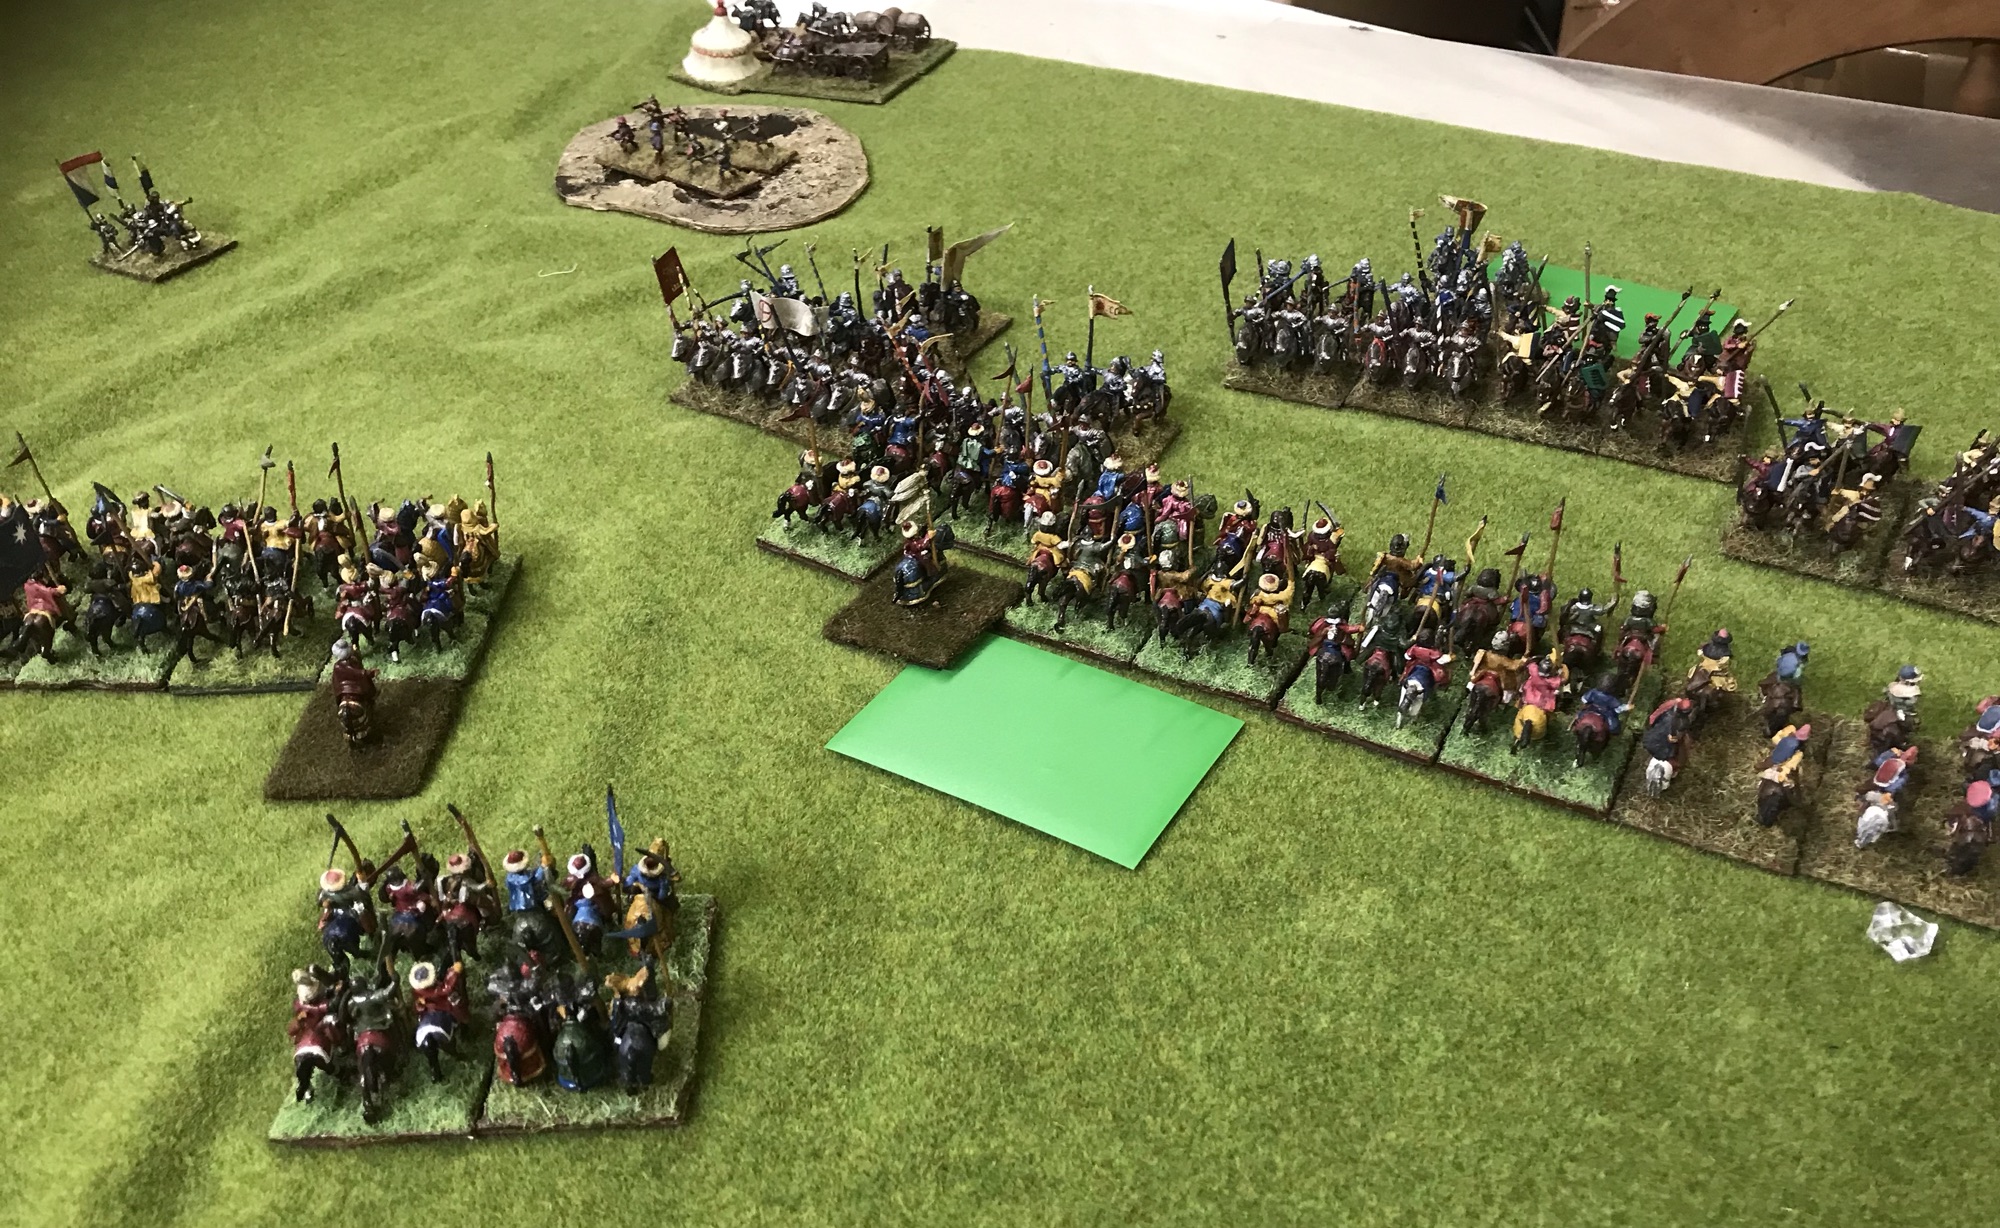
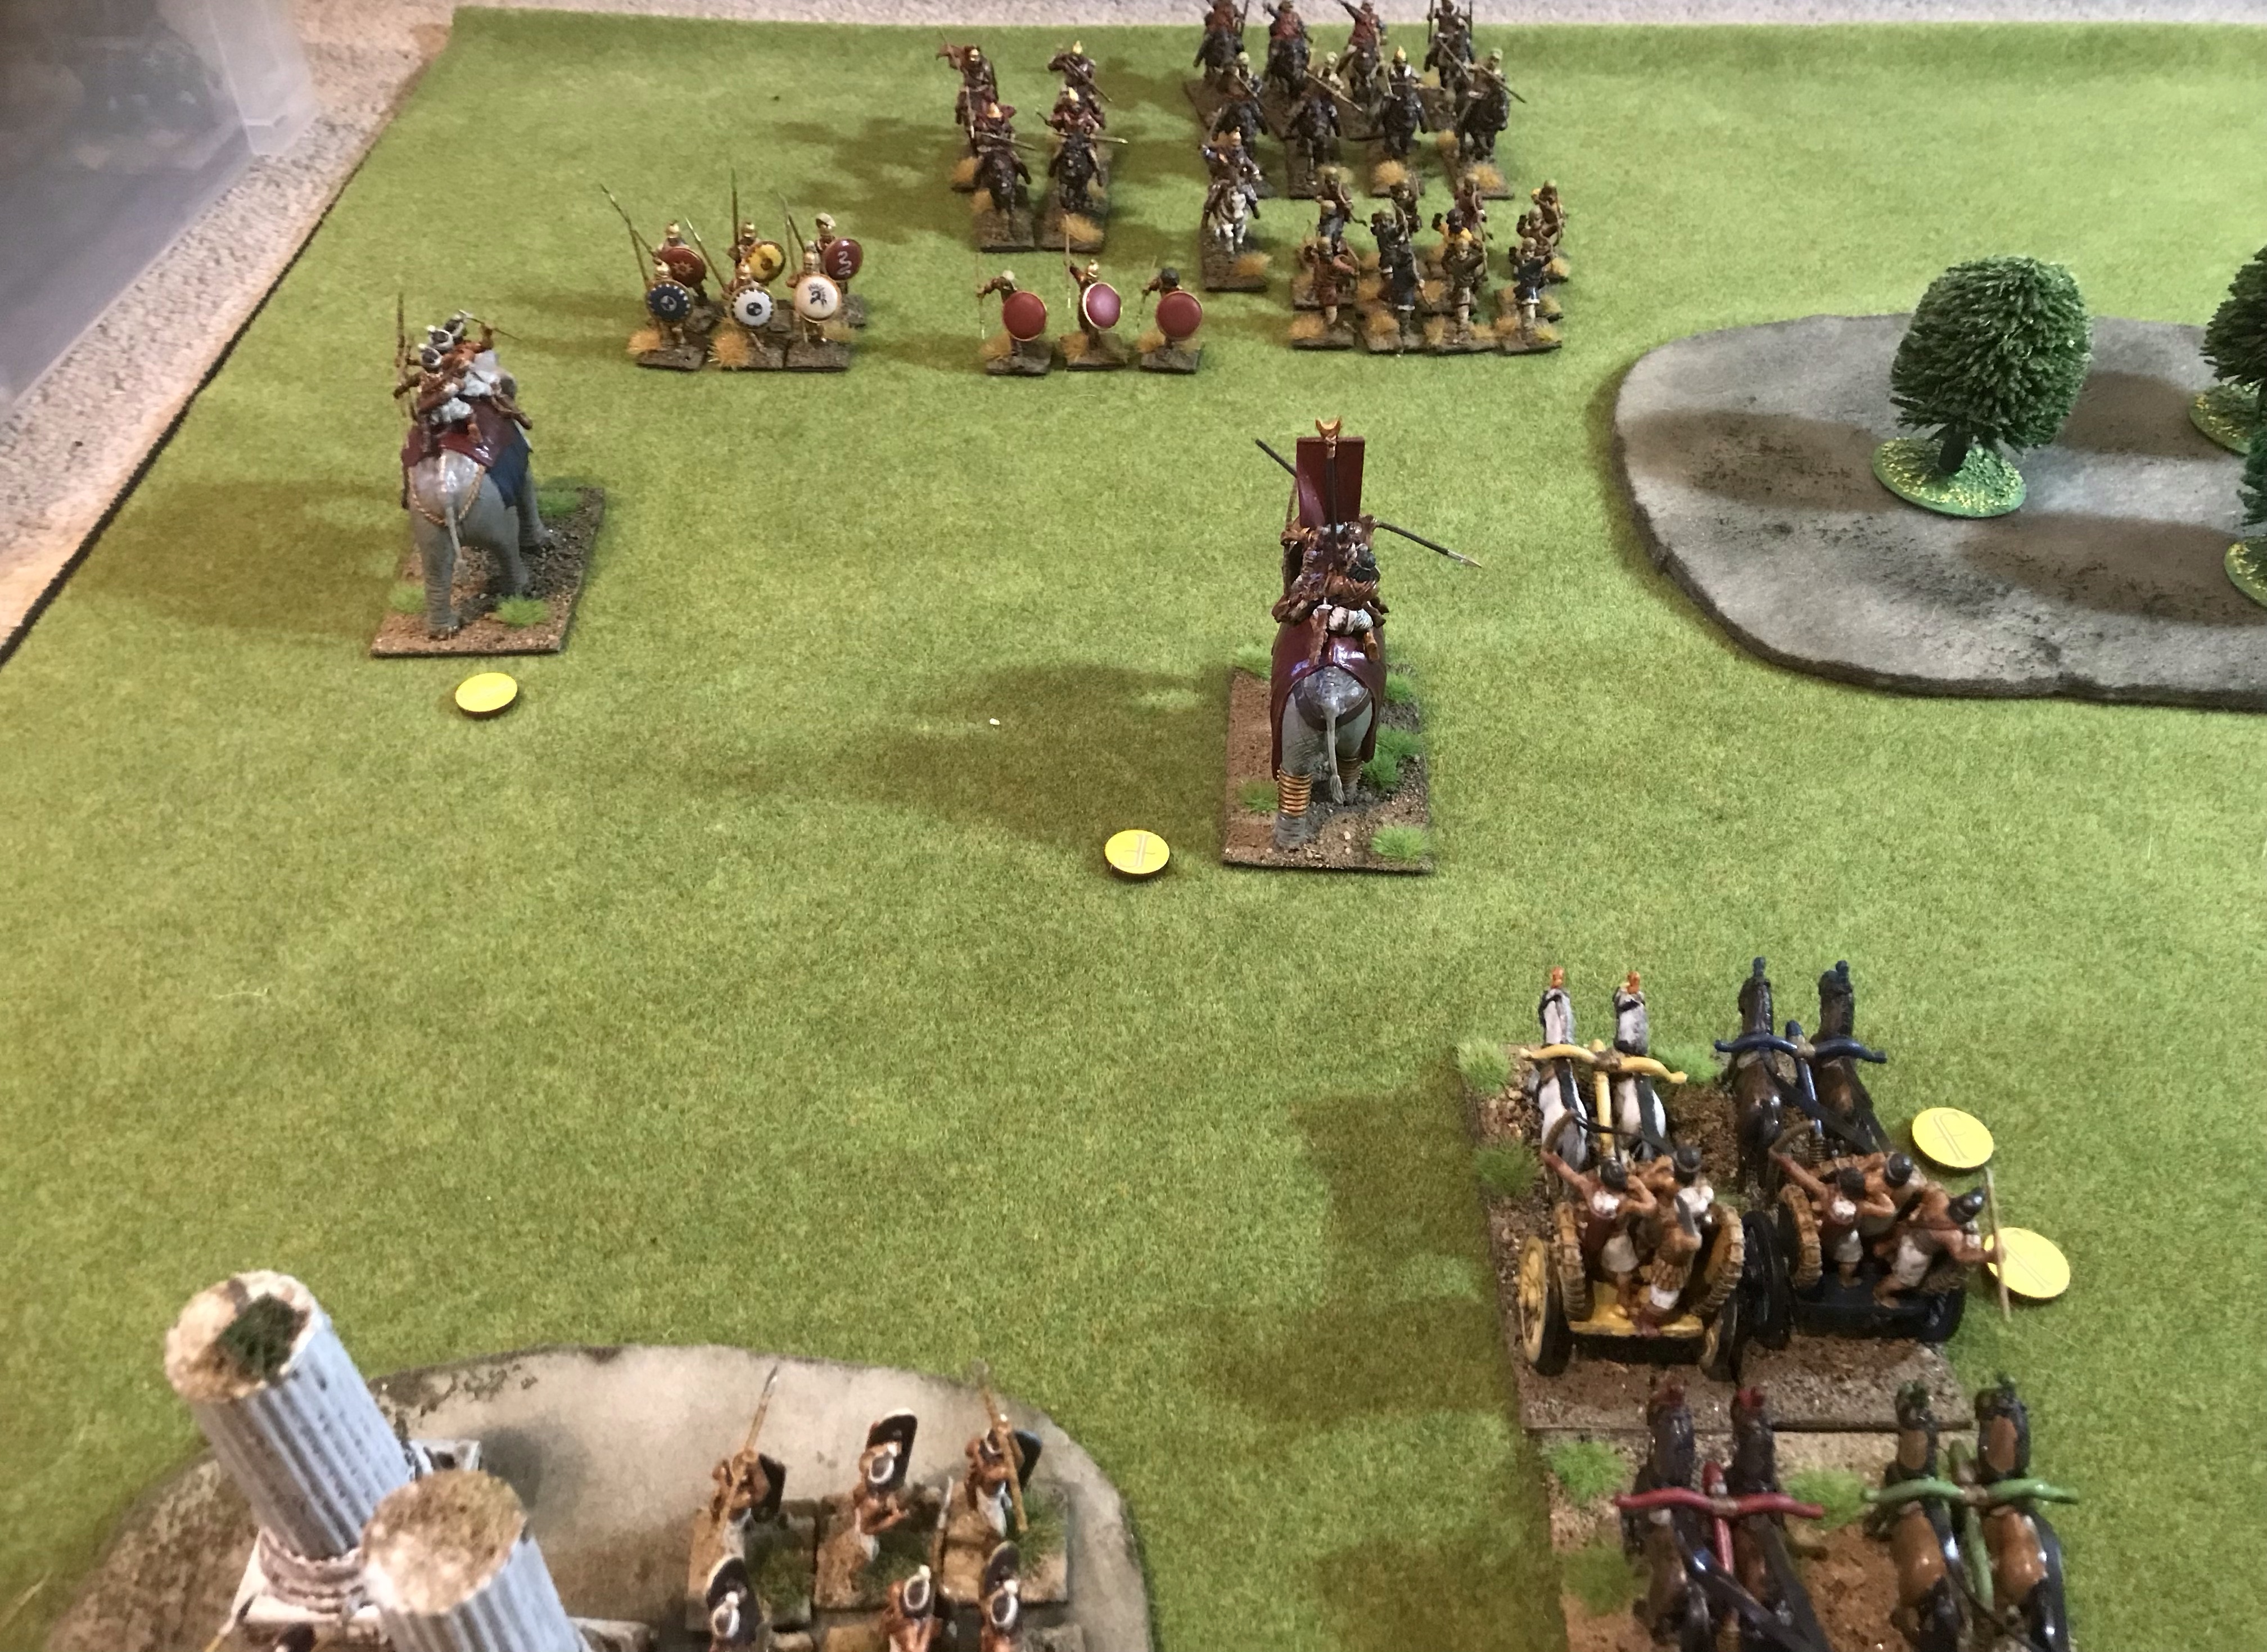
Turn 3 sees more cavalry combat and the pike line coming into charge range. The Venetian horse is better than the Ottoman but not massively so and these units of 4 stands are very brittle. 2 units of cavalry mutually destroy each other, the morale effects on neighbouring units are thankfully limited.
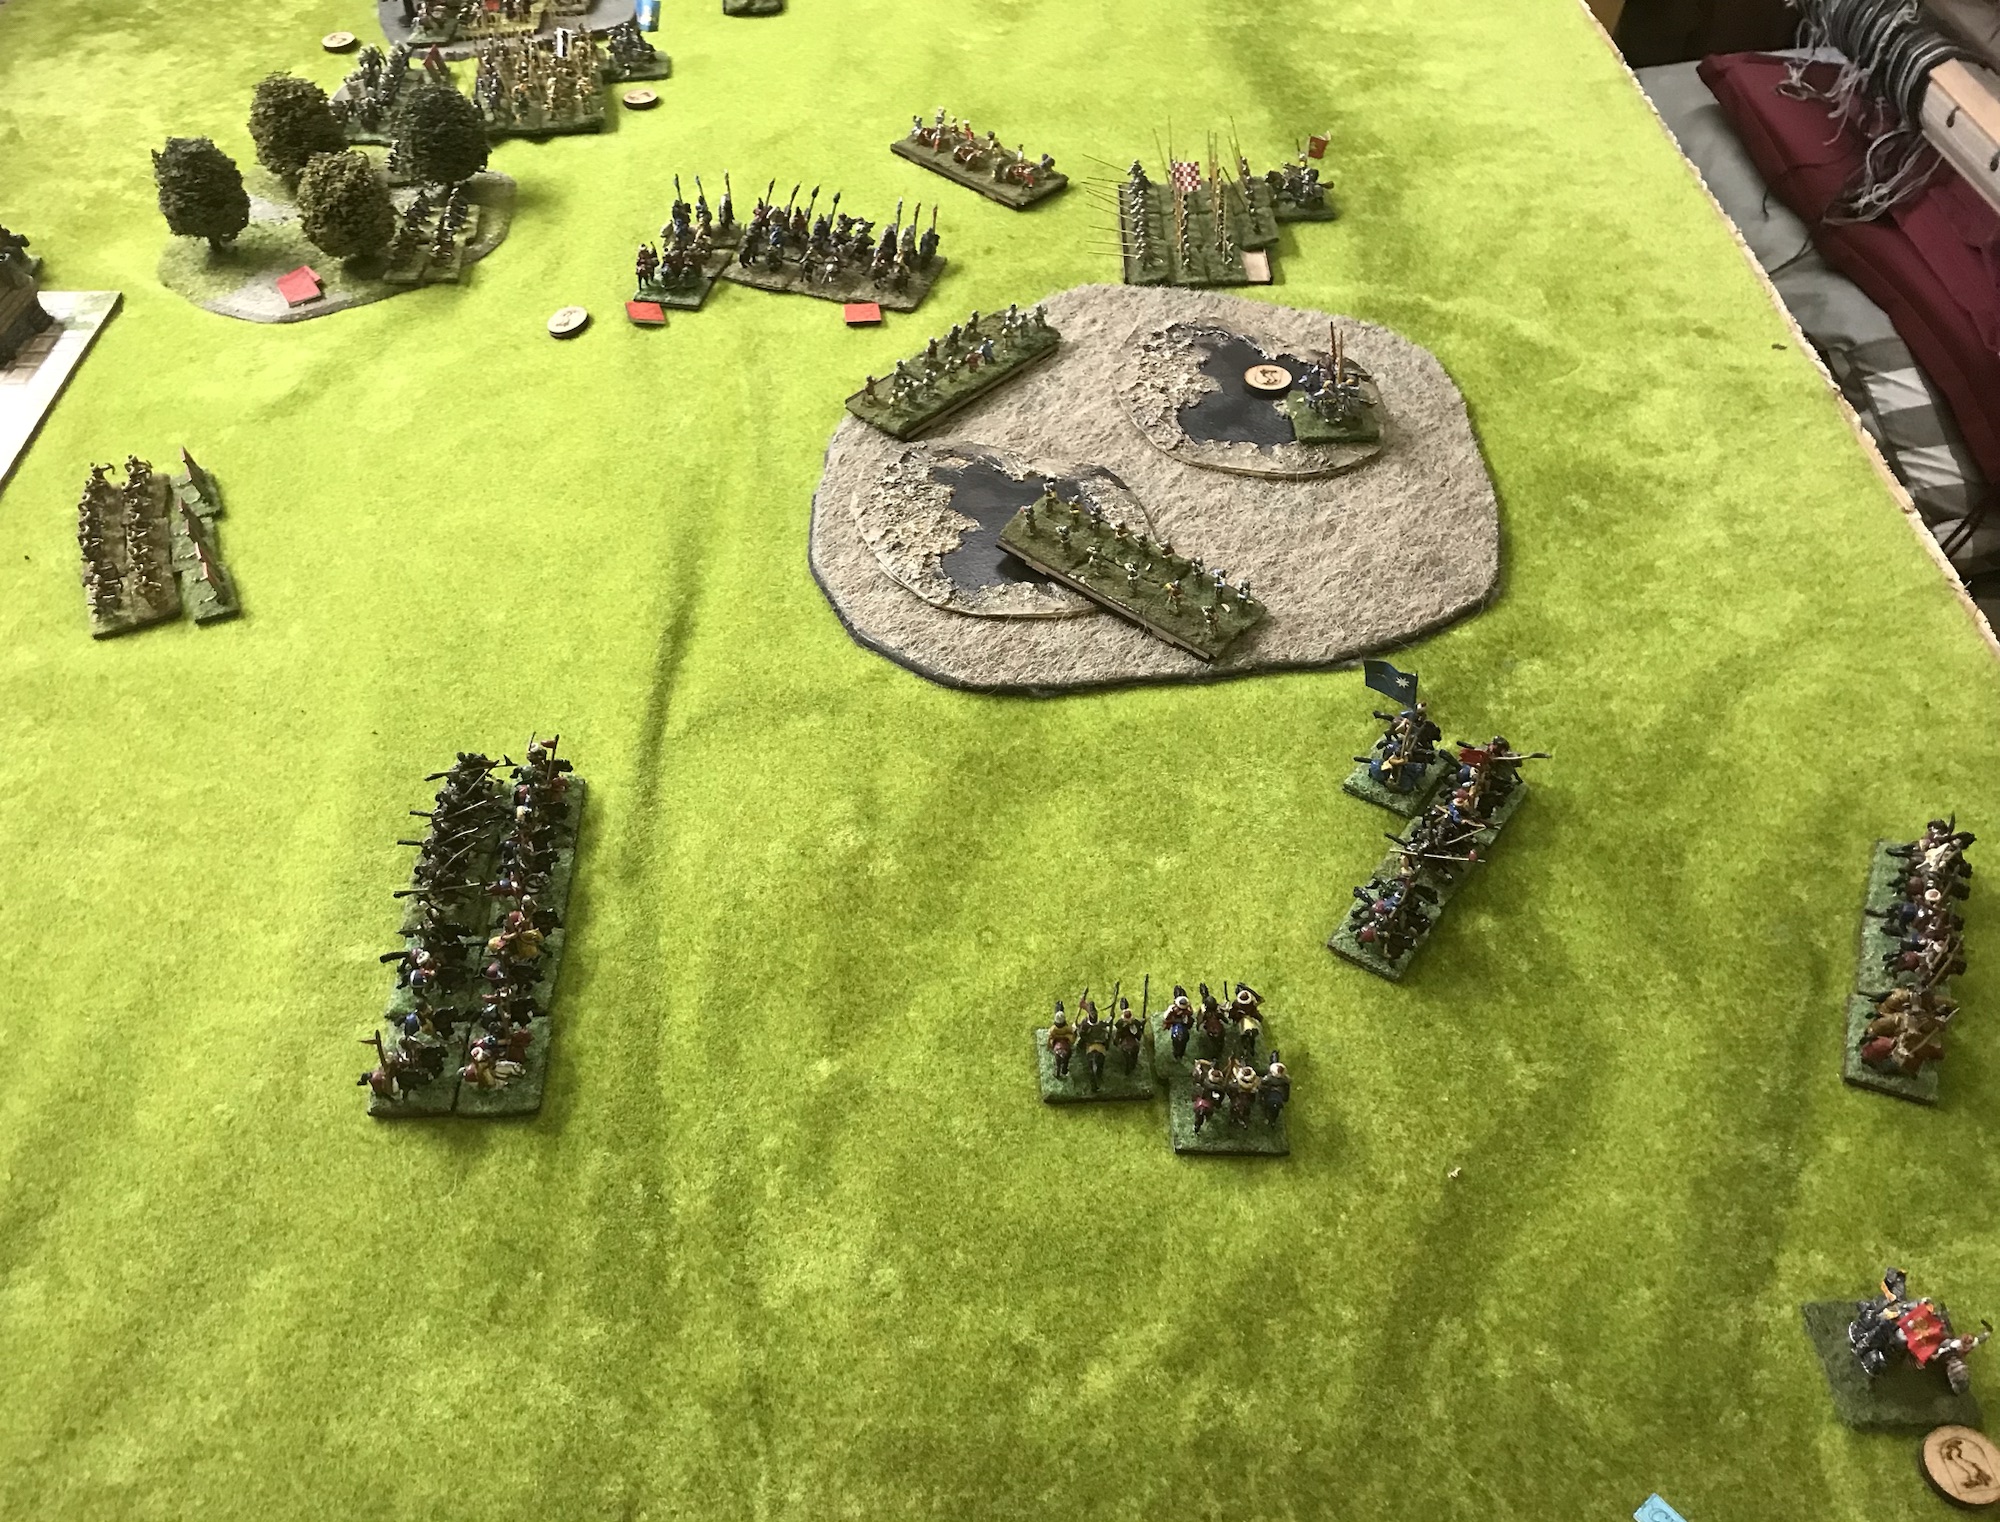
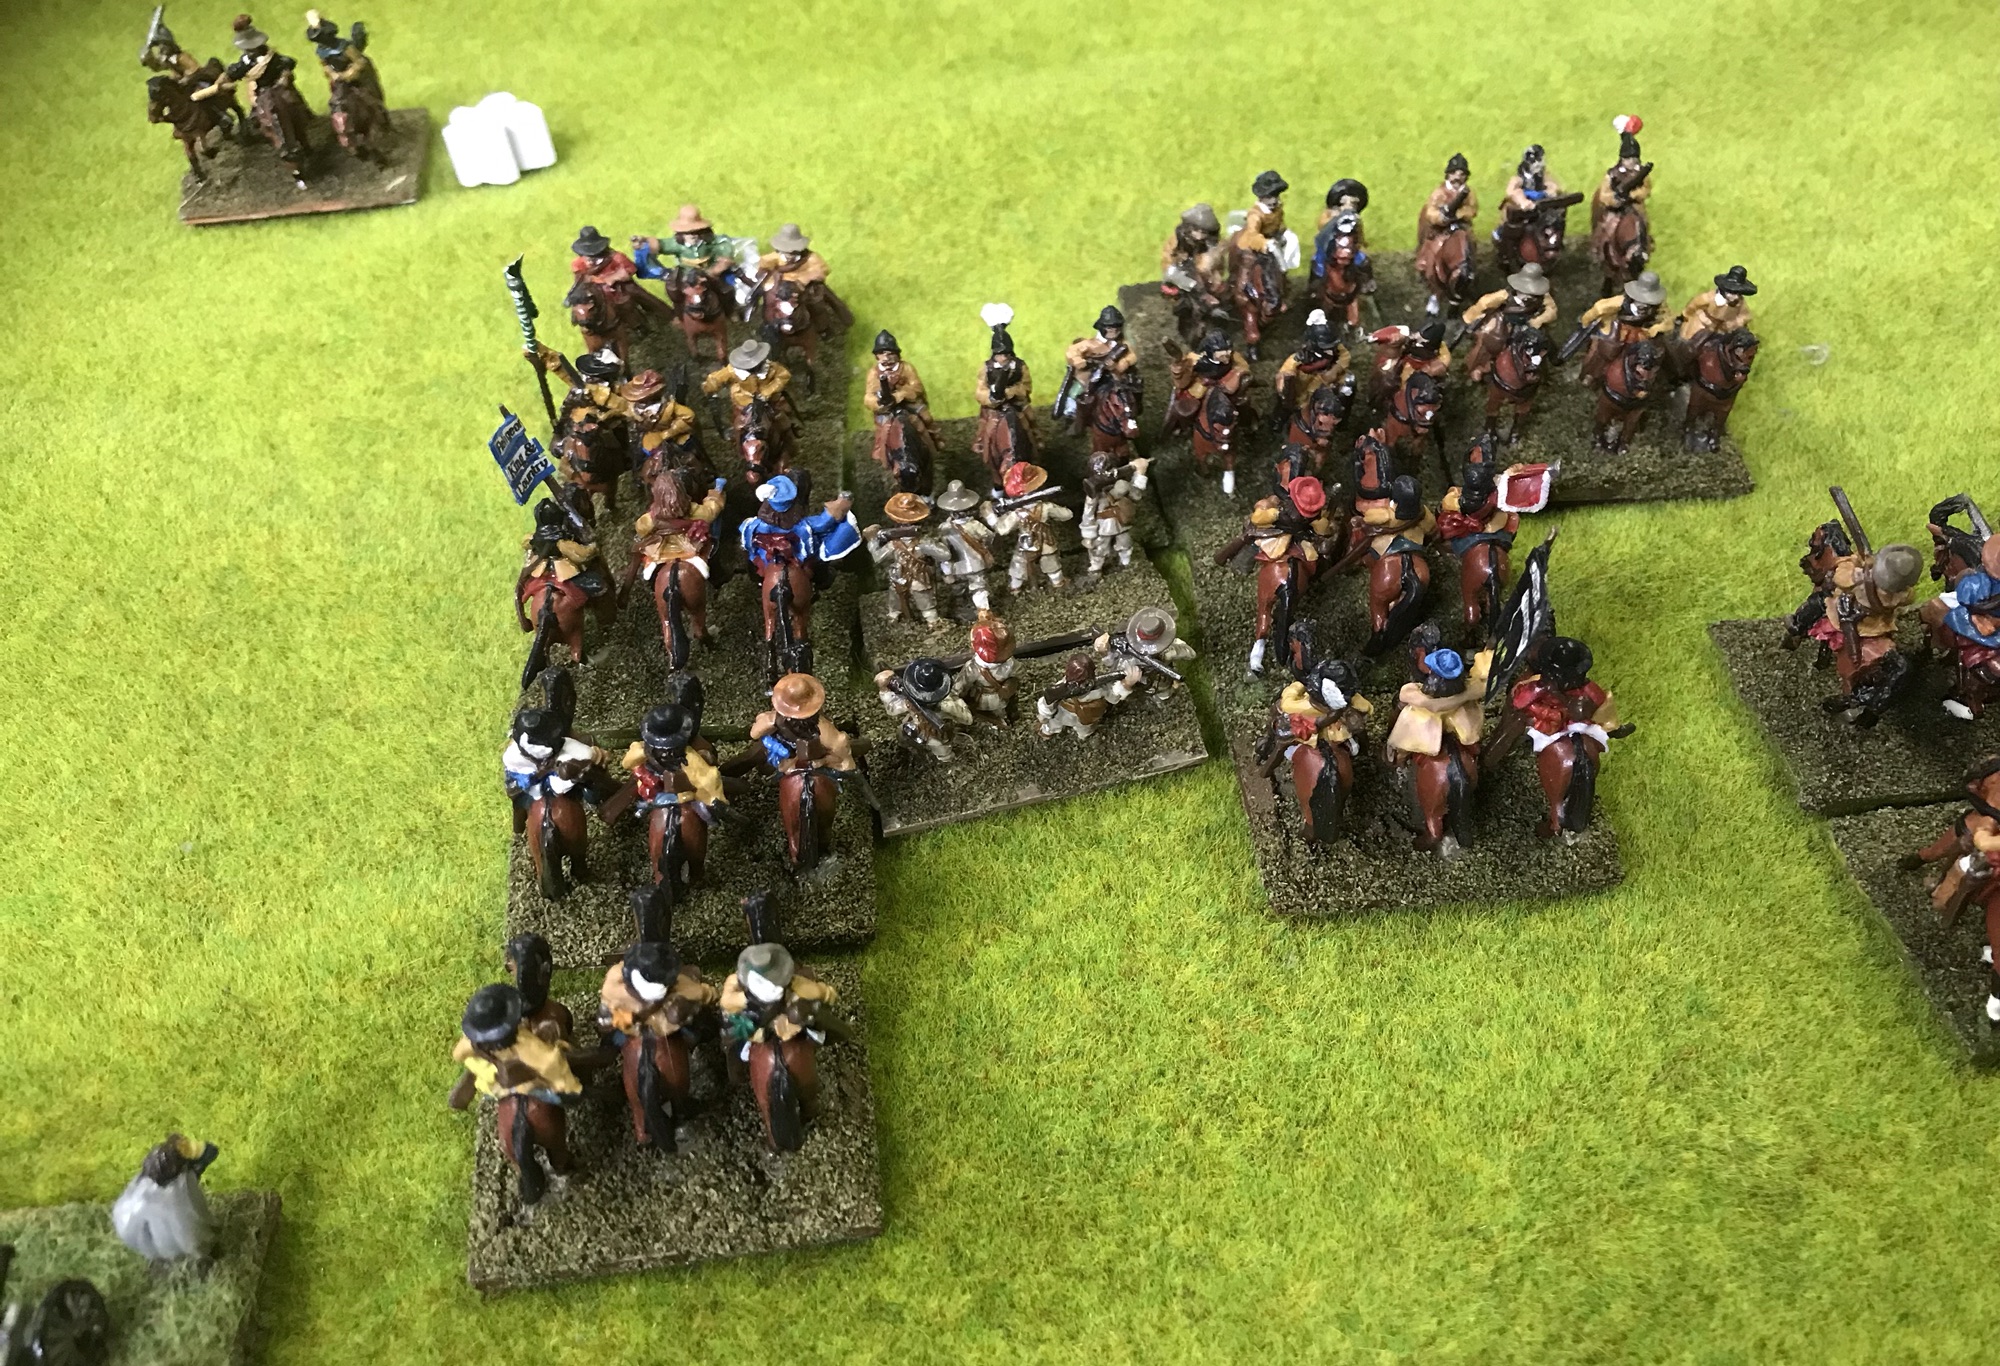
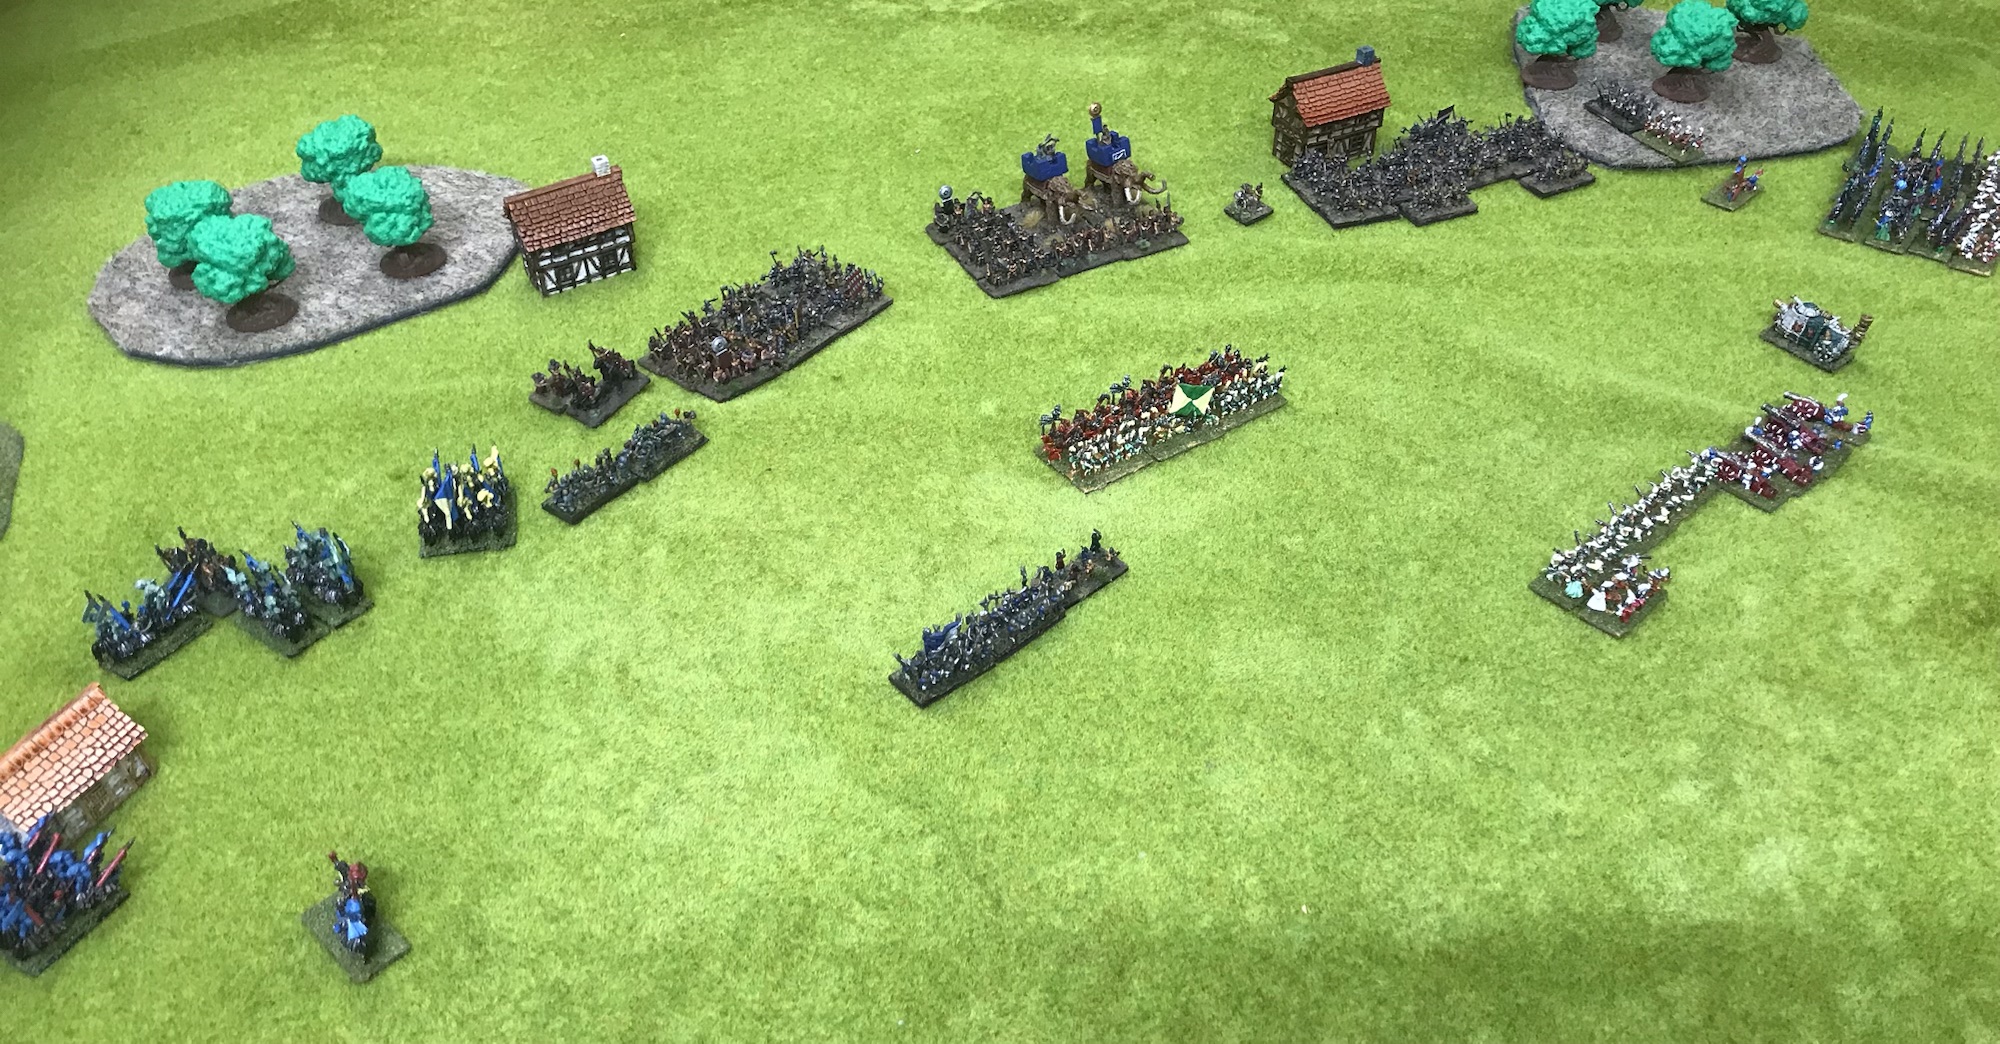
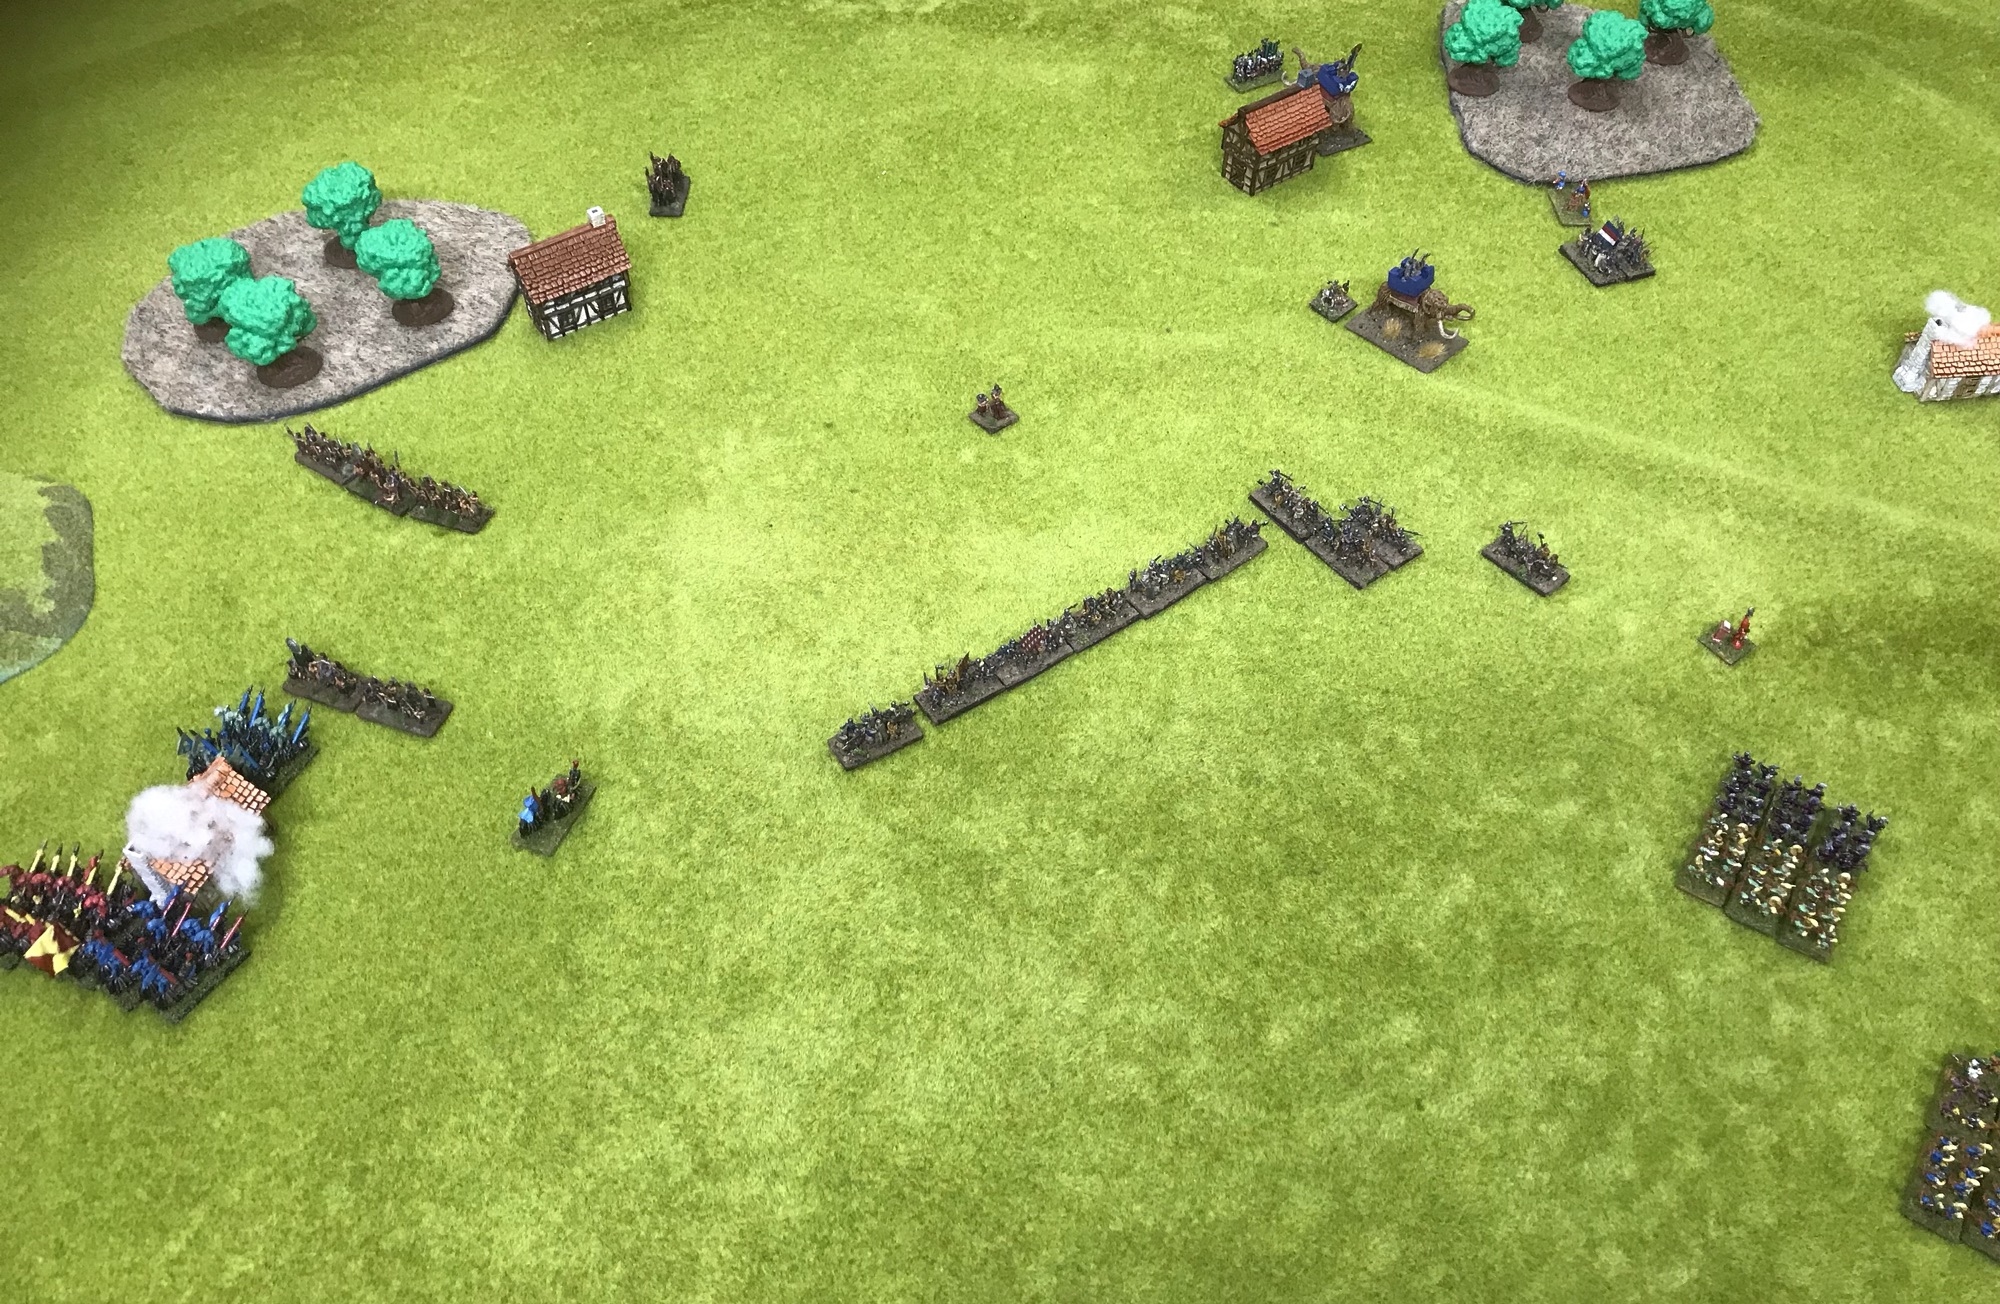
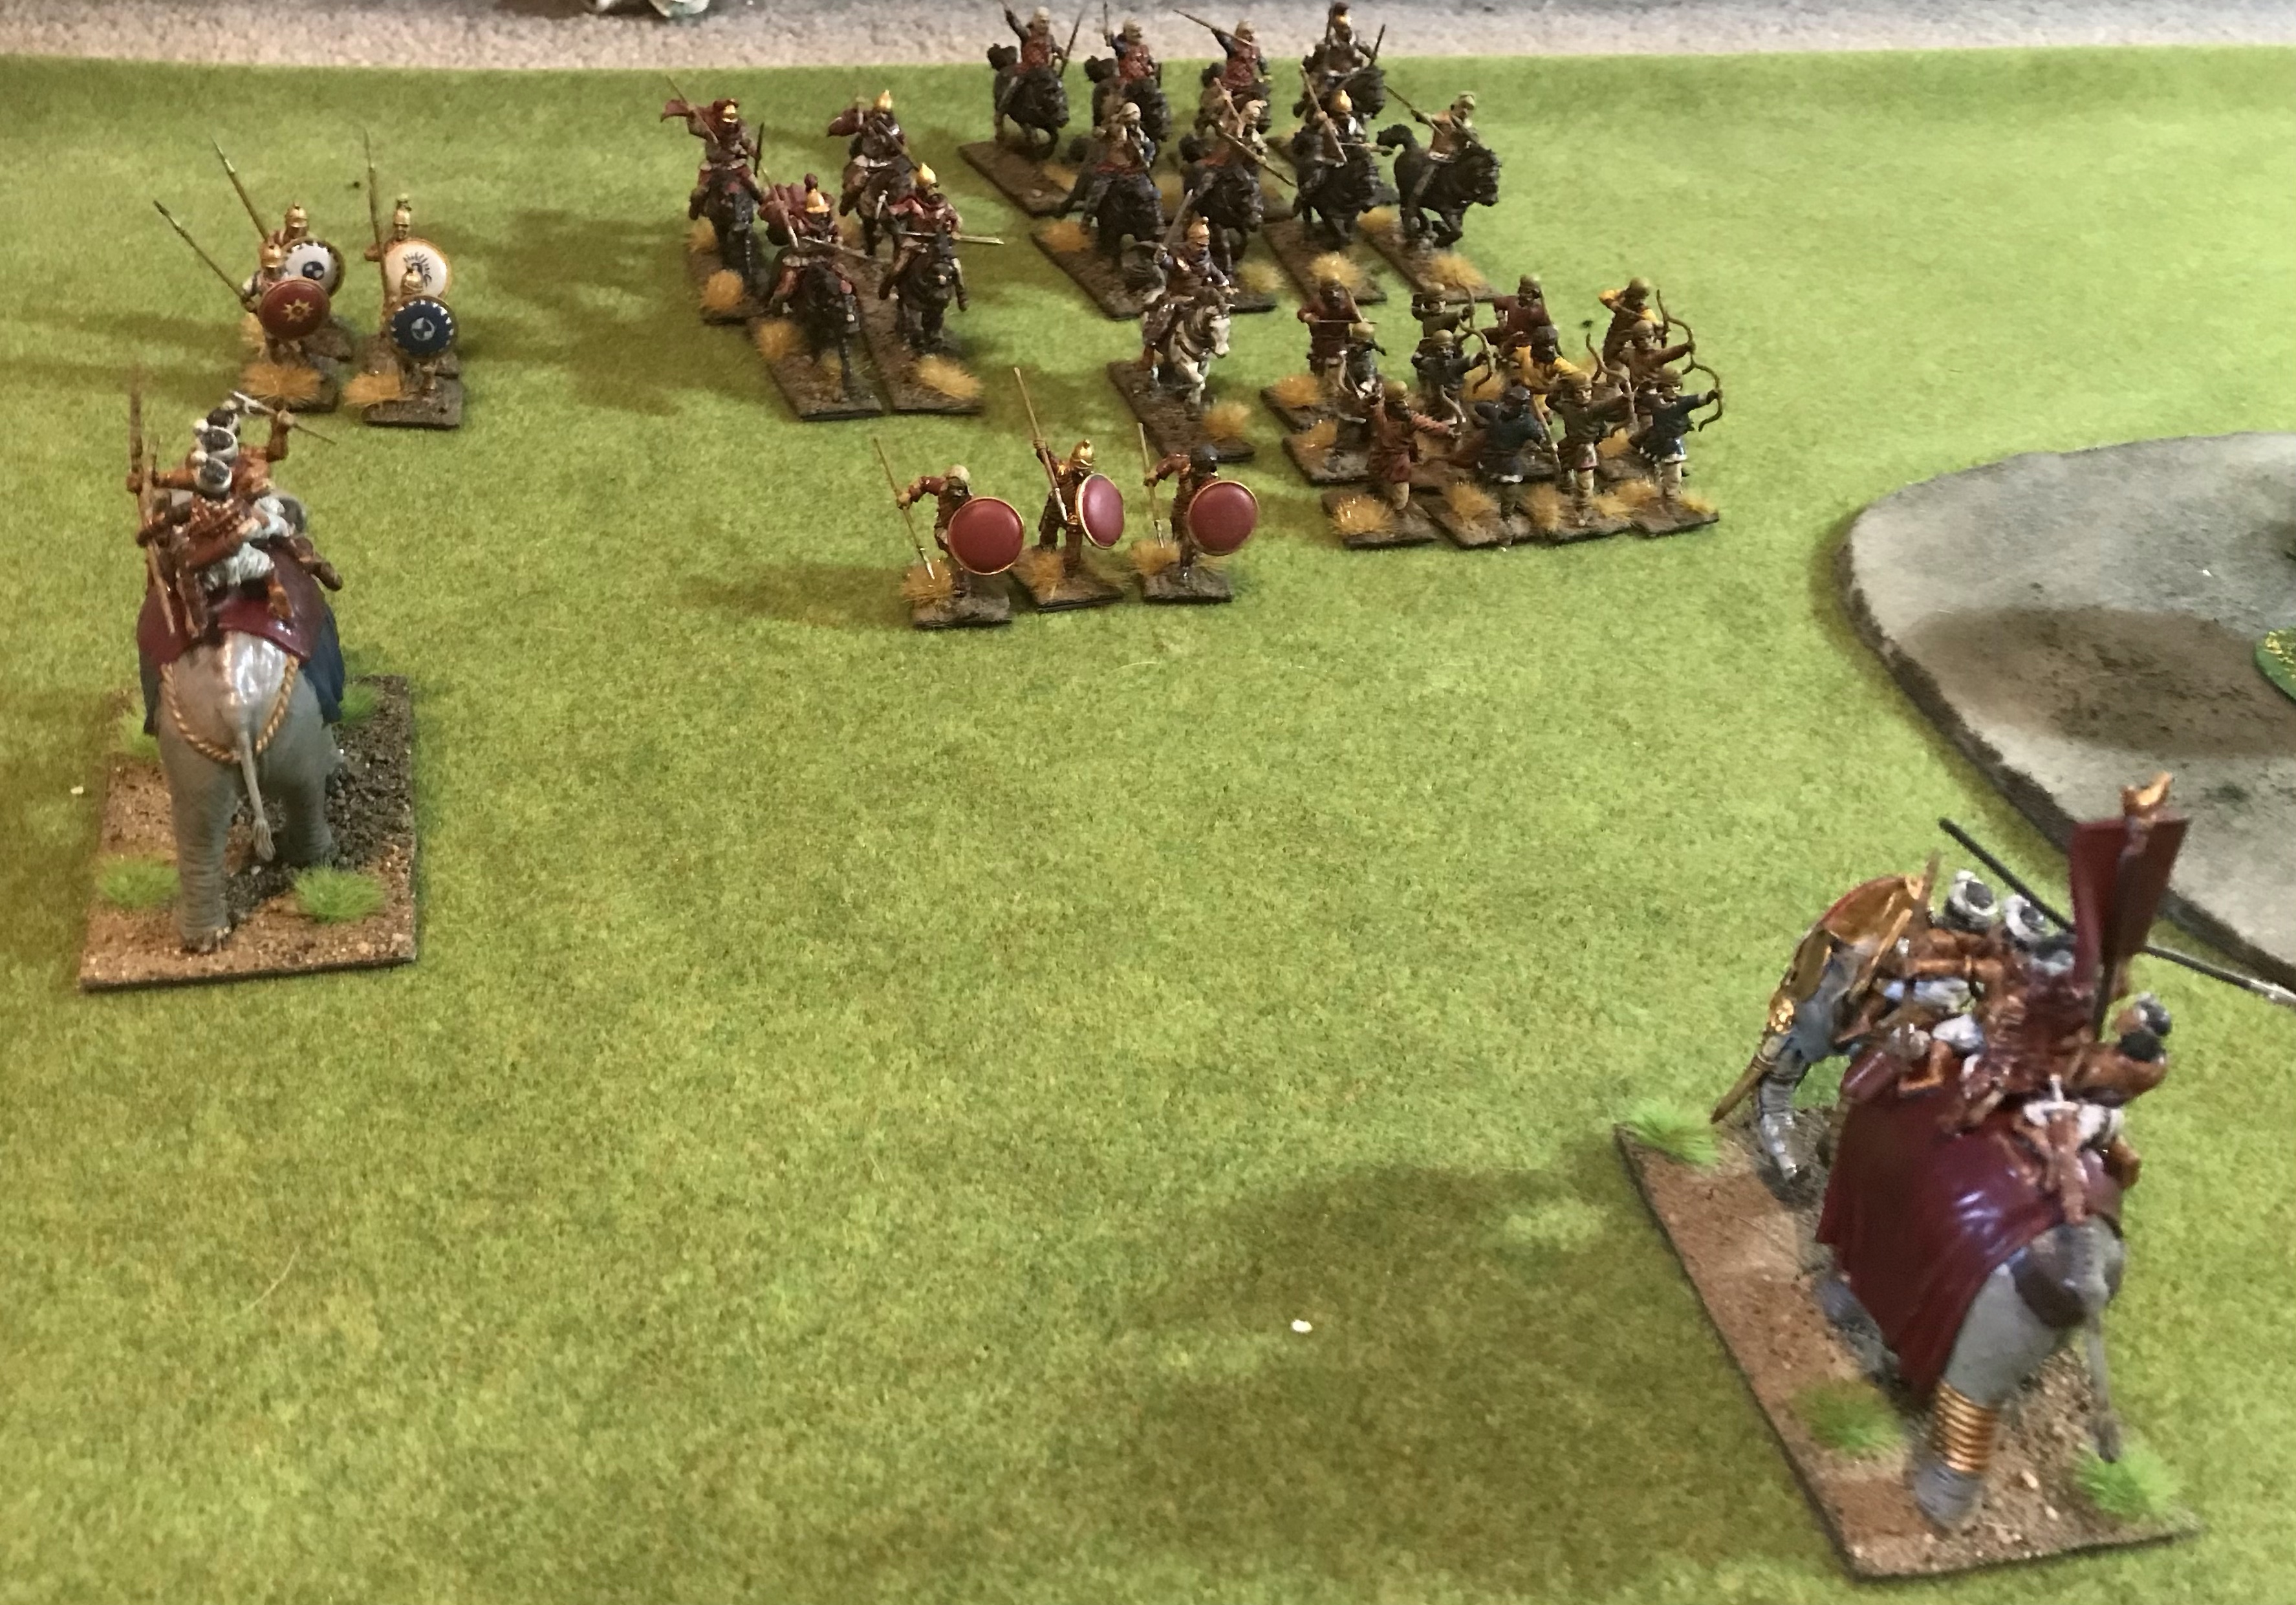
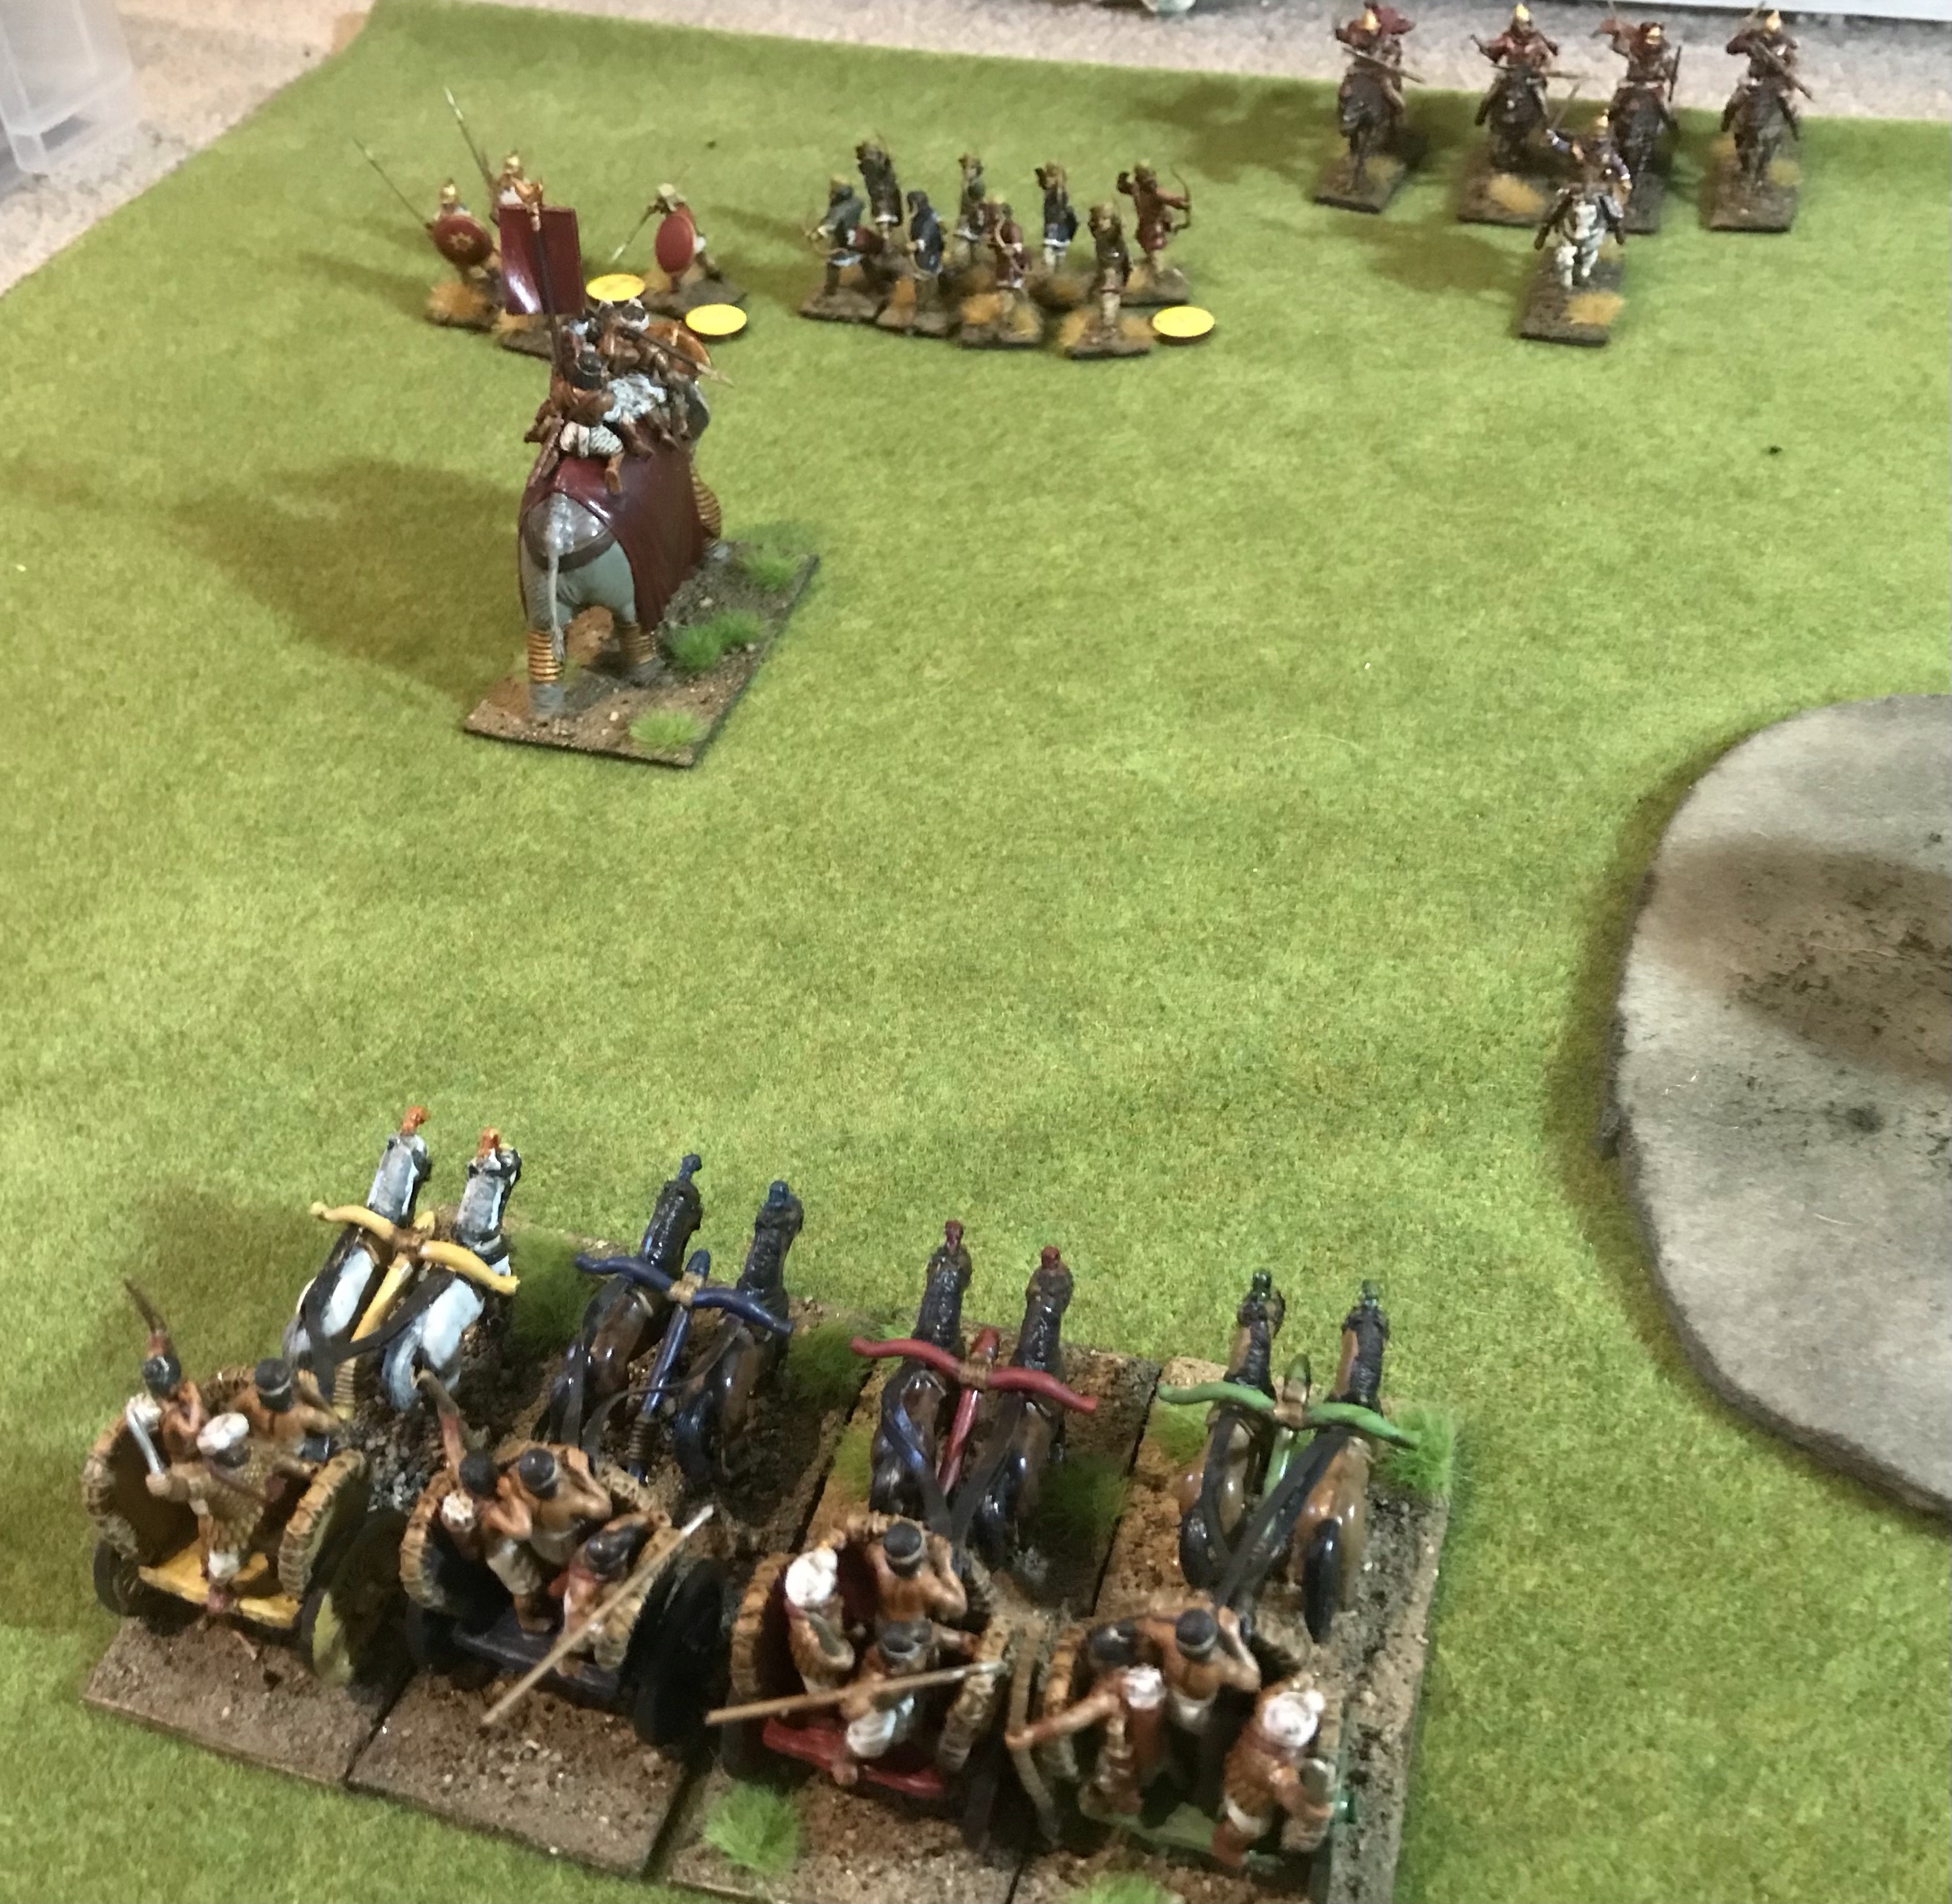
The Venetian pike are finally in combat. On the right of the pike line one unit holds back to pin the Ottoman units in the wood unless they fancy coming out to fight. The Ottoman horse bring numbers to bear in the cavalry fight but are losing bases.
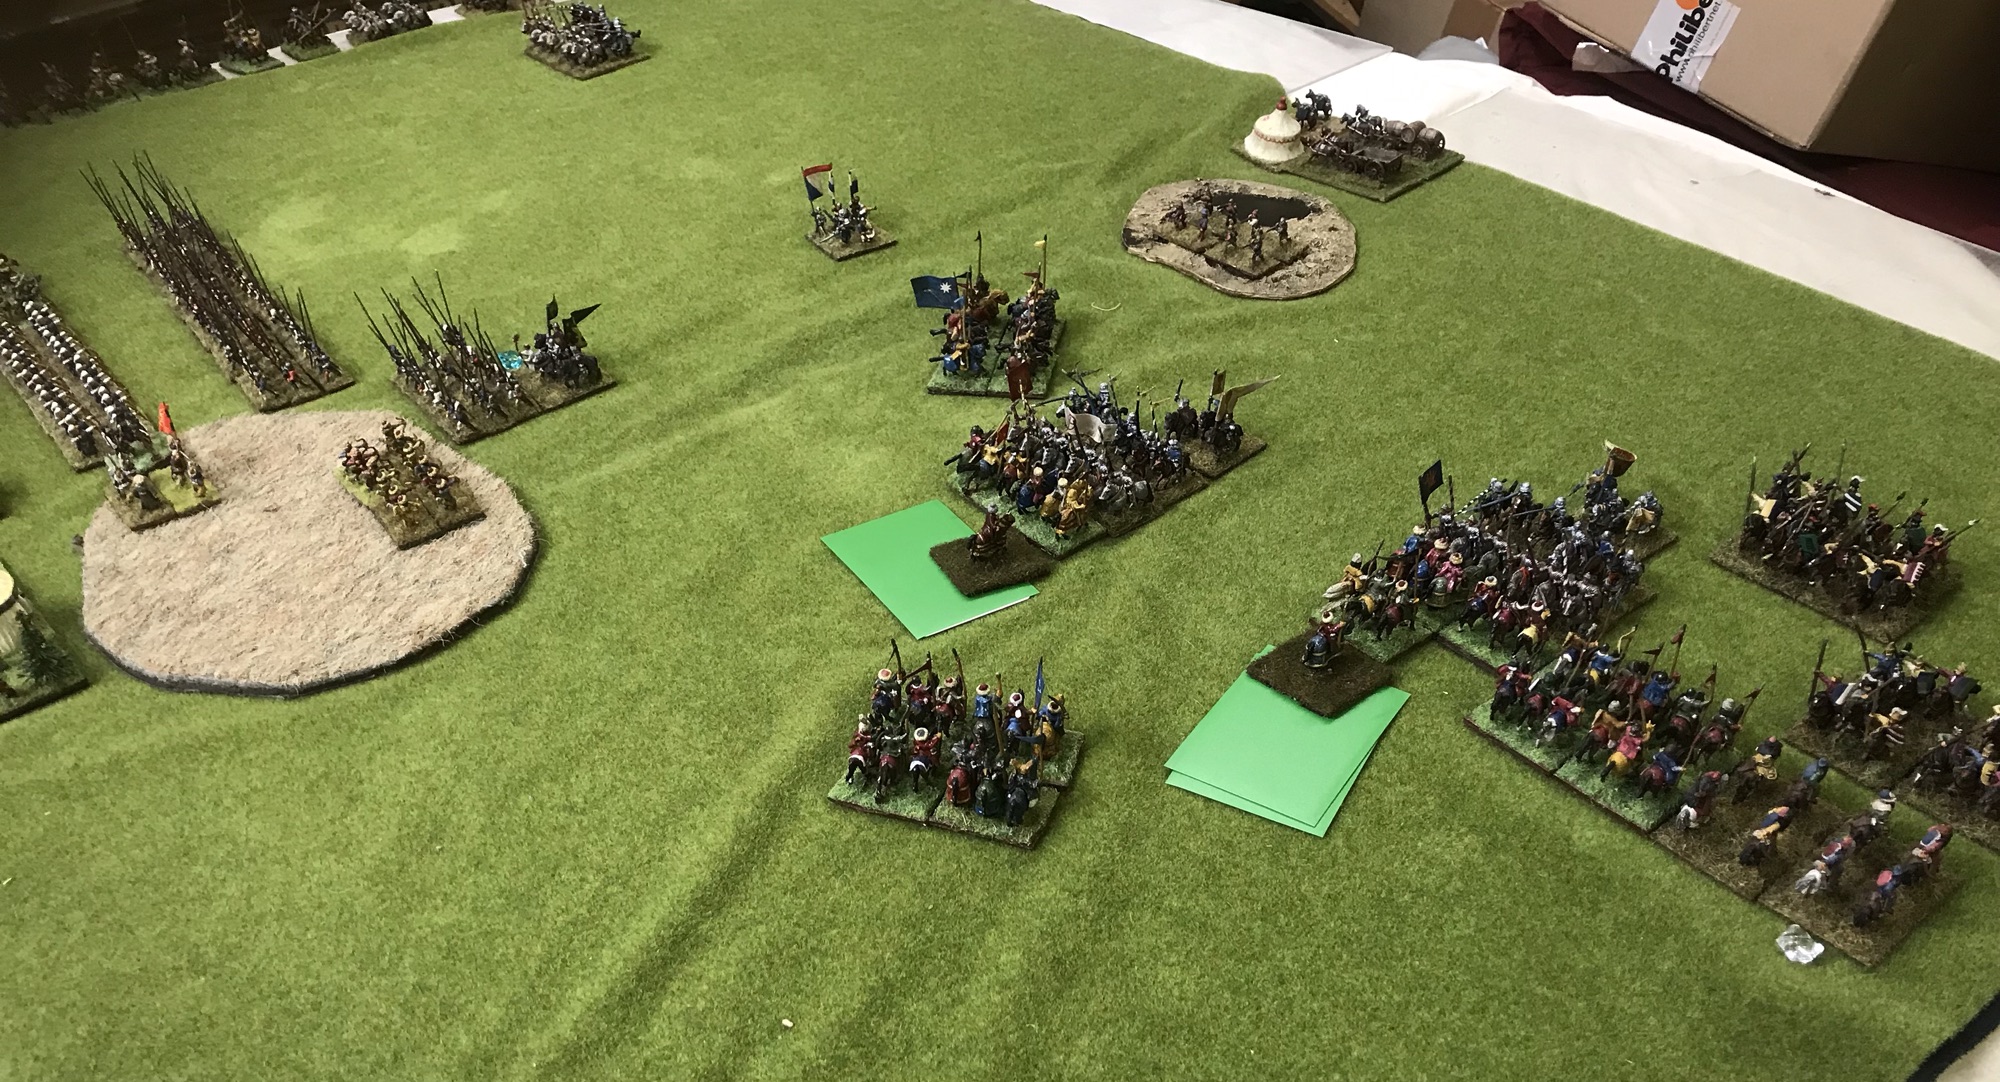
The Ottomans nudge a unit of bows out of the safety of the woods to shoot into the flank of the Venetian pike. This is a dangerous mistake as the shooting has no effect and a Venetian Condottierre unit moves up to sort them out. Moving forward with a wheel is a relatively simple action. Alas the opportunity to wheel back does not exist and the Dellis to the side in the woods prevent any other cunning moves to get back to safety. The right flank is getting to be a bit of a mess and the Venetians are running out of cavalry.
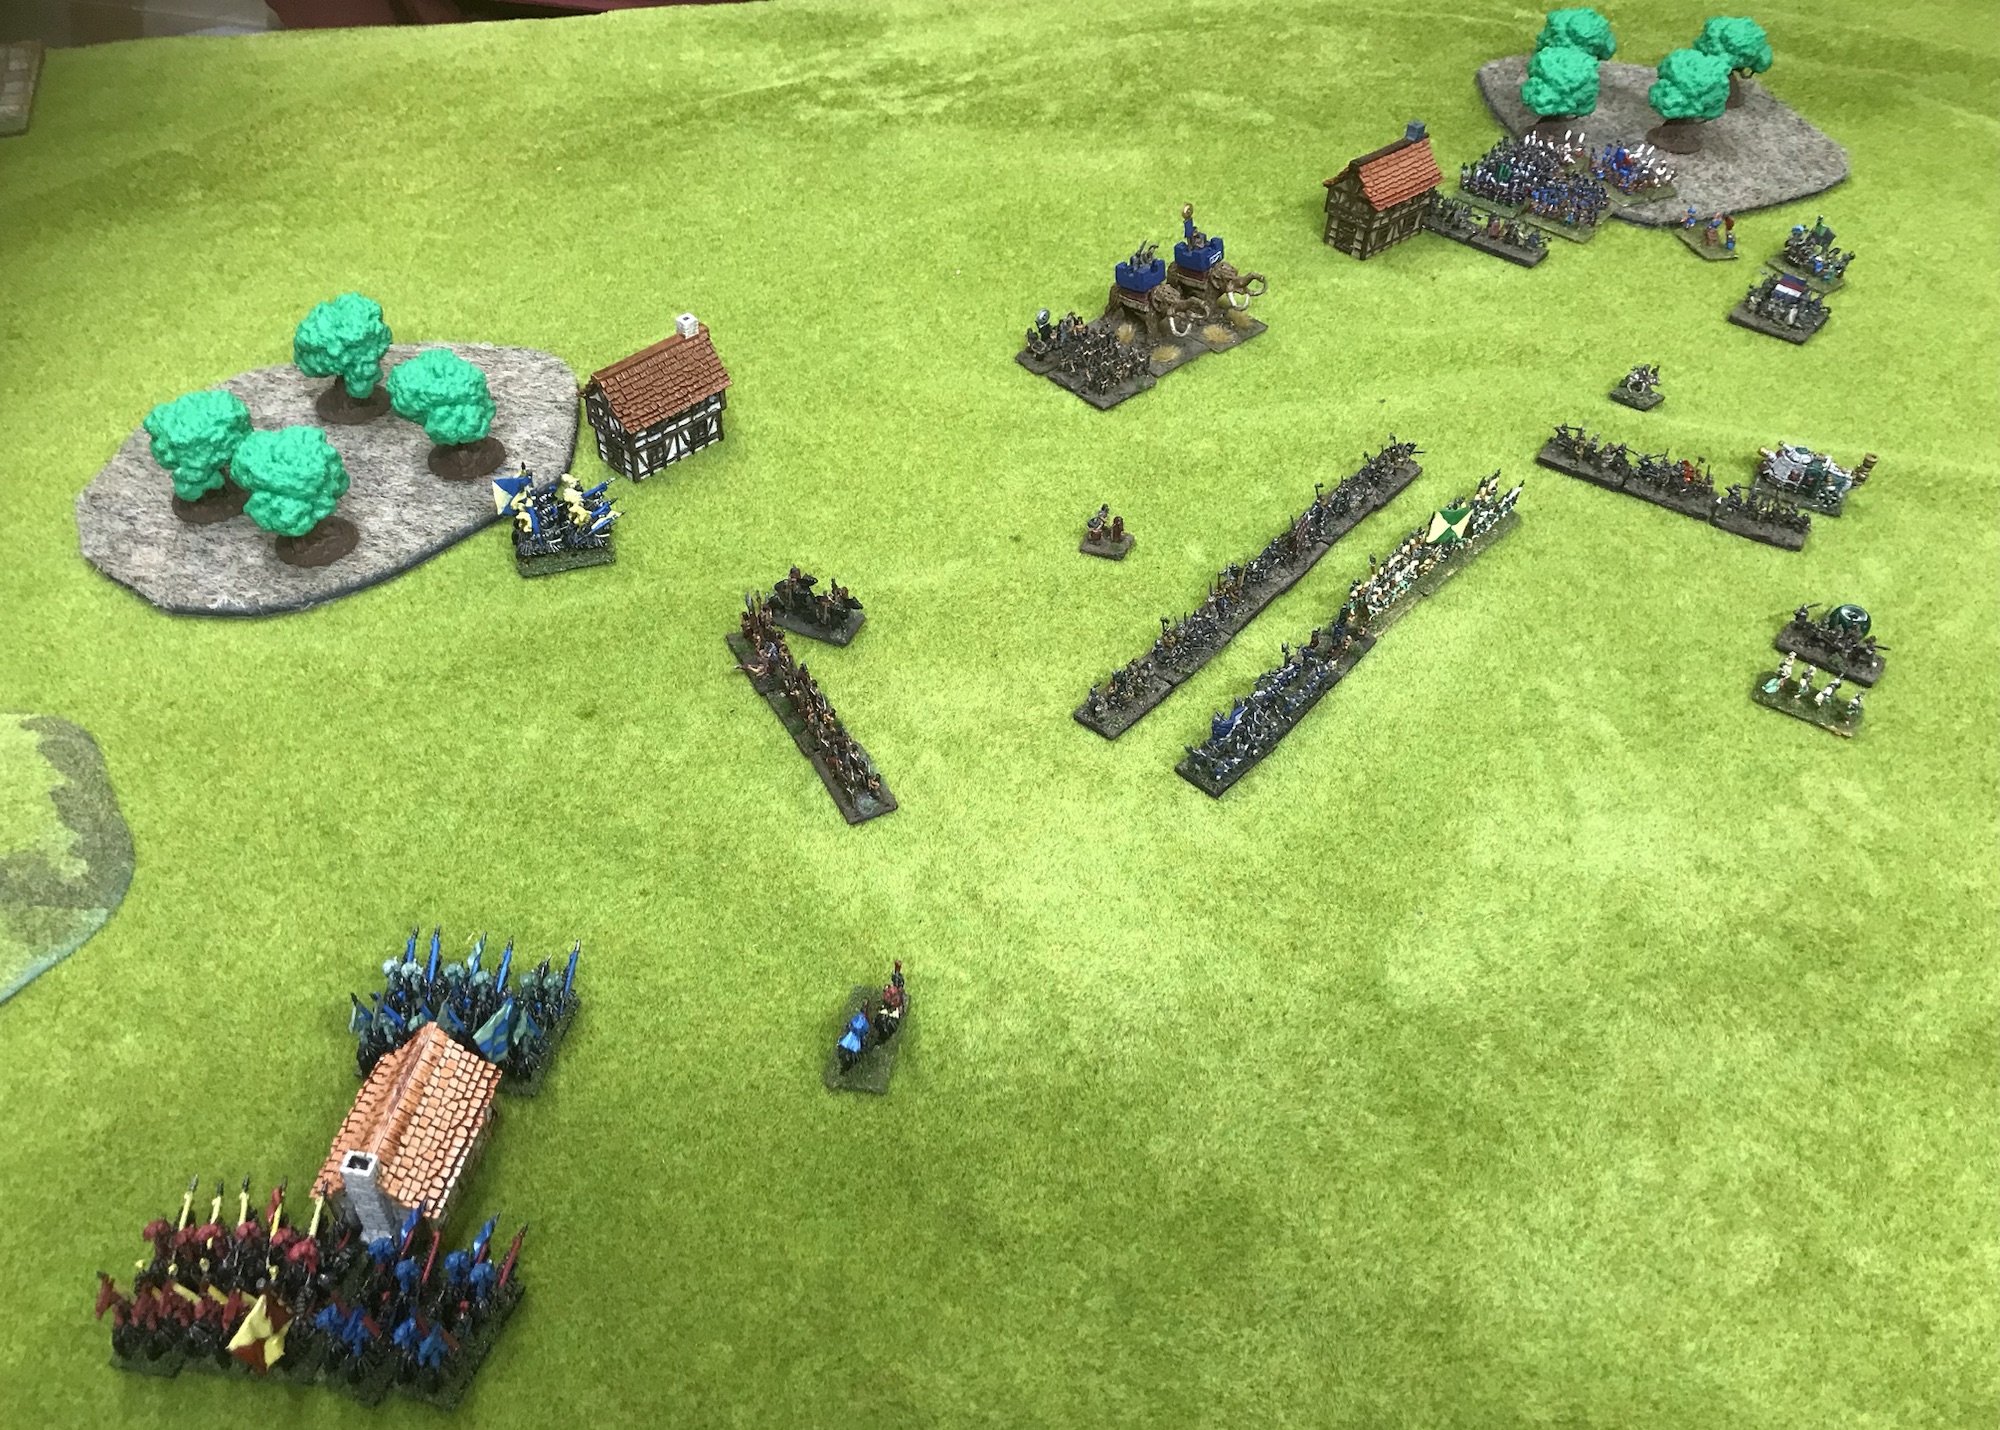
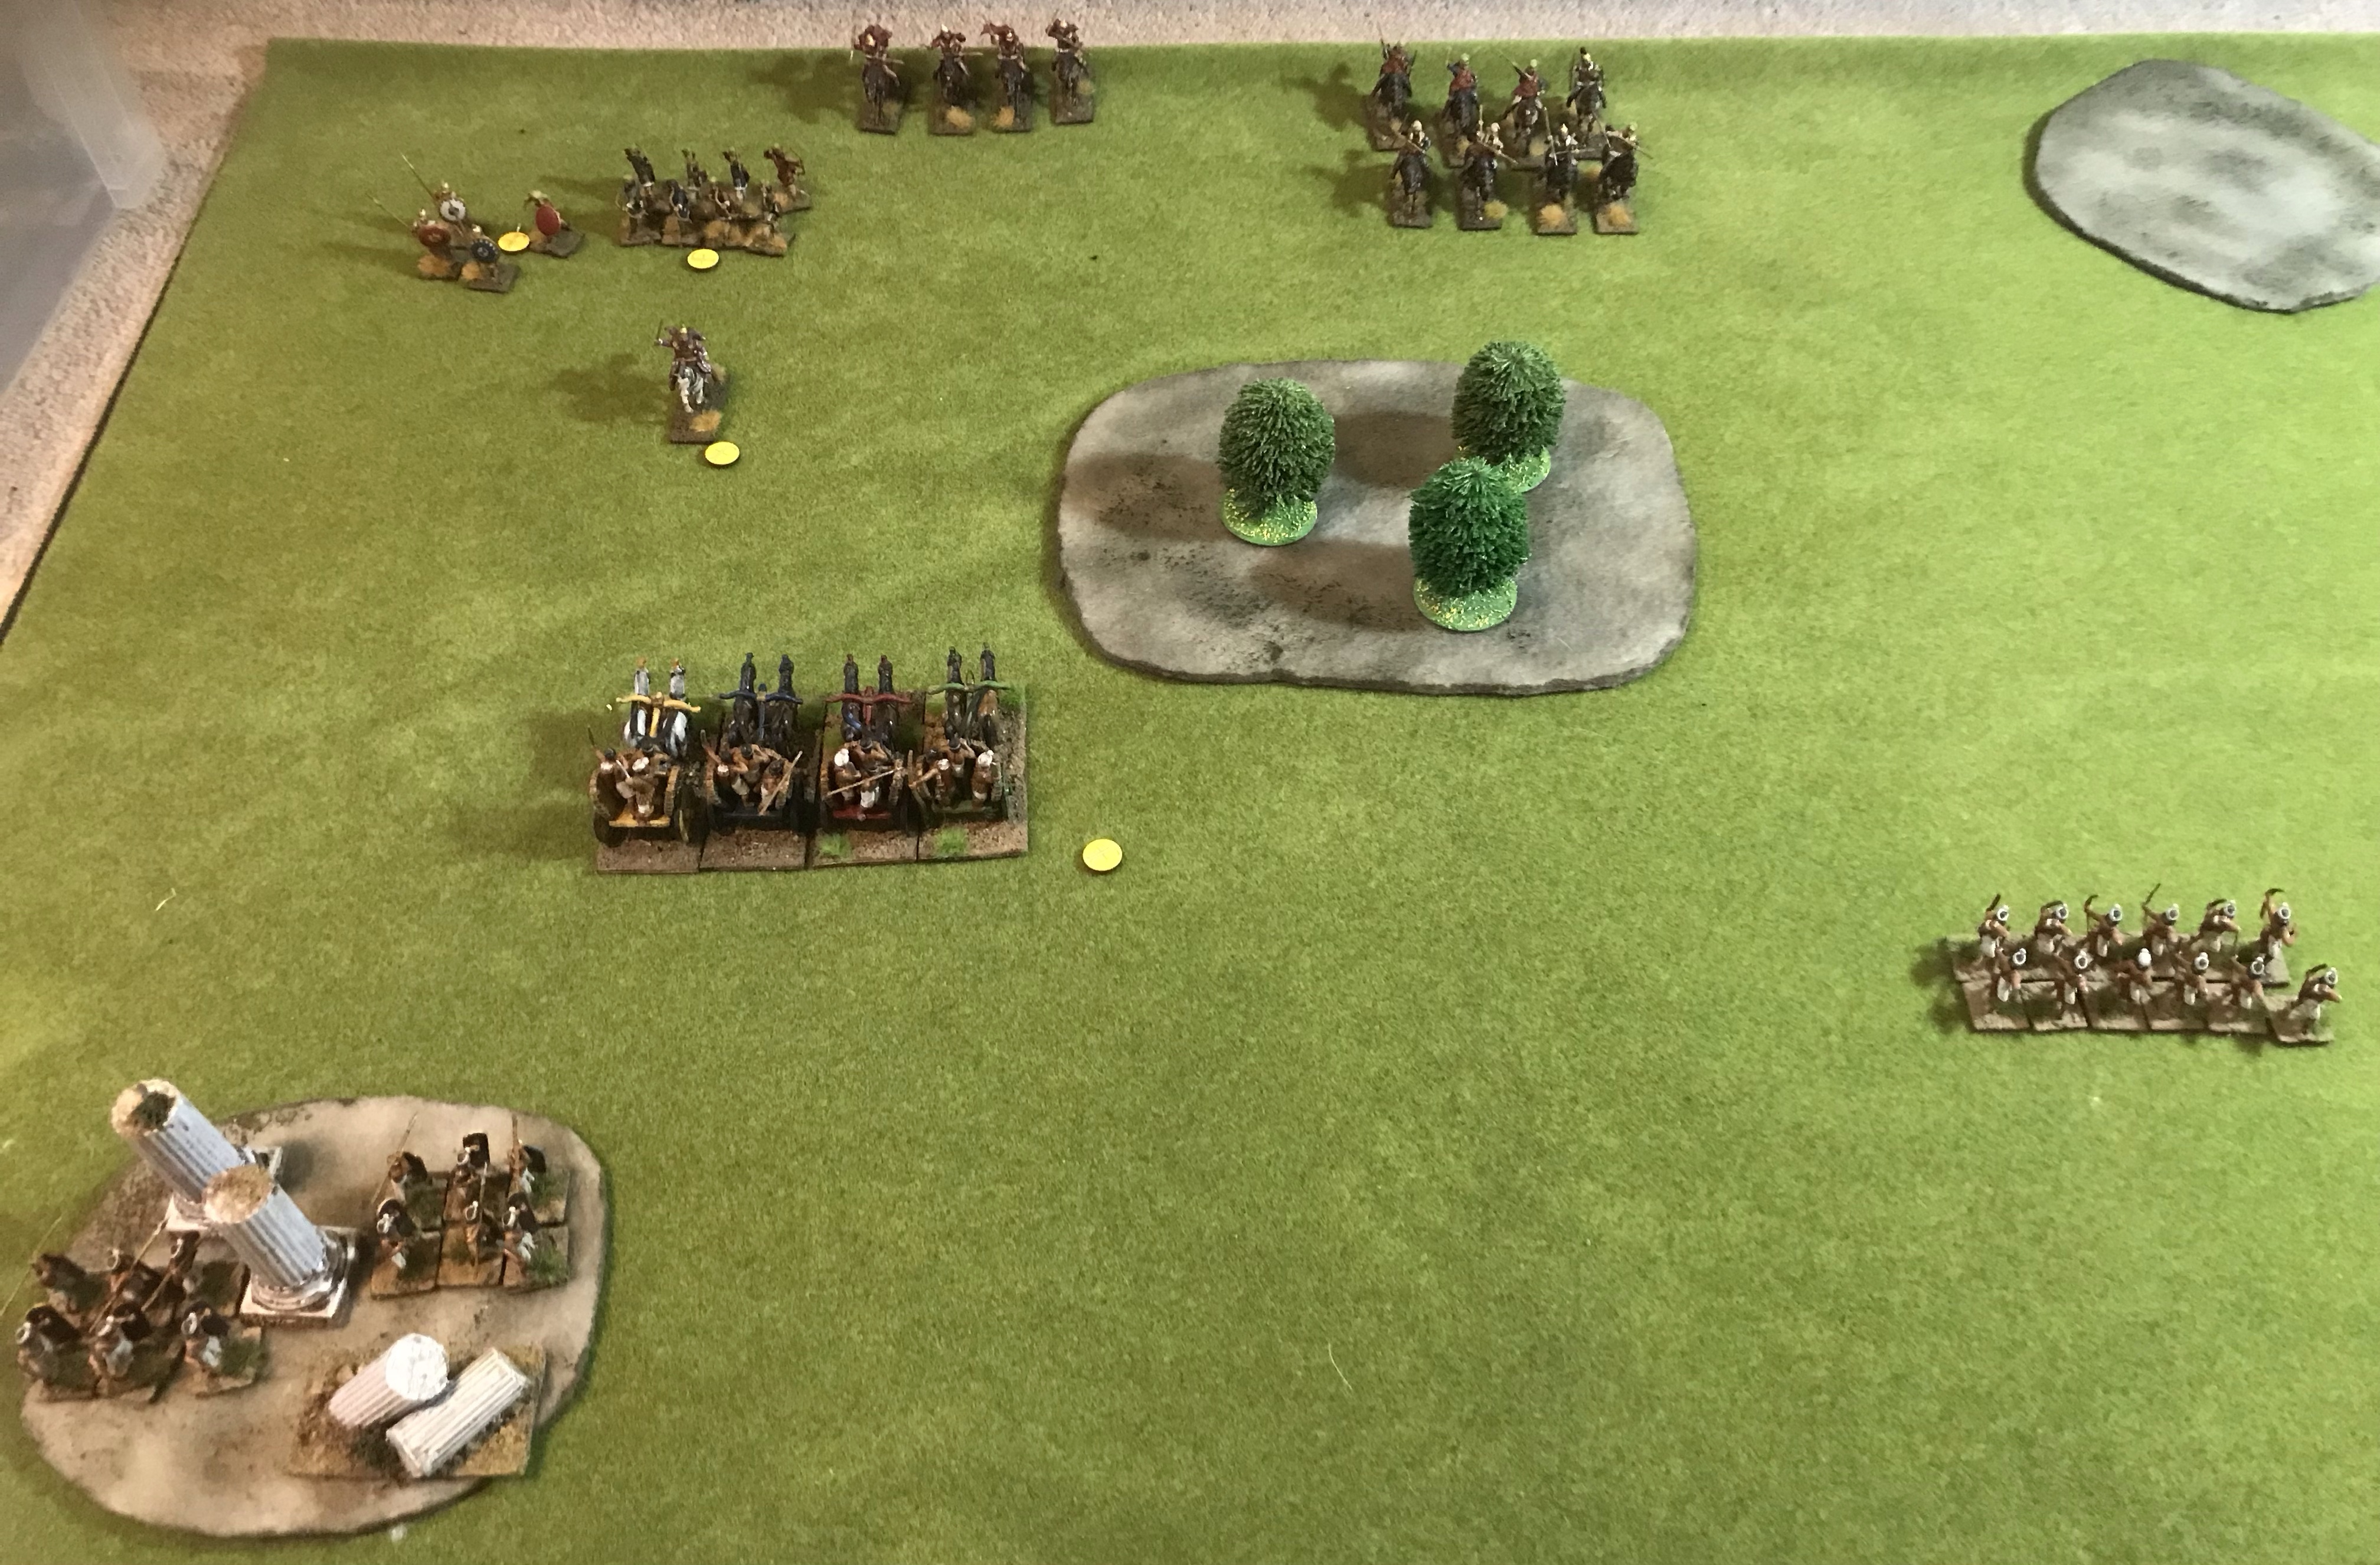
The Ottomans surround a unit of Venetian Condottierre and wipe it out. They are close enough to charge the Venetian camp with Delli cavalry but lack a Green card to do so. It would all have been too late anyway. The last Condottierre unit routs the exposed Ottoman bow and the leftmost Venetian Keil breaks the Janissaries to their front. A wave of morale checks routs more Janissaries and the Ottoman army as a whole.
It all worked out much as in Venetian against Ottoman Renatio et Gloriam games. The Ottoman horse will win out but can their own foot hold out long enough for that? With smaller units and fewer hits to kill a base infantry combat is less likely to drag on. As the overall count of units is lower than in the full game the armies could get away with lower ranking commanders. In many cases here the generals had more than enough cards but these were not good enough to do everything. This is a factor of card distribution not number so would not work through with more units but better commanders.
Being of a thrifty nature and preferring to fork out for rules, models and terrain rather than bits to make gaming easier I worked out some short cuts for games that need dice, cards or markers. These details should also be useful for gamers looking for play aids but located in places where the postage to receive them might be hefty.
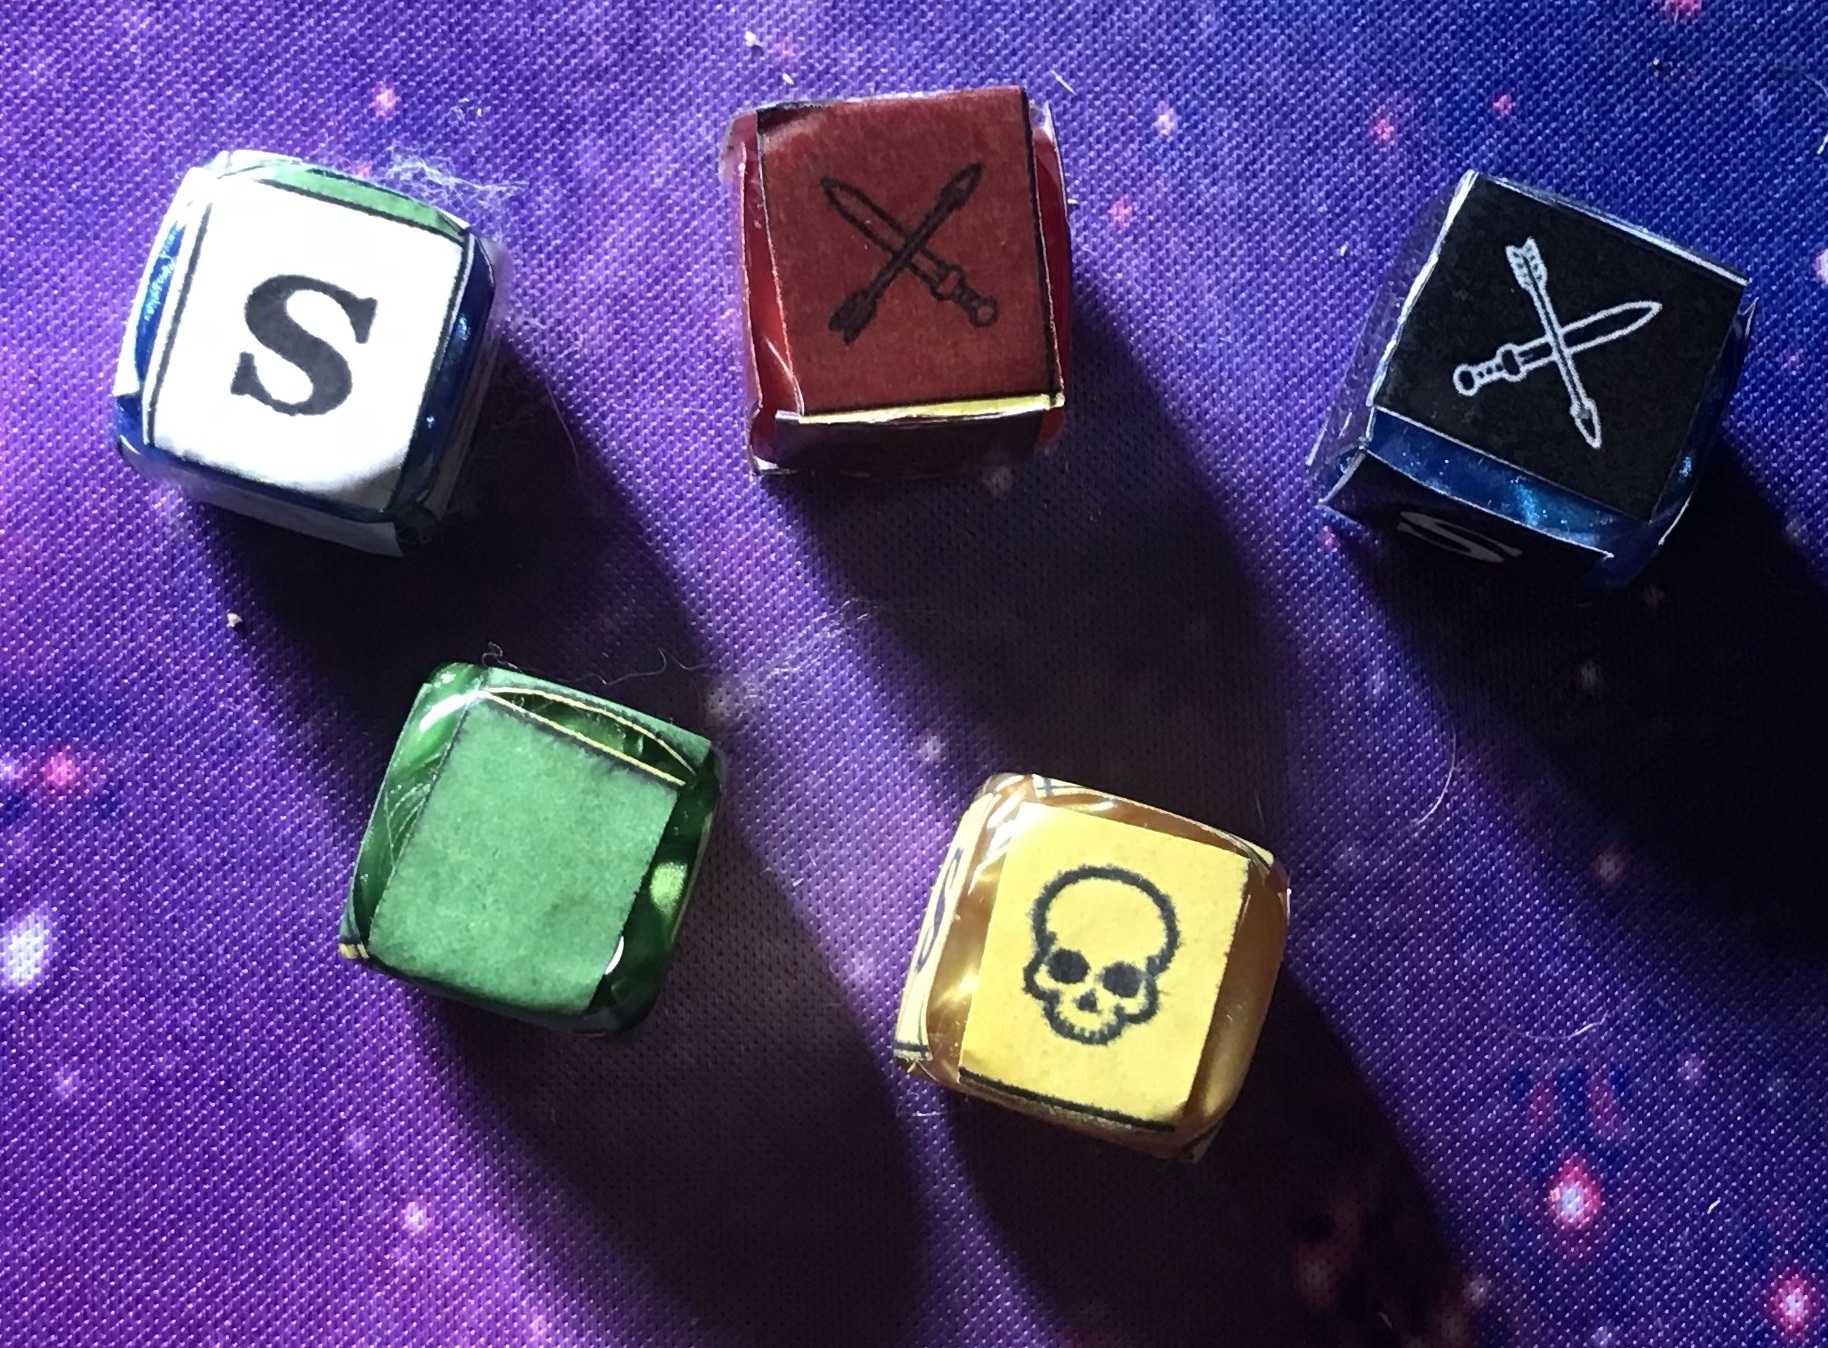
First up are dice. Mortem et Gloriam uses specialist dice. The easiest way to craft these is taking an image of the dice faces from the web site. This is then resized, cut up and stuck onto regular dice. The examples below look naff at this magnification but are good enough for regular play. They have been printed onto label paper using a laser printer. This sort of colour rubs off very easily so the images were covered in clear sticky plastic before cutting them out. A better effect can be achieved by printing onto specialised sticky back printing paper. The base colour scheme of these dice could be better. Red and black is not a good choice for contrast. An improvement would be to change the black to white or forge new but similar symbols from scratch. A good starting point are the Saga dice symbols; these will need colouring in a paint program. There are plenty of heads and weapons but no ‘S’. Either use an ‘S’ from a text tool or pick a suitably squiggly Saga symbol.
Next up are cards. There are only 50 cards (not including flank or ambush cards) in MeG and ReG but the colours do not match a standard pack. The best solution is a Uno pack that has 5 colours in the right numbers except for a lack of white cards. Using blue cards for white fixes this. In the example shown the cards are in green-backed card sleeves that cost more than the cards themselves. They do provide some protection from shuffling and look better on the table than seeing the Uno backs.
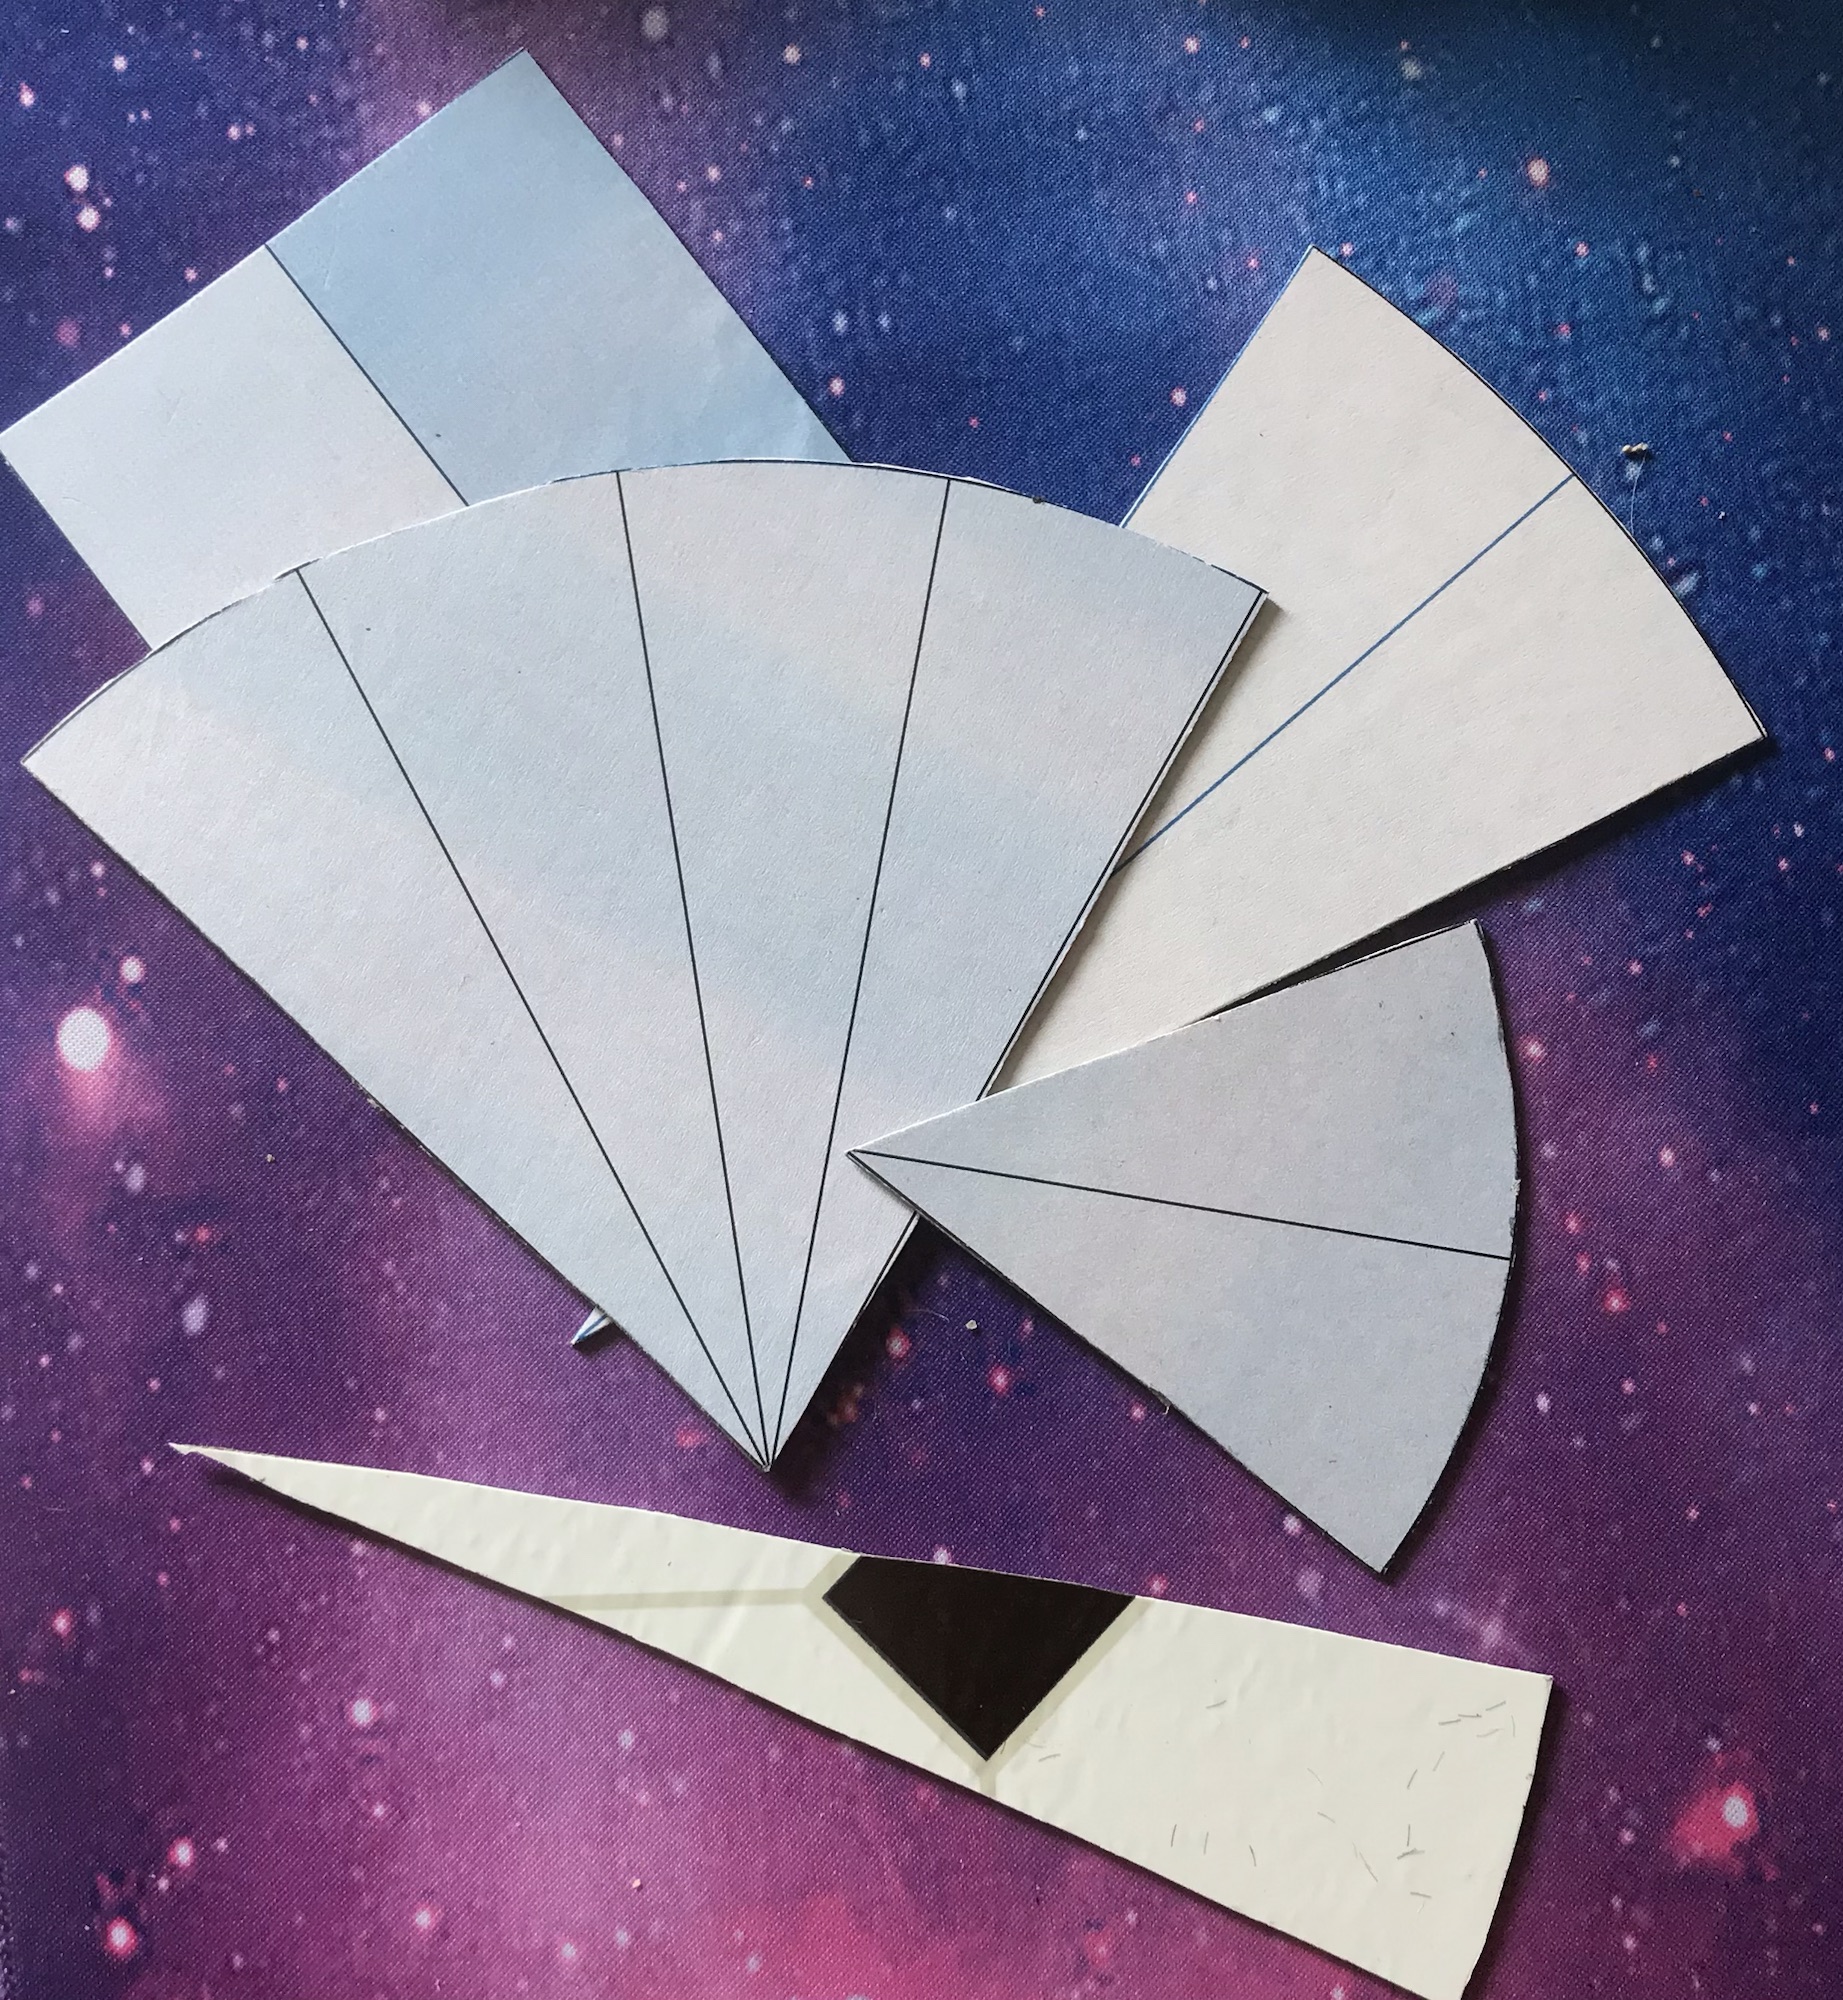
On to templates; these are used for turning and moving. This set was made using PowerPoint as the drawing element as it allows a line to be rotated at one end by an angle. The trick is to draw a line of the required length (1 or more base widths), then copy it and rotate the copy. The exact angle required can be worked out hand or online. The 2 long sides will be the width of the block moving and the short side the distance to be moved. For example an 8cm wide unit wheeling in increments of 4cm. The circle round the edge has the radius of the unit width but is mainly here to aid in lining up the triangle edges and in making the template look good. Parts of the slide not in use have been blocked out with white rectangles to save ink. The finished templates are glued onto cheap floor tiles (sold in packs of 3 or 4 in discount shops). This adds some weight and is still easy to cut with scissors. The resulting templates are equivalent in accuracy to commercial MDF cut examples. Their big benefit in MeG or ReG is to work out if a charge can get in before declaring it. A few fractions of a millimetre won’t matter and most gamers’ bases are not working to that sort of precision having been built up with filler and flocked.
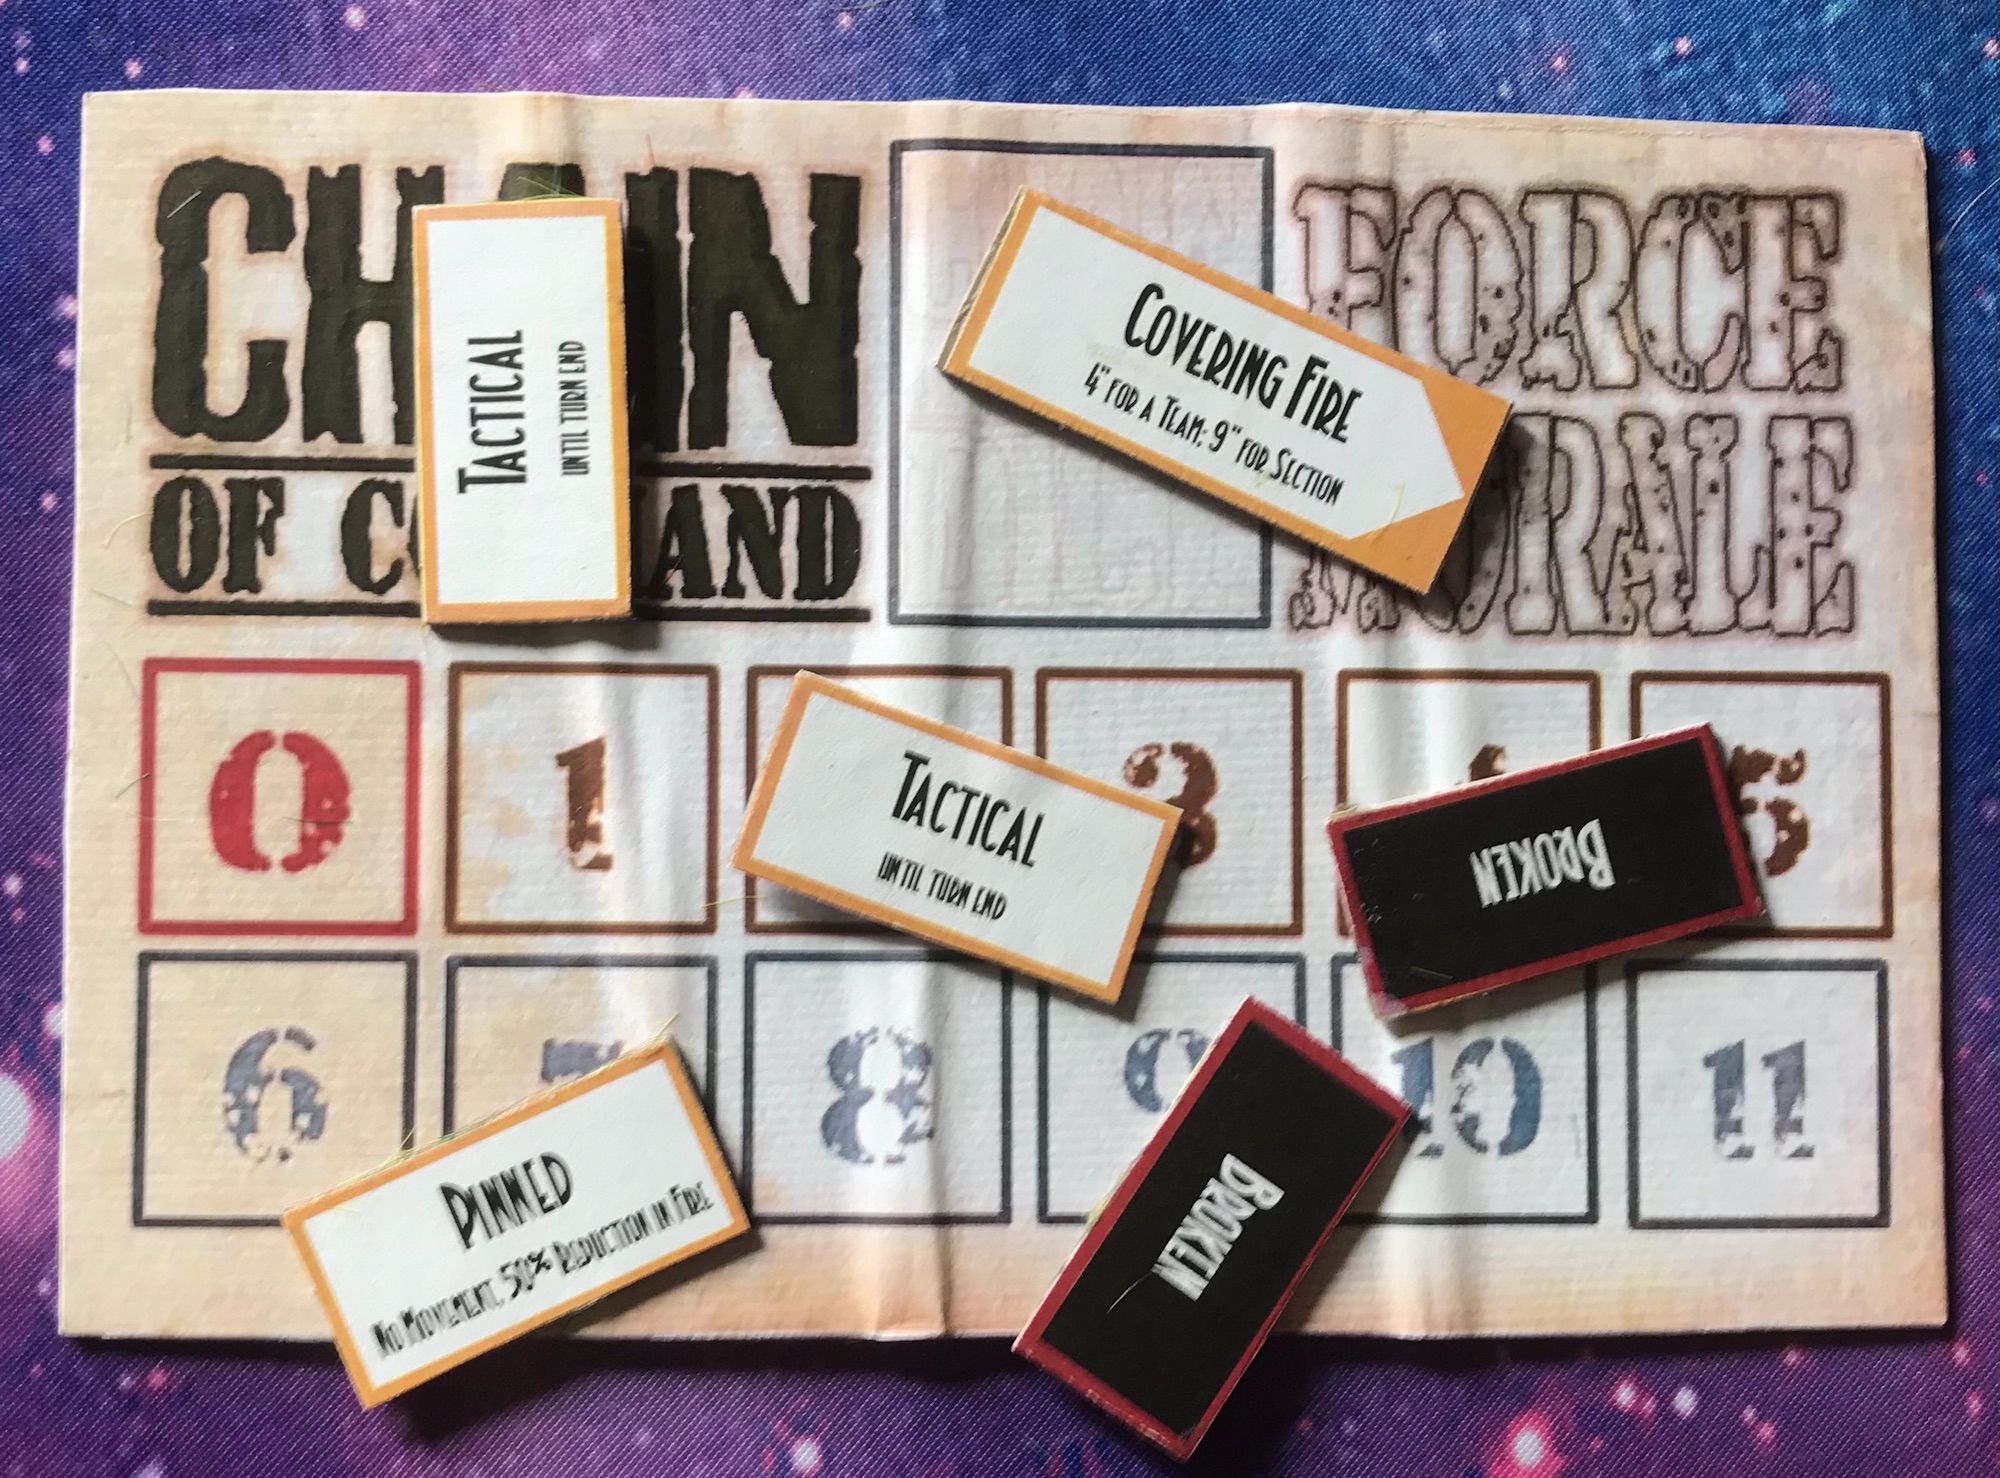
A final note on markers. Simply print out and stick to floor tiles. For double-sided examples you’ll need to use glue on one side. These are for Chain of Command. Hit markers could be easily made up although any bead or crystal will do. Just make sure that the hit markers keep pace with their allocated units as they move around.
A face to face game against an opponent who had played Renatio et Gloriam competitively so it all should go smoothly. That was not exactly the case as that competition was using the 2023 PDF rulebook and there is no reason to assume that any rule will be the same in the printed 2024 rules version. This was a 10,000 point game that ran for about 6 1/2 hours with a lot of stopping to look up and interpret rules (although the frequency of this did drop off as the game went on). The 2024 Britcon competition has limited 3 1/2 hours for each game so you’ll need to know what you are doing. Choosing the terrain and setting up commands is a key part of the game which would take up 30 minutes before the first in-game action starts.
Issues that threw us into debating mode included the exact sequence of play for charging. This is very strict and with some planning can be manipulated to get maximum benefit. Initial facing before charging is also crucial as to ending up on the flank/rear or not. Charges, evades and lining up prior to combat can get complicated. There are examples for this in the rules but the chance of finding an exact matching case is unlikely. Also there were points that did not seem to be expressly forbidden in the rules but after much searching were found to be illegal. What did transpire is that Renatio et Gloriam is sorely in need of a proper index. Rules and consequences do seem to be explained but as that could be in more than one possible place these are hard to track down.
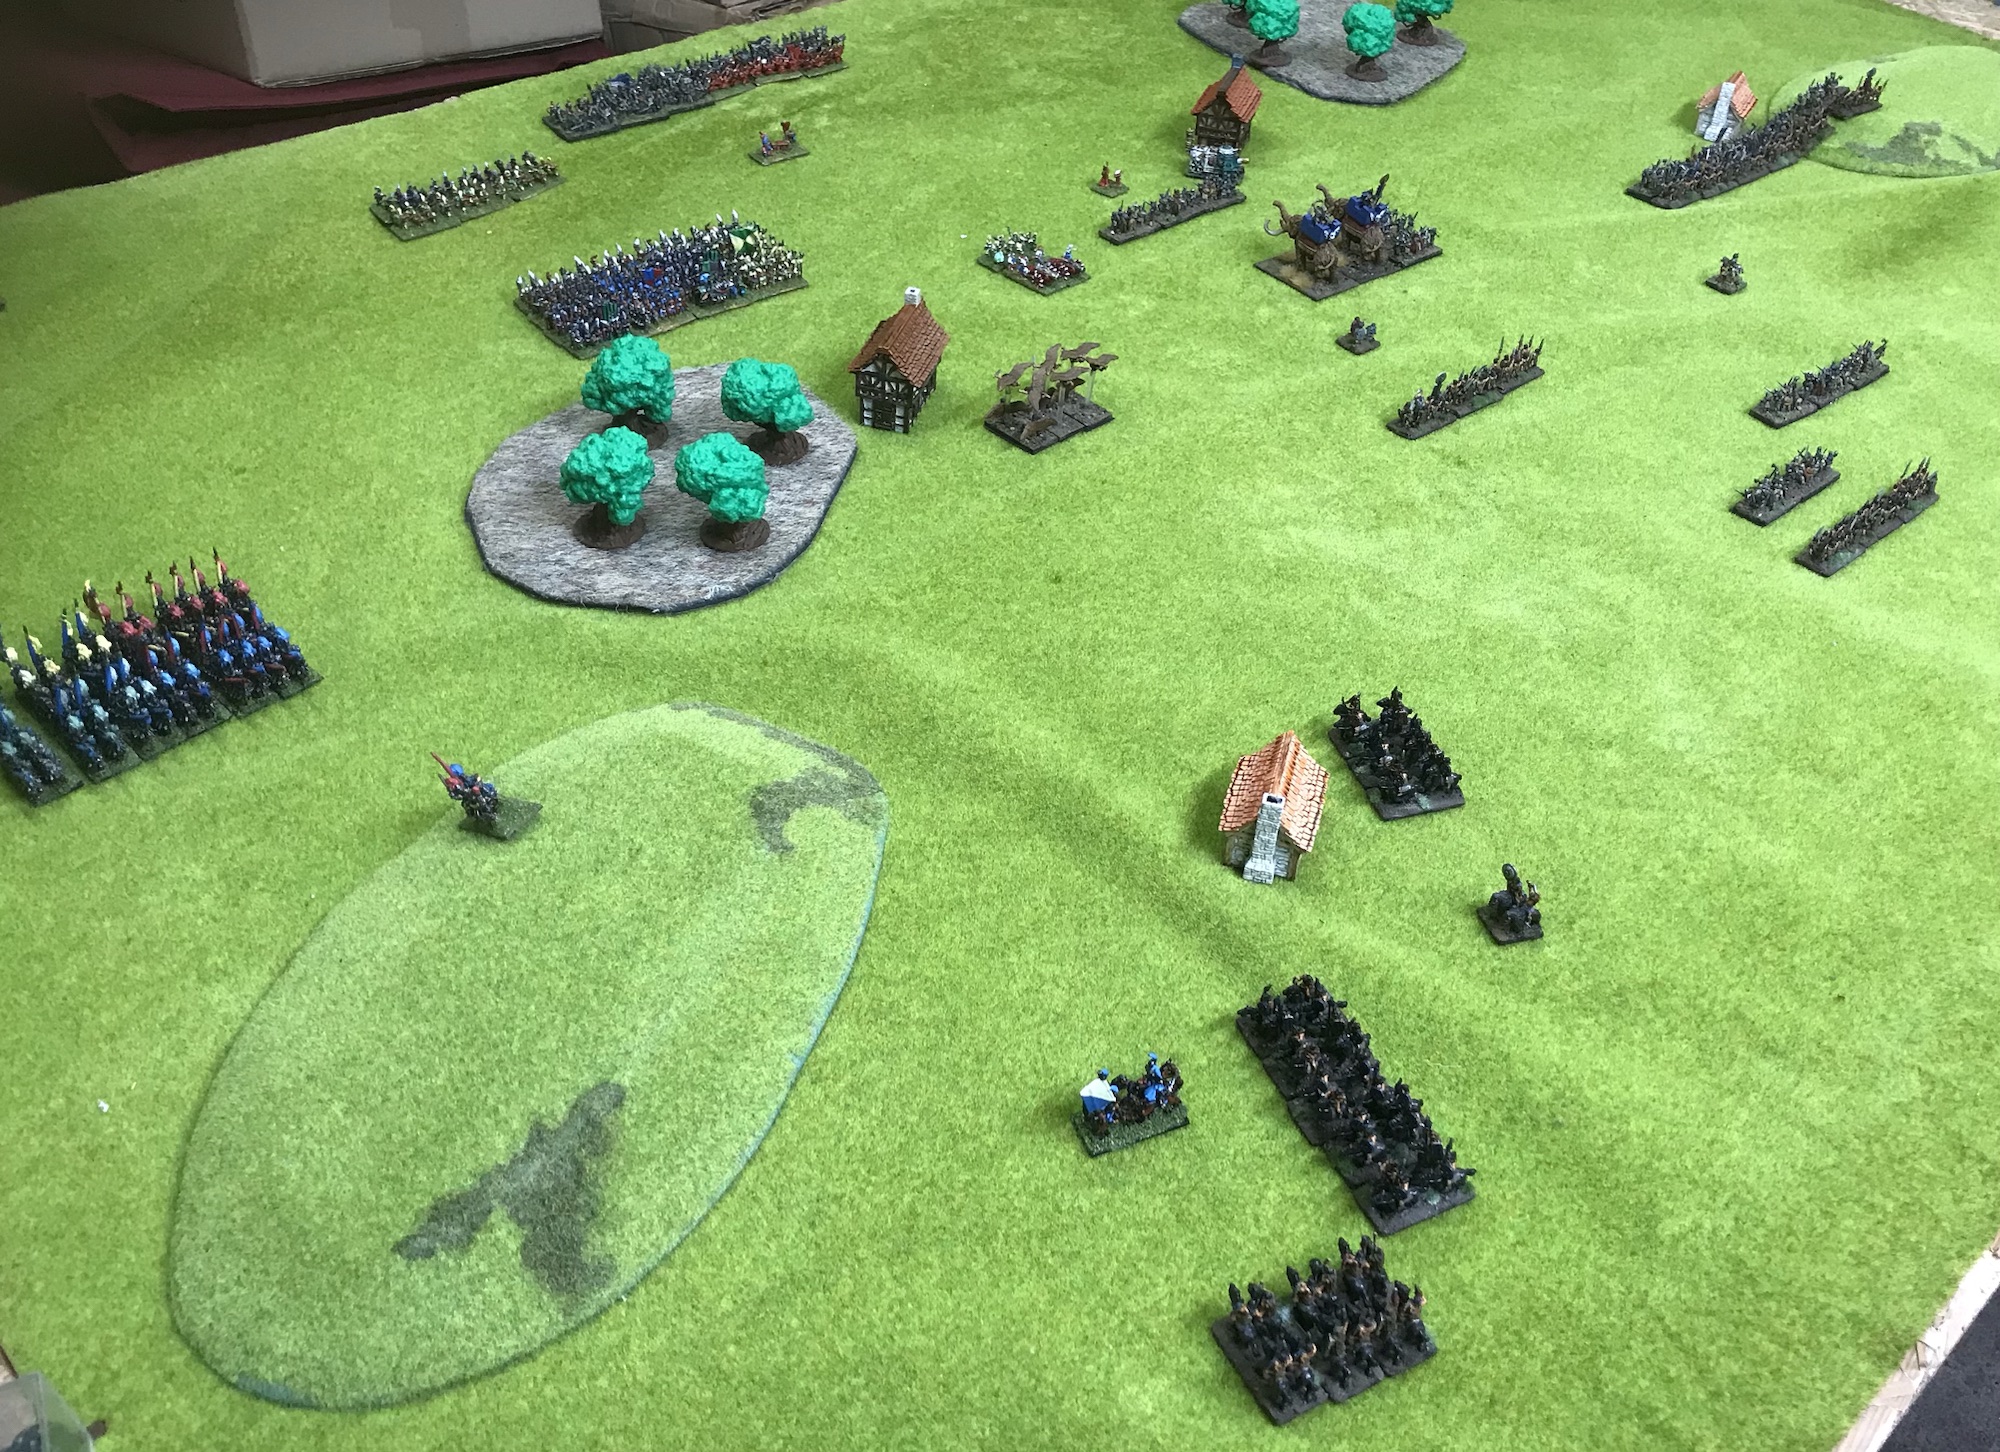
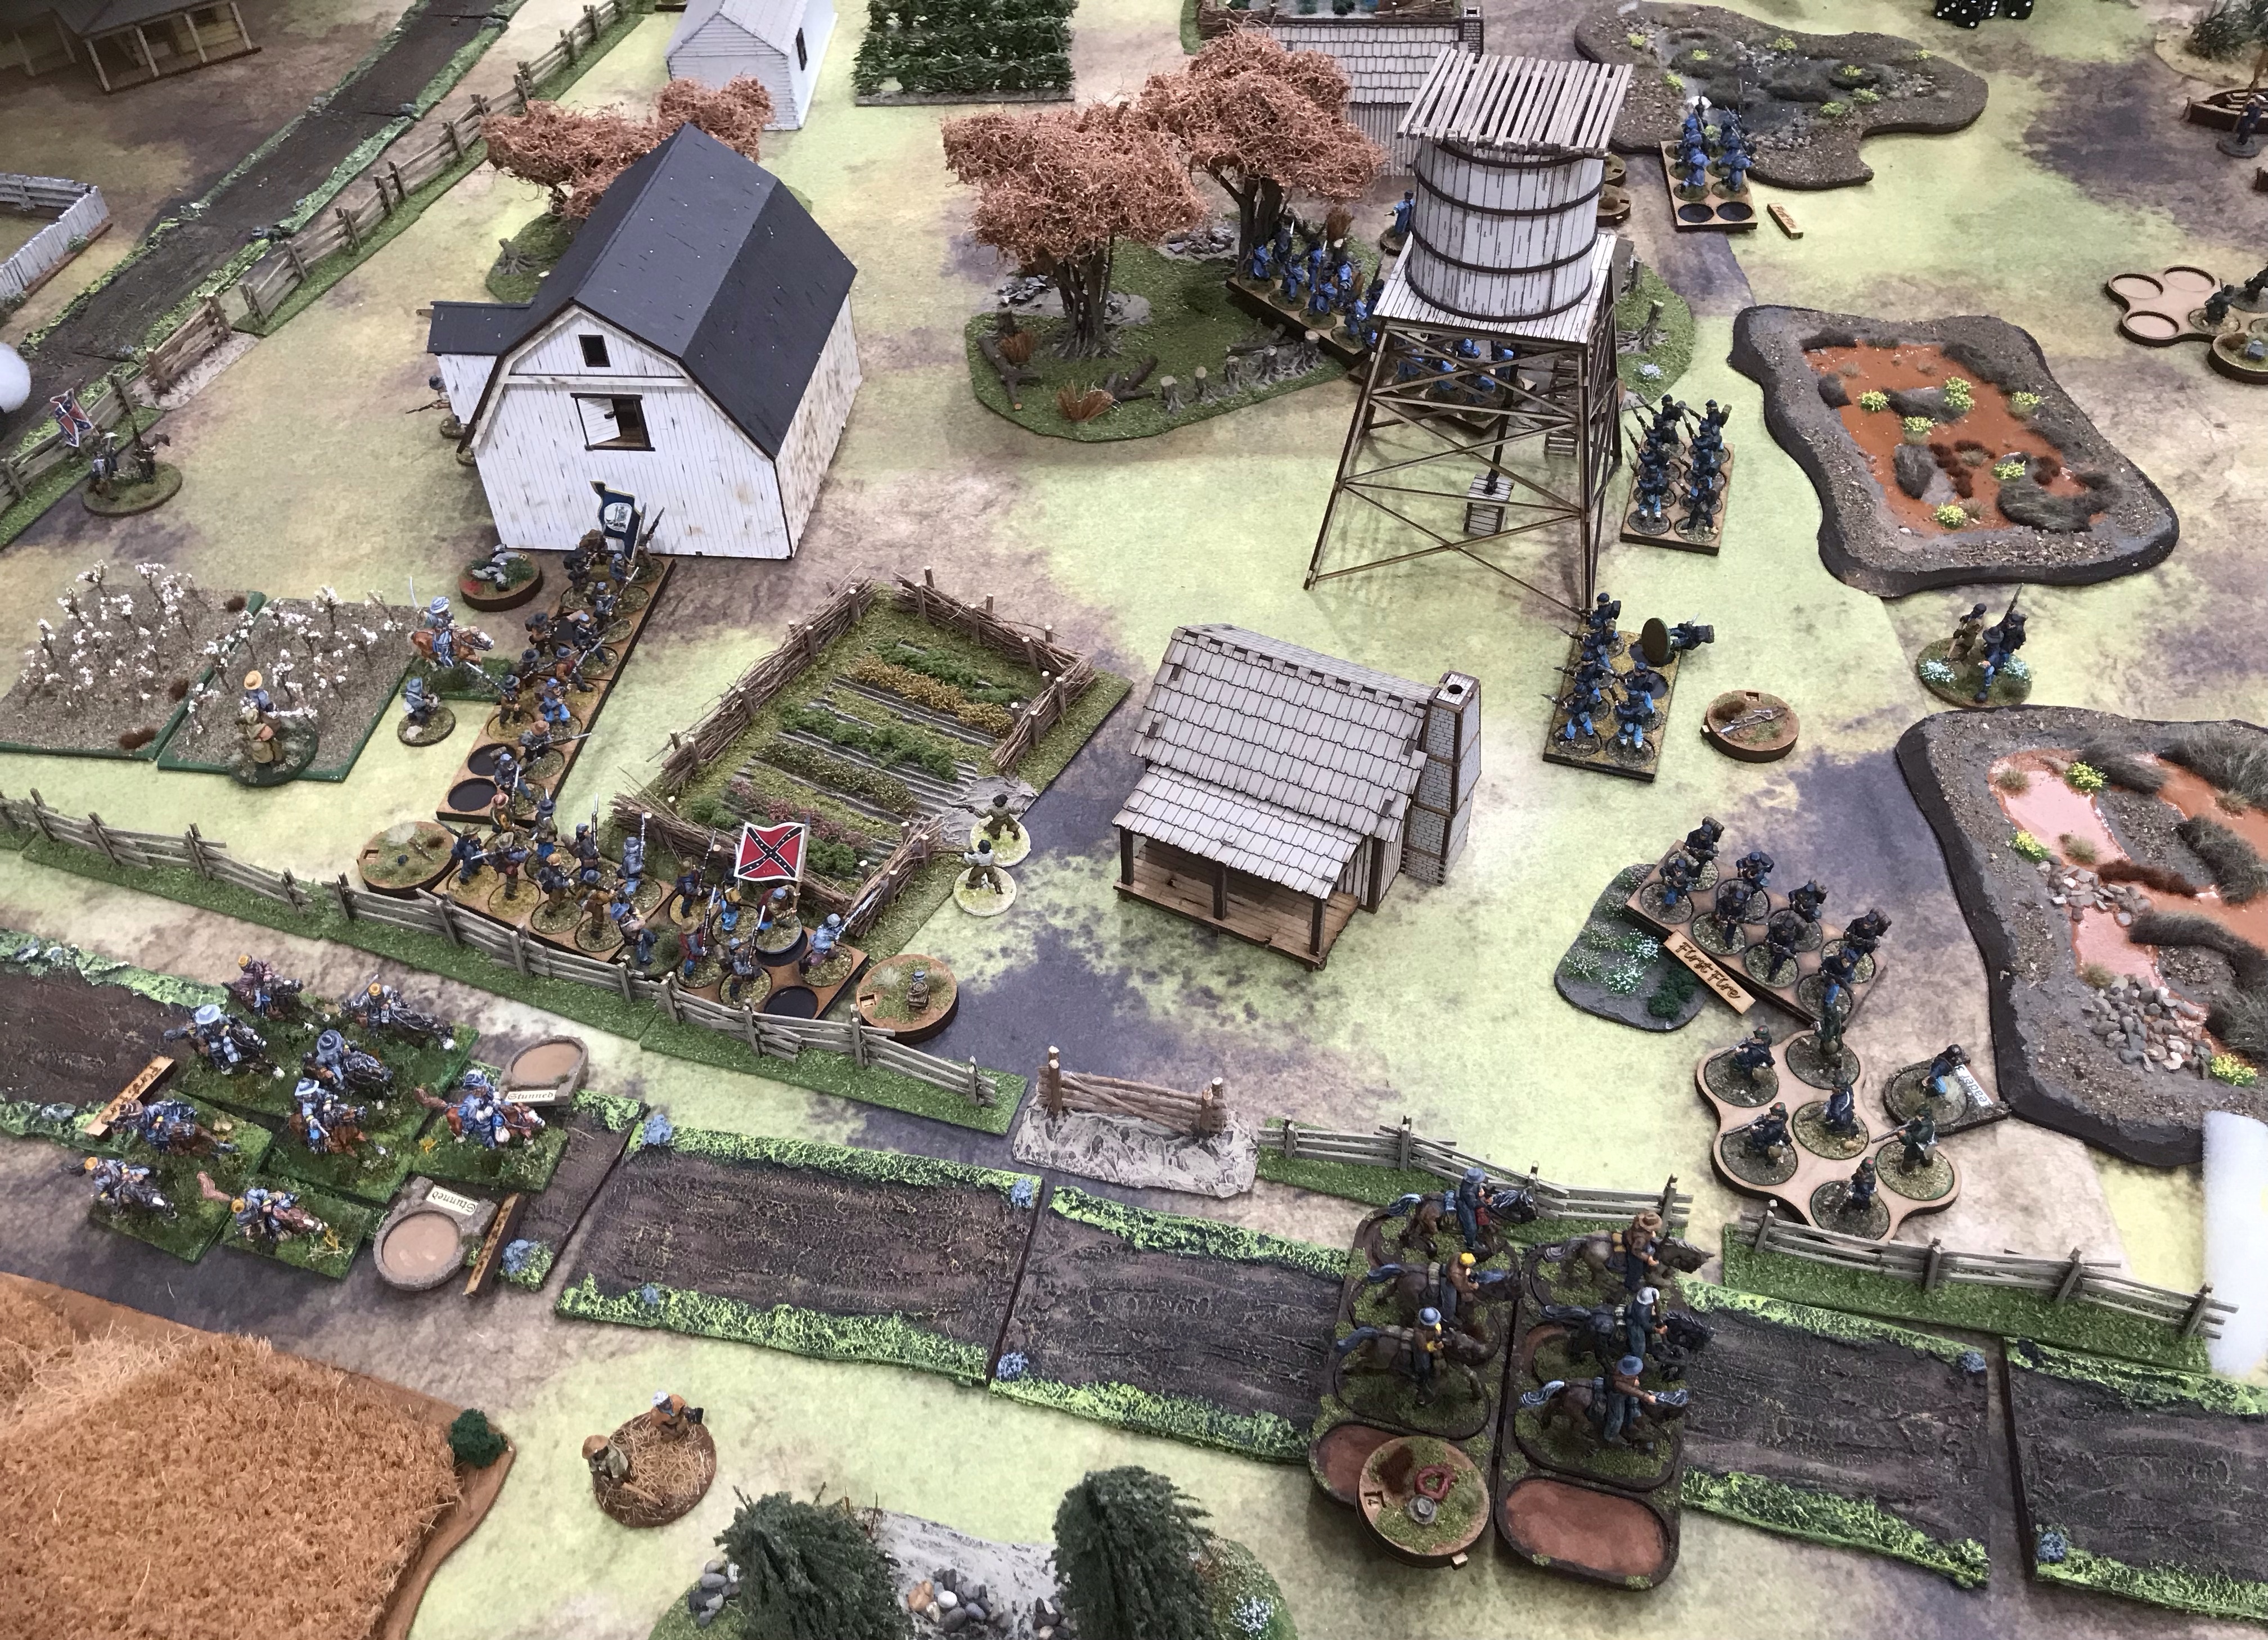
Moving onto the game we have Venetians rolling out against Ottomans from PDF lists (Ottoman and Holy League). Looking at the options taken we are running at somewhere around 1520. The 15mm models in use have been around for a while. Certainly since the 1990s. Some had to be pried off their magnetic bases which had fused onto the metal tins they were stored in. Thankfully the model metal and paintwork was still good. Several of the paper banners had suffered due to their varnish yellowing them. Some spears and pikes had also bent but that had always been a problem rather than being age related.
The Ottomans have plenty of cavalry, some good, some average. The Janissary infantry are good, their big blocks of fanatic infantry are good enough but hard to move around because they count as tribal and need good cards to maneuver (we were using tokens not cards here but the maths is the same). The Ottoman archers are rubbish but compulsory. The Venetians have good cavalry but not much of it, three strong but slow units of pike keil and some useful skirmishers. There will almost always be a big body of water down 1 flank when fighting with Venetians. Renatio et Gloriam terrain pieces can be relatively large(24-30cm each side). Note the huge marsh and wood. The other wood and village are a little smaller (16-32cm). Any serious player will want to craft their own terrain pieces and take them to games to ensure that they can get the maximum benefit or hindrance out of them. Any Venetian that does not carry around a proxy water edge is fighting with 1 hand behind their back. Any such features might not end up on the final table but you would want to keep your options open.
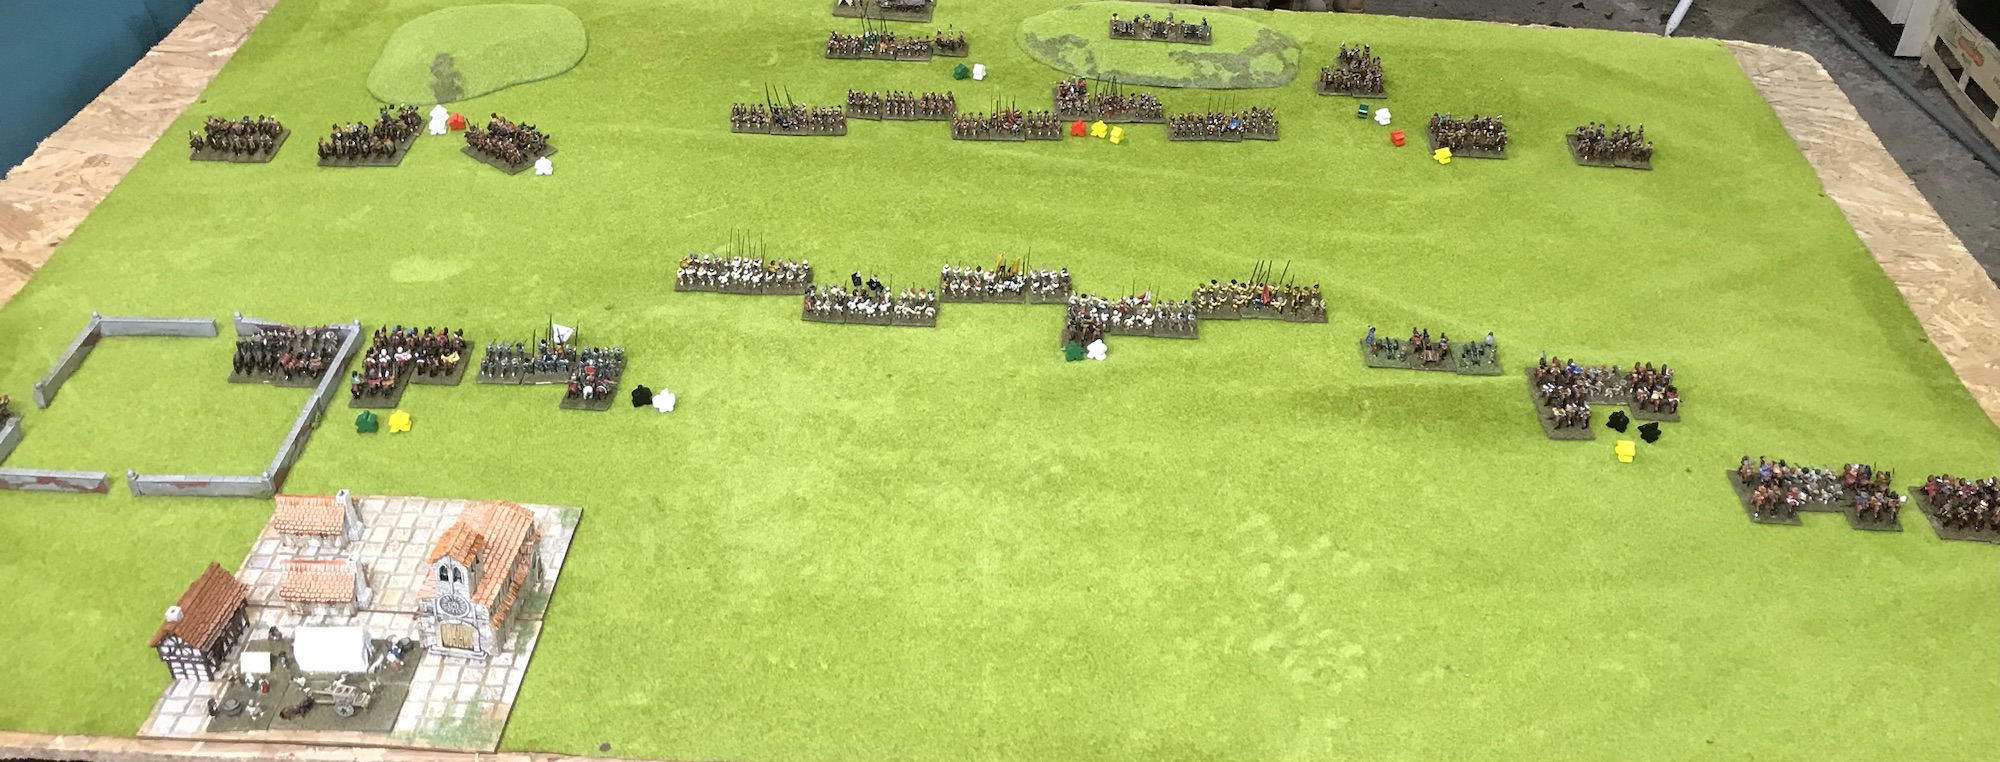
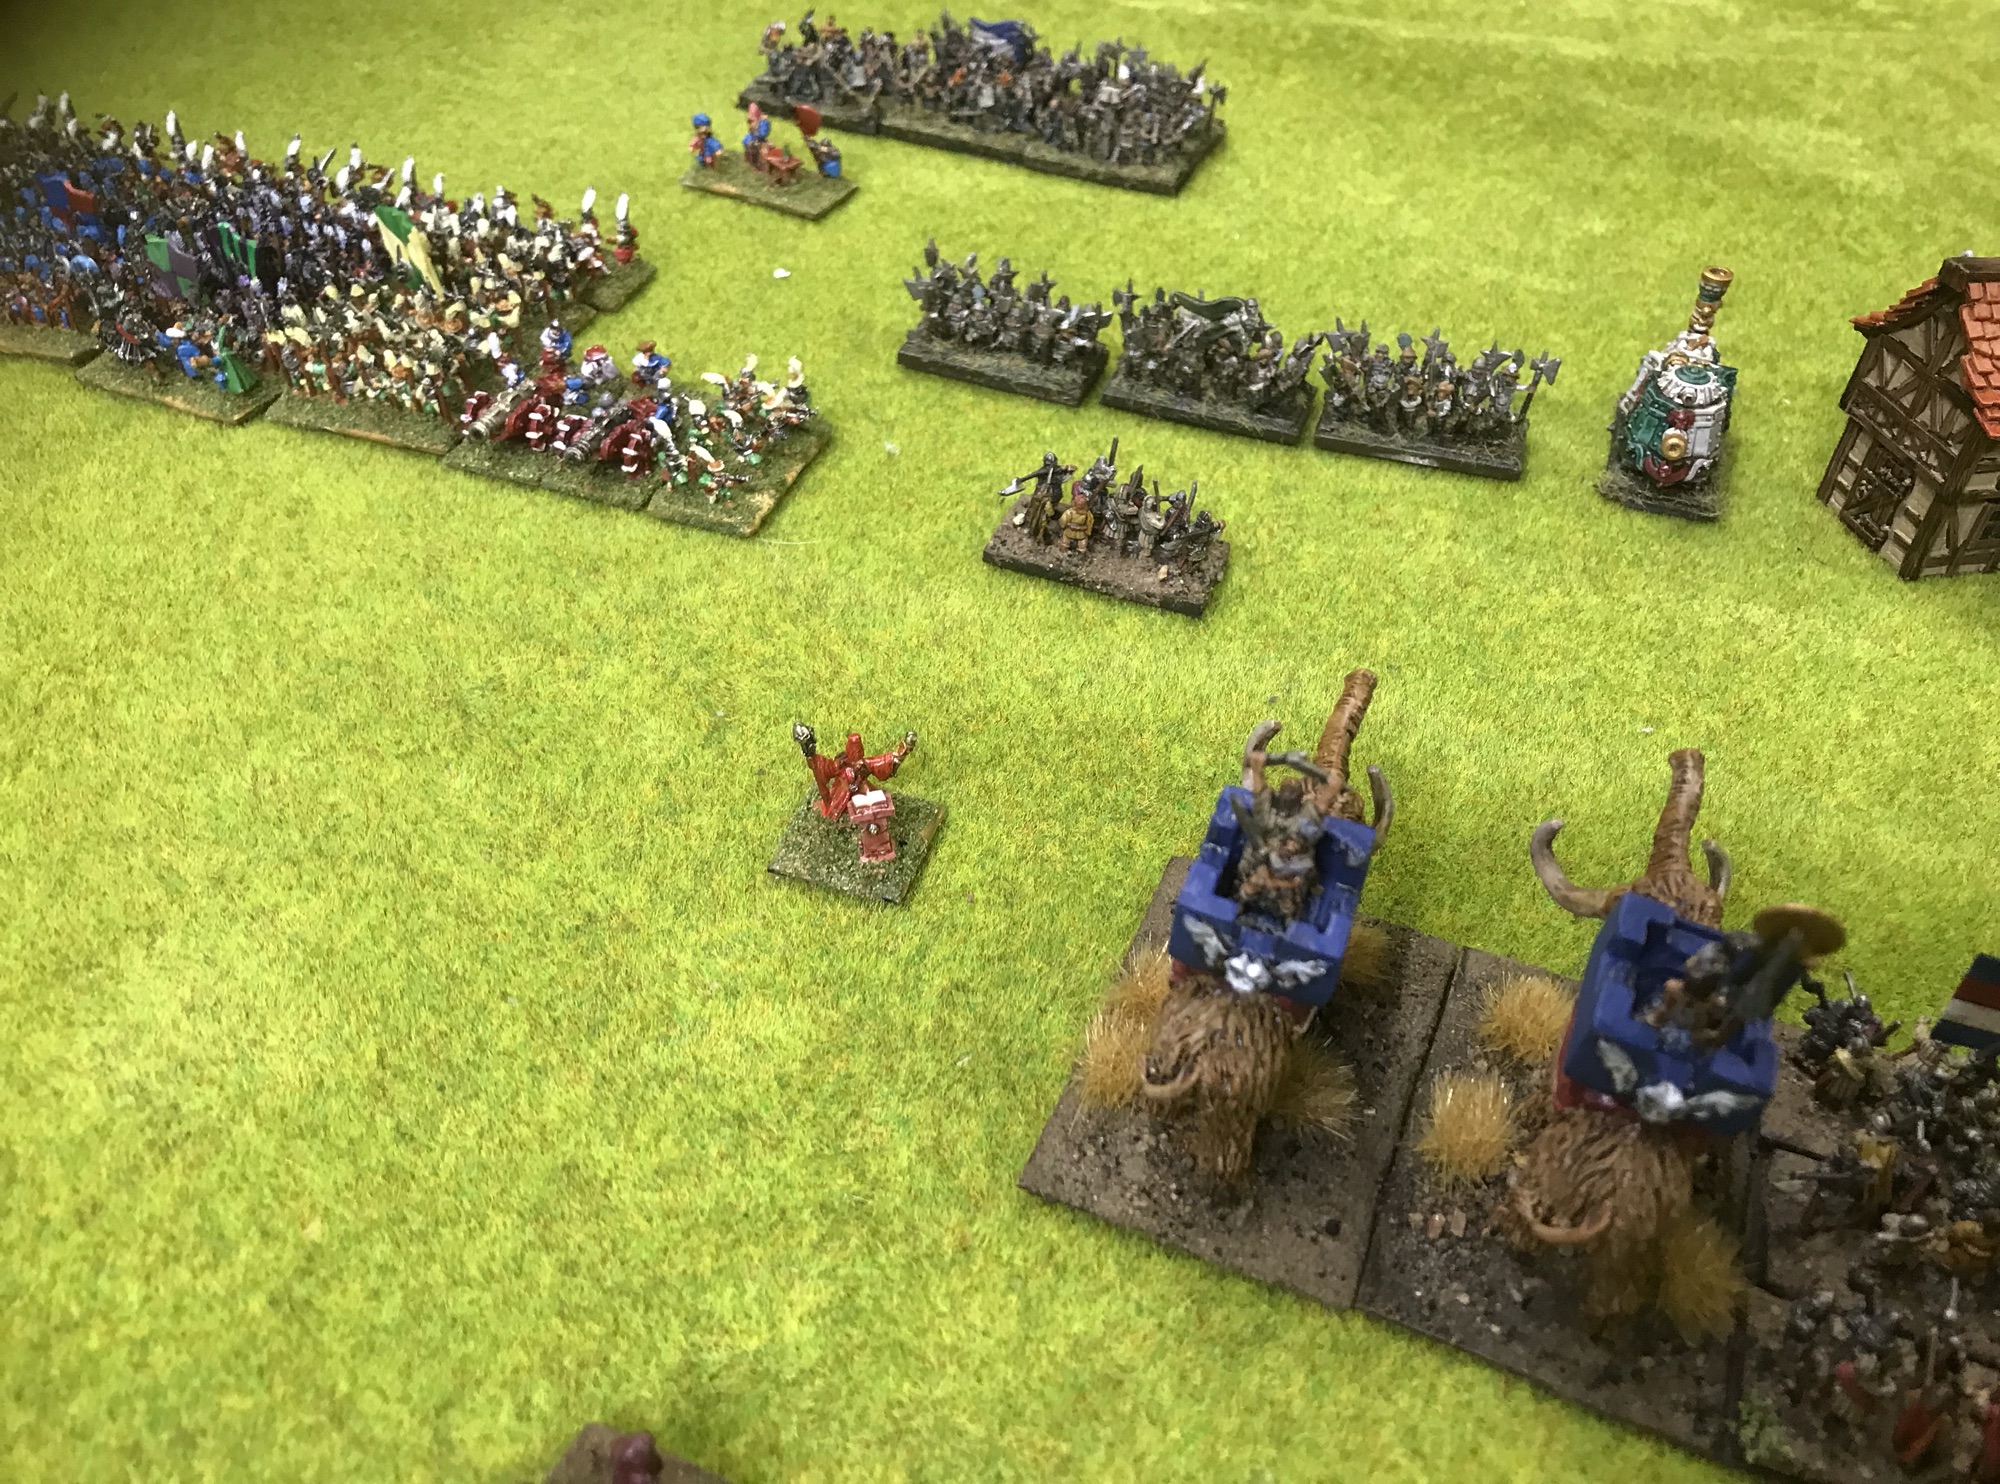
The Ottoman cavalry and Venetian infantry move up. Most of the Ottoman infantry is happy where it is. Mounted units are 4 bases strong. 3 hits kills a base and a loss of half the starting bases plus 1 hit destroys a unit. This means that mounted troops run off quickly but their opponents pursue for 1 move so mounted lines are going to break up. In the centre a Venetian stradiot unit is about to destroy the Ottoman guns but at such a cost that the nearby Ottoman bow break it in turn.
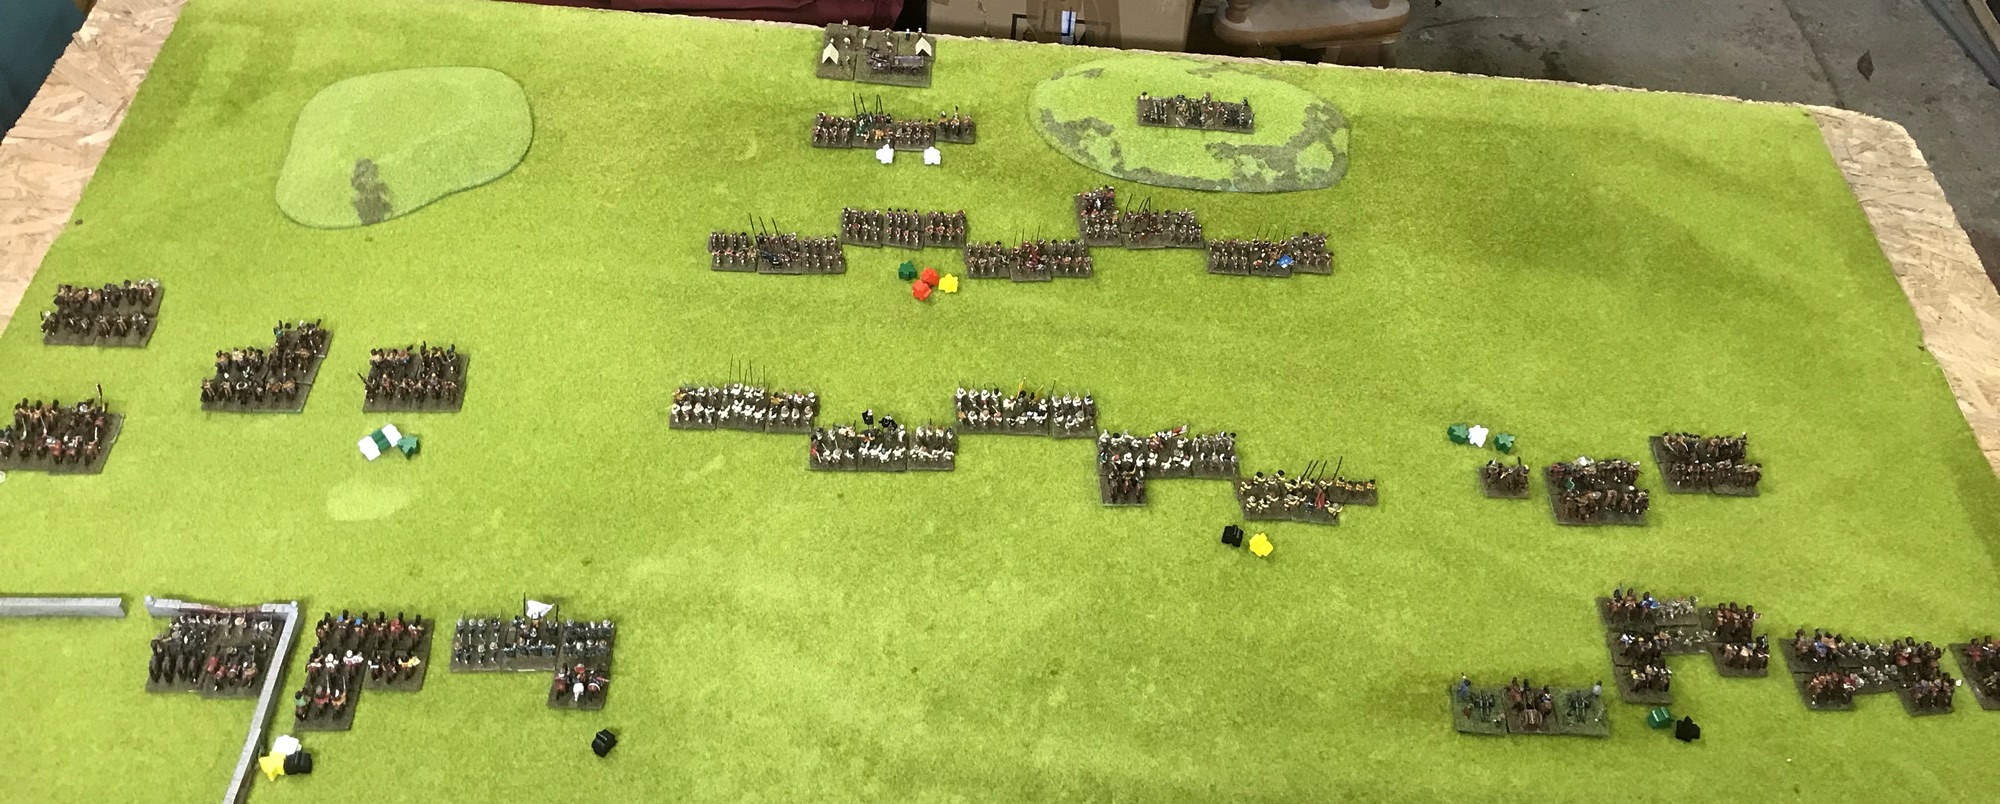
The game at crisis point. In the centre 2 big Venetian pike keils are almost into melee.
The other flank sees Ottoman cavalry all over the shop but a notable lack of anything Venetian. The game hinges on the Ottoman infantry holding on until their cavalry sorts itself out and swings onto the Venetian flank and rear.
Those cavalry at the Venetian back are Ottoman (not a good sign). 2 of the 3 Venetian pike blocks have also broken (1 is just about to be removed in rout). Pike are not good in woods but the Janissaries and Ottoman fanatics can cope. The other defeated keil suffered from being attacked on the sides and rear. The 3rd keil messed about rather than getting in on the action. A loss of half an army’s units is a defeat and the Venetians are off back into the box. Model of the game award goes to the Ottoman overall commander. Being rated professional he could dole out any and all of his order tokens to the other Ottoman generals. This ensured that every command had a decent chance of being able to do something useful. The Venetian commander could only give 1 command token to each of his own generals and had to put up with leading some troops himself. This led to at least one occasion of a Venetian command being very restricted in what it could do.
This game played quite differently to the Pike and Shot game. More due to different special rules to get the hang of rather than massive misunderstandings in game play. Some effort has had to go into getting these rules to grok. They seemed harder to work out than the similarly thick Napoleonic Bataille Empire system. Familiarity with the Ancients version Mortem et Gloriam would have helped. The feeling so far is that it is worth keeping on with Renatio et Gloriam and hoping that with less lookups the game length will drop off.
Renatio et Gloriam is a newly published (2024) set of Renaissance big battle rules. Although the books boast being the fully revised 2nd edition all previous sets were PDFs and best described as playtest versions. Be warned that some of the on-line fluff describes 3 ways to play with small, medium and standard sized battles. At present only the standard, big table, 1,000 point version seems to exist. There is an extensive list of alternative Pike and Shot rules together with more general Renaissance sets at The Via Regia. Renatio et Gloriam is included; several of the alternatives are in common use, some are completely free. One omission is the unofficial Renaissance expansion for the Ancient rules Art de la Guerre, these are free but do require purchase of the base rules. Renatio et Gloriam is relatively expensive to get into, the army lists are a separate cost to the rules and the initial user base is limited at best.
An obvious buyer’s market are those with old DBR and FOGR armies that have been boxed up for years. Although roughly the same model count it is not immediately obvious if these armies will run optimally without buying any new bits. The Renatio et Gloriam list books are not free and, at present, there are very, very few army lists to be seen in the wild. Not even lists being used in specific games; data from older versions of the rules and lists being of doubtful relevance. There are some details of real games from November 2022 on the ‘Mad Lemmy’ blog. To make any sense of what is required to play you need some idea how the lists work, you cannot simply read down the lines and add up the points (fear not we’ll fix that here). Another market is from users of the ancient rules Mortem et Gloriam. Some of the mechanics are the same and the same bespoke cards and dice are in use. The Mortem et Gloriam lists are free and overlap Renatio et Gloriam in the late 15th century. It would not be a major task to punch the Morten et Gloriam stats into the Renatio et Gloriam army builder, guess any missing special rules and go for it. These would not be competition official but the calculated points would be accurate and this sort of list is always going to rely on a degree of interpretation or fudging to get the right look and feel.
Organisation follows in the style of DBR and Field of Glory Renaissance (FOGR) with element basing, lists and points. Most bases are the same as for DBR. Notable exceptions being that limbers are not required for Renatio et Gloriam and its generals should be based individually not as part of ordinary army units. DBR suffers from the lists not completely matching the rules mentality as some unit types (such as Shot) had changed quite a bit in how they work without the lists and points being updated to reflect this. FOGR is slightly more up to date but can be slow. I recall a Britcon where I had to wait some time for a lift home from a FOGR player, my Bolt Action tourney having finished. Dice were rolled, stands moved back and forth (but not by much). Nothing seemed to be happening but suddenly one side ‘broke’ and it was all over. This might reflect a prolonged firefight with some dancing in and out of range but was less than exciting to watch. All generic Renaissance rule sets suffer or benefit from a wide time and technology spread. There is some acceptable degree of variance in 2 Pike and Shot armies having it away. Throw in Indian elephants, samurai warriors, North American Indians, it all gets tricky. On the plus side the games can be used for a wide range of armies. In FOGR and DBR-land the later, better equipped armies came to be the winner’s choice as obviously better kit is better no matter how many unarmed rabble you can drag up.
For some idea about army make up ‘The Little Corporal’ sell competition size army packs for the latter part of the period. Their 10,000 point lists seem to be current 1,000 point armies. 1689 Jacobites need 246 infantry, 12 cavalry plus commanders. Their Government opposition; 192 infantry, 36 cavalry, 10 dragoons, 1 gun plus commanders. Some rough maths and mapping of these models to DBR gives 464 DBR points including 3 commanders for the Government dudes. DBR is often played at 400 or 450 points so we could guess at needing a few more models or sticking to the ‘high cost’ armies. Models are in DBR/FOG bases usually of 4 infantry or 3 cavalry. These are then grouped in formations. Most infantry are of 6 bases (24 models) and cavalry 4 (12 models). Elephants and Guns are 3 bases, the big pike blocks and Tercios 12. The bases within each formation flow around each other so there is no easy get out in using a single smaller base in place of several larger ones.
The special game dice are 6 sided but with specific icon faces. Ordinary D6 and a look up chart can be used instead; a player could get by with one of each of the 5 dice colours and re-rolling in the few cases where more than one needs to rolled at once. The dice ‘feature’ is that a unit in a better situation rolls a better die. The cards are used for unit command and to a lesser extent for deployment and scouting (the latter could be skipped). There are 8 Black, 10 White, 12 Green, 10 yellow and 6 Red cards, plus a few more (4) for optional ambushes or flank marches. This is less than a 52 card pack but there are 5 suits in use making even using multiple basic card packs tricky. The easiest get around is to use 2 packs, treat the 8 Aces as Black and divide the suits into game colours to taste. The alternative is to use tokens drawn from a bag. These will need to be coloured on one side and neutral on the other or the drawn colours will be immediately obvious to both sides. The activation trick is that some colours are better than others but the better cards trump the lower. So if you need a rubbish Green the better Yellow and Red will still do the trick. Black and White are broadly useless although the White can be upgraded to Green by Generals in some situations.
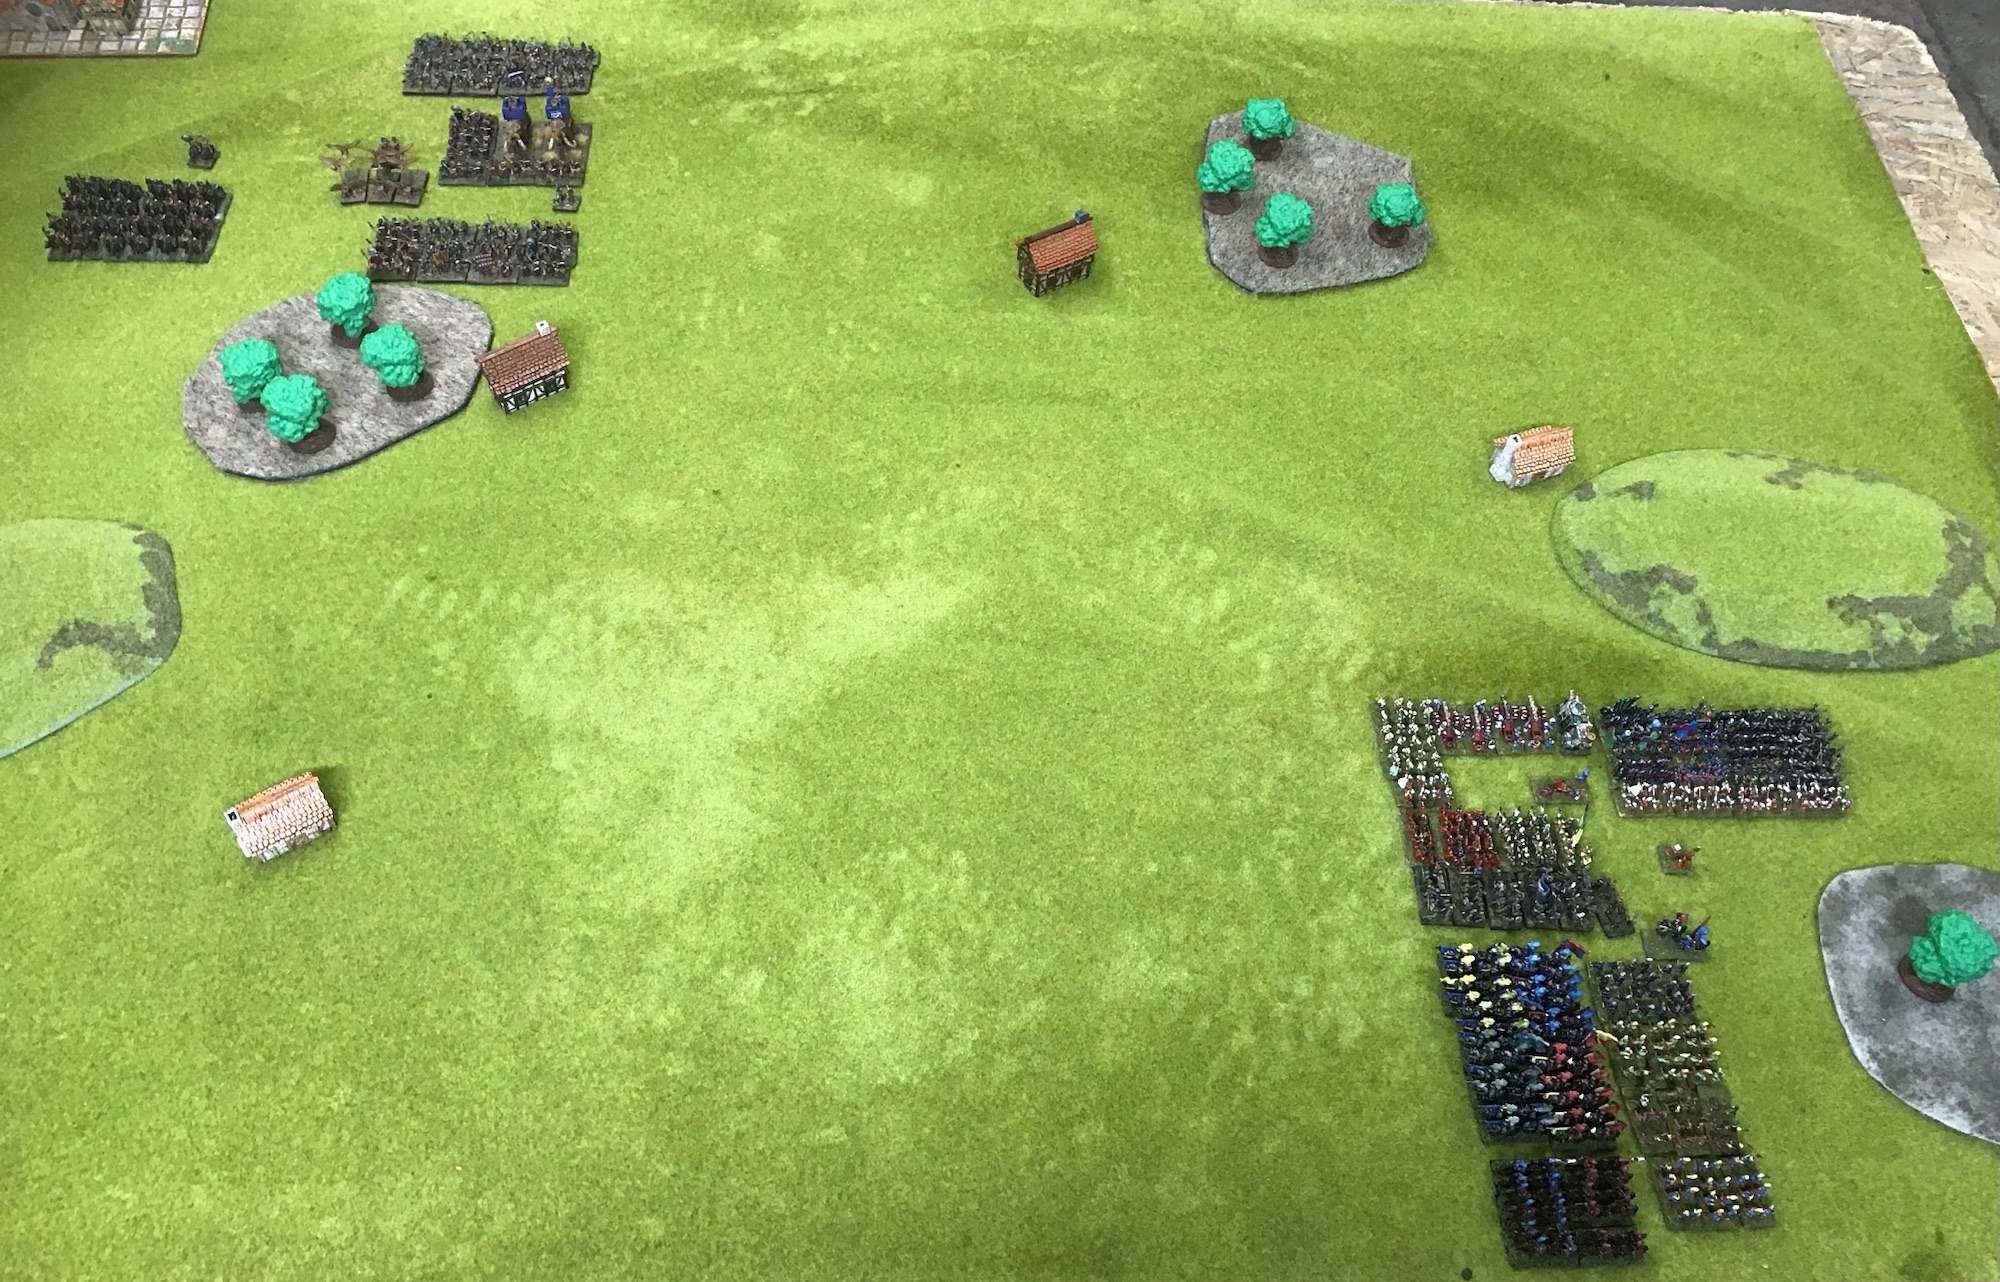
There is not much help about on the web in terms of playthroughs or hints on play beyond the basics of design philosophy. Even Mortem et Gloriam has very few playthrough videos in the wild despite having being out for several years. To try and work it all out here is a solo game between 8,200ish points of Royalist and Parliament forces. A full 1,000 point game would require another 4 or 5 units or better quality units on each side. The English Civil War is a relatively easy situation to game as the range of troop types is limited and both sides are somewhat similar. More diverse match-ups such as in Eastern Europe or off-the-wall encounters like Samurai against Indians are going to push the rules considerably more. Terrain is legally placed here but has been kept to a minimum; moving stuff about and interpreting dice rolls will be enough work.
This should not be seen as an accurate example of play but an outline of what is going on. Later moves are going to have fewer errors than earlier ones. This blog will has been updated with knowledge gained from another solo, plus a face to face game and some rules forum clarifications. Both sides have 4 commanders (the game maximum) although they could possibly get away with 3 each (infantry centre and 2 wings). Parliament has better command and draws 4 (commander), 3, 3 and 3 activation cards. The Royalists 3 (commander) 2, 2 and 2 (on reflection this may be a poor choice). These will be shown as coloured meeples placed by each general but cards would usually be hidden during games. One card is usually needed to move a unit but 2 cards can move a line of units (with the second card needing to any other than black or white). Some units get a free move (in this case the Royalist Horse a free charge) and others (none in this game) will move unless a card is played to hold them. Shooting and melee does not need a card play but melee can be influenced by card play.
Here is the game after turn 1. The Royalist baggage is safely in a village and the Parliament guns on a hill so they can shoot over their mates. No units are in charge range and most units can only move once so there is still some way to go. On a good card a unit can move twice but nothing that good came up. The orders shown are those in play for turn 2. The only fighting so far is both batteries blasting away. The Royalist galloper guns doing some hits on the Parliament Horse ahead of them and driving them back.
Turn 2 and still no one is in charge range. The Royalists keep moving up. One infantry unit takes hits and is driven back but the checkerboard line is still in place.
Turn 3 and finally some action. A unit of Royalist horse charges on the left. There is a charge combat and later regular combat. All pretty even. The Parliament horse pulls back. The Royalists are forced to pursue routs but stay away from orderly retreats. With better commands the Royalists would have the option to expand in melee which might have helped. Parliament has more orders than it can reasonably use at this time. The galloper guns put out enough hits to break the Parliament horse opposite them. The horse break, run off and are removed from the table. In retrospect Parliament could have used a yellow or better command in a previous turn to remove one of these hits before they built up.
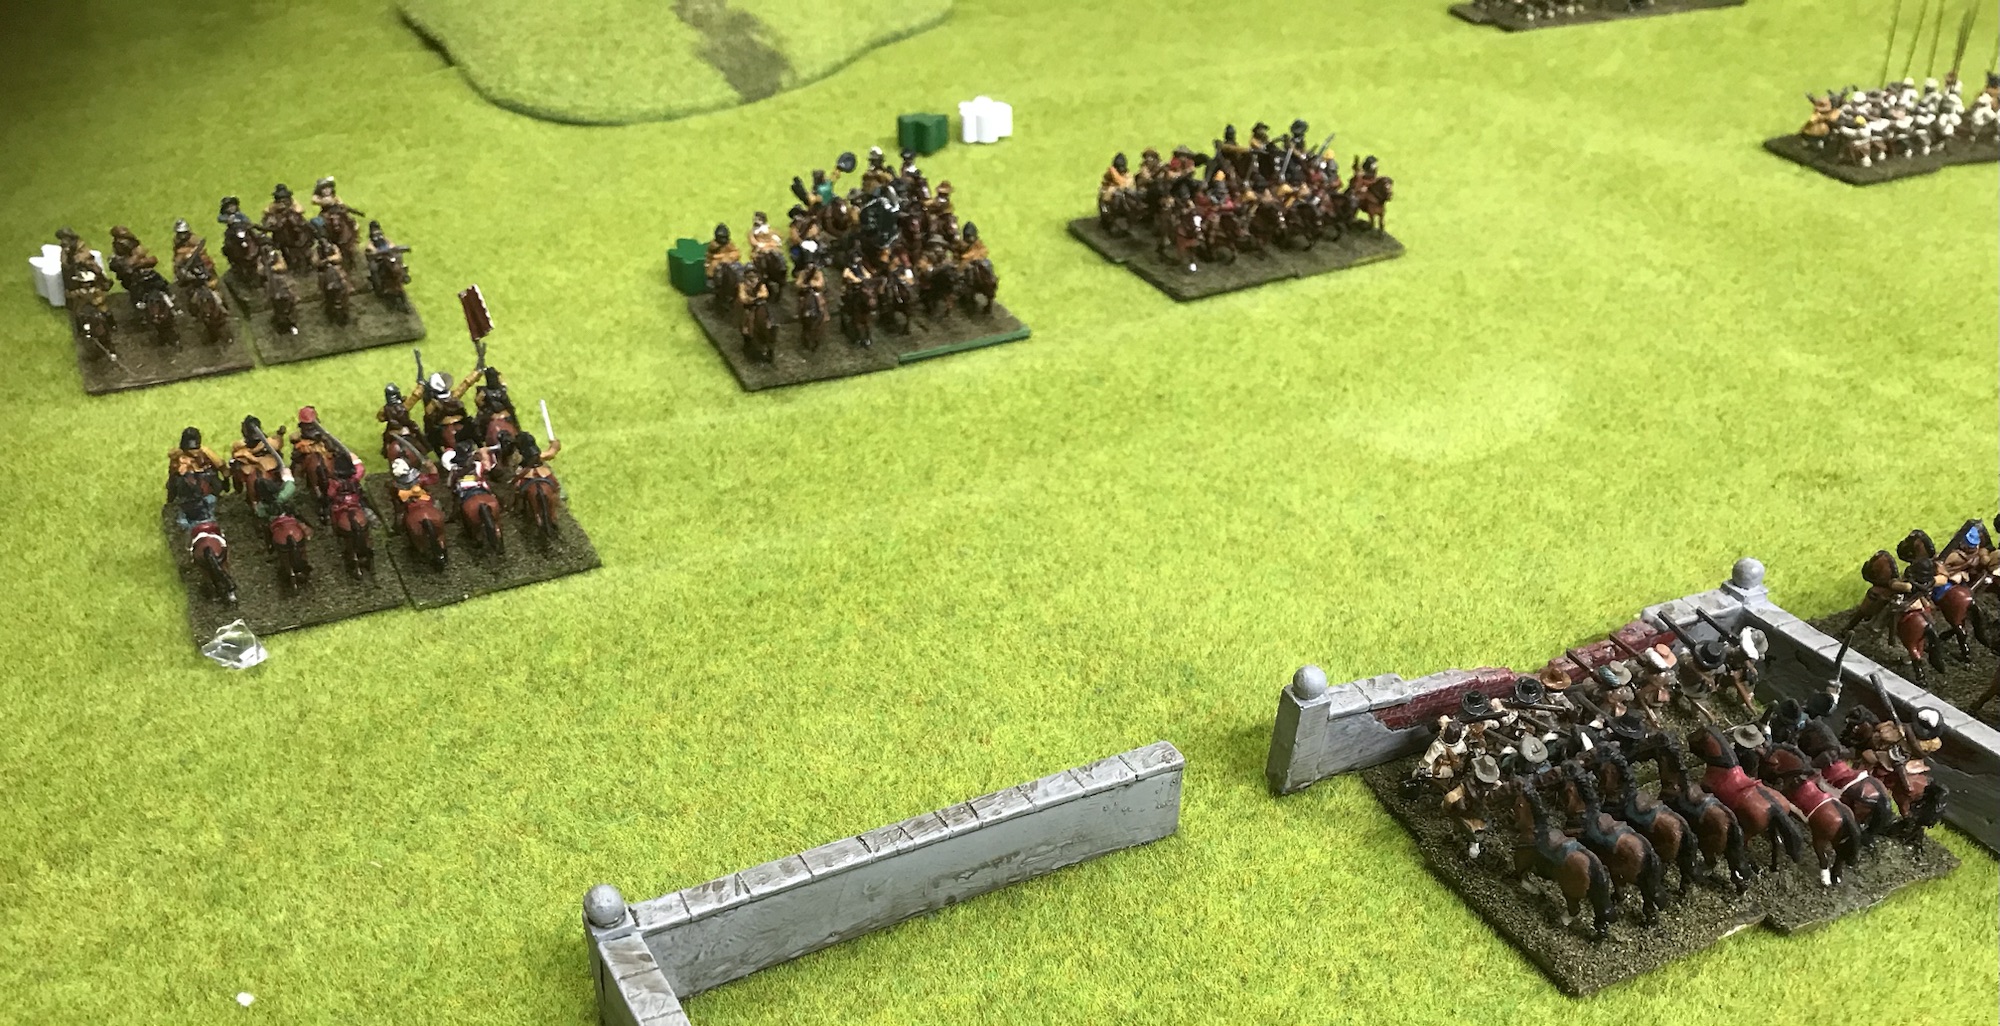
At this point we see some meaningful combats. Two Parliament cavalry (top of image) declare charges at a single Royalist horse. None of these charges are eligible as flank charges as these must start with the whole of the charger’s base behind the front face of the target. Flank charges are relatively hard to set up in Renatio et Gloriam if a rough line of defense can be kept up. The Dragoons were still too far off to shoot at the Horse coming in.
On the other flank 2 units of Horse declare a charge on the Royalist mixed Horse and Shot. A neighbouring Royalist unit could counter-charge in but it seems better to stand back. The Horse take fire from both Royalist units on the way in but not enough to stop them getting into combat.
That 6-base unit is hard to shift. It fights as well as the full Horse units. The overlapping file adds a dice but 1 value lower than the paired off combat rolls (but only in the melee combat not the initial charge phase). Both sides are still at it at the end of melee.
The end of the turn sees the lines starting to break up. The Parliament centre and right still looks good. Their left is a mess.
Both centres move up and we get some musket shooting. The Parliament left is all gone bar the General (who I forgot to roll a death test for).
Parliament Horse moves to threaten the left flank of the Royalist infantry line. The Royalist right moves up unopposed. The centre is not clear, both sides are roughly equal, stands are being lost.
The Parliament flank attack on the Royalist left does not work out. The Horse can declare a charge on the foot but another unit, the second line blue foot can intercept them. The Horse are broken and off table. Off to one side Horse units from both factions fight each other.
All but one Parliament horse unit is wiped out. The remaining one pulls back in good order. The centre has seen a lot of tit for tat casualties but with the foot units starting close to half strength they are beginning to rout.
Parliament have now lost 2 infantry and 5 cavalry units so the army breaks
The mixed Shot and Horse units seemed particularly useful here. They are more expensive in points than pure Horse but are bigger (so fight better and last longer) than Horse and shoot as well. They do lose some of the Horse special rules but move nearly as quickly. The Galloper guns were a natural compliment to them. They do not have the range of heavier batteries but could move (other guns can only wheel) and their range is still good enough for most purposes. Bad terrain would probably stuff up both unit types.
Although both sides’ deployment seems reasonable there is an artificial restraint. Close foot such as the Pike and Shot units cannot deploy within 40cm of board sides defined as open (both edges in this case). Also should they move into these sectors they will take random hits unless they end up partially in cover. This does feel like the system restricting what can be done rather than allowing actions but with potential unfortunate consequences.
Looking back at the game mechanisms losses really started to mount up. A default shooting die is Green. Each shooting stand rolls 1 dice so a Pike and Shot or artillery unit will roll 3. Each Green die has a 1/3 chance of scoring 1 hit and a 1/6 of scoring 2 hits. It is quite reasonable that a unit shooting once will destroy a base (needing 3 hits) on a target. Even the 1-step reduction in shooting on a White die will cause a hit on 1/3 of rolls. Shooting will also cause drive backs which can be negated by red or yellow command cards from a nearby General. A mistake was made in this game in that shooting should be simultaneous but was instead run alternately by unit. This resulted in some targets being driven back out of range by shooting and then ending up unable to reply. Face to face charge and melee was also often at Green or White with relatively even losses. I did miss that the chequerboard Pike and Shot units had ‘rear support’ so having a second line would have allowed at least 1 additional wound to be recovered each turn. O
The command card system is key to getting anywhere with the game. A card can generally only do one thing; charge or move (including within combat), negate drive backs or remove losses. One exception is a Red double move that keeps a distance from hostile units. Cards drawn depend on general quality and this is in turn is restricted by the rules and army lists. Moving a whole command will be tricky unless it is small and the general both reasonably talented and lucky. This is not a major issue if out of shooting and charge range but in other cases there is a strong case for keeping some good cards back for reacting or recovery. Card manipulation could be seen as a key factor in success. This sort of system also swings on terrain choice and list makeup. Battlefield tactics are only one other contributing factor in doing well.
Here’s hoping that not too many other rules were missed. Renatio et Gloriam is not off to eBay just yet. At least the rules got played unlike Art de la Guerre and FOGR that were read but not played or FOG-Napoleonic that never got read because of an unfortunate and almost impossible to decipher font face (they did sell on eBay).
A look at 2 simple chariot racing rules that do not use a grid. Both are in the Ben Hur style with options for offensive use of the whip and deliberate crashing. Although loosely based on the Roman style of chariots both allow variants so can be used for just about anything that races around a track.
Faustus Furius is from Ganesha games and follows their usual hook of rolling 1 to 3 dice and counting success or failures. Here in the first lap 2 good dice are rolled with a success on 3+ and 1 bad die needing a 4+ for success. In the 2nd or any subsequent laps 1 good and 2 bad dice are rolled. A player can choose to roll from 1 to 3 dice each move although in this game there is little incentive to roll other than 3. In other Ganesha rules choosing more dice adds more risk but here the benefits appear to outweigh any risk. Chariots move with a range stick marked for short, medium or long distances although few chariots will be able to use the long measure.
A chariot will always move medium and straight ahead unless it expends a die success to change that. Perhaps moving short or hazarding a turn. Success rolls can also be used to attack other chariots but the best choice is often to spend them to move further down the track. Failed rolls are just lost success opportunities except that 3 fails will put an obstacle exactly medium ahead of the chariot. There will only be a serious problem of a chariot rolls 3 failures on 1 turn and no successes the next, possible but not probable. Things can go downhill if a chariot is attacked successfully but any chariot making attacks is missing chances to move down the field. 3 successes gives a ‘get out of gaol free’ effect giving the owner a chance to avoid a collision or other bad thing.
In terms of gameplay the system works and chariots do race away. Bad effects can give a bonus to other chariots within long of the roller and chariots that are too close can collide. The flip side to this is that any chariot getting well ahead of the field will be hard to catch up with. It is all a nice simple system and easy to pick up but has the problem that there is not enough risk or reward in choosing 3 dice and there is no safety net if only a single die is rolled. This might be sorted by messing with the action tables and rolls needed for success at some cost in complexity.
Charioteer is from Two Hour Wargames, an outfit better known for combining a combat engine with a self-generating campaign setting making them well suited for solitaire campaigns. The base game seems to have vanished from the Two Hour Wargames stable although there are reference sheets on Boardgame Geek that could be used to reconstruct the game.
Charioteer does include a campaign system and NPC chariots within a race but only the base racing rules will be considered here.
Unlike Faustus and most other racing games there is no need for a physical track. The track element is seen as a set of stages; a minimum of 2 straights and 2 corners. Within each segment the position of the chariots along the track is not important only the position of a chariot in relation to each other chariot, like a cycle race peloton. Each turn chariots will try to overtake, attack or crash into adjacent chariots. This will effect their position in the pack but one will race off up the track or get left well behind as in Faustus. The exception in both systems being chariots that are irrevocably wrecked.
A chariot starts with a set of dice based on its characteristics and a pool of bonus dice. The base pool is of 9 dice and a chariot will usually roll 6 to move or attack (damage will pull this total down). Any number of bonus dice can also be rolled but those bonus dice are hard to get back and can only be rolled once then discarded. A roll of 1-3 is a success. Chariots will roll off when overtaking; the one with the most successes winning and overtaking the other. Attacks depend on how great is the difference in successes. If the defender has more successes on these roll offs they will be able to inflict harm on the attacker.
Each turn begins with the chariots deciding if they will try to overtake or stay in position. Staying grants a new bonus die. Random events are then rolled but usually these have no effect. They can lead to a chariot that was not in a position to attack suddenly getting a chance for that. There is also a chance of gaining another bonus die from the random events.
Although a success will allow a chariot to pass it might be better to not pass or allow a failed pass and attack the ‘losing’ chariot instead. This does not get the original winner further up the field but could reduce the target’s basic stats meaning that it rolls less dice on its actions. Without this the chariots are relatively equal and will bounce up and down the track with a hint of randomness. As with Faustus chariots can be classified as different types giving a better range in who can do what where.
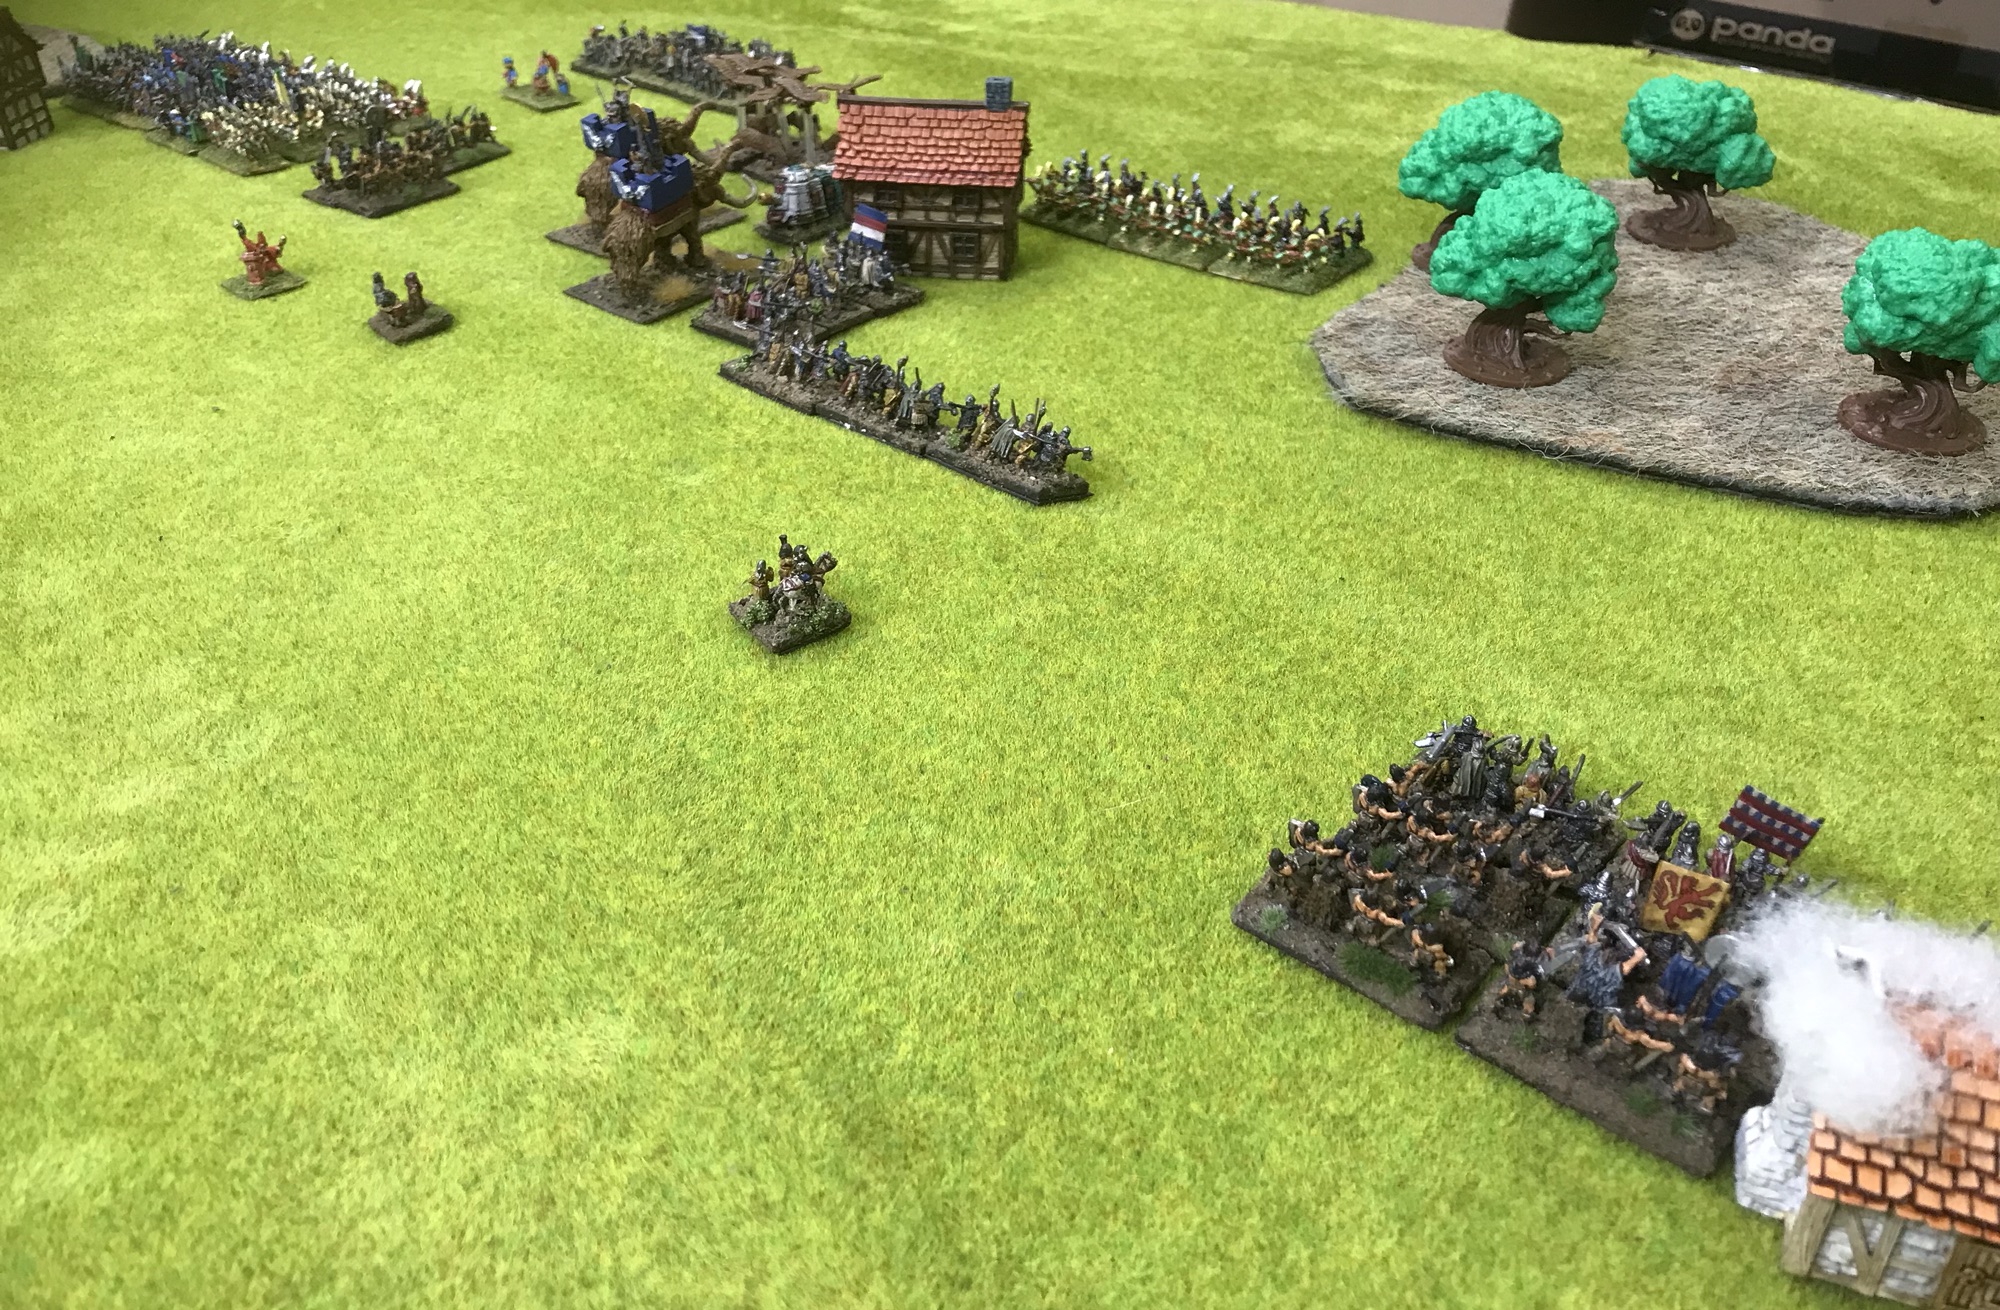
A 2,000 point game of Defending the Village from the Warmaster Revolutions rules book. Winning this scenario depends on breaking the enemy and burning buildings. Thedefender also gains victory points for controlling buildings. This has been interpreted as only applying for the control of buildings that are not burnt. Otherwise the buildings would be little more than the objective markers seen in many scenarios. Burning requires a stand rolling a 6 in the combat phase if not also in combat so it pays to swamp a building with as many stands as possible although this will not guarantee success.
The Norse have been forked from a Chaos army with the Kallistra Marauders becoming Bondsmen. The Huscarls are a mix of Pendraken Norse Gael and Highlander figures. The Mammoths are from Alternative Armies. The Mammoths and Huscarls are massive point sinks so the army has a worryingly low break point. The Valkyries are Pendraken, having the insane requirement to glue on separate wings and flight stands.
The Empire force is almost all original Games Workshop with the exception of 3 units that are 3D prints that will probably end up in the bin or reserves bench as they don’t even come close in quality.
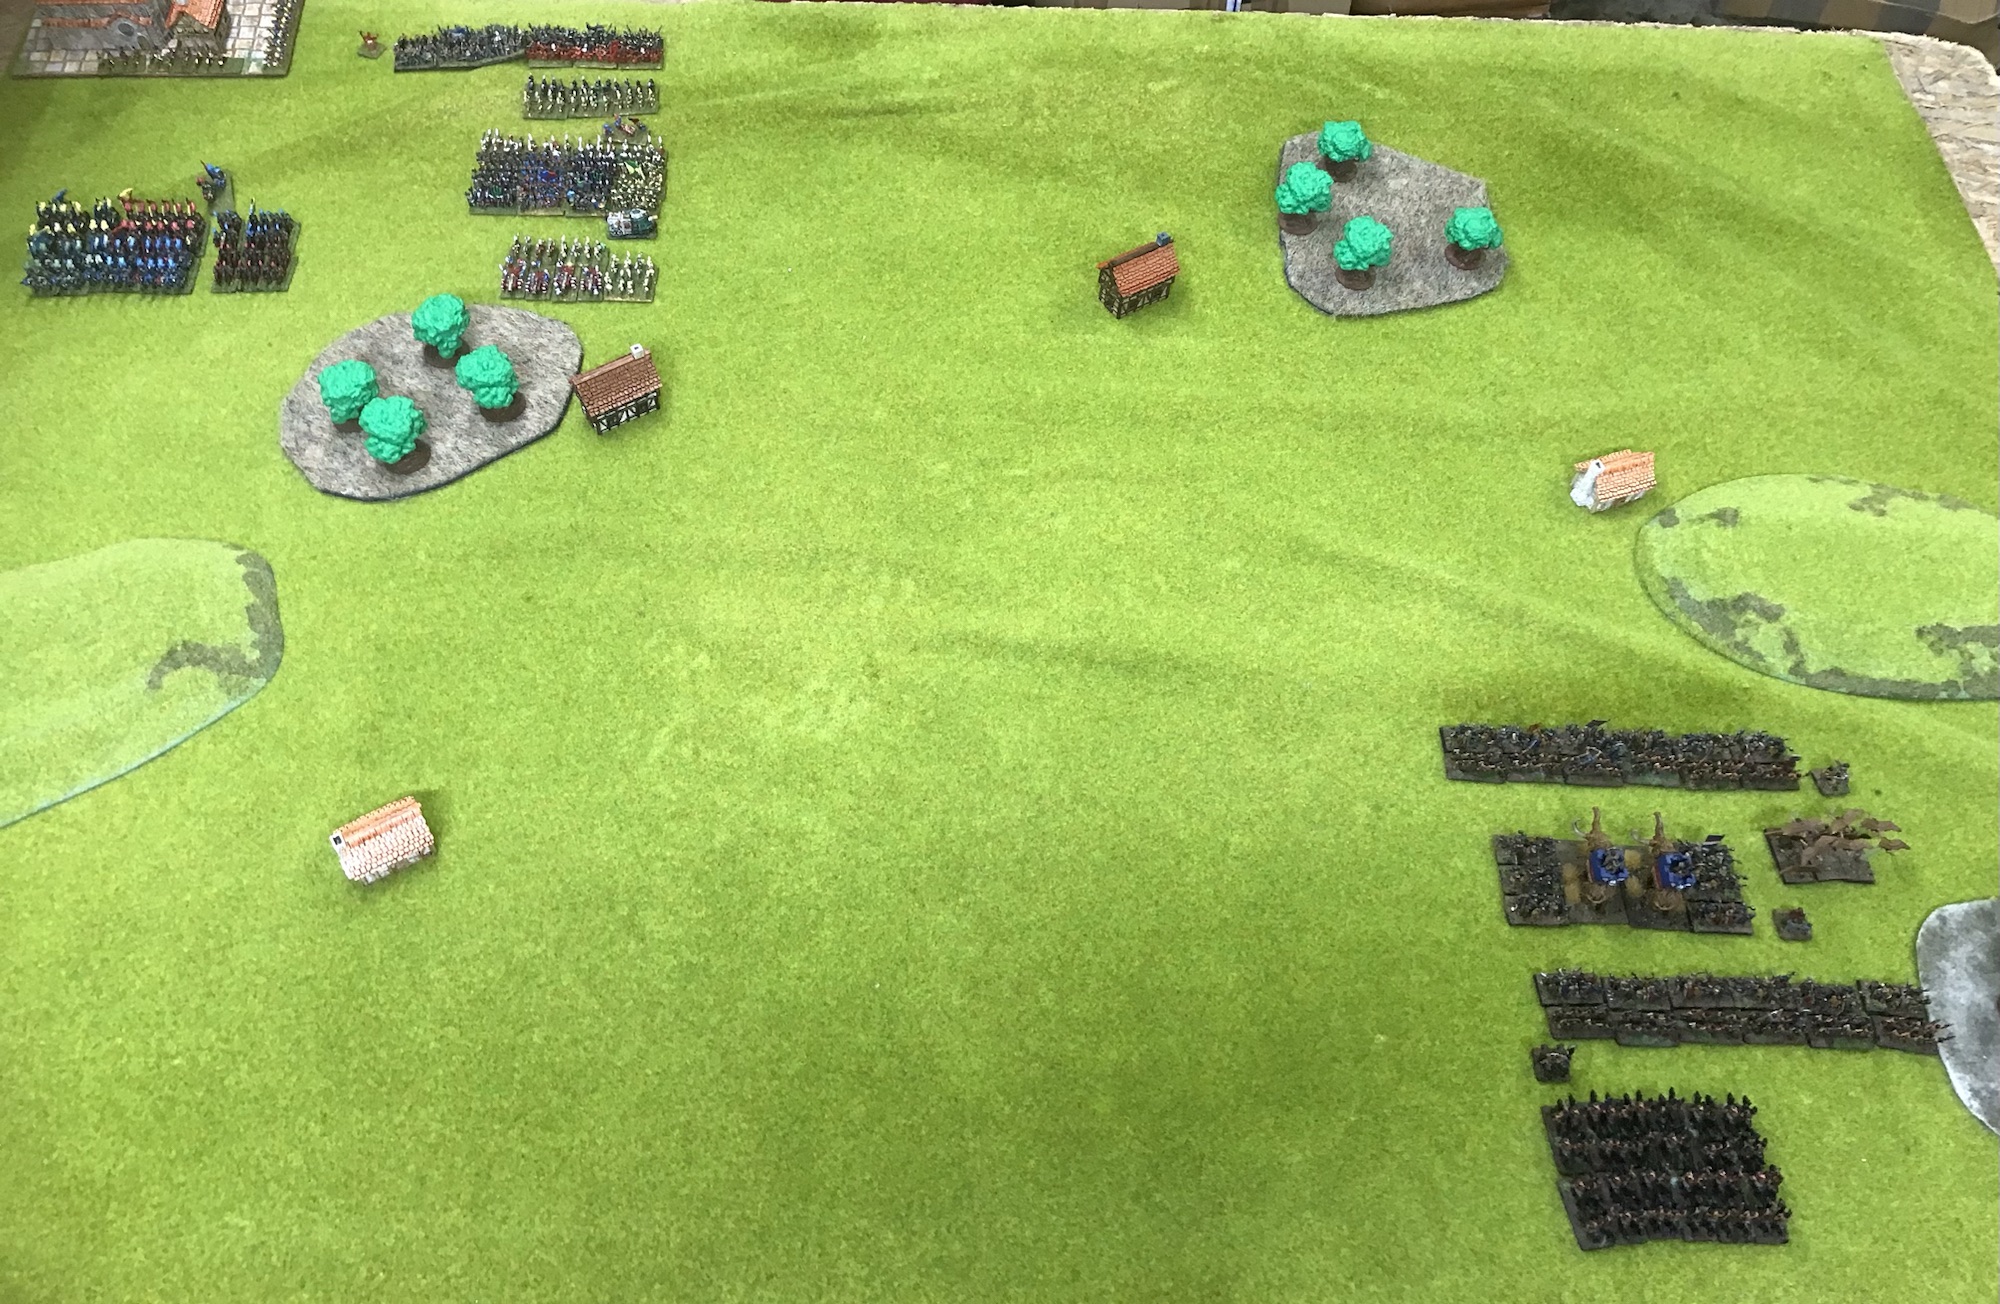
The terrain has been chosen to try and match that shown in the Warmaster rules including an almost redundant wood in the attacker’s deployment zone. The 4 individual buildings have been treated as impassible although they can be burnt down. The town at the back of the defender’s deployment area is a standard Warmaster village, it all counts as built up but the building models can be moved as needed. Naturally this town can also be burnt down.
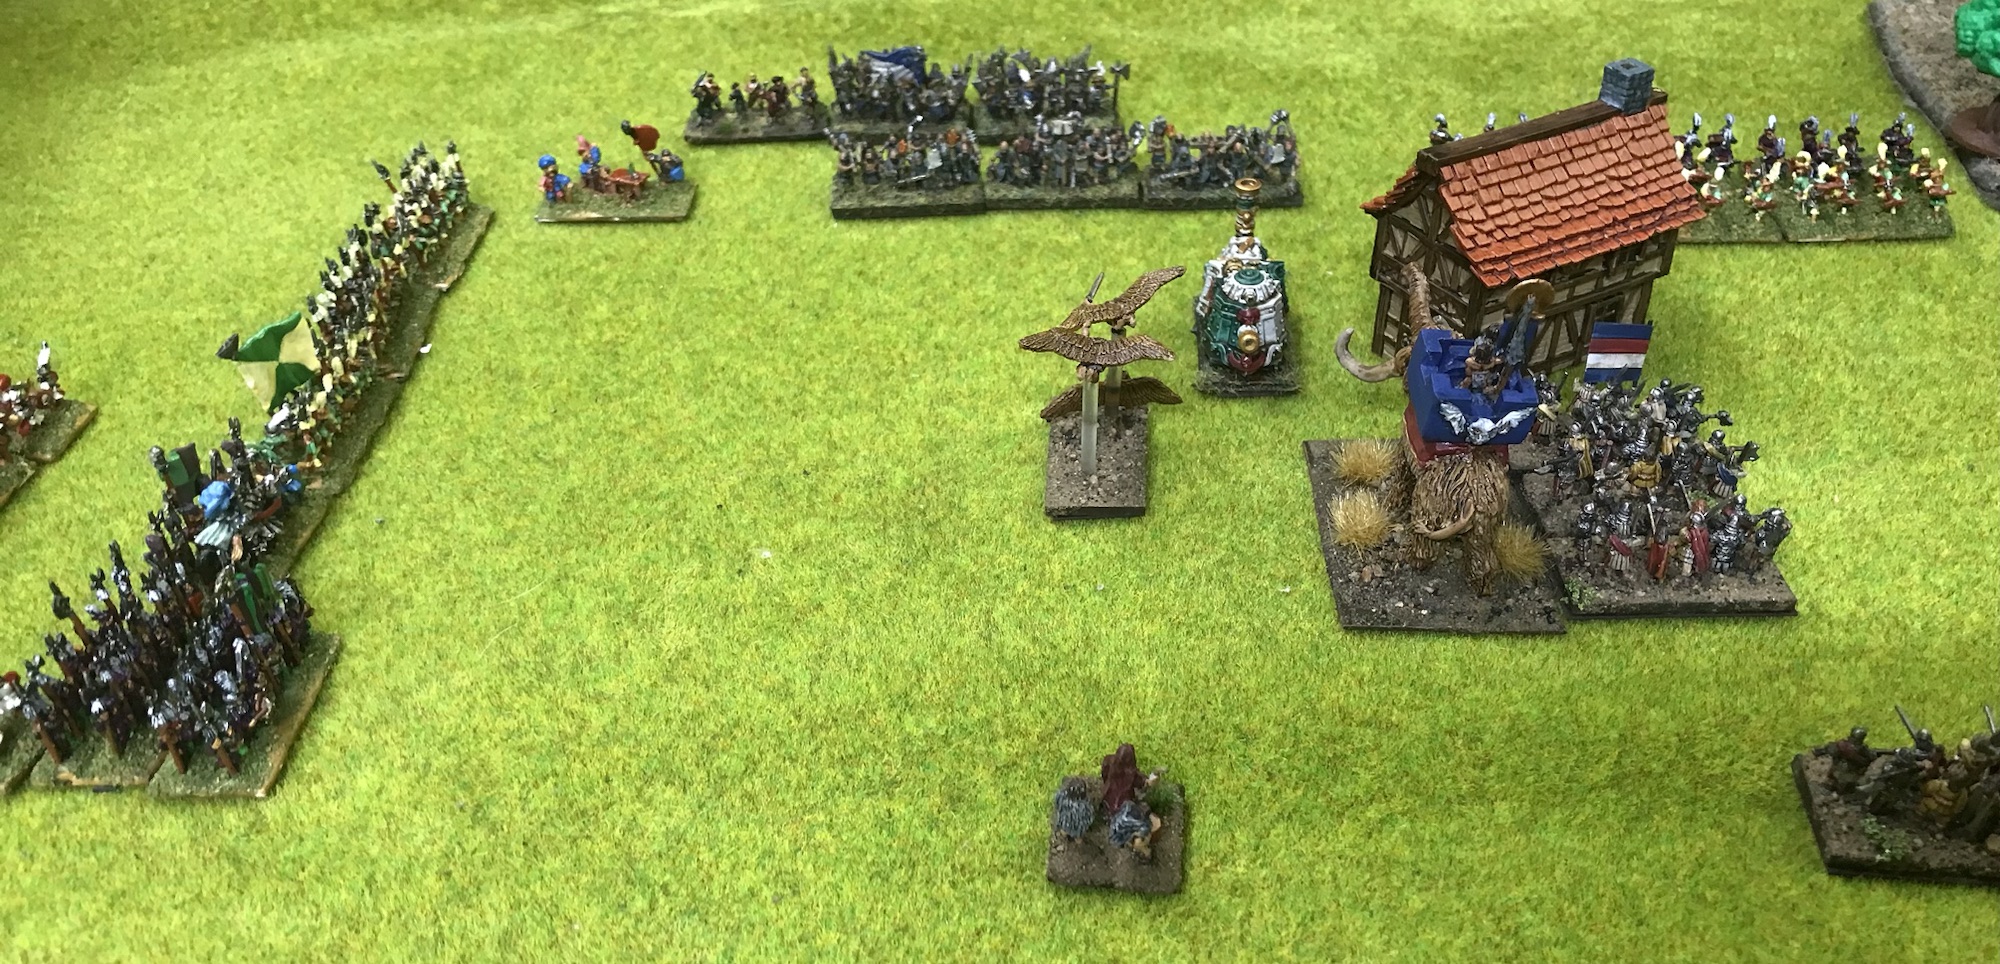
Initial command rolls for both sides are middling, a Norse block of 4 units just falls short of getting close enough to torch a building. The Empire have plenty of chaff and leave 2 crossbow units in the town throughout the game.
The Empire cannon are out. 2 units shooting together breaks up the Norse advance leaving 1 unit confused.
The Norse cavalry tries for the leftmost building but can’t quite reach. The bunch of Norse units by the building at top fail to get it to light up. Mammoth move on to sort out the centre,
To the left cavalry from both sides bounce off each other.
In the centre the Norse chew up 1 cannon unit at some cost but a single unit is far less of a drive back threat than 2.
1 building is finally lit up but no such luck in the centre.
The Steam Tank proves a formidable opponent. Fanatics take down 1 Mammoth.
The Norse concentrate on burning rather than combat as that is where the points are, 2 buildings are now smoking.
That plan could have worked out better as the Norse reach their break point and with little chance of burning the remaining buildings it’s off for an early bath.
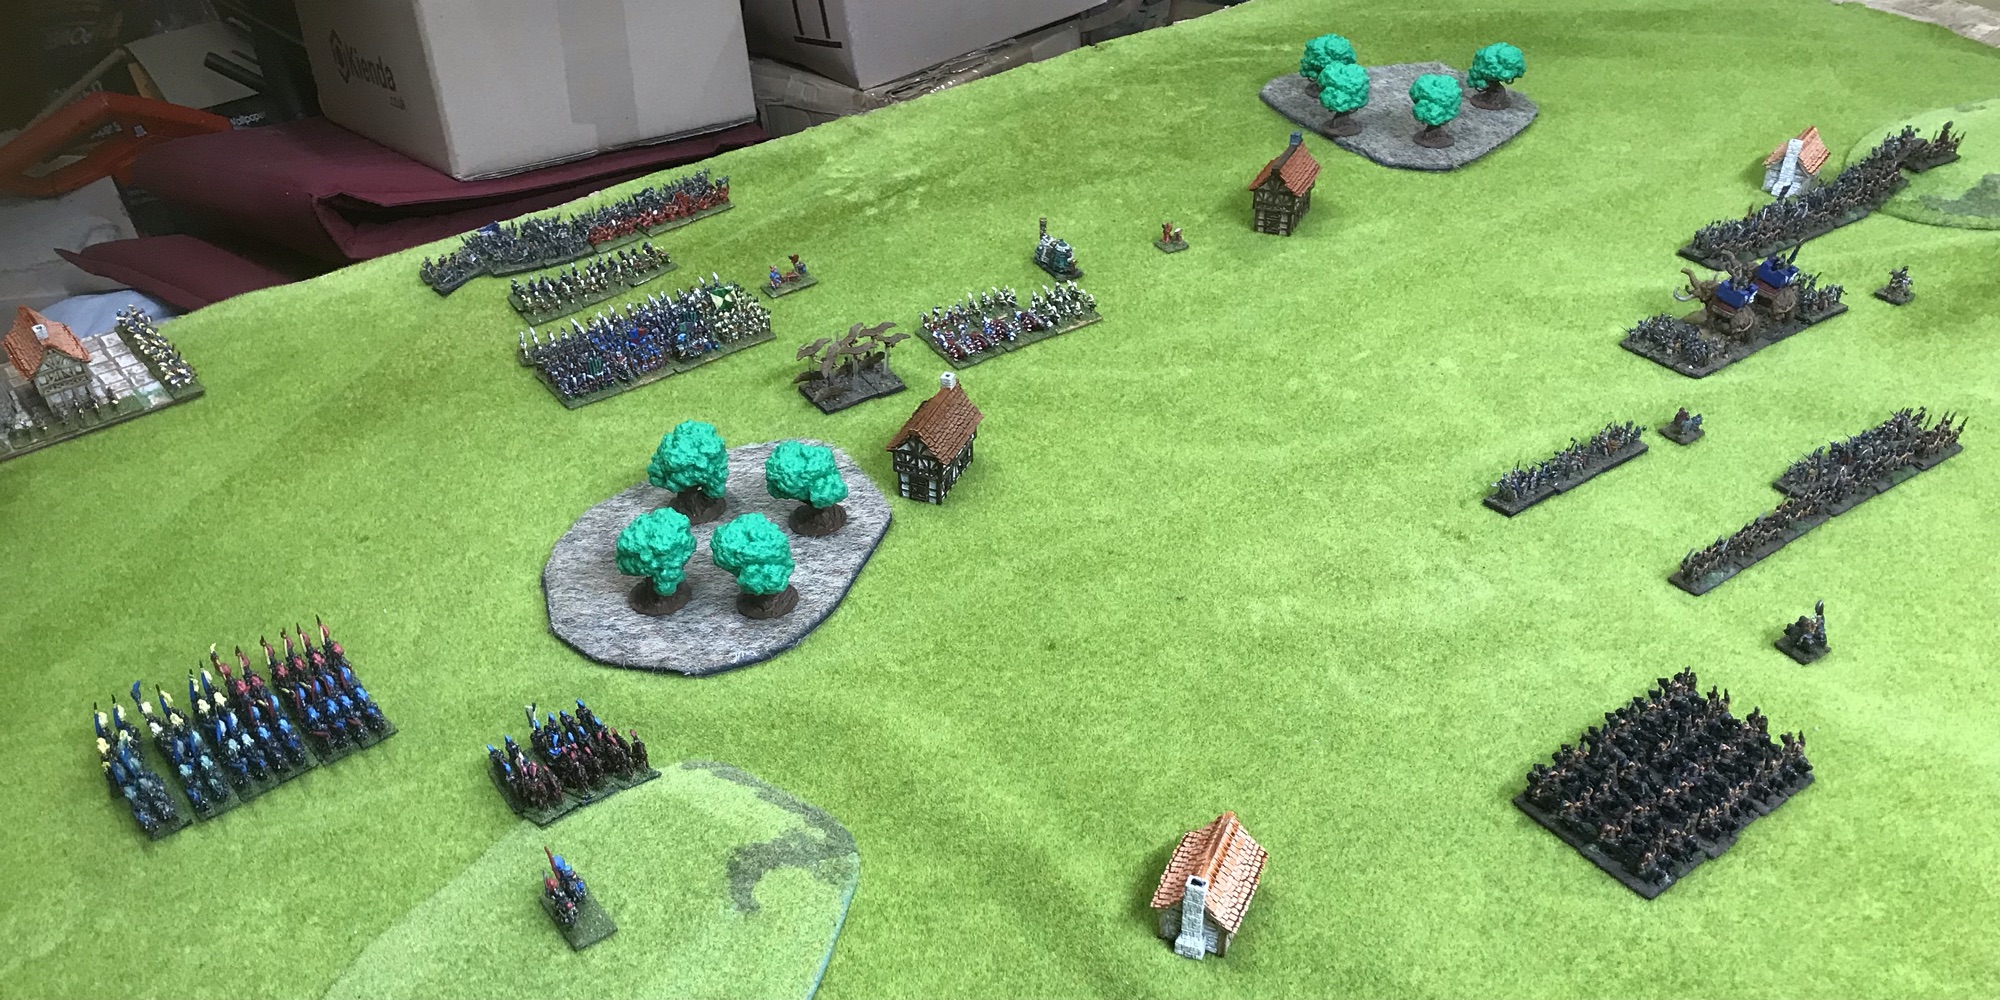
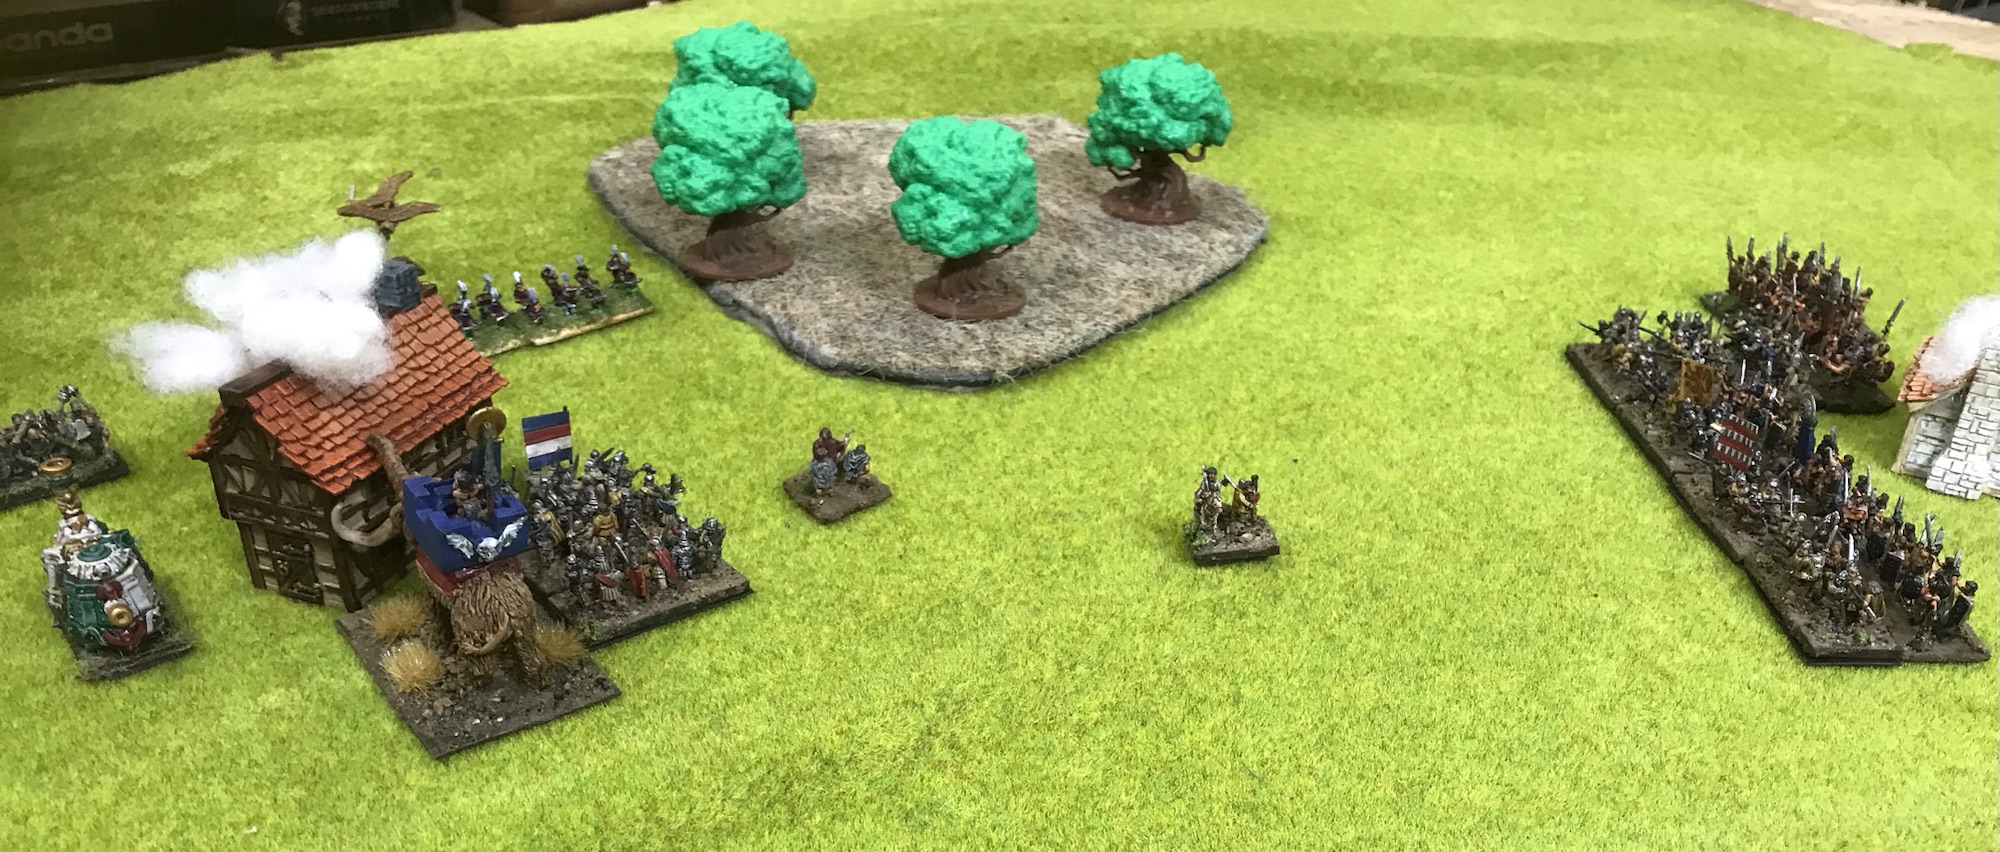
Setting up for another game but swapping attacker and defender. Both sides are in their respective corners.
Some fair results in both sides’ initial command rolls, the Empire even get the cannon units out and in range. A Norse Bondsmen unit loses a stand and was within 1 die pip of routing as it is thrown back 19cm. More good Empire news sees the closest building burning nicely.
The Norse horse line up nicely, the Empire pistoliers get around the building but fail to light it up.
The Empire pistoliers are gone but the knights chew up the Norse horse.
The Knights mob the house but still fail to light it up. Empire halberdiers move round the Norse huscarl flank but these guys are hard even when hit in the side.
Empire units surround 2 houses and fail to set fire to either.
Finally the Empire set fire to something and for good measure the break the Norse. They are, however, driven off the top right house.
Norse quality finally starts to work out. Halberd units are sliced up all over the shop and the Empire also break. Although the Norse are all over the field with both sides broken the game is a draw.
This was the first run out for the Norse and their performance was fair at best. The Mammoths are not as great as they appear. They throw out 8 attack dice (with another 2 being possible for a charging monster) but are a full base width wide. So charging into the centre of an enemy will probably bring on 9 dice (3 per stand) in reaction. This can be reduced by avoiding a centre charge but Mammoths really need at least 1 other unit to flesh out a battle line and soak up some incoming attack dice. Dropping a Mammoth will buy 3 units of Bondsmen with a potential 27 attack dice. Successive revisions of Warmaster have rationalised flyers so the Valkyries are also not as effective as they might appear. On the other hand Huscarls are solid bang for bucks units; unfortunately capped at 4 per 1,000 points.
The Empire always hold up well. The Steam Tank is on a narrow cavalry base and is hard to take down. 2 units of cannon placed side by side can put out 8 dice on a single target with no saves. They are however rubbish in hand to hand and they may not do enough damage to justify their points cost. Halberdiers are great, just don’t ask them to fight. They could not chew up the Huscarls even when attacking them in the flank.
The scenario was worth dragging out from the book but might not get replayed much as the same tactical choices will turn up every time. The attacker needs to spread out and hope for some luck to maximise burning points. It is tempting to ignore all this and concentrate on breaking the opposition, hoping for a draw and no better.
The afternoon game at Steel Lard November 18th 2023. Having lived close to the Combahee river I had a fair idea of what to expect in the morning game. In contrast your author had close to zero knowledge of Mentana or Pickett’s Charge Rules. Pretty much limited to knowing that Garribaldi is more than just a biscuit and that the wars of Italian Unification led to Italian unification. Pickett’s Charge rules were described as a variant of General Brigade, a Napoleonic set that I had owned and read but sold off as too much like hard work. No surprise that Pickett’s Charge is for the ACW but there will be some modifications here as the French have their new fangled chassepot breech loaders. Luckily I left the rules crunching to the umpire and stuck to moving models and rolling dice. Most combat is 2D6 (1 roll per battalion unit or artillery stand, score modified by circumstances), except skirmisher fire with 1D6 per stand (needing 5s, close range, or 6s, circumstances modify the number of dice rolled). High rolls are good. The nature of maths and 2D6 vs 1D6 makes volley fire somewhat less predictable than skirmisher shooting.
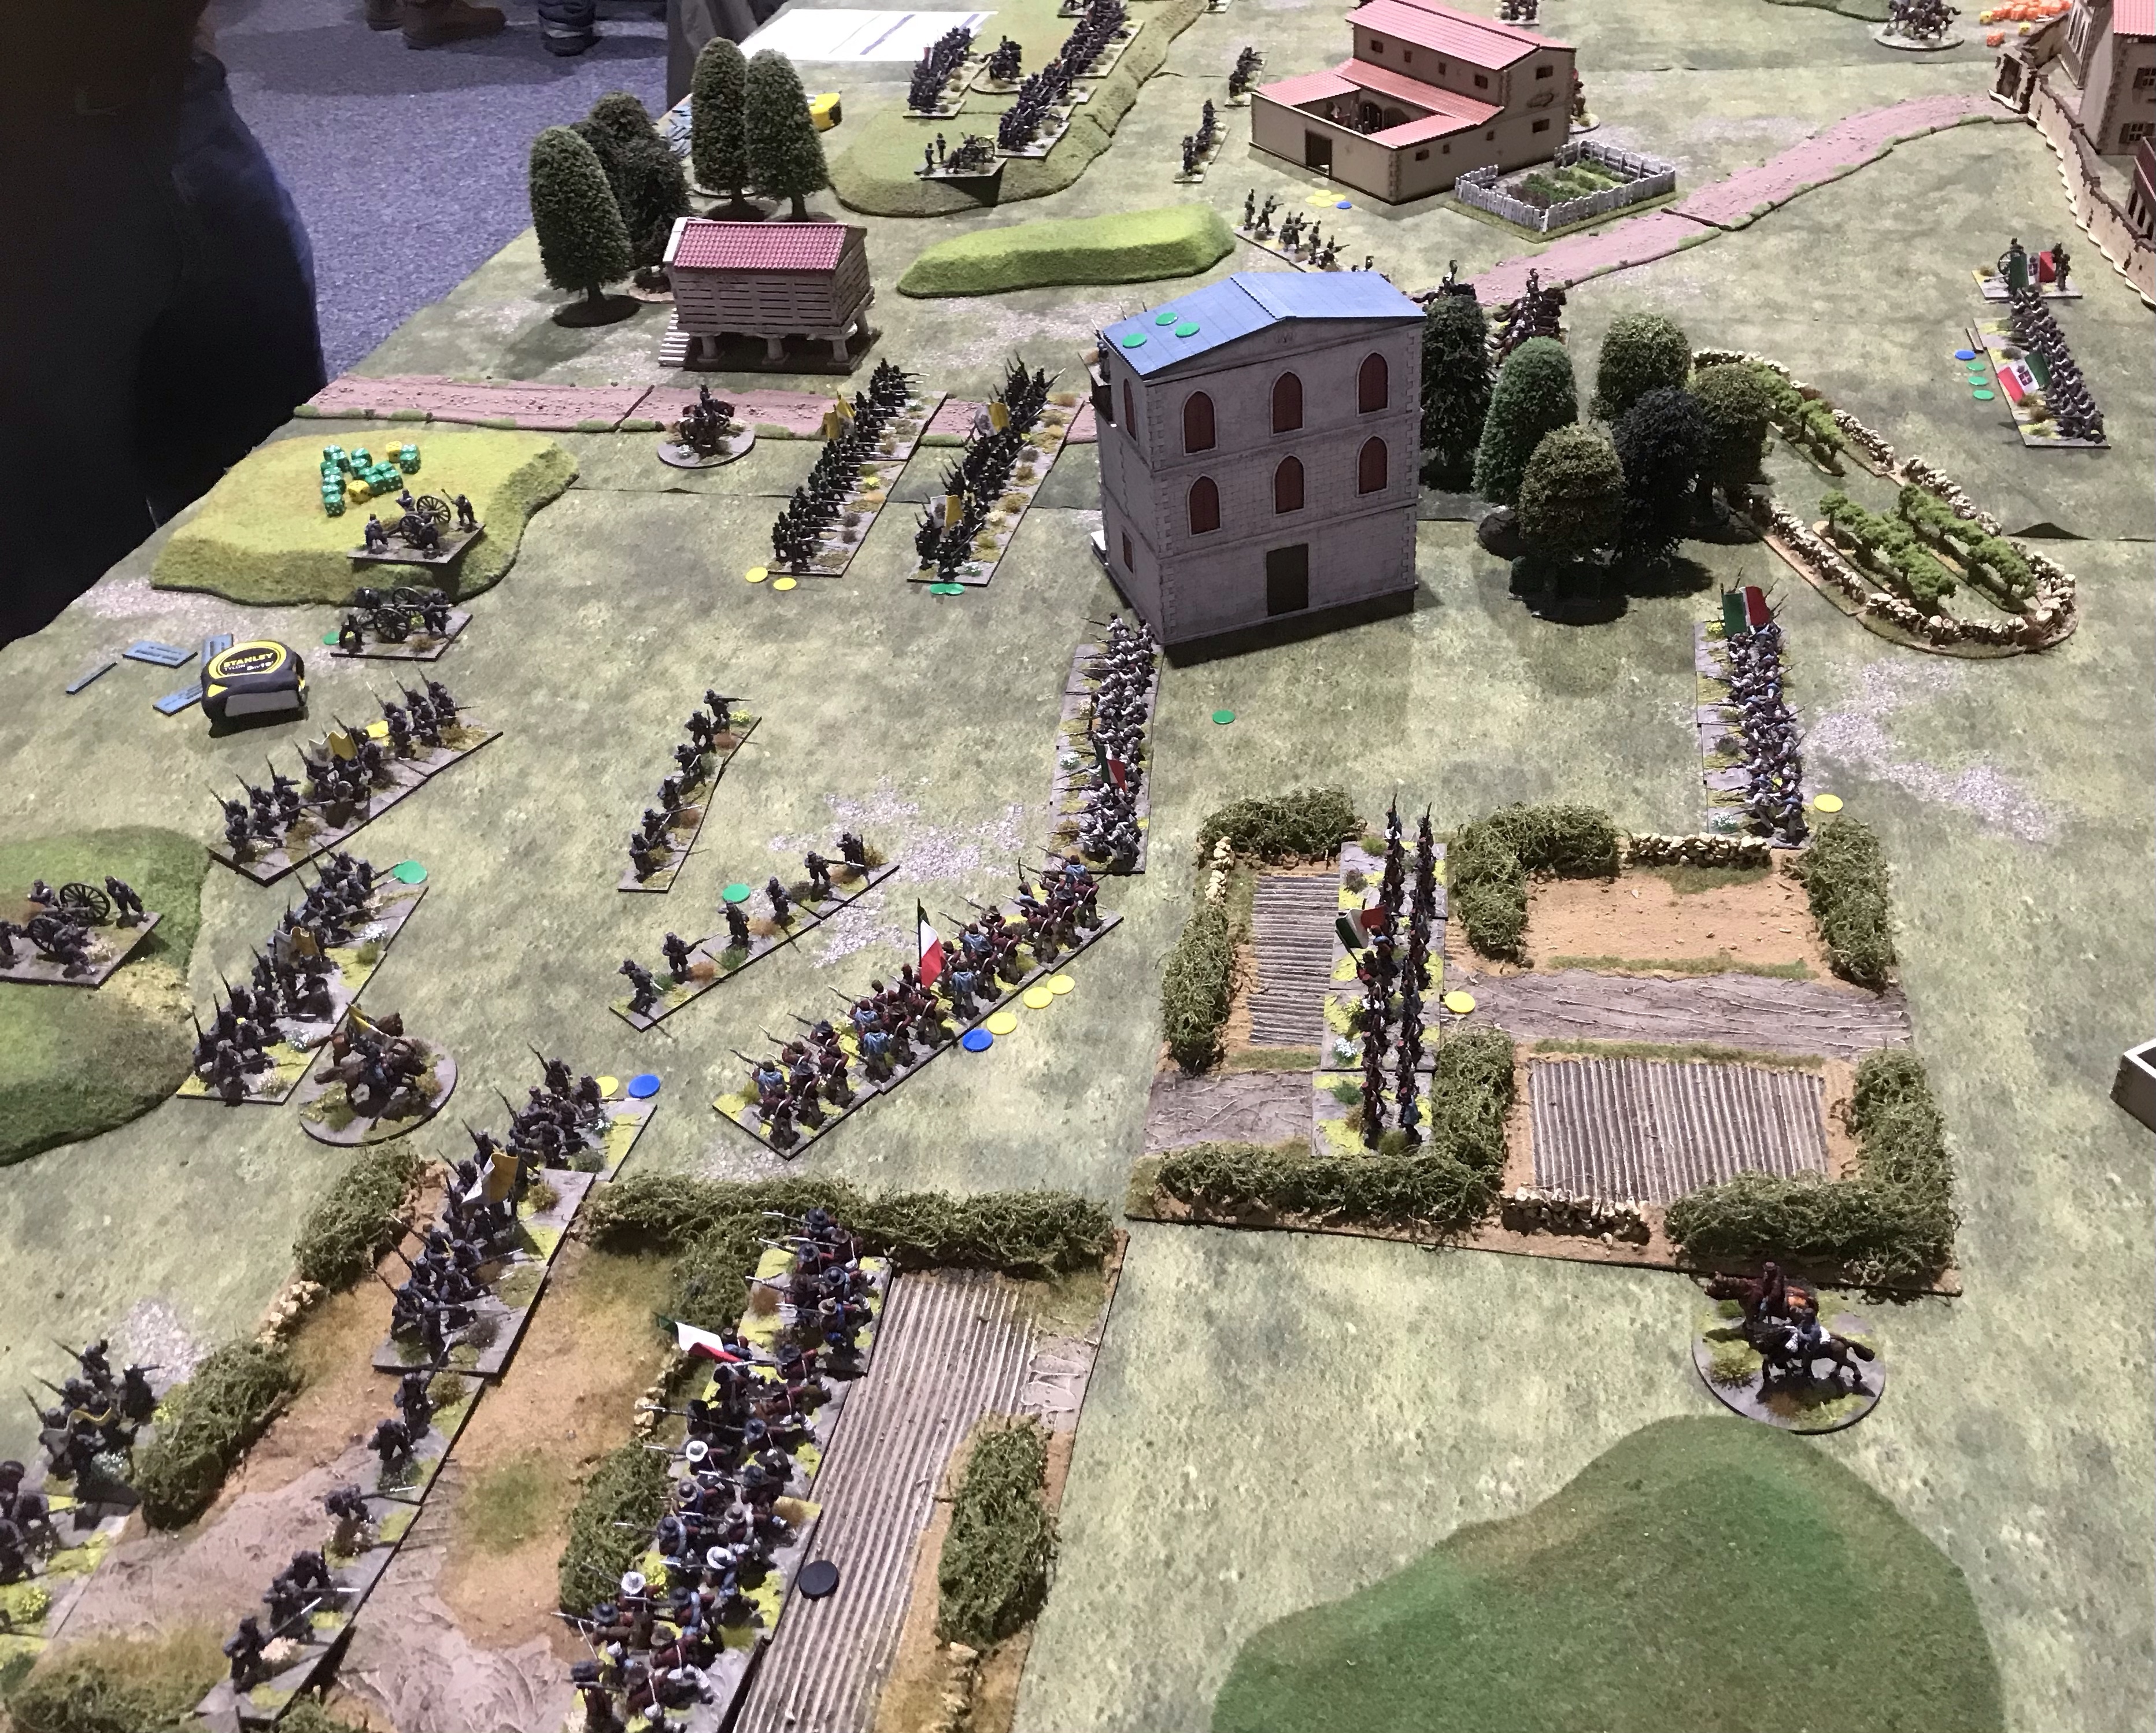
This was a 3 hour game with 4 players and an umpire. One player seemed to know his way around the rules or was a top shot blagger. The forces are in Brigades each of roughly 4 battalions each plus attached artillery and the Papal troops have some cavalry.
The game flow is of each player rolling 1D6 per brigade (and a bonus D6 for Garribalidi himself). A 3+ yielded a die that could be used to aid or hinder a Brigade’s activation by granting or forcing a re-roll. All the brigades from both sides then check in turn for activation with a 3+ needed unless the brigade had taken heavy losses (a 5+ required) . Failure would prevent them moving closer to the enemy and reduce their shooting to effective ranges only. We did get some failures which messed up our plans. Initiative was diced on 2D6. Next came charges, which we muddled through; first the advantage player handling charges then the other with the target shooting on the way in. Afterwards the first player moves everything else , followed by the second, then all remaining shooting from the first then second players. Losses are marked as coloured counters except for blue markers that note poor fire control (and limited shooting), a consequence of rolling very low on the fire table. Shooting almost always causes at least one loss and these gradually mount up but bases are not removed. After high enough losses units are removed, partial losses will reduce shooting effectiveness. Being shot back or moving through poor terrain can disorganise a unit making it less effective for a turn.
Based on the limited knowledge that Garribaldi was going to Rome and that the Papal forces were in the way we opted to attack. In reality the outclassed redshirts were on the defensive. We also decided to concentrate against the Papal troops as the French chassepot sounded worrying and we assumed the Papal troops were only good for standing around and attending mass. Another error as we learnt that the Papal troops were pretty good. From a historical point of view these were not unreasonable assumptions and we did come close to pulling it off.
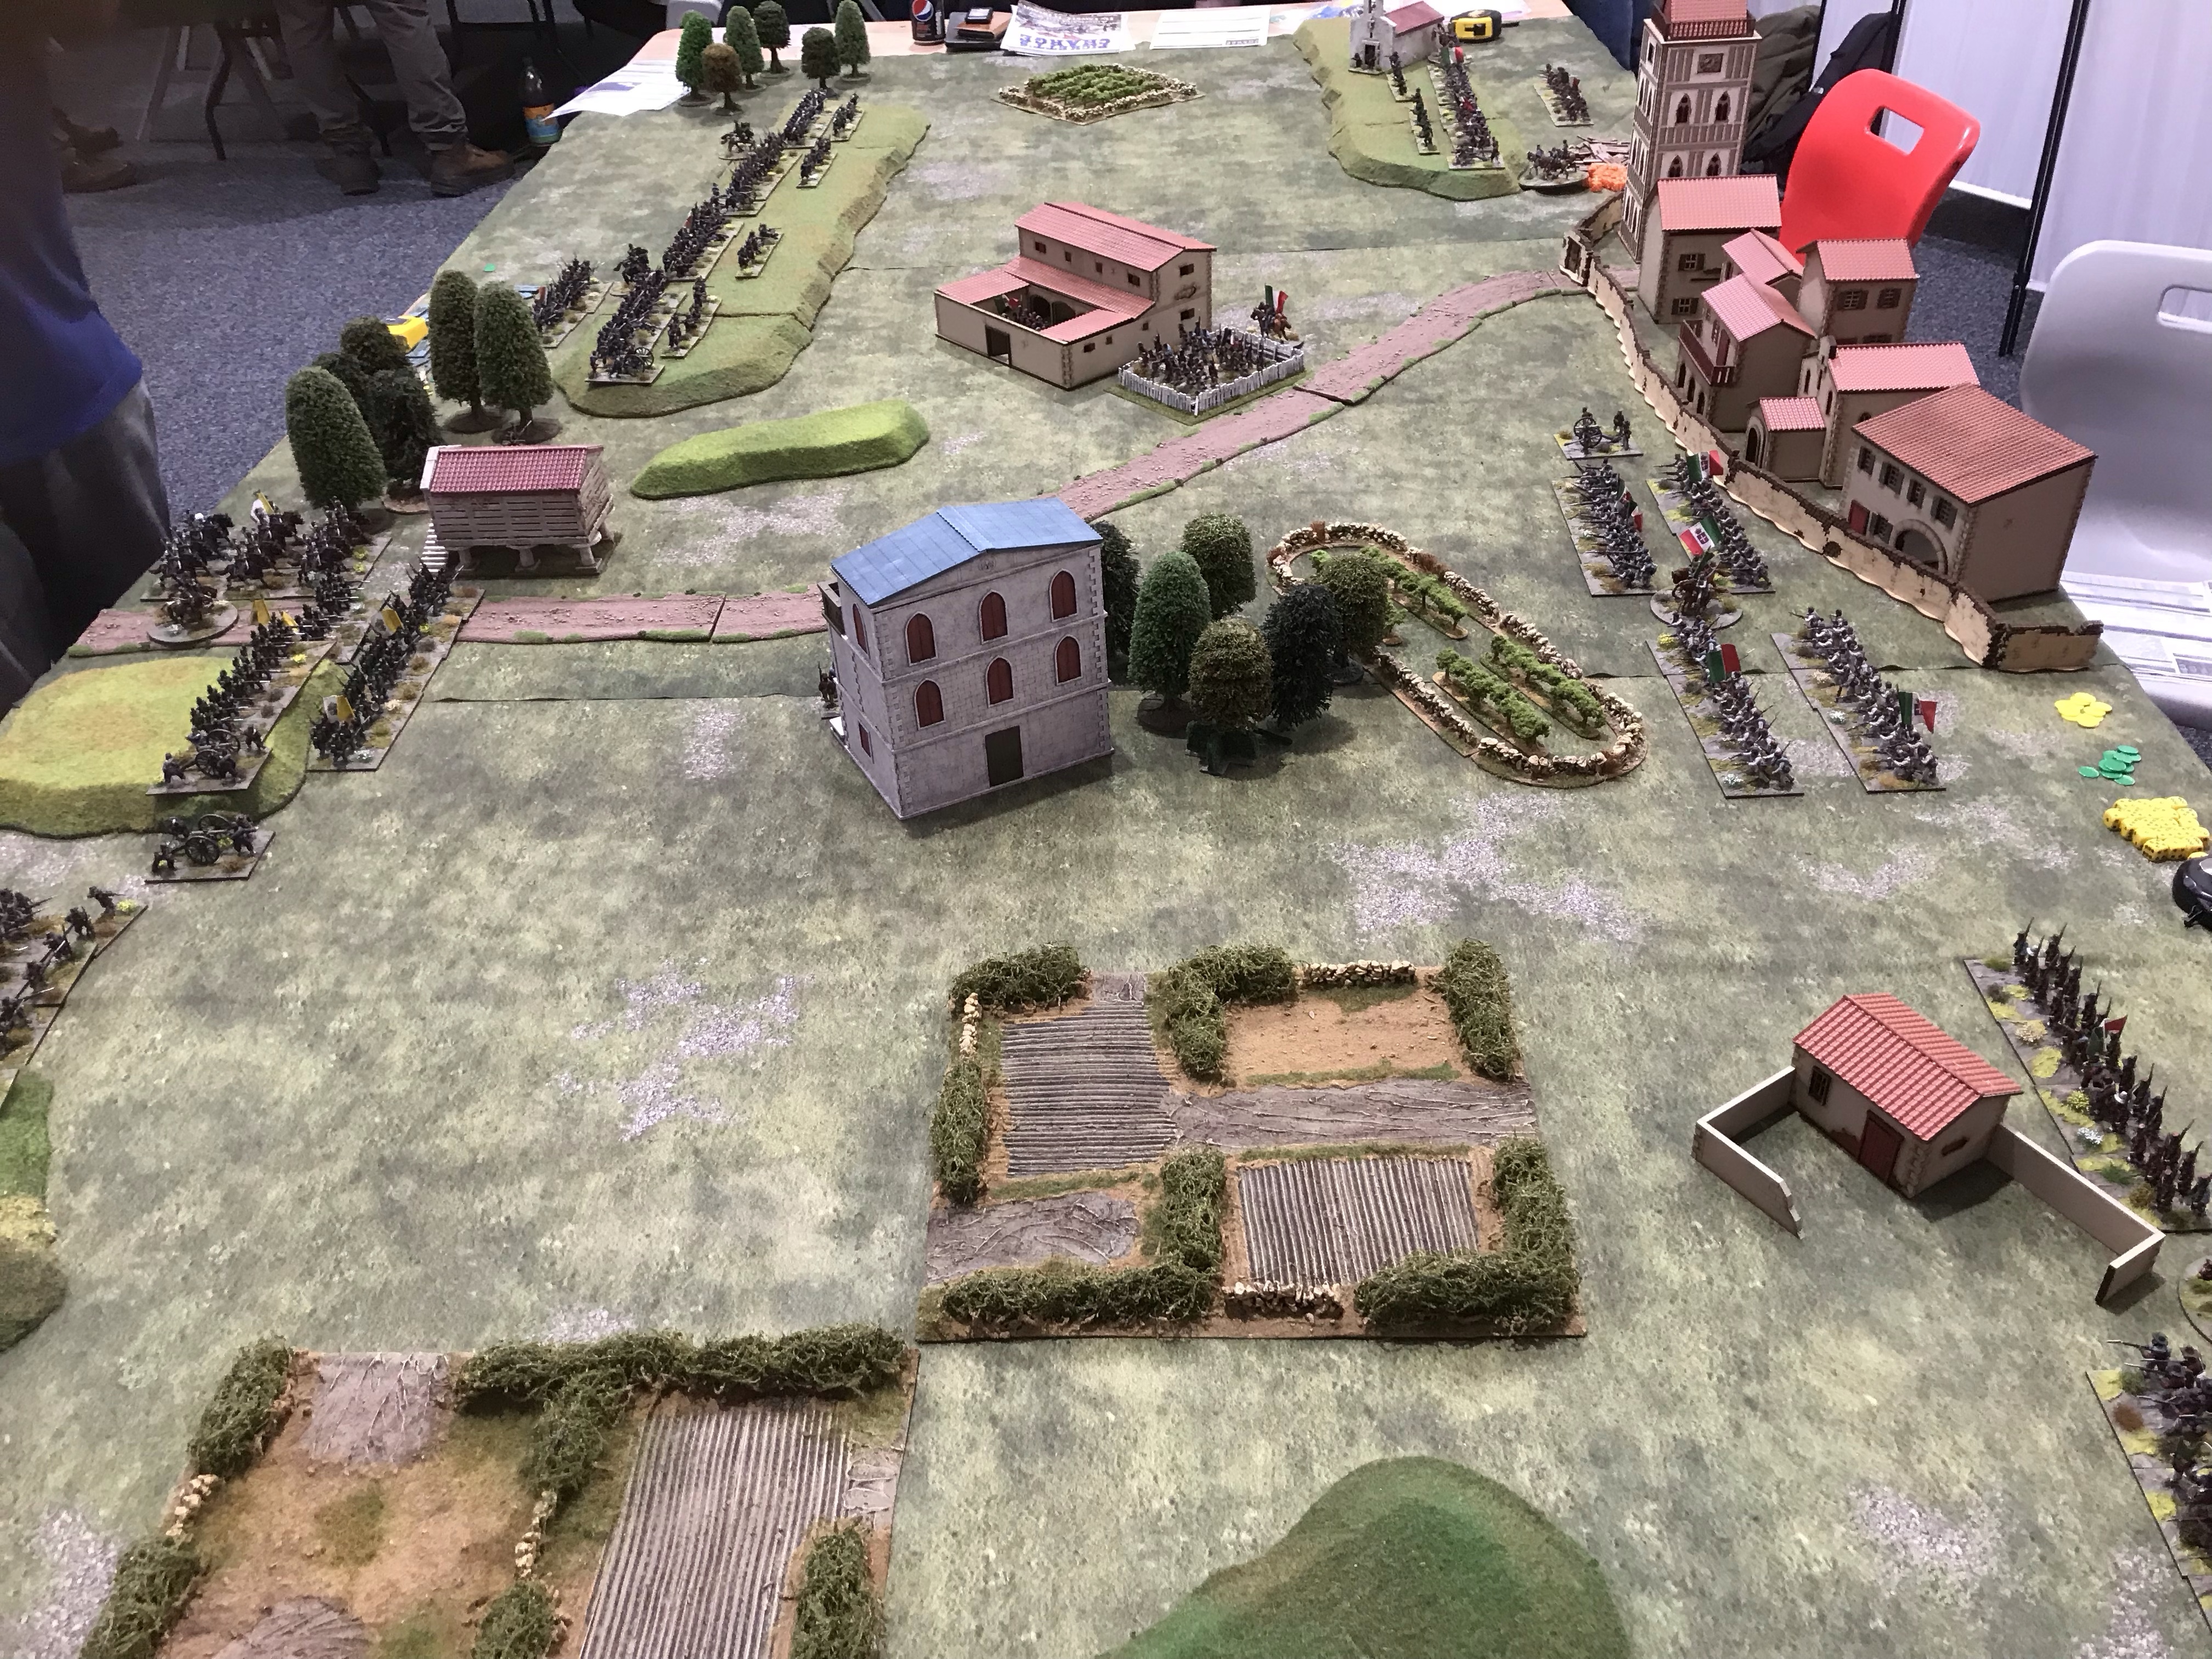
Here we see the initial line up. 1 of Garribaldi’s brigades (3 units) is deployed forward in the buildings and walled garden. The rest are formed up on the start line.
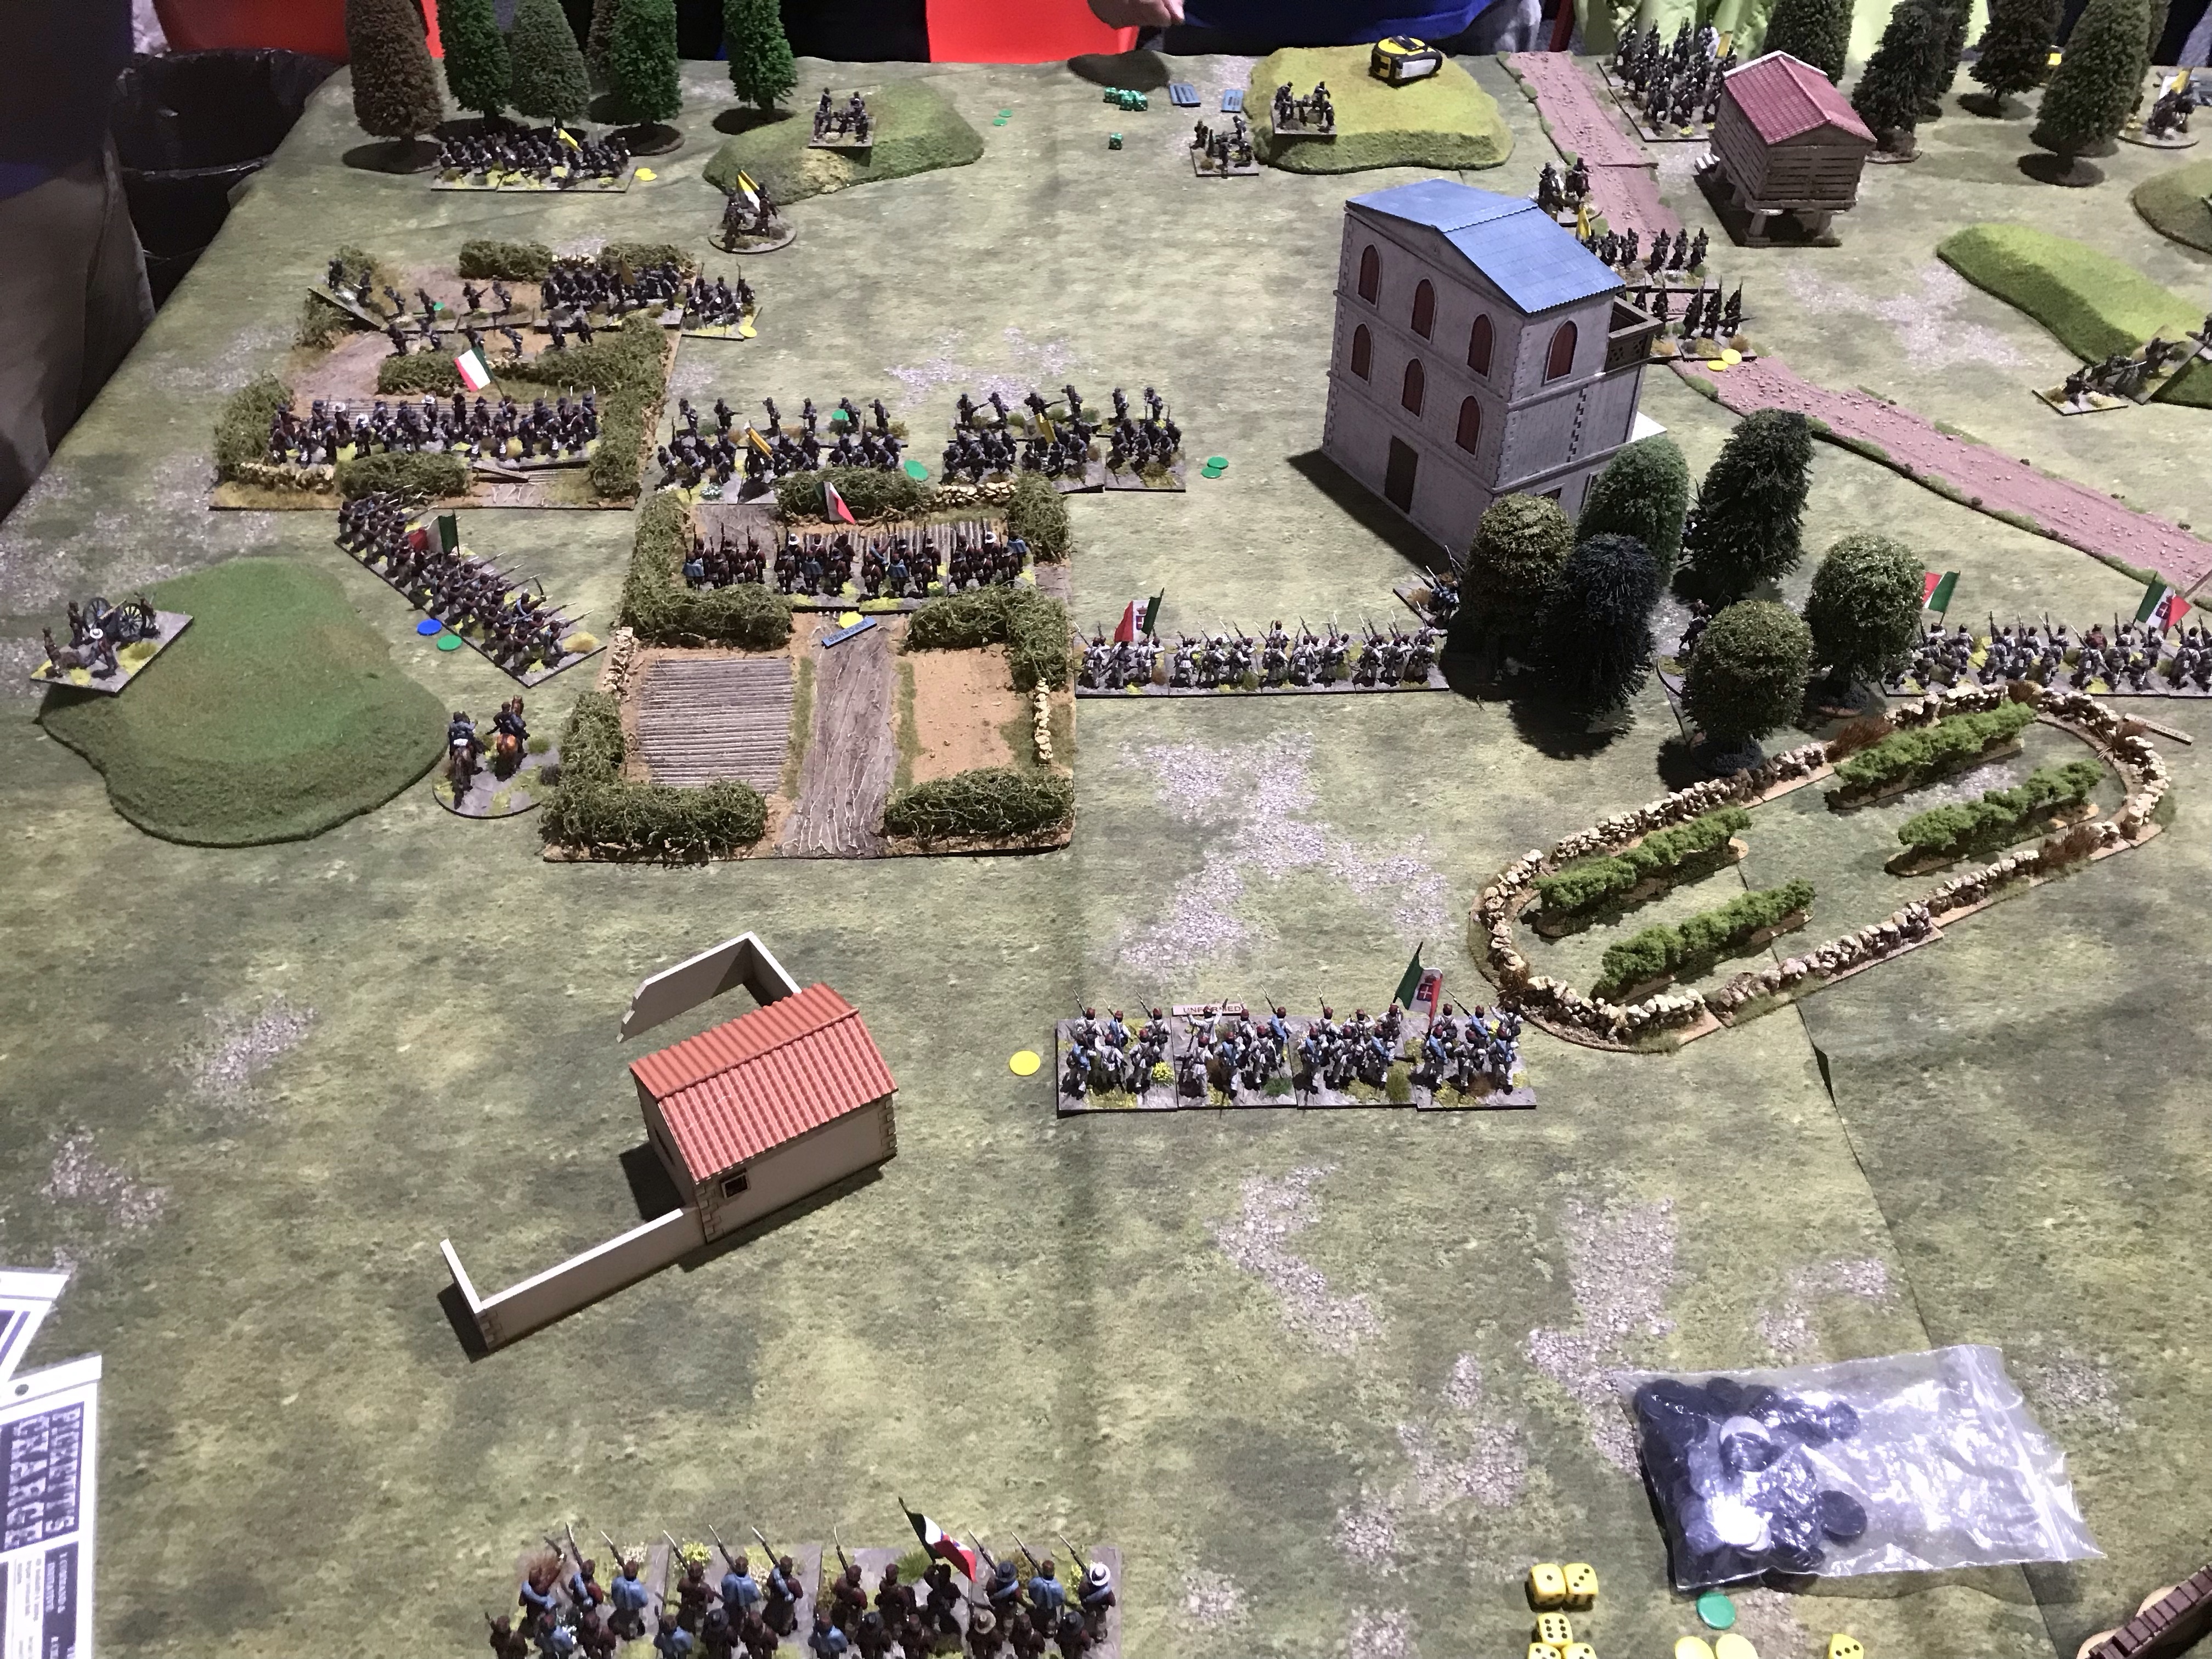
The Garribaldi left moves up. The lads in the buildings take a dreadful pounding from skirmish fire and the odd cannon shot. They deal out very little damage in return. The plan to hold on the right is helped by the whole brigade refusing its initial order to move. Later it does manage to throw forward skirmishers who duel with their French counterparts.
The boys finally get into combat and push back the Papal defence. At the top of the picture a unit of Garribaldi infantry heads for the rear having suffered from an adverse papal cavalry charge. Their inability to get off any useful shooting on the cavalry’s way in did not help. The folks in the far building with the red roof have already left for home. The French line sat on their ridge throughout the game. Possibly not a good plan as they might have gone through the Italians facing them like a knife through butter.
A close up of the fighting beside the houses. Most of the models were metal with a scattering of converted plastics.
It all worked out in the end although the game could of run on for quite a bit longer it was starting to look squiffy for the redshirts. Mentana is a relatively small battle with only 1 unit of cavalry involved. It seemed about right for the detail required by Pickett’s Charge rules and would probably whizz through with a less involved game system.
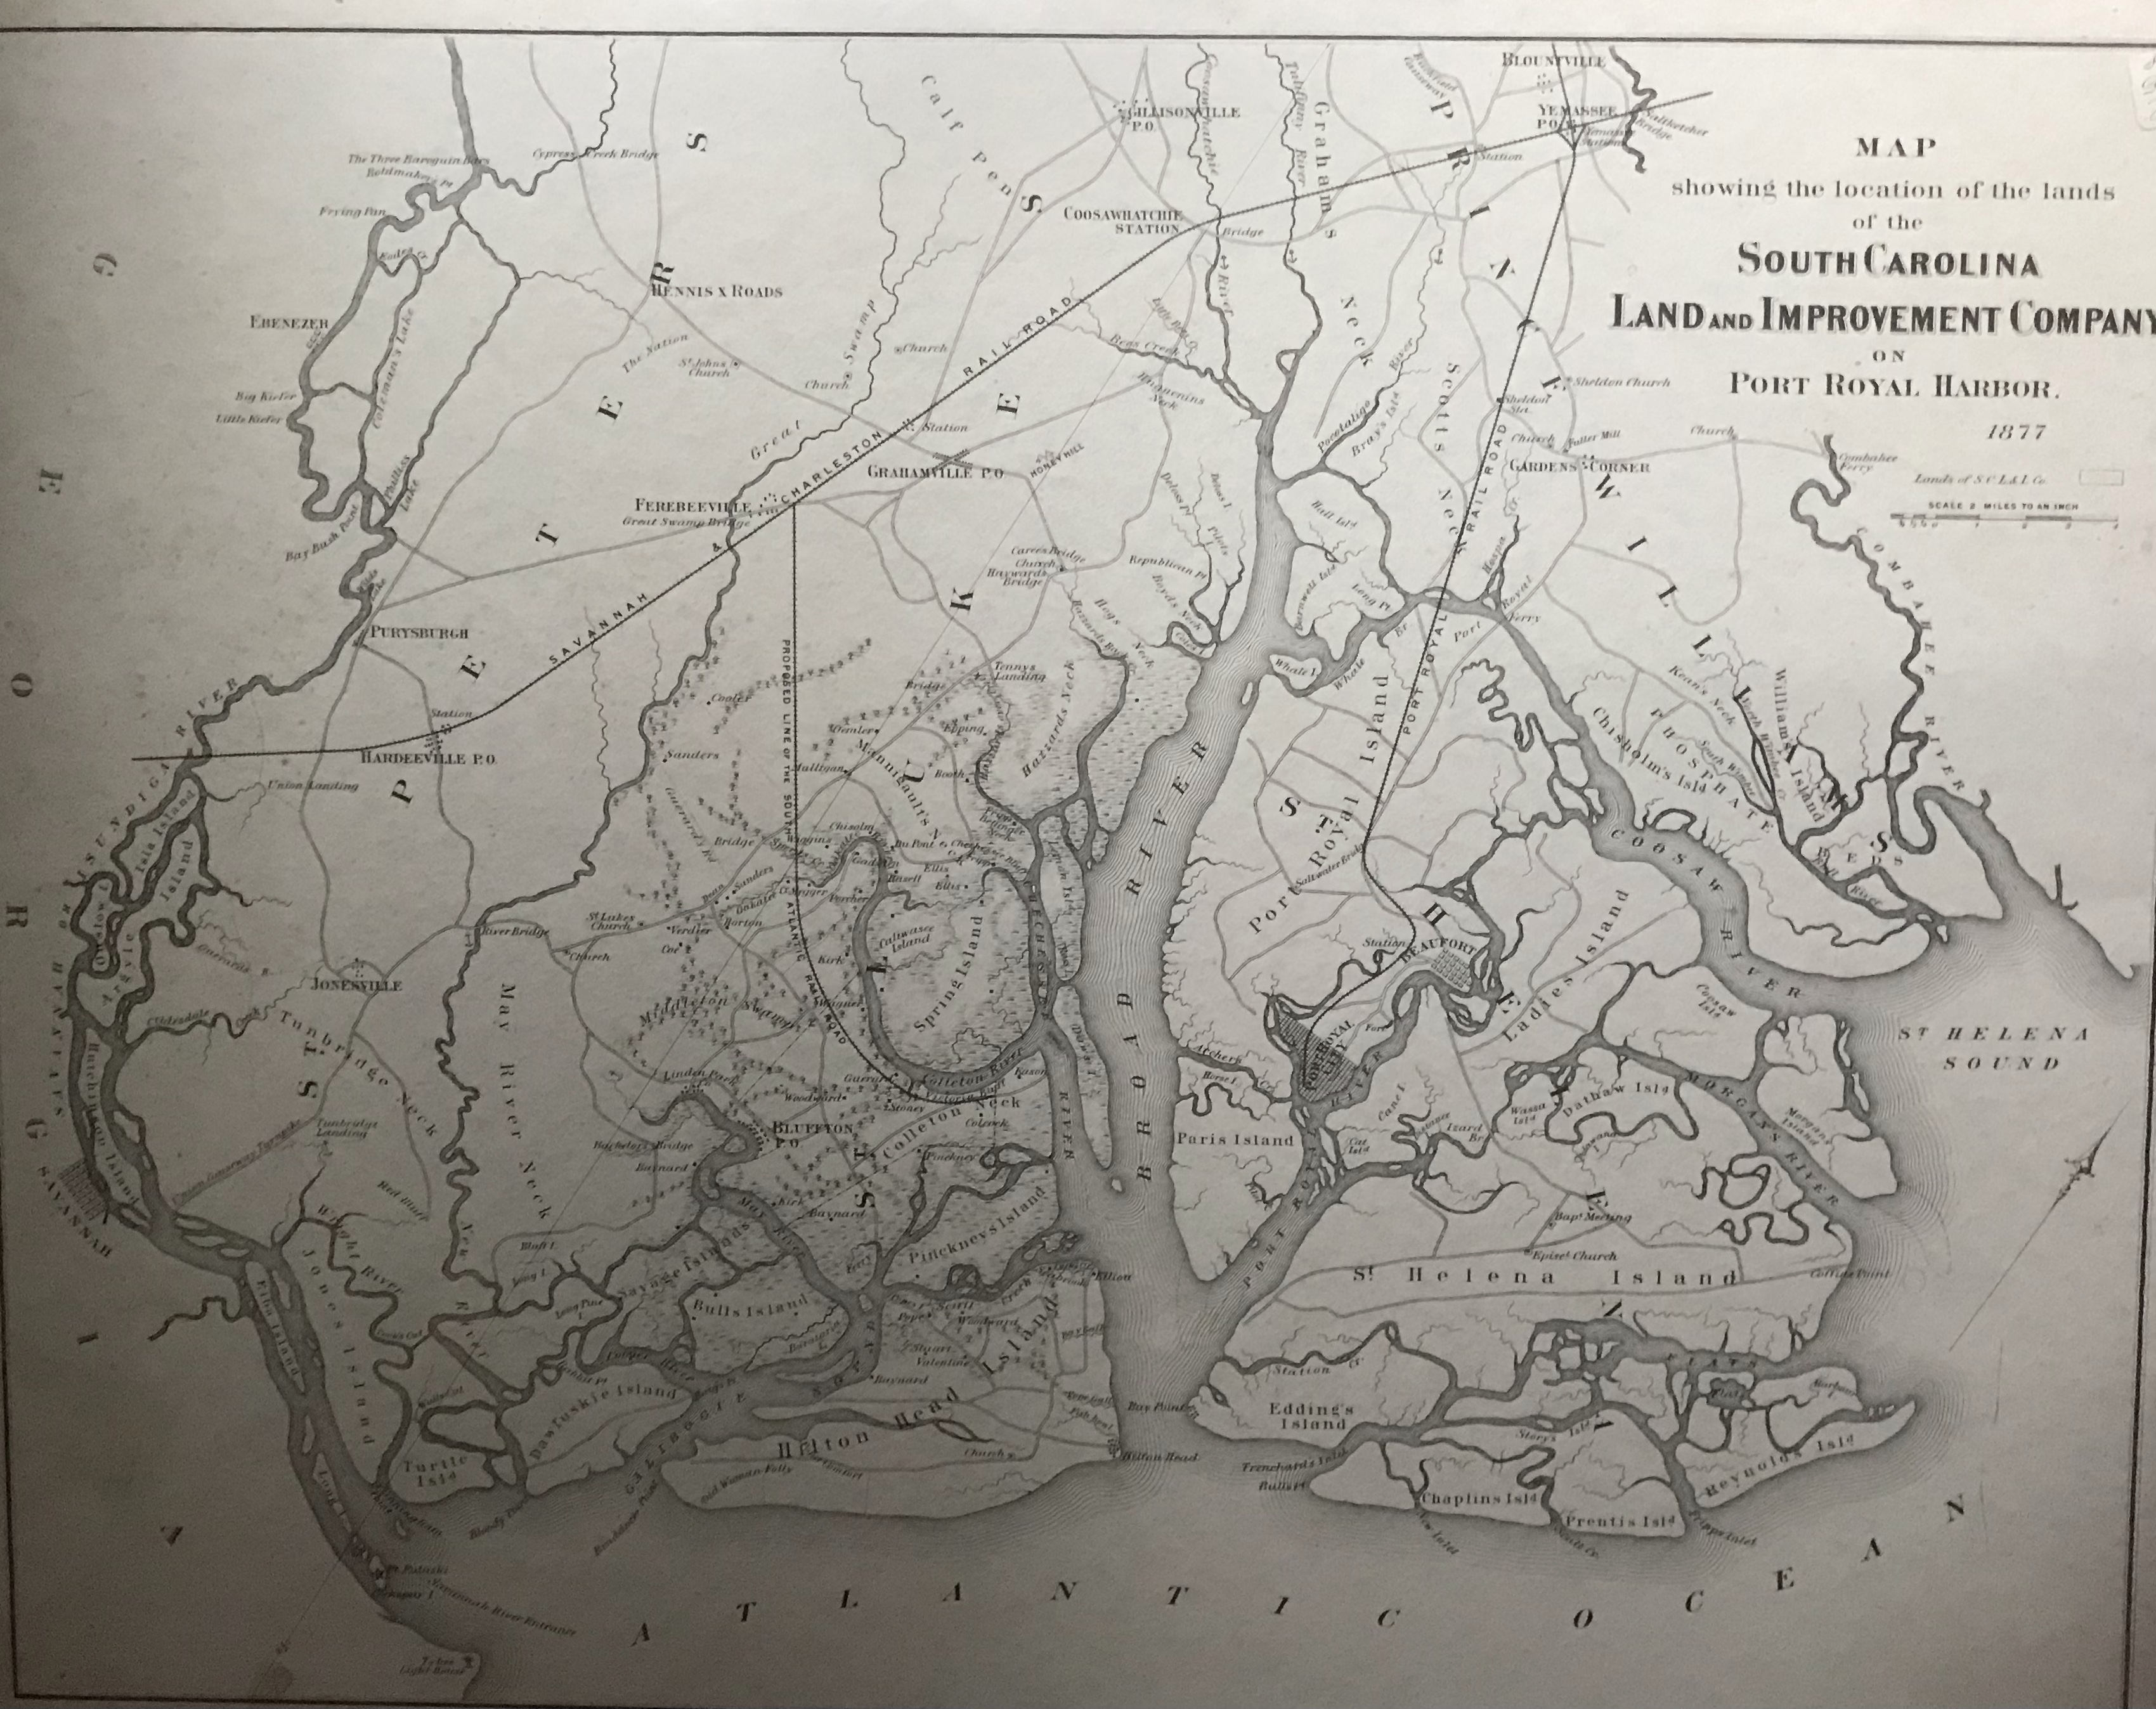
We are off to June 1863 and the Low Country of South Carolina at Steel Lard 2023 via Patriot Games Sheffield. The Union have occupied the coastal port of Beaufort (pronounced bewfort as in kew) and raised a battalion (the 2nd South Carolina Volunteers) from liberated slaves. A force has sailed along the coast to the rice plantations by the Combahee river. Their mission; liberate the local labour force and do as much damage as possible.
The following map should help but note that it is a proposed development from 1877. In 1863 the railroad from Yemassee to Port Royal does not exist, nor does the spur to Bluffton, Port Royal itself is little more than a place to unload ships. The Savannah Charlestown rail road was built and in use. The only place one might call a town is Beaufort.
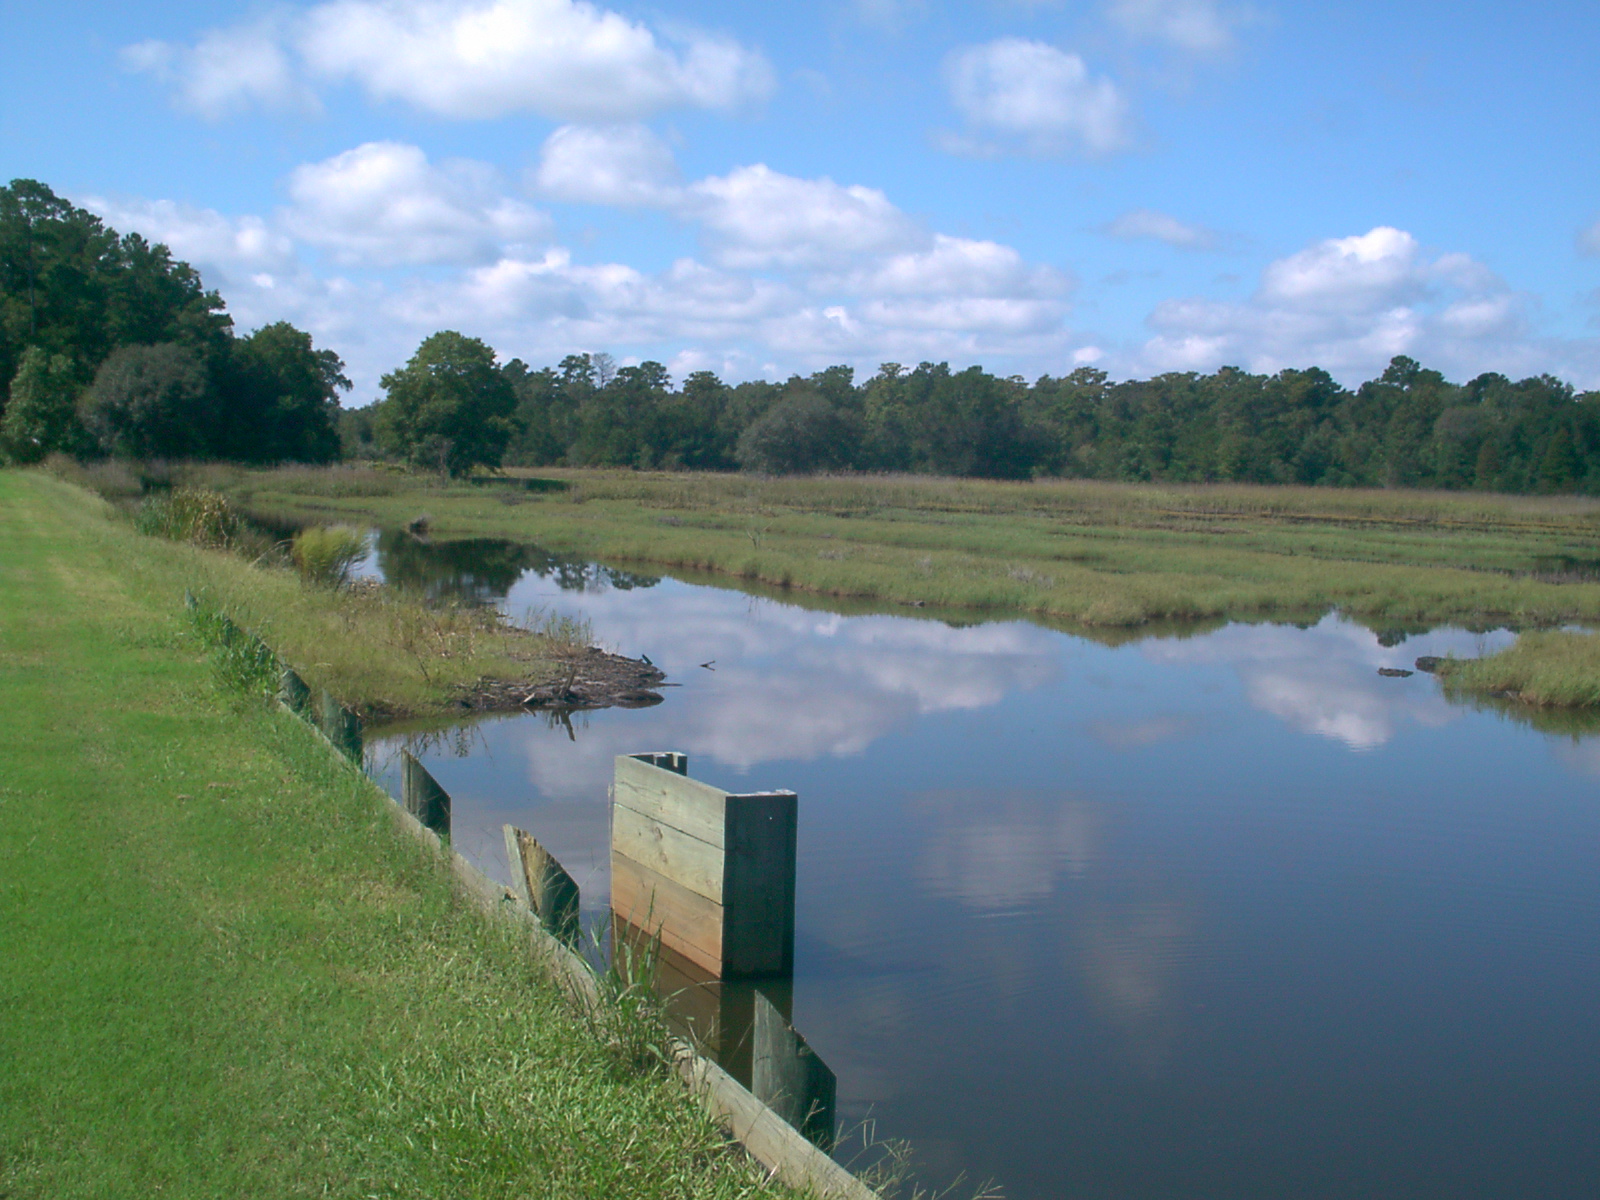
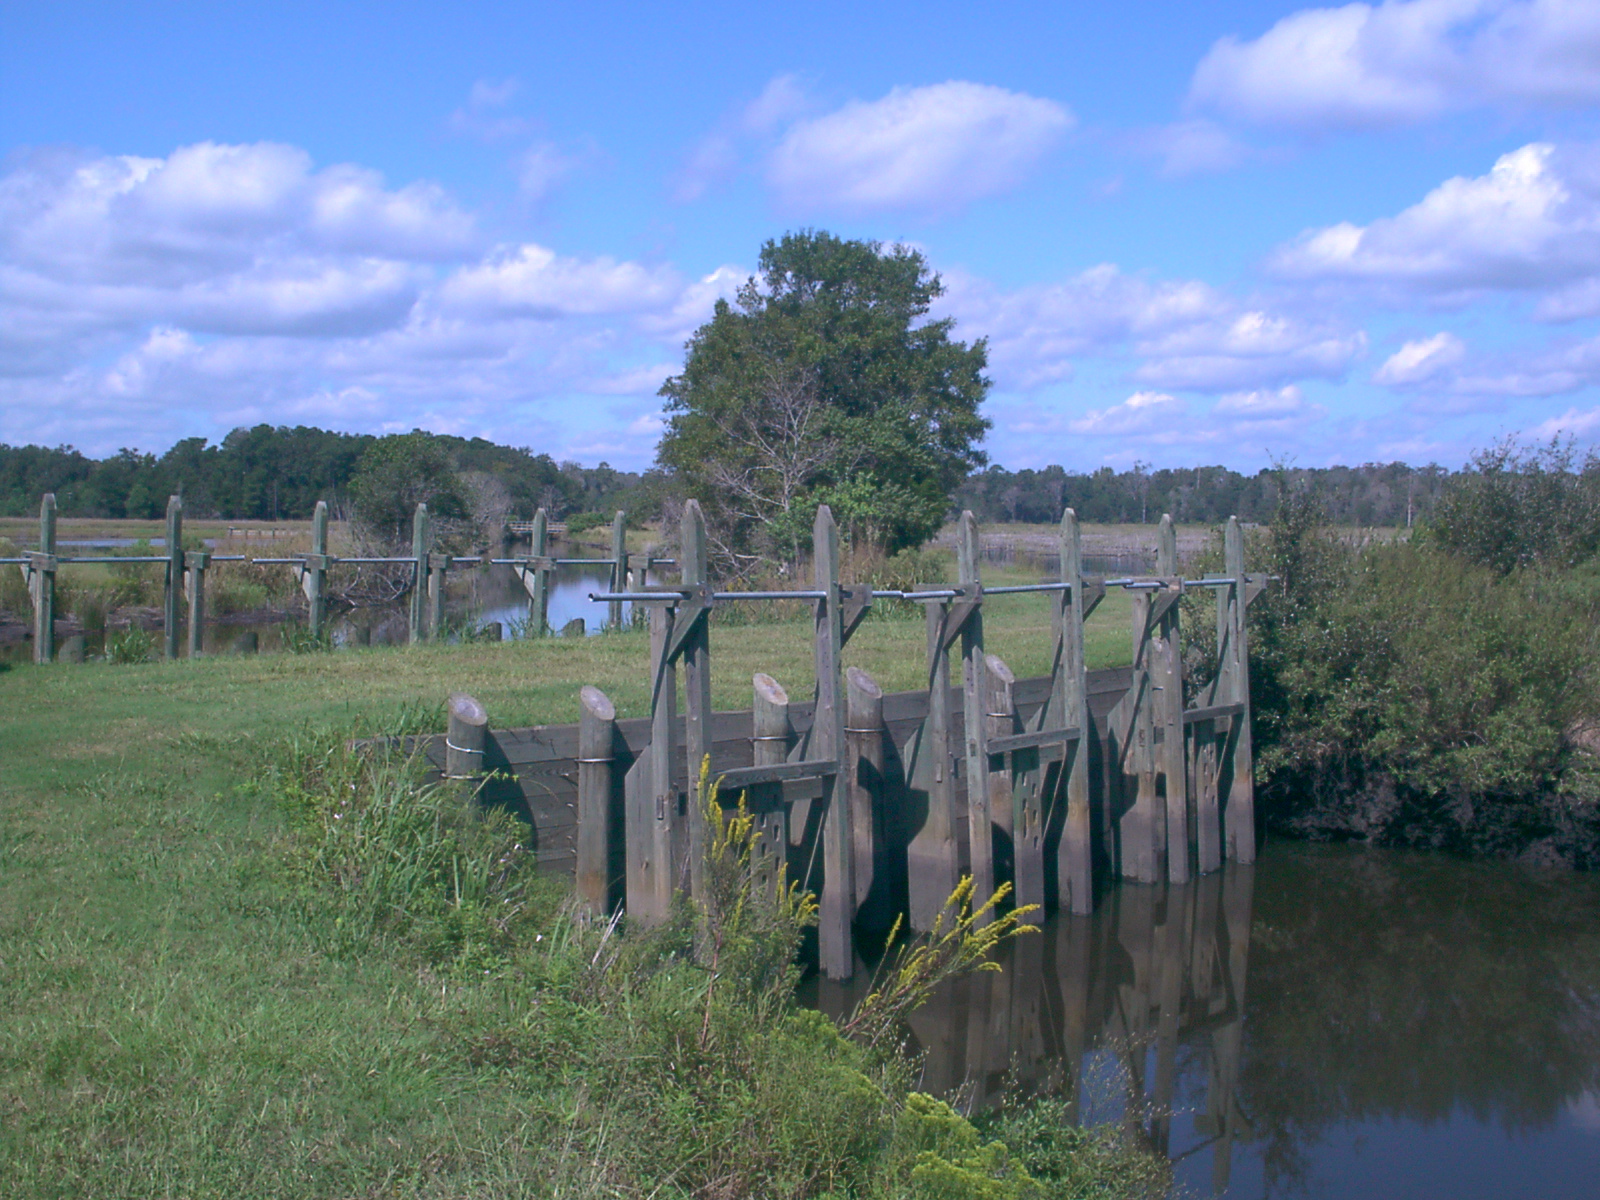
This is rice country, no cotton for a long way. The rice fields are sunken and surrounded by ditches and banks to allow water to flow into the fields and keep it there. Here are the remains of a rice field in Sheldon South Carolina. It is on the map but you need to look hard; between Yemassee and Gardens Corner. Key features are large, flat open fields with areas of dense forest surrounding them.
Keeping the fields in action requires maintaining the channels and paddles that surround the fields. Rice cultivation at the time was very labour intensive; overcome by the use of large numbers of slaves.
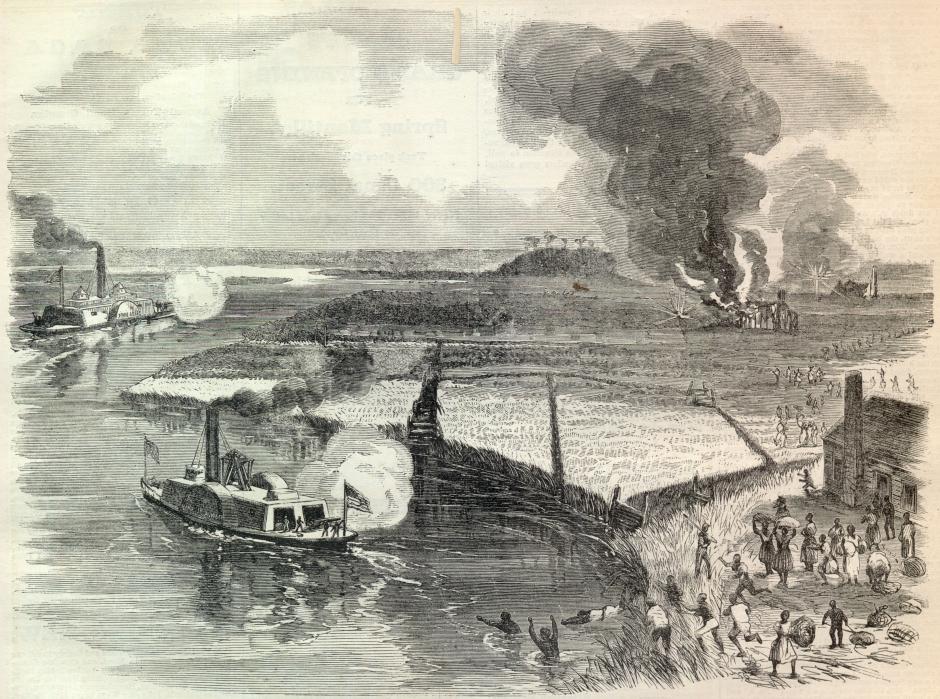
This illustration from Harpers Weeky dates to about 1 month after the raids. There is no certainty that the artist was physically present but the impression looks reasonable.
In reality the Confederates tried to put up a fight but were massively outnumbered and could do little to prevent the destruction of buildings and loss of hundreds of slaves. The Sharp Practice game at Steel Lard is a bathtub approach with the key events and places scaled into a smaller area. Although this is a battle setting winning is based on rescuing slaves and saving white plantation owners and their houses.
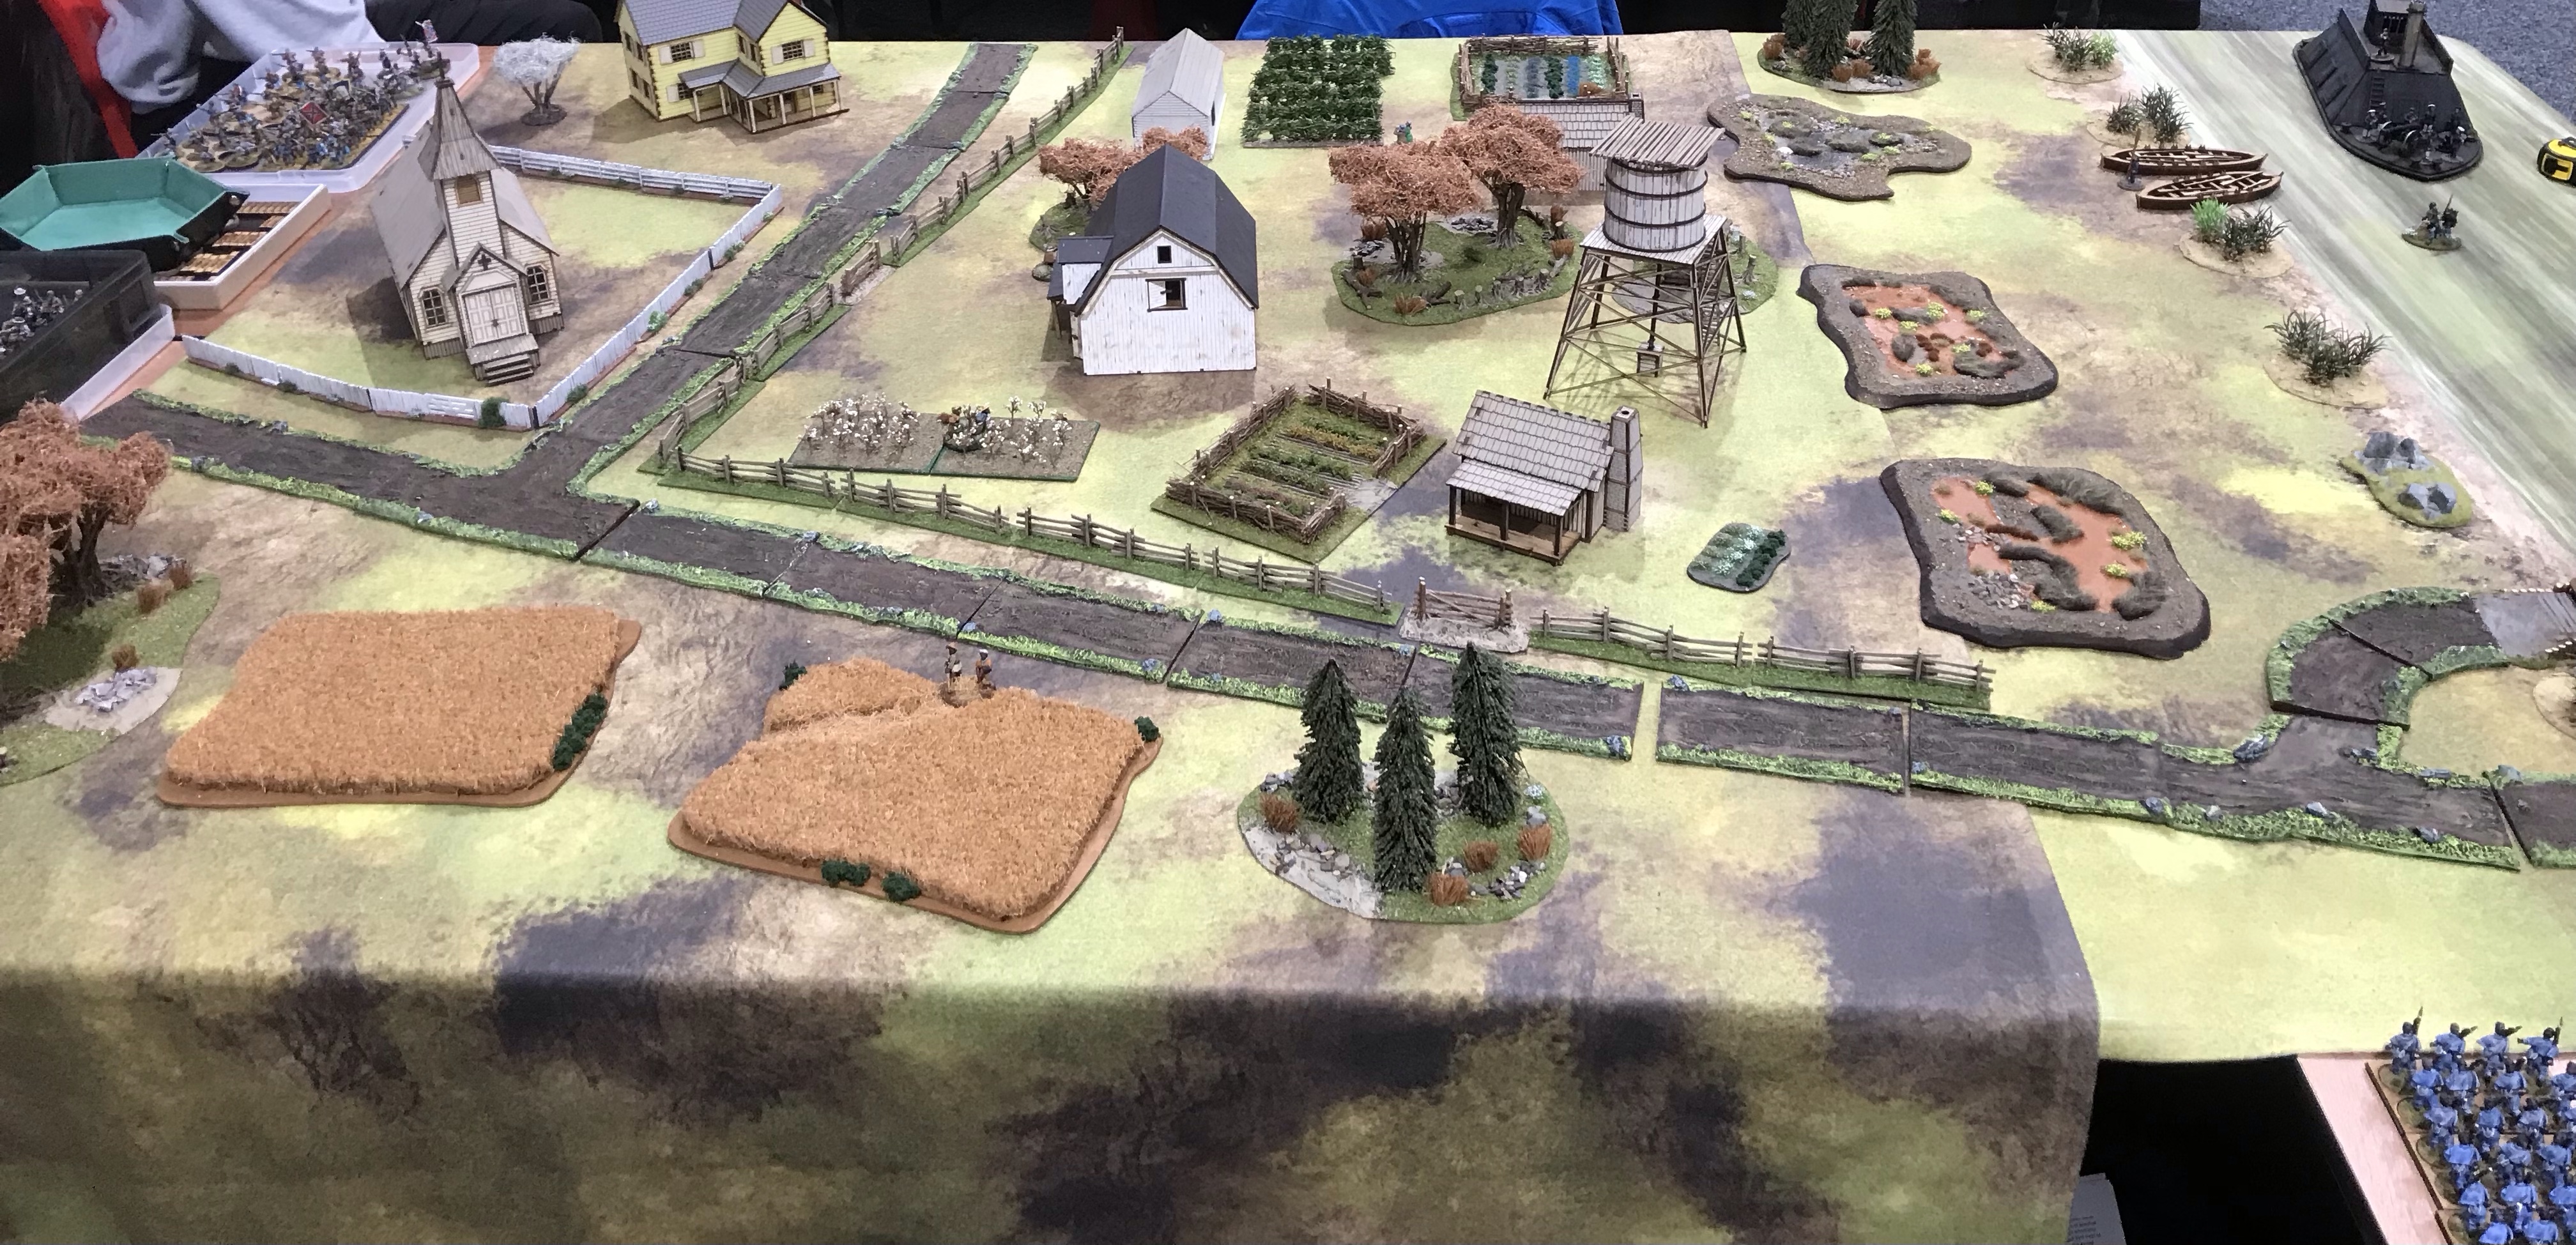
This is the pre-game set up with the Union gunboat just cruising into view.
A small force of Confederate skirmishers spend the game in the reeds by the river at the bottom of the battlefield. They inflict disproportionate casualties on the Union forces although they are probably being bitten raw that close to the river. They are protecting General Pickett who had been out for a drive in his carriage. Ideally he needed to get back through the plantation and away but the road was blocked by fighting.
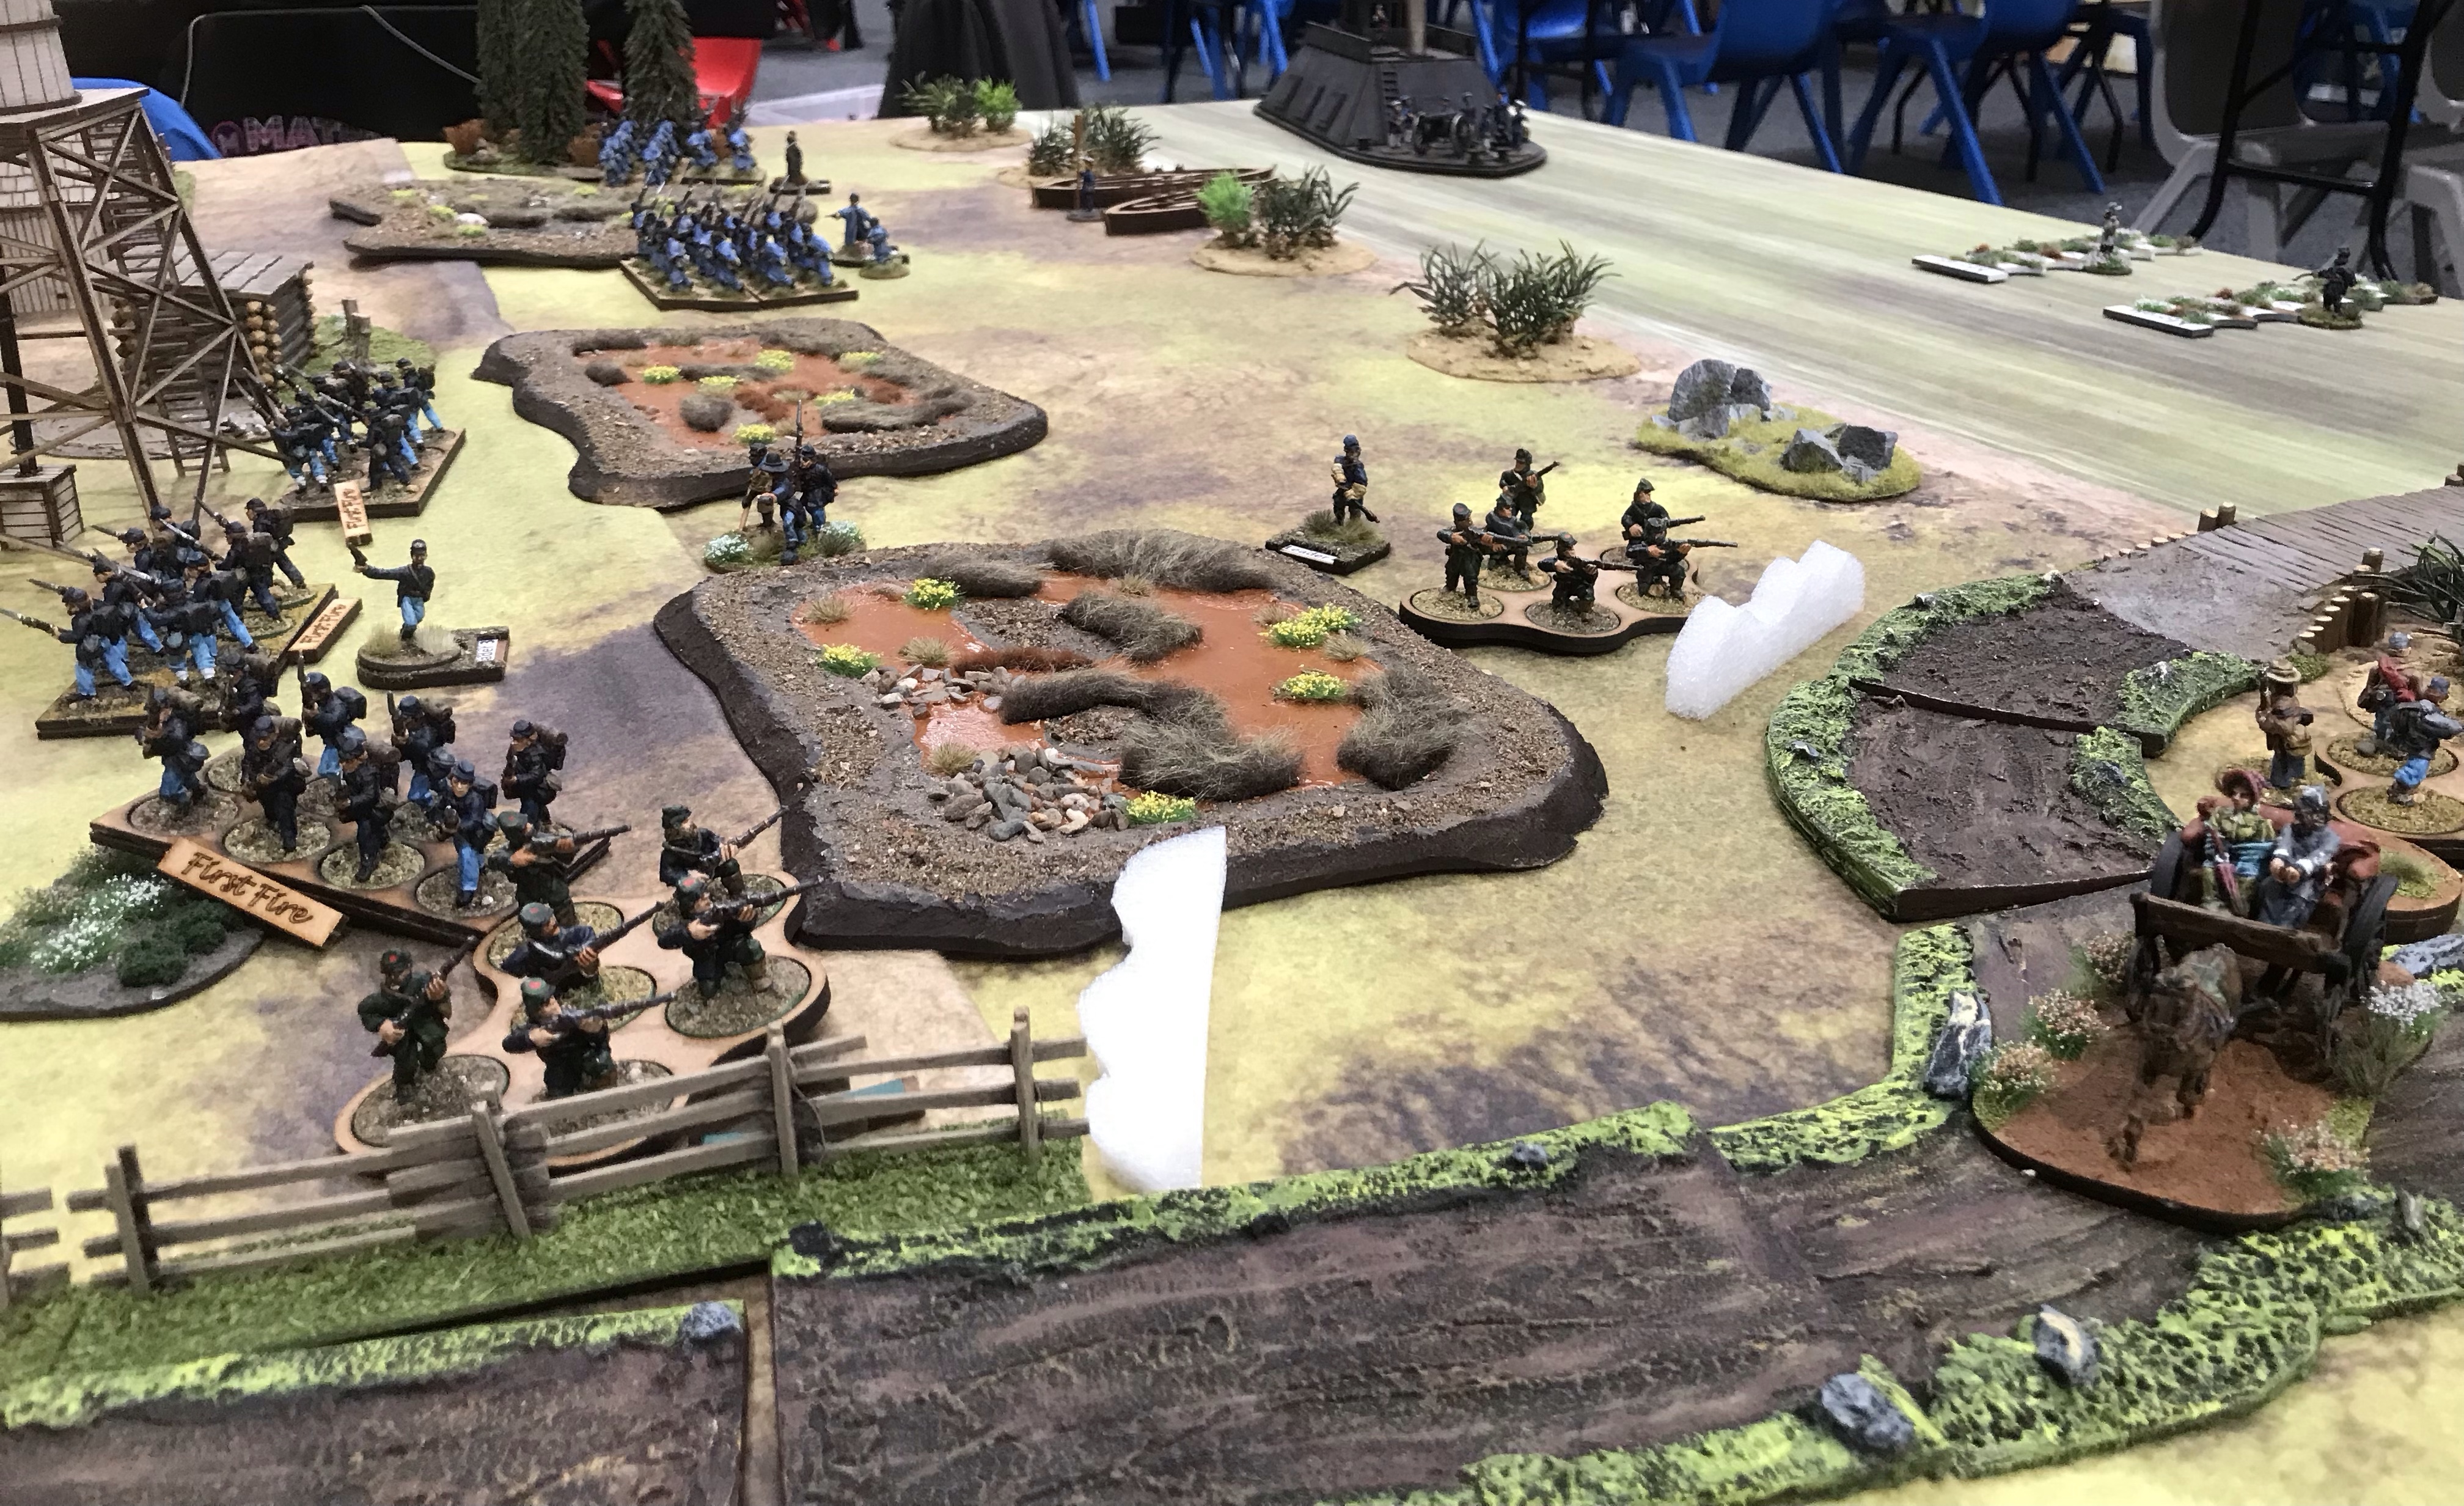
Deployment is based on chit pull and swiftly sees the battlefield swarming in Union troops and only a smattering of Confederates. The Negro 2nd South Carolina Volunteers should be in red trousers and will all be a bit warm with those coats in June. The Union also have some white skirmishers and white crew on the gunboat (the Union army was still segregated until 1948).
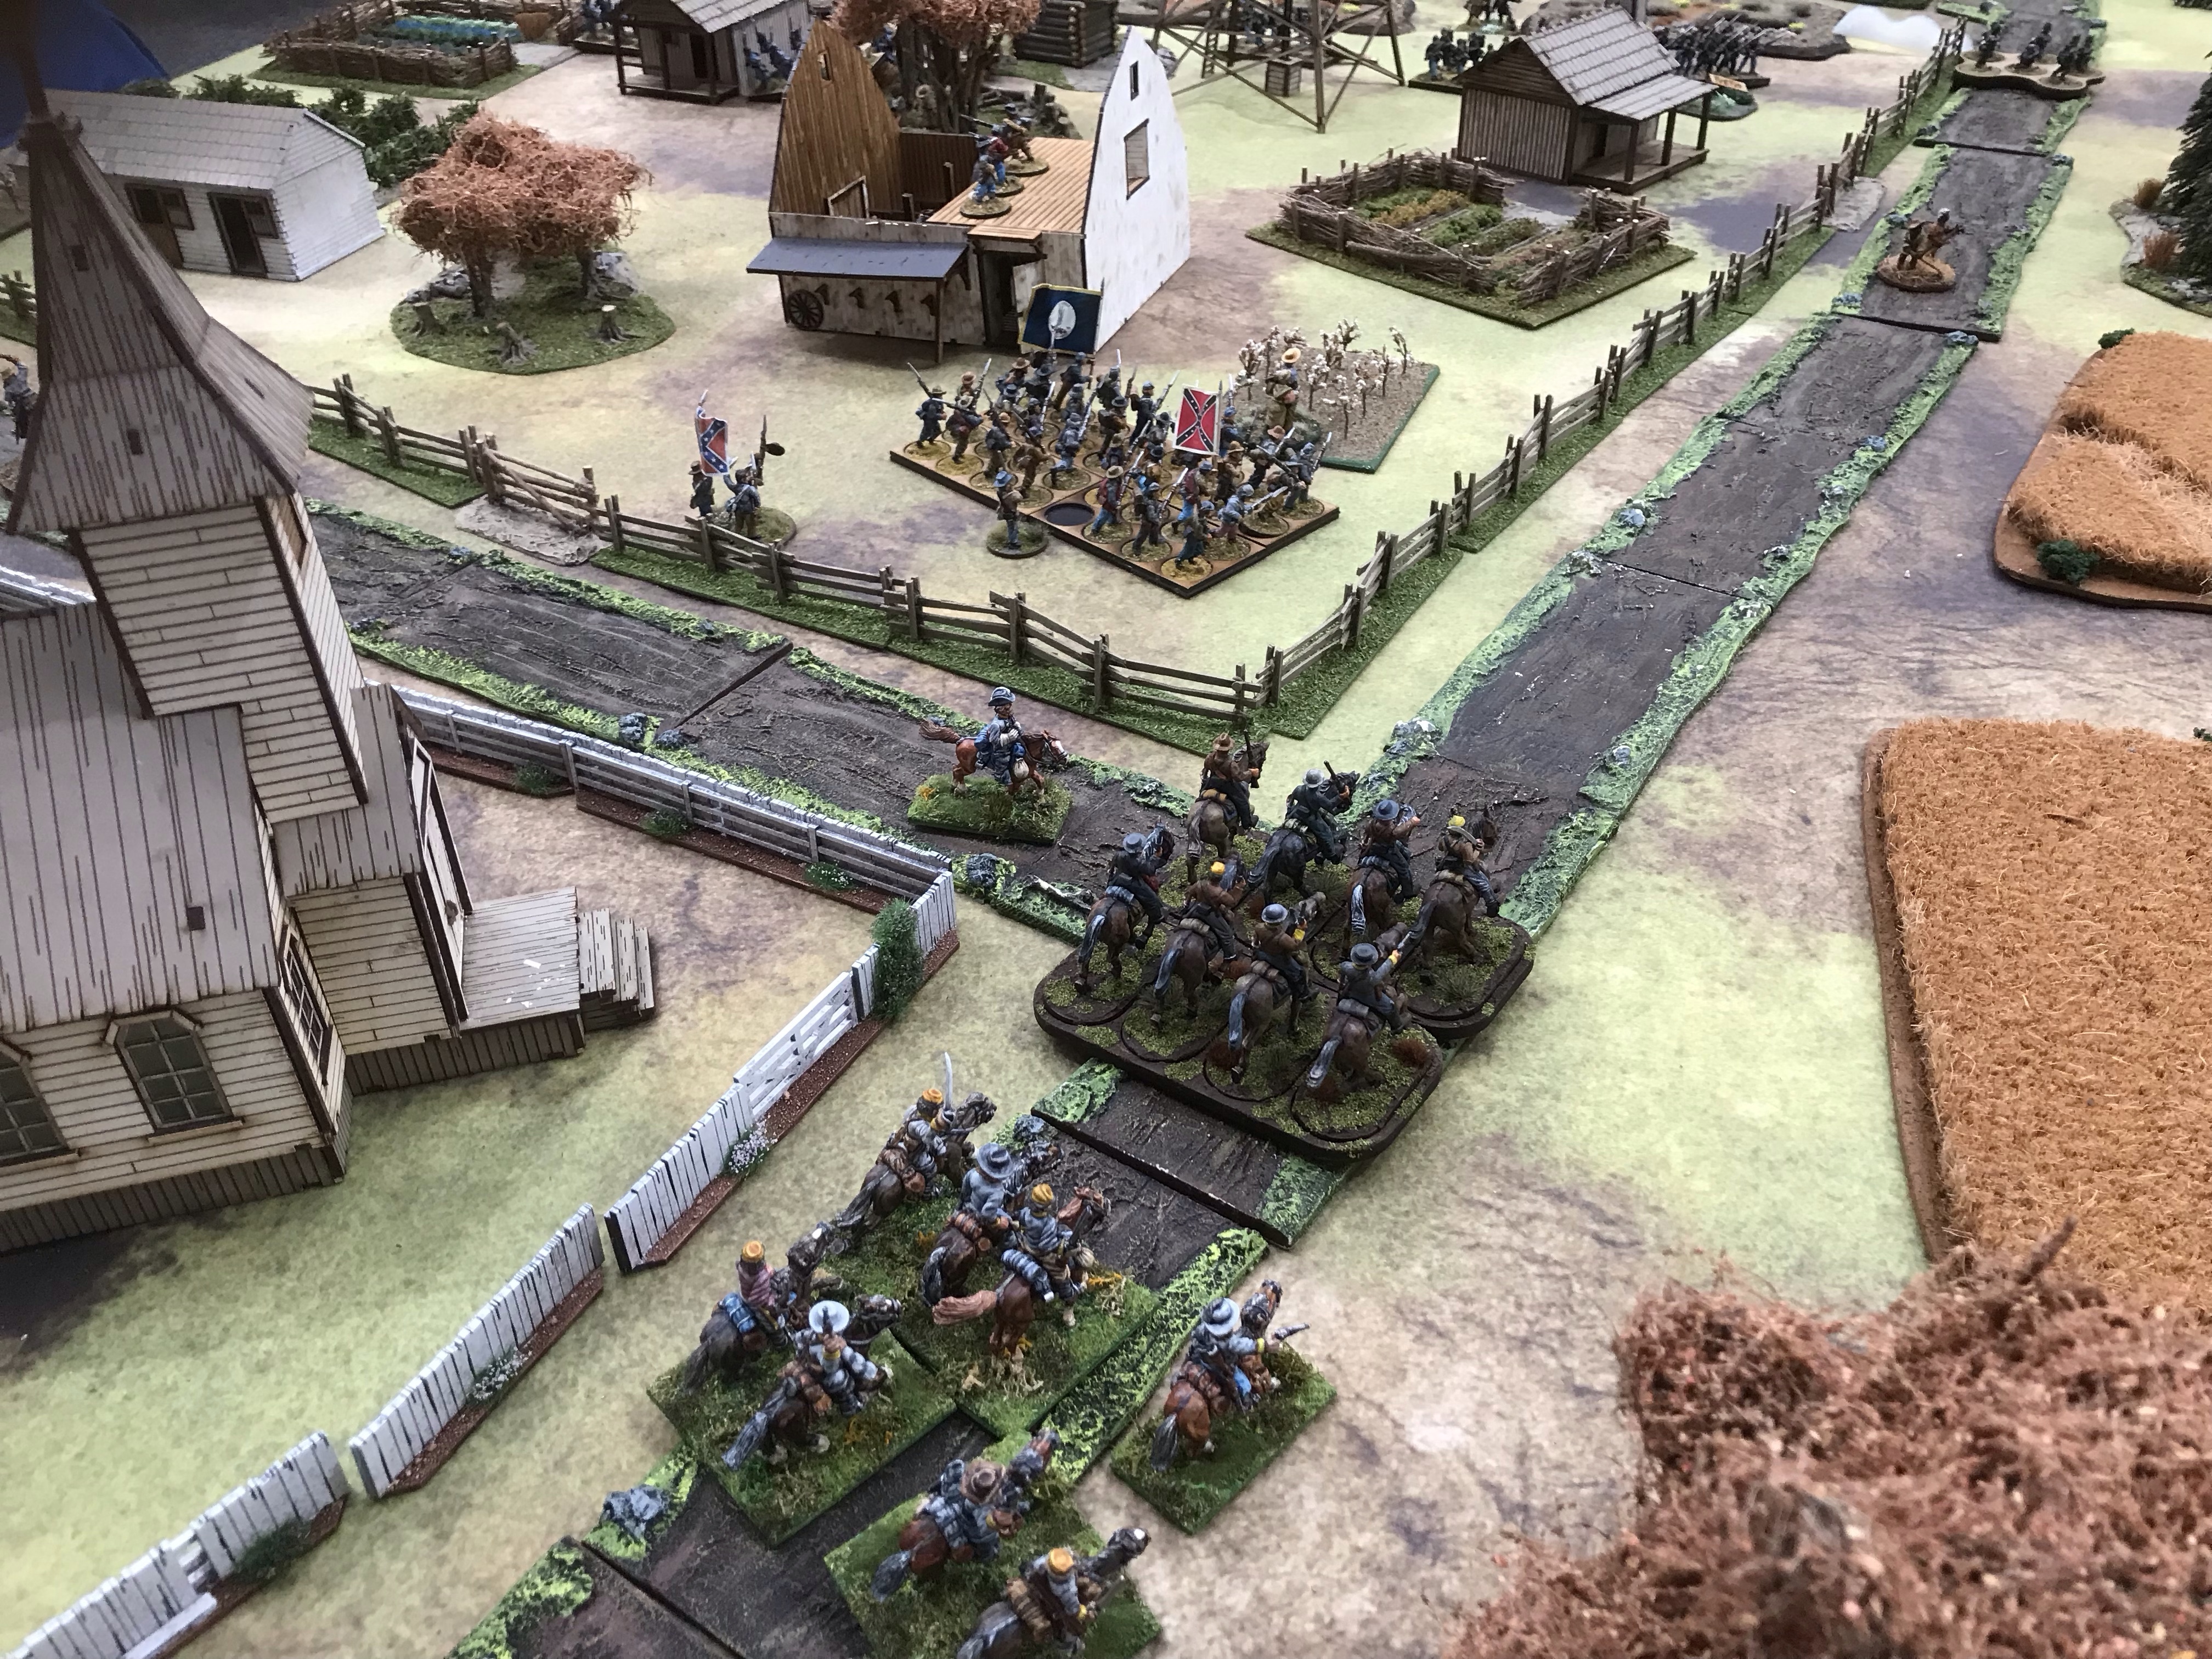
A Confederate cavalry force arrives and prepares to rescue General Pickett. Other forces form a line to protect the plantation. The plantation owner heads towards them but with glacial speed. Clearly too much port and not enough exercise.
The cavalry charge falters and gets shot up. A victim of the activation system. With improbable luck they could have ridden down the Union skirmishers and rode back with General Pickett.
The end of the game sees the Union rescuing the slaves while the plantation owner and General Pickett are still in the thick of it. Honourable mention to the CSA gun crew who rode up, deployed, shot off a devastating round of canister then saddled up and rode off again.
The whole game took 3 hours with 4 players and an umpire. It could have run for a few more turns and was still anybody’s game although a Union win when we called it. The in-play events, some scripted, some random certainly made the gameplay flow.
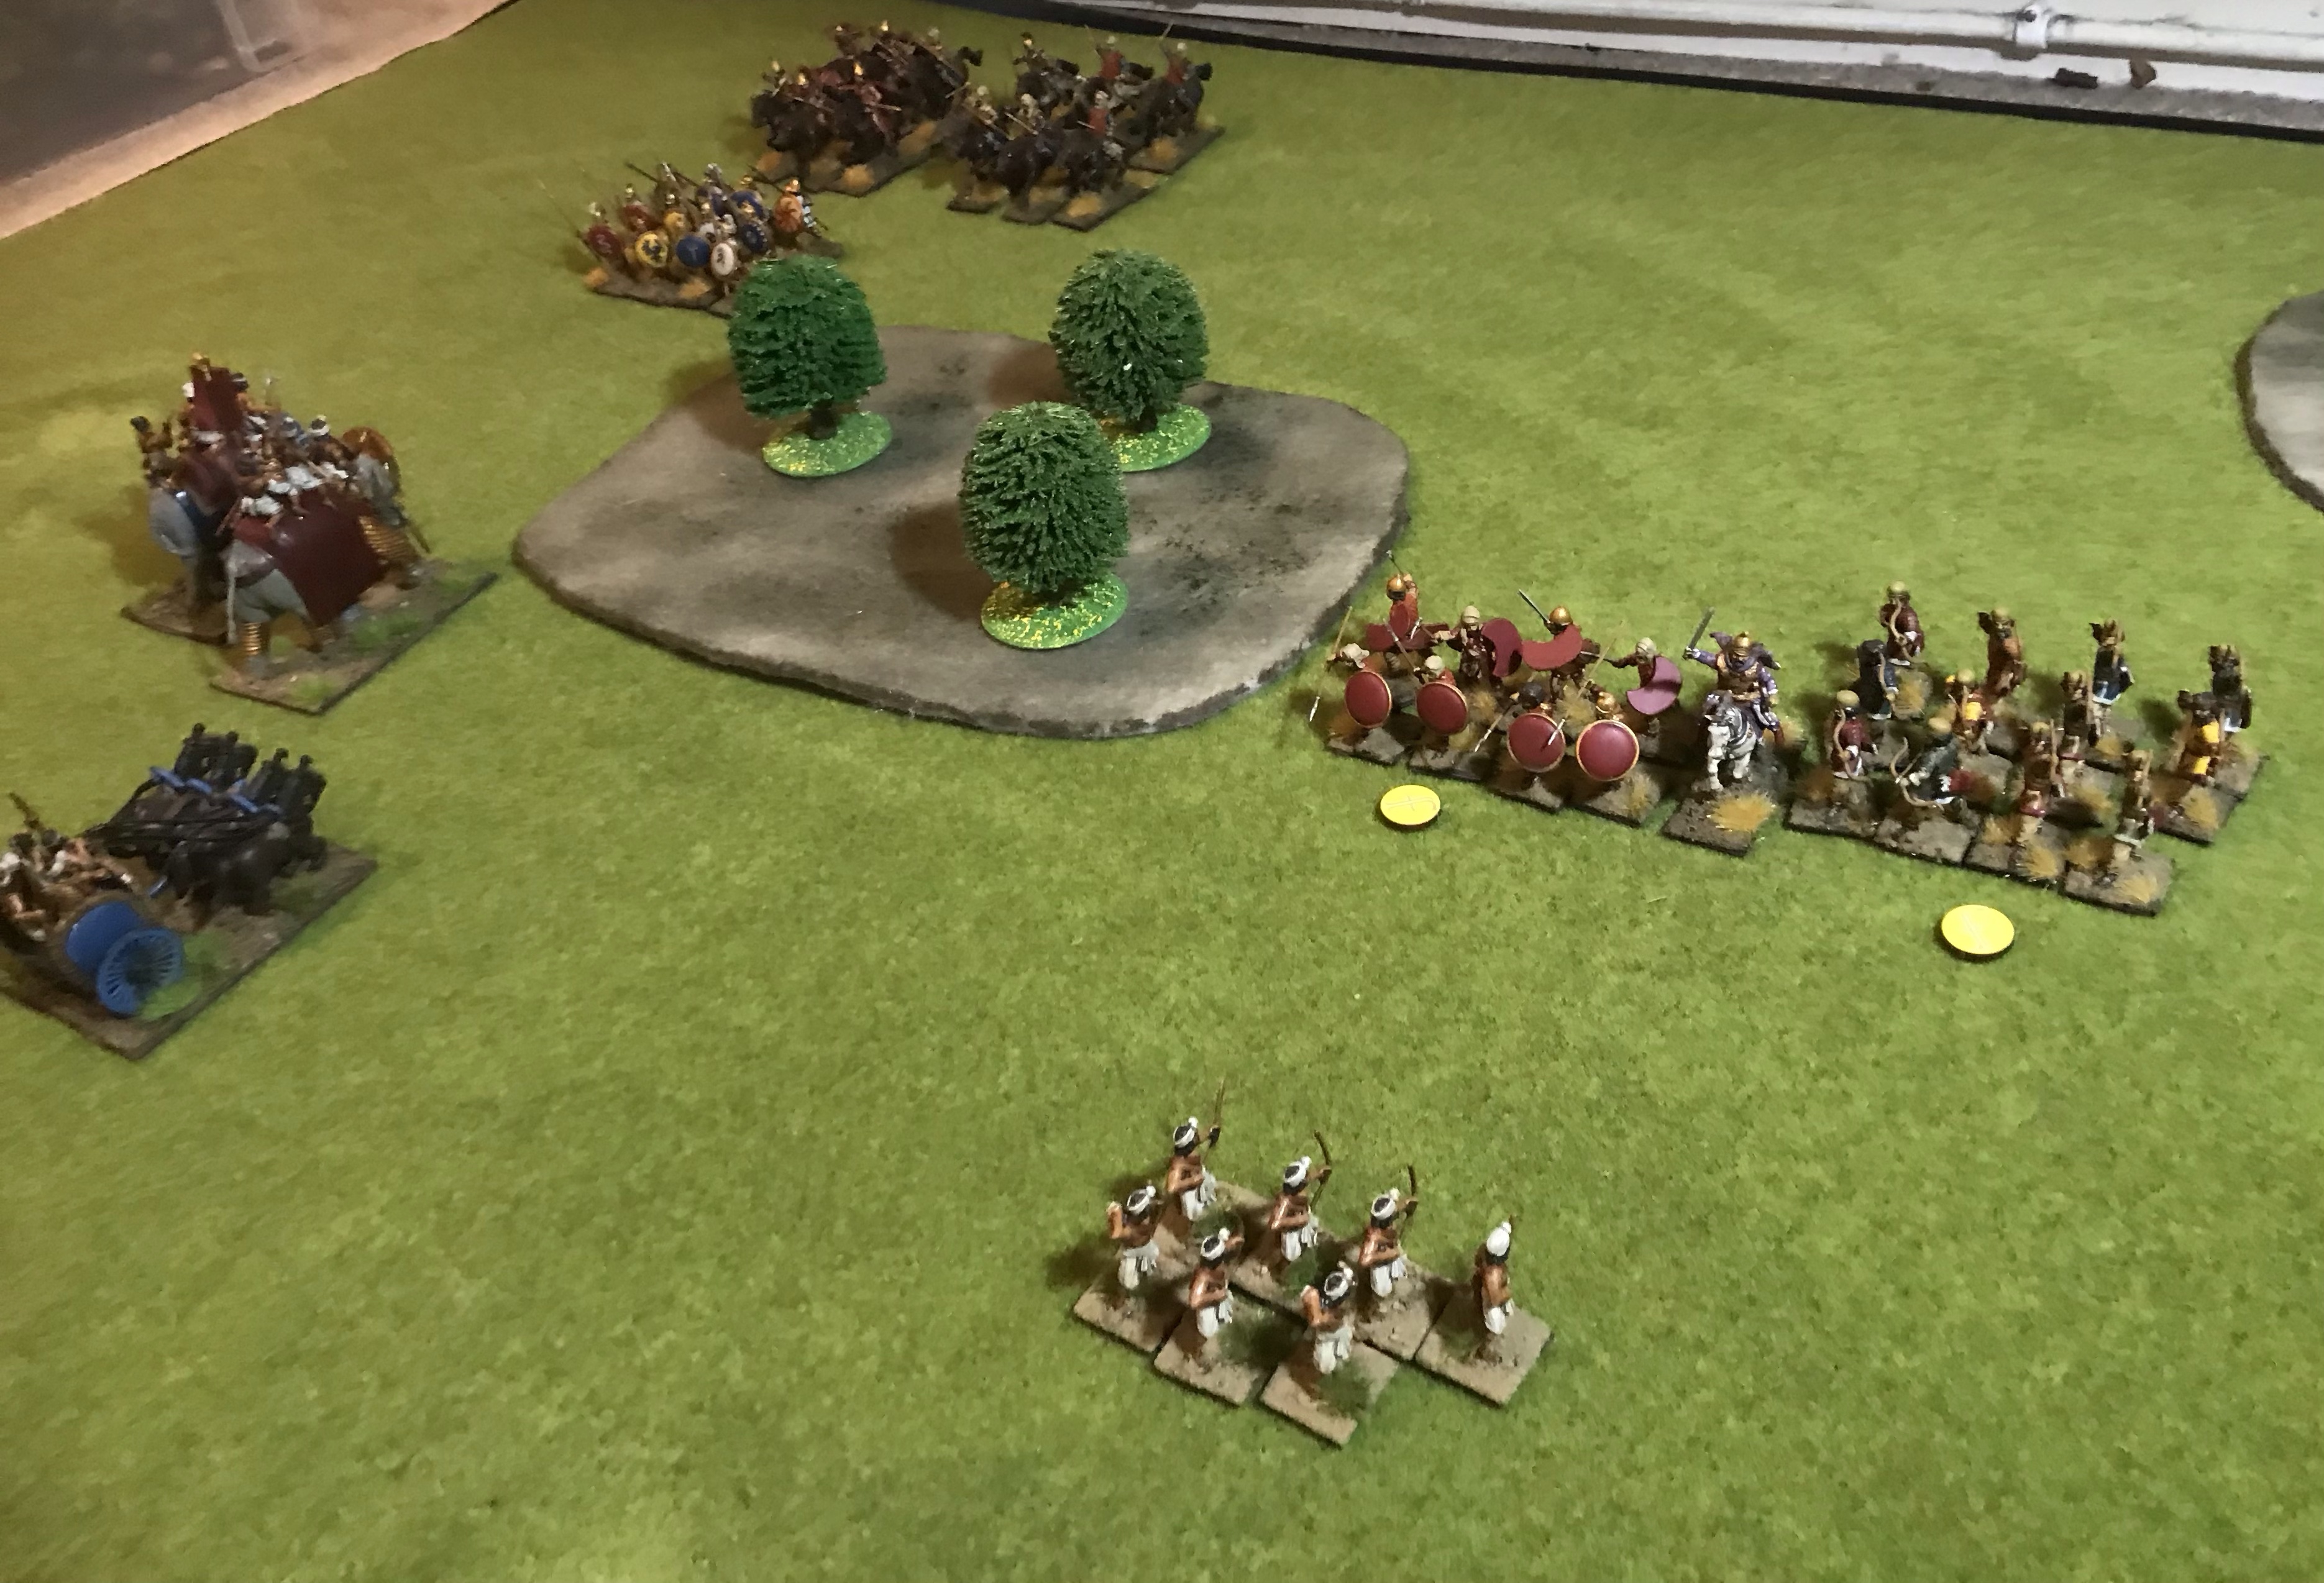
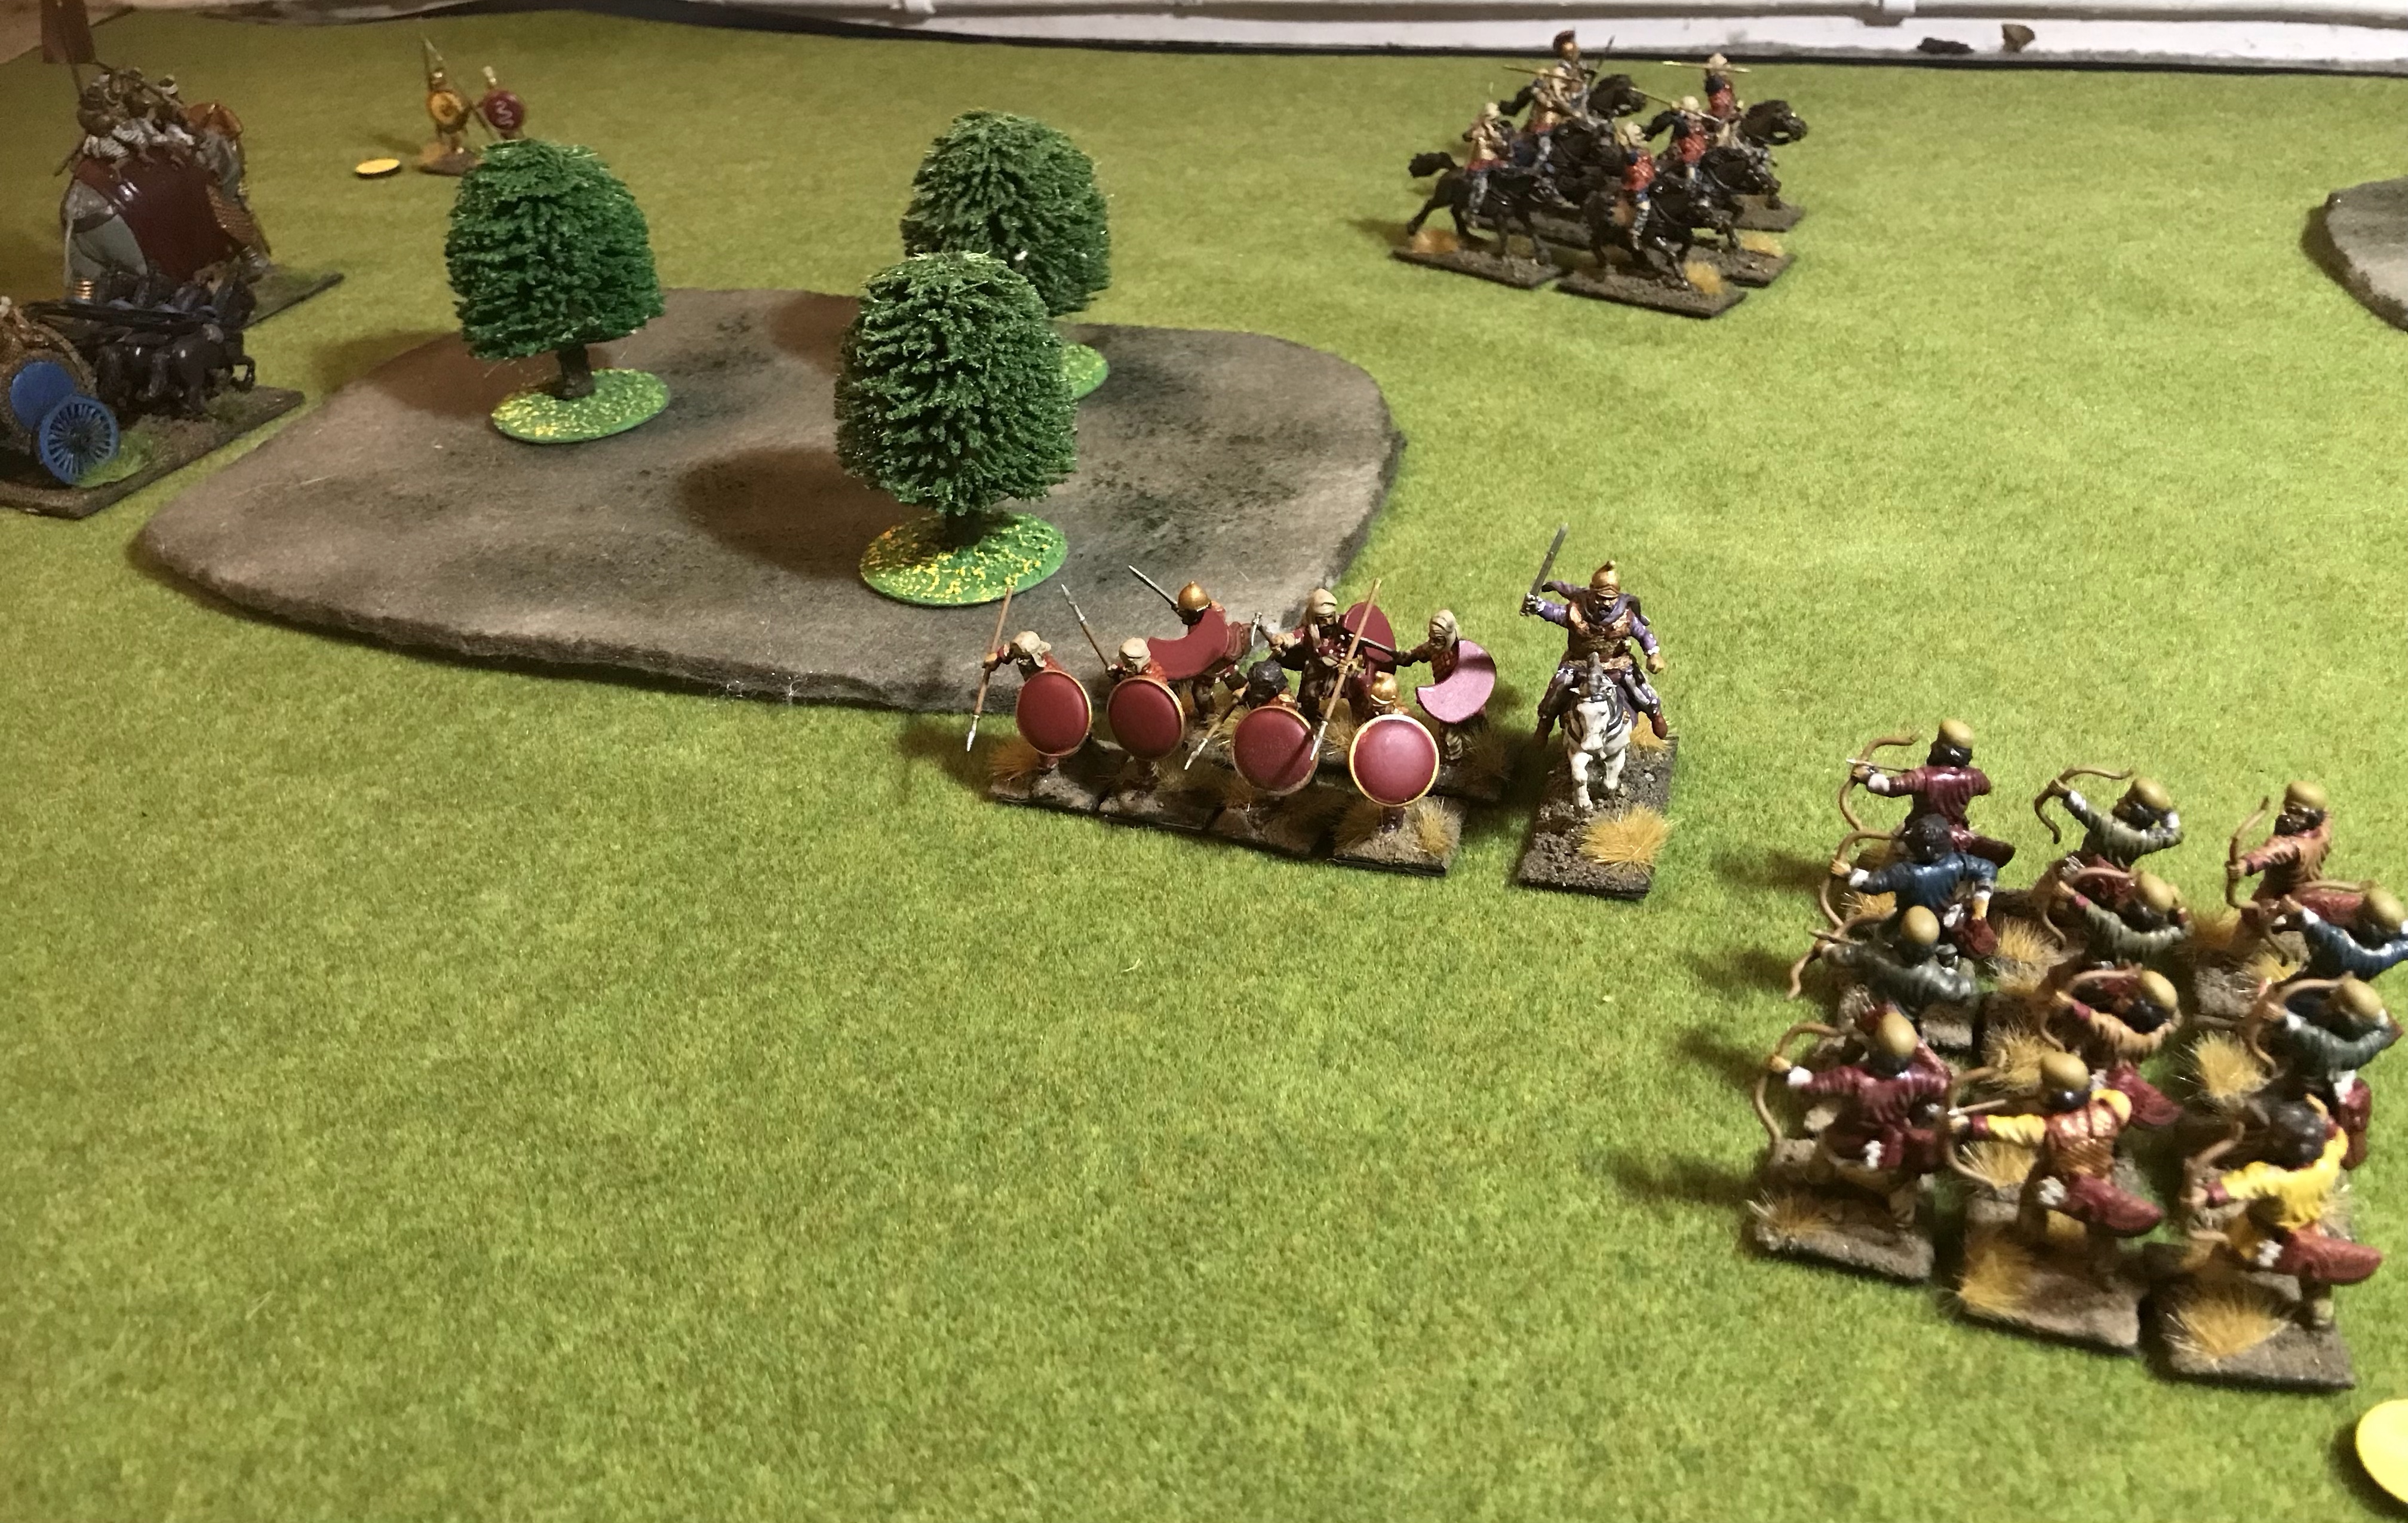
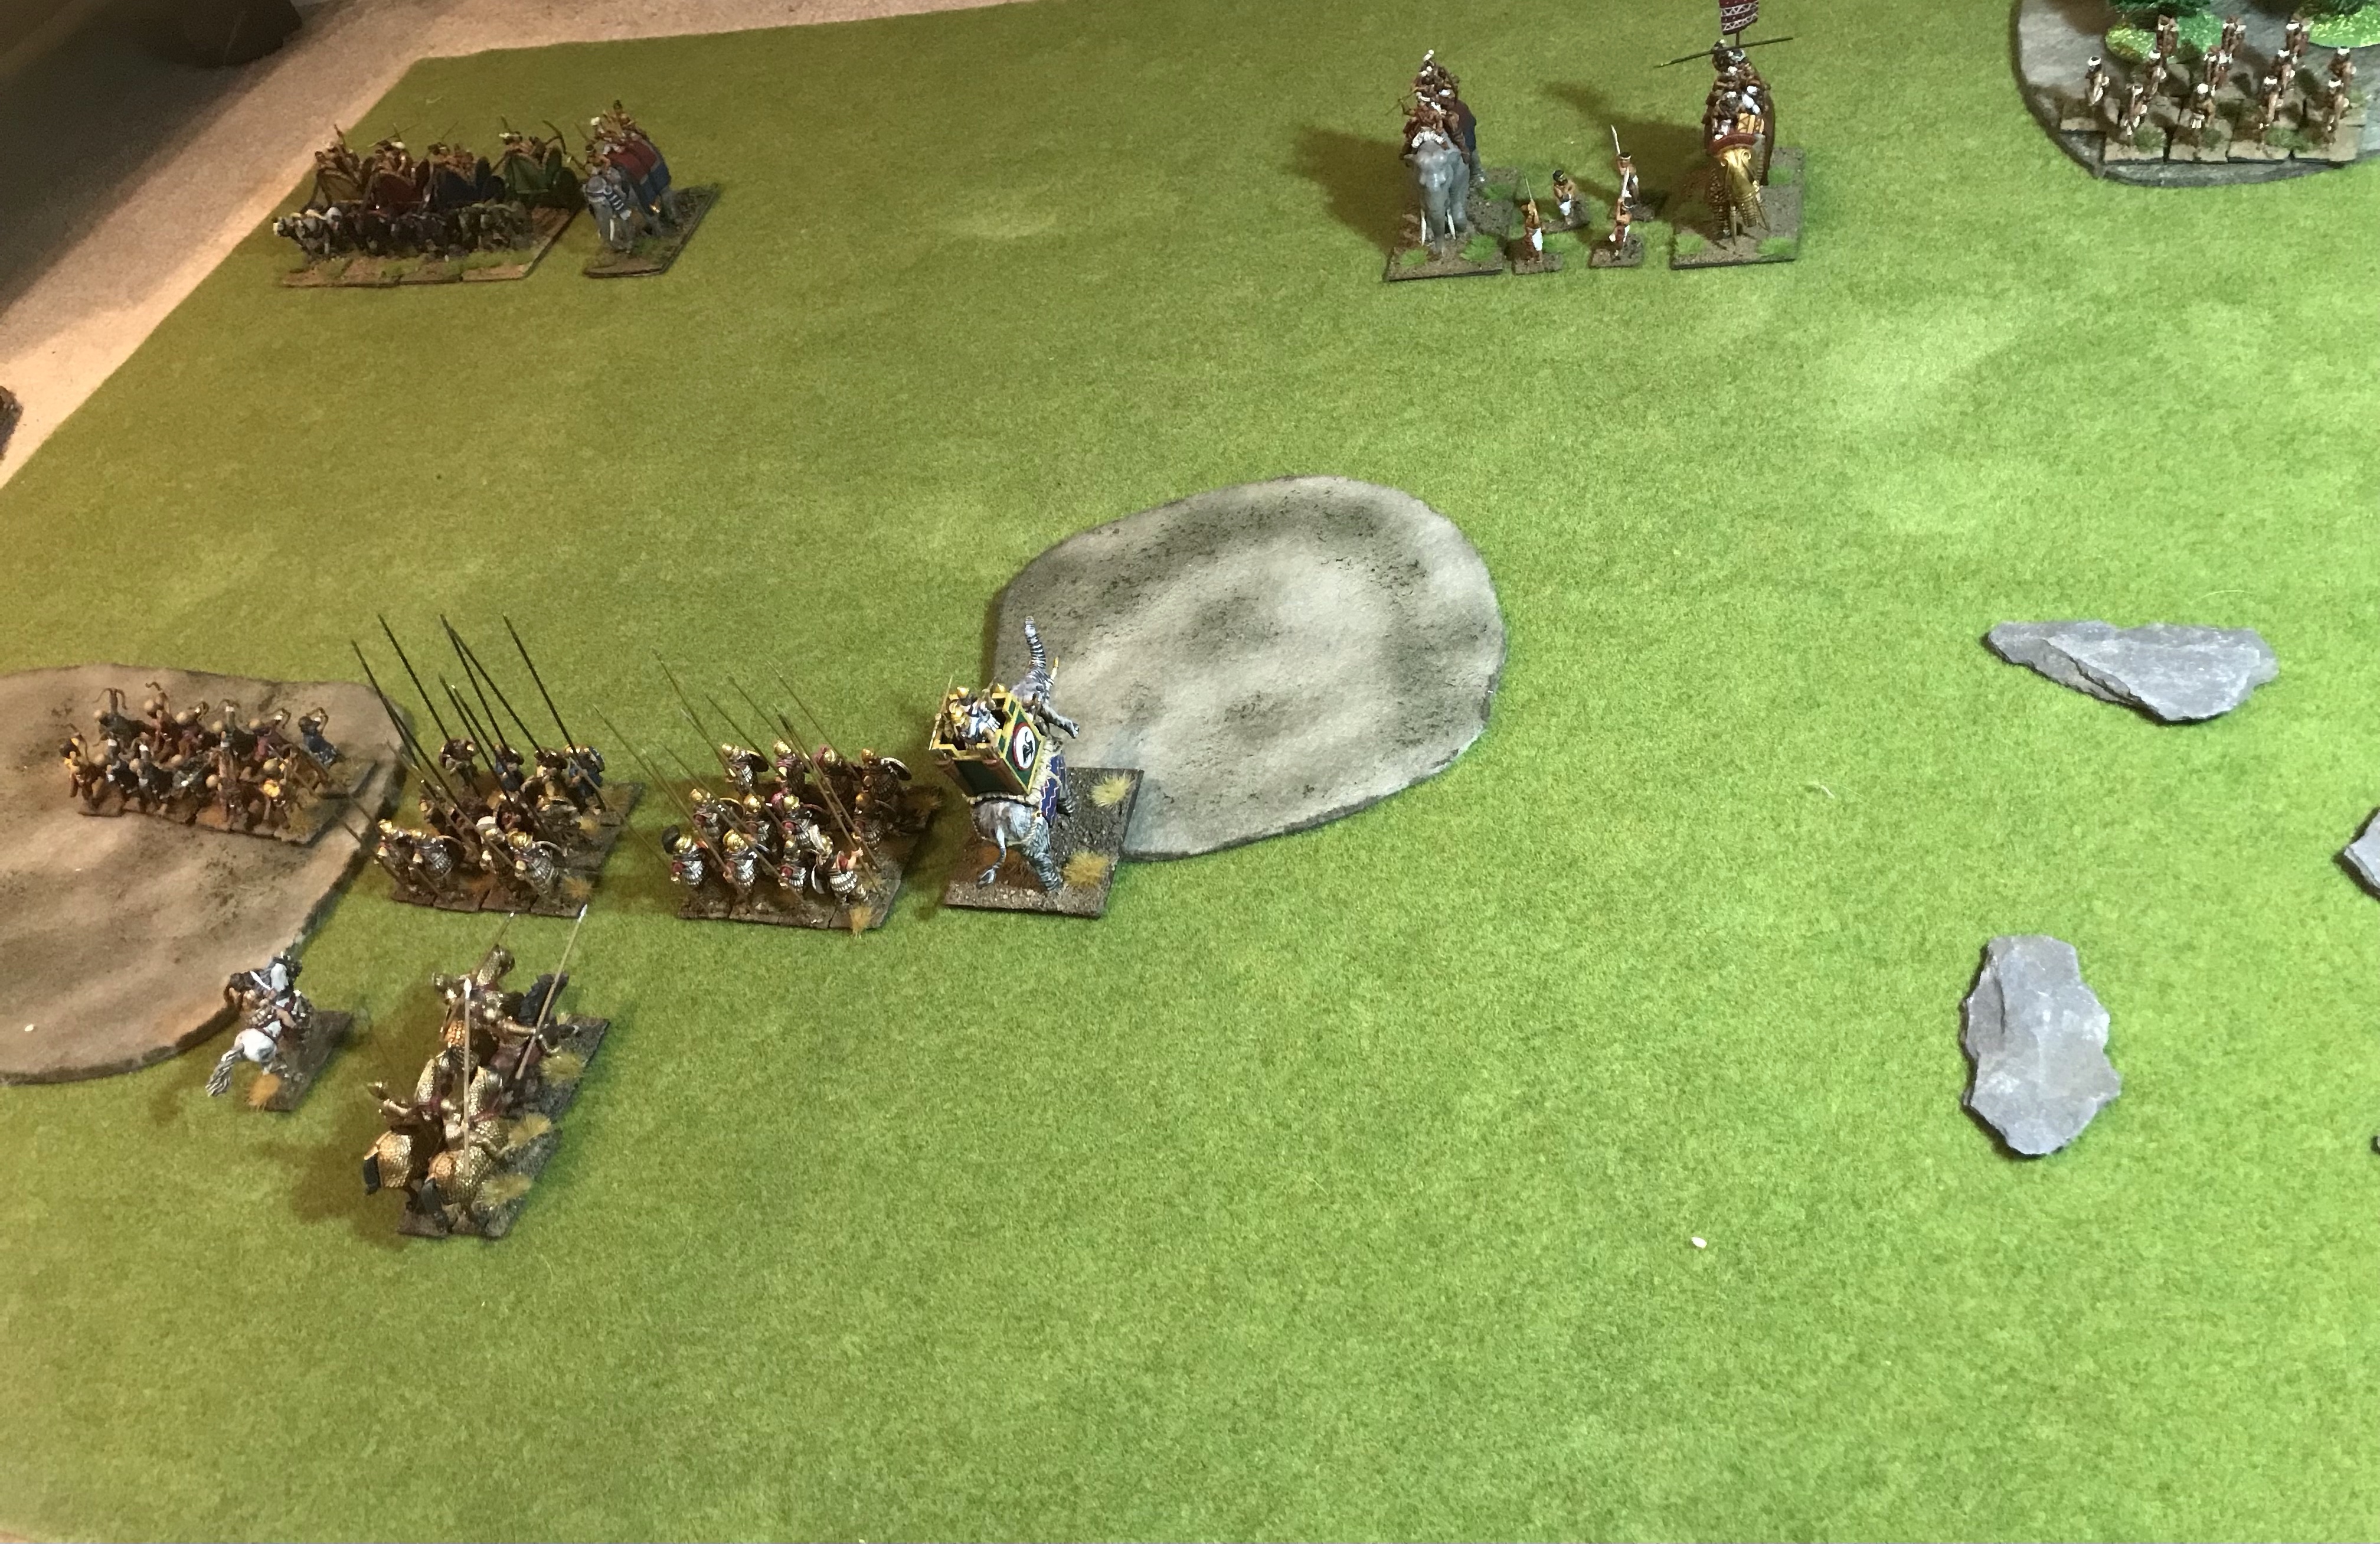
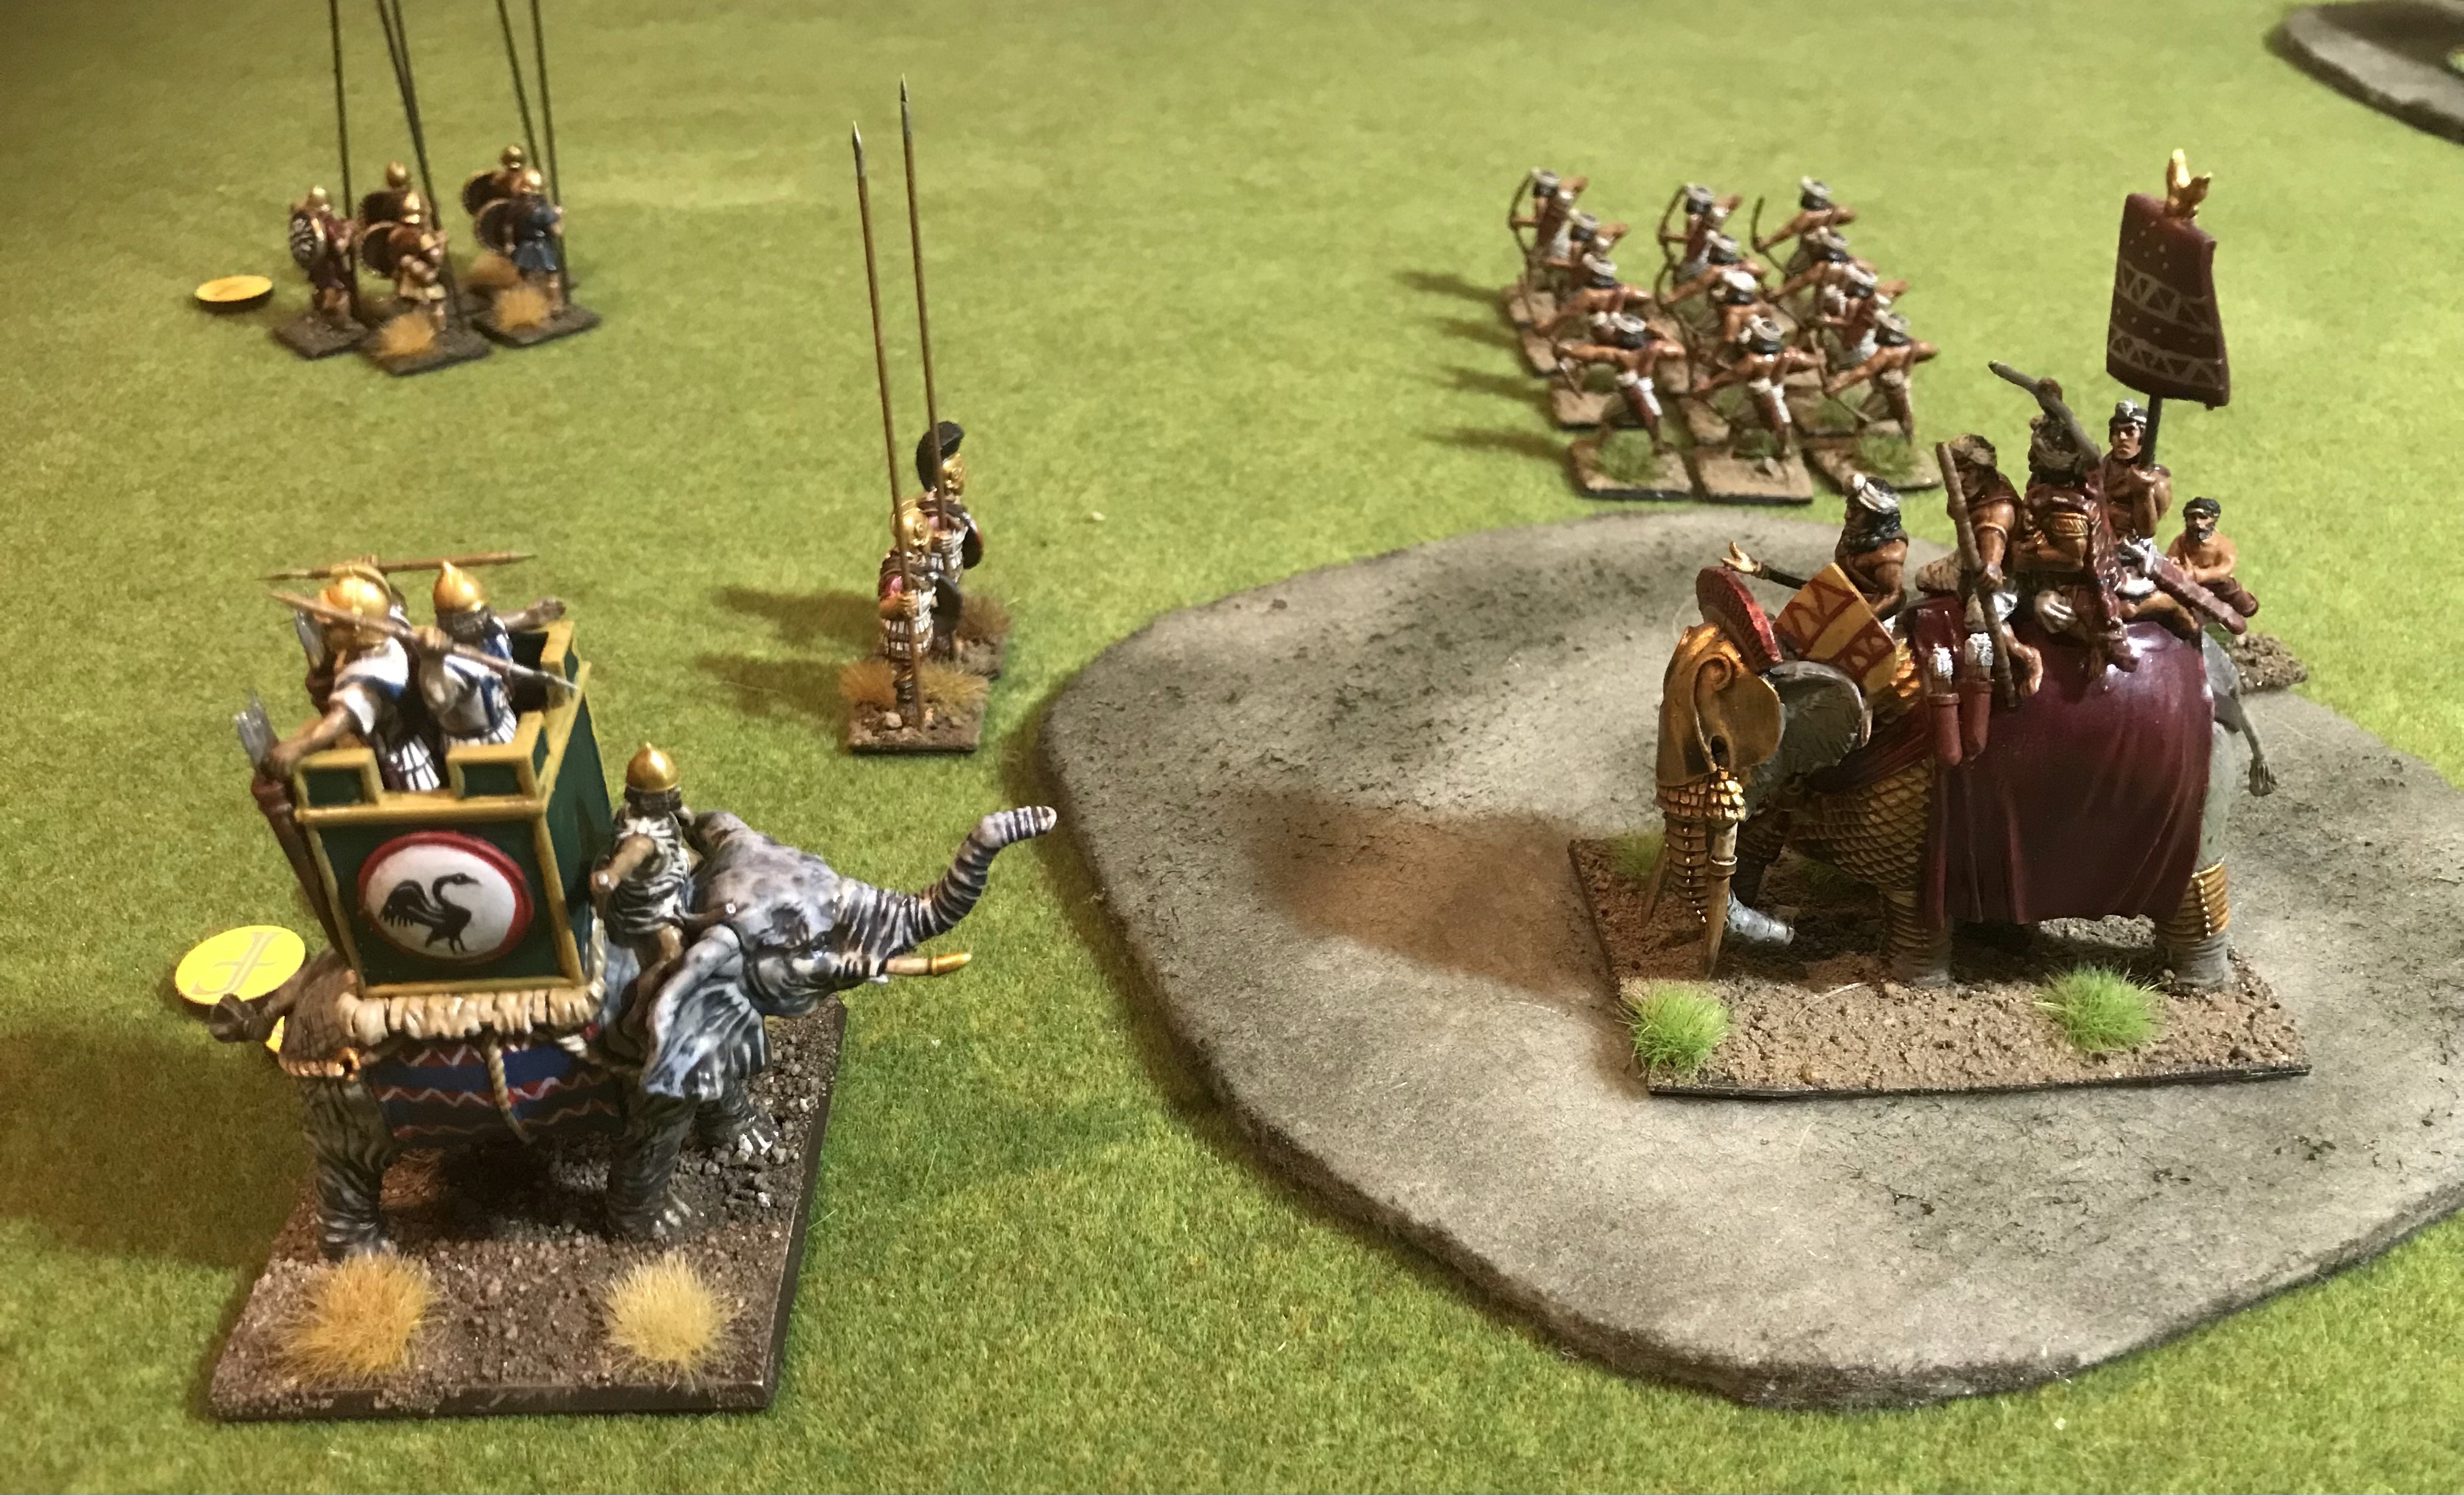
Careful study of the Saga Indian list reveals that we can cram in 3 elephants and 5 chariots by running an 8-unit list. No more than 3 points can be spent on elephants and not more than half the units – not including the Warlord – may have resilience. So we can run Warlord in chariot, 3 elephants, 1 unit of 4 light chariots, 1 unit of 12 Levy and 2 units of 6 Levy (or 2 other half point throwaway units). As a bonus an 8 unit list pulls the full 8 Saga dice (at least for the start of the game).
Here the Indians are first player and put down some ruins to hide the small Levy units in and a big wood to block Persian shooting.
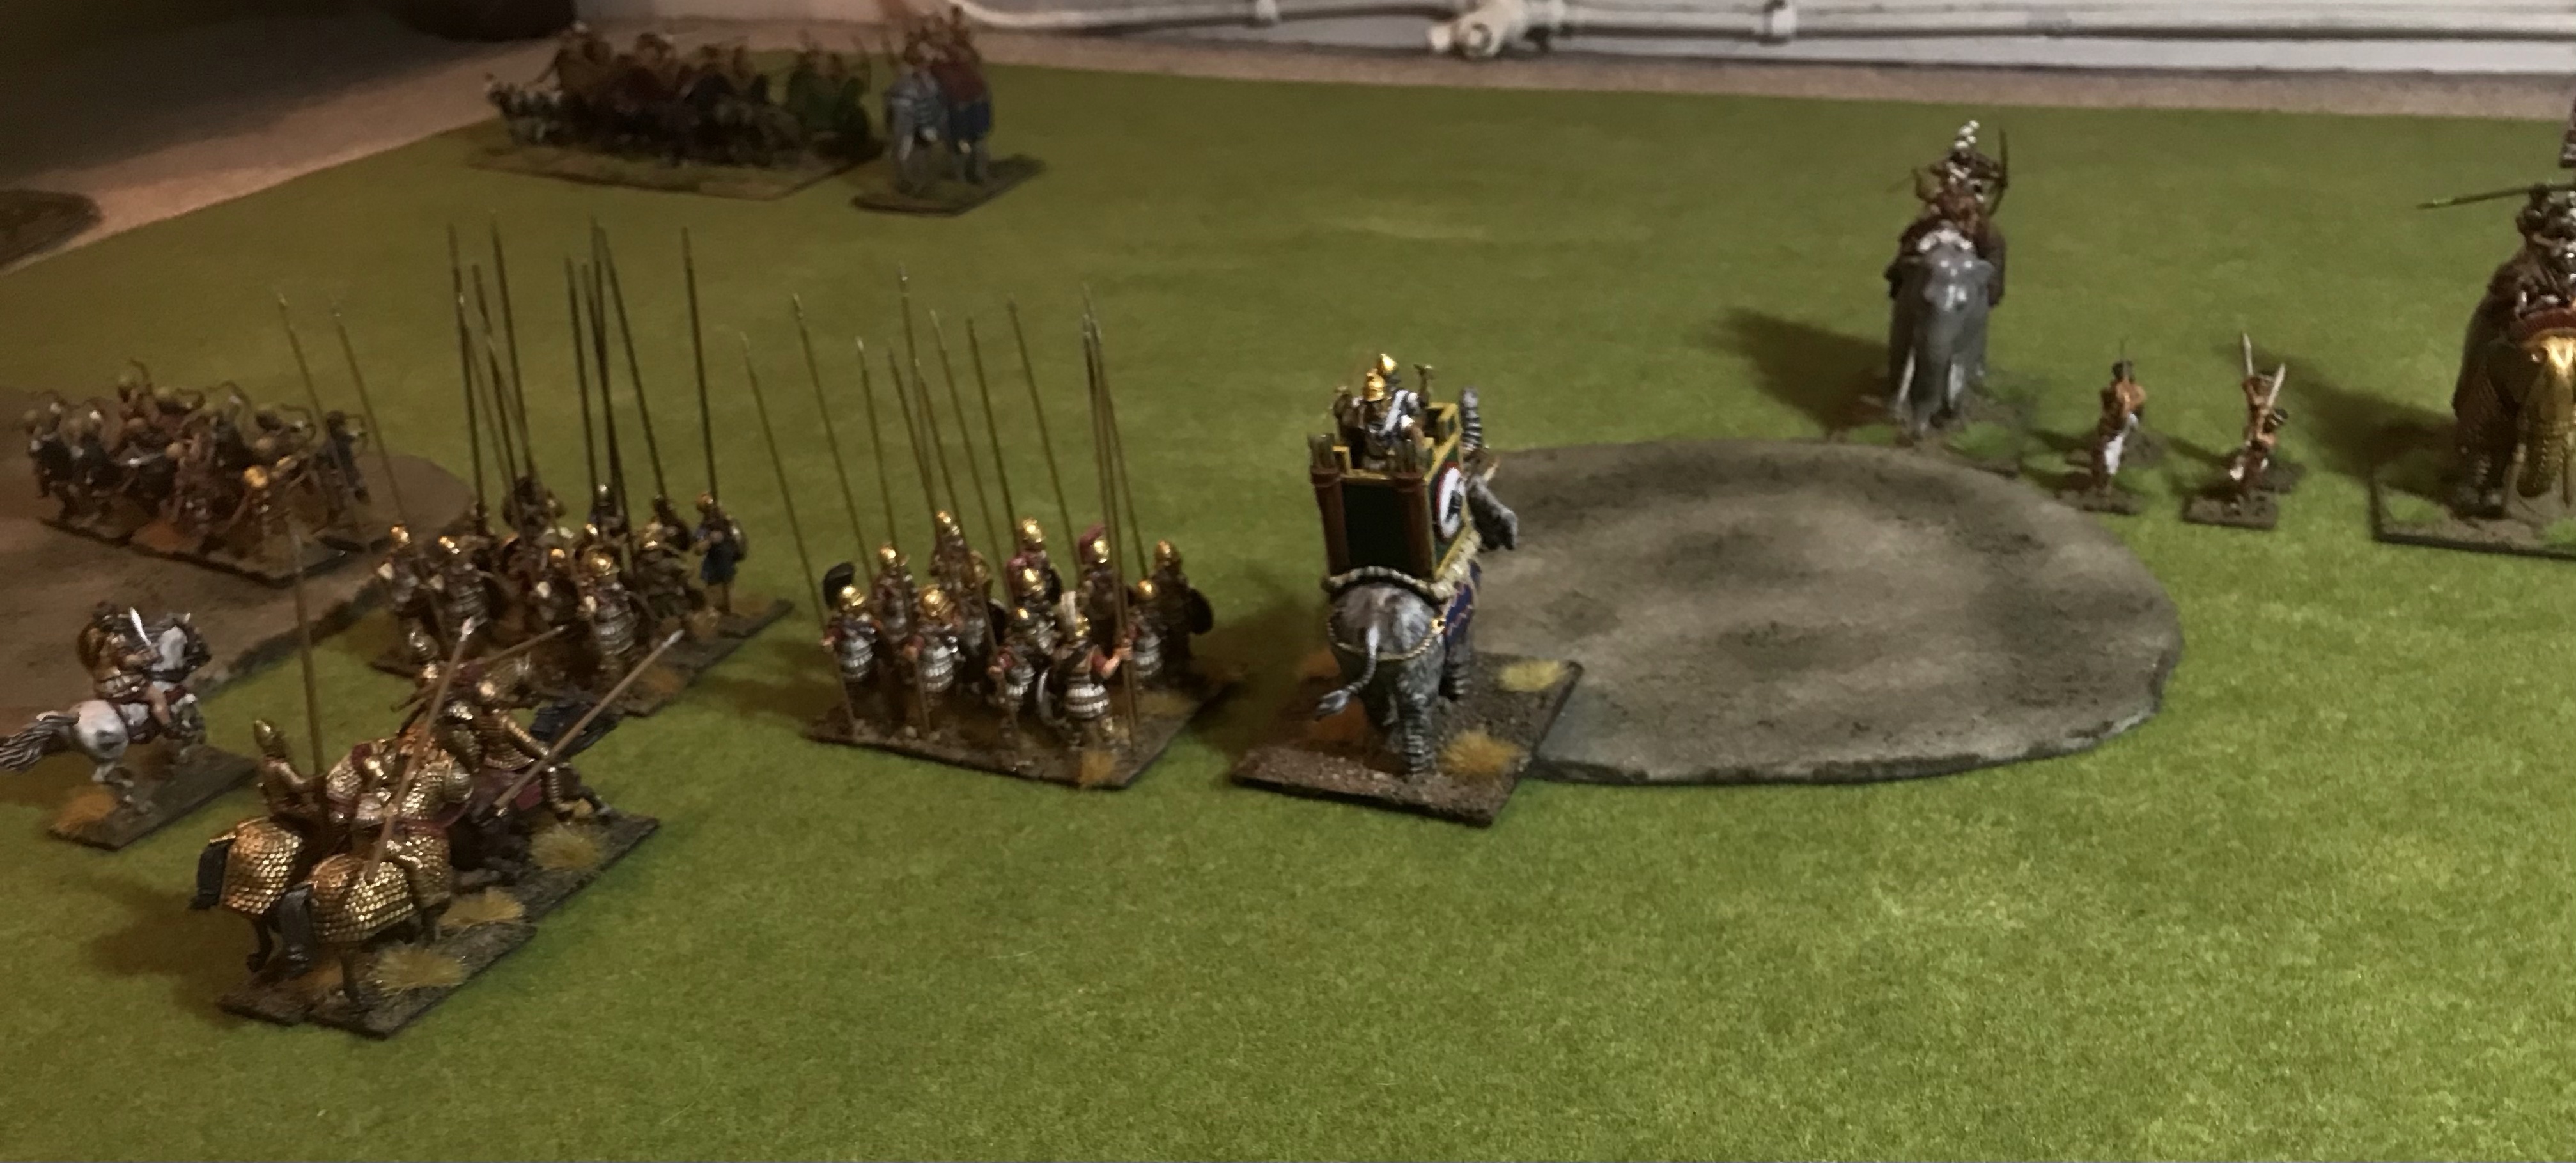
It all goes wrong for the Persians from the word go. Their army is only pulling 6 Saga dice in this configuration. The key combined formation Hearthguard unit only has an Indian Levy as a useful target plus as it can only move ‘S’ is unlikely to get much more action. The Indians move up, their Chariots get some shots off but with no effect.
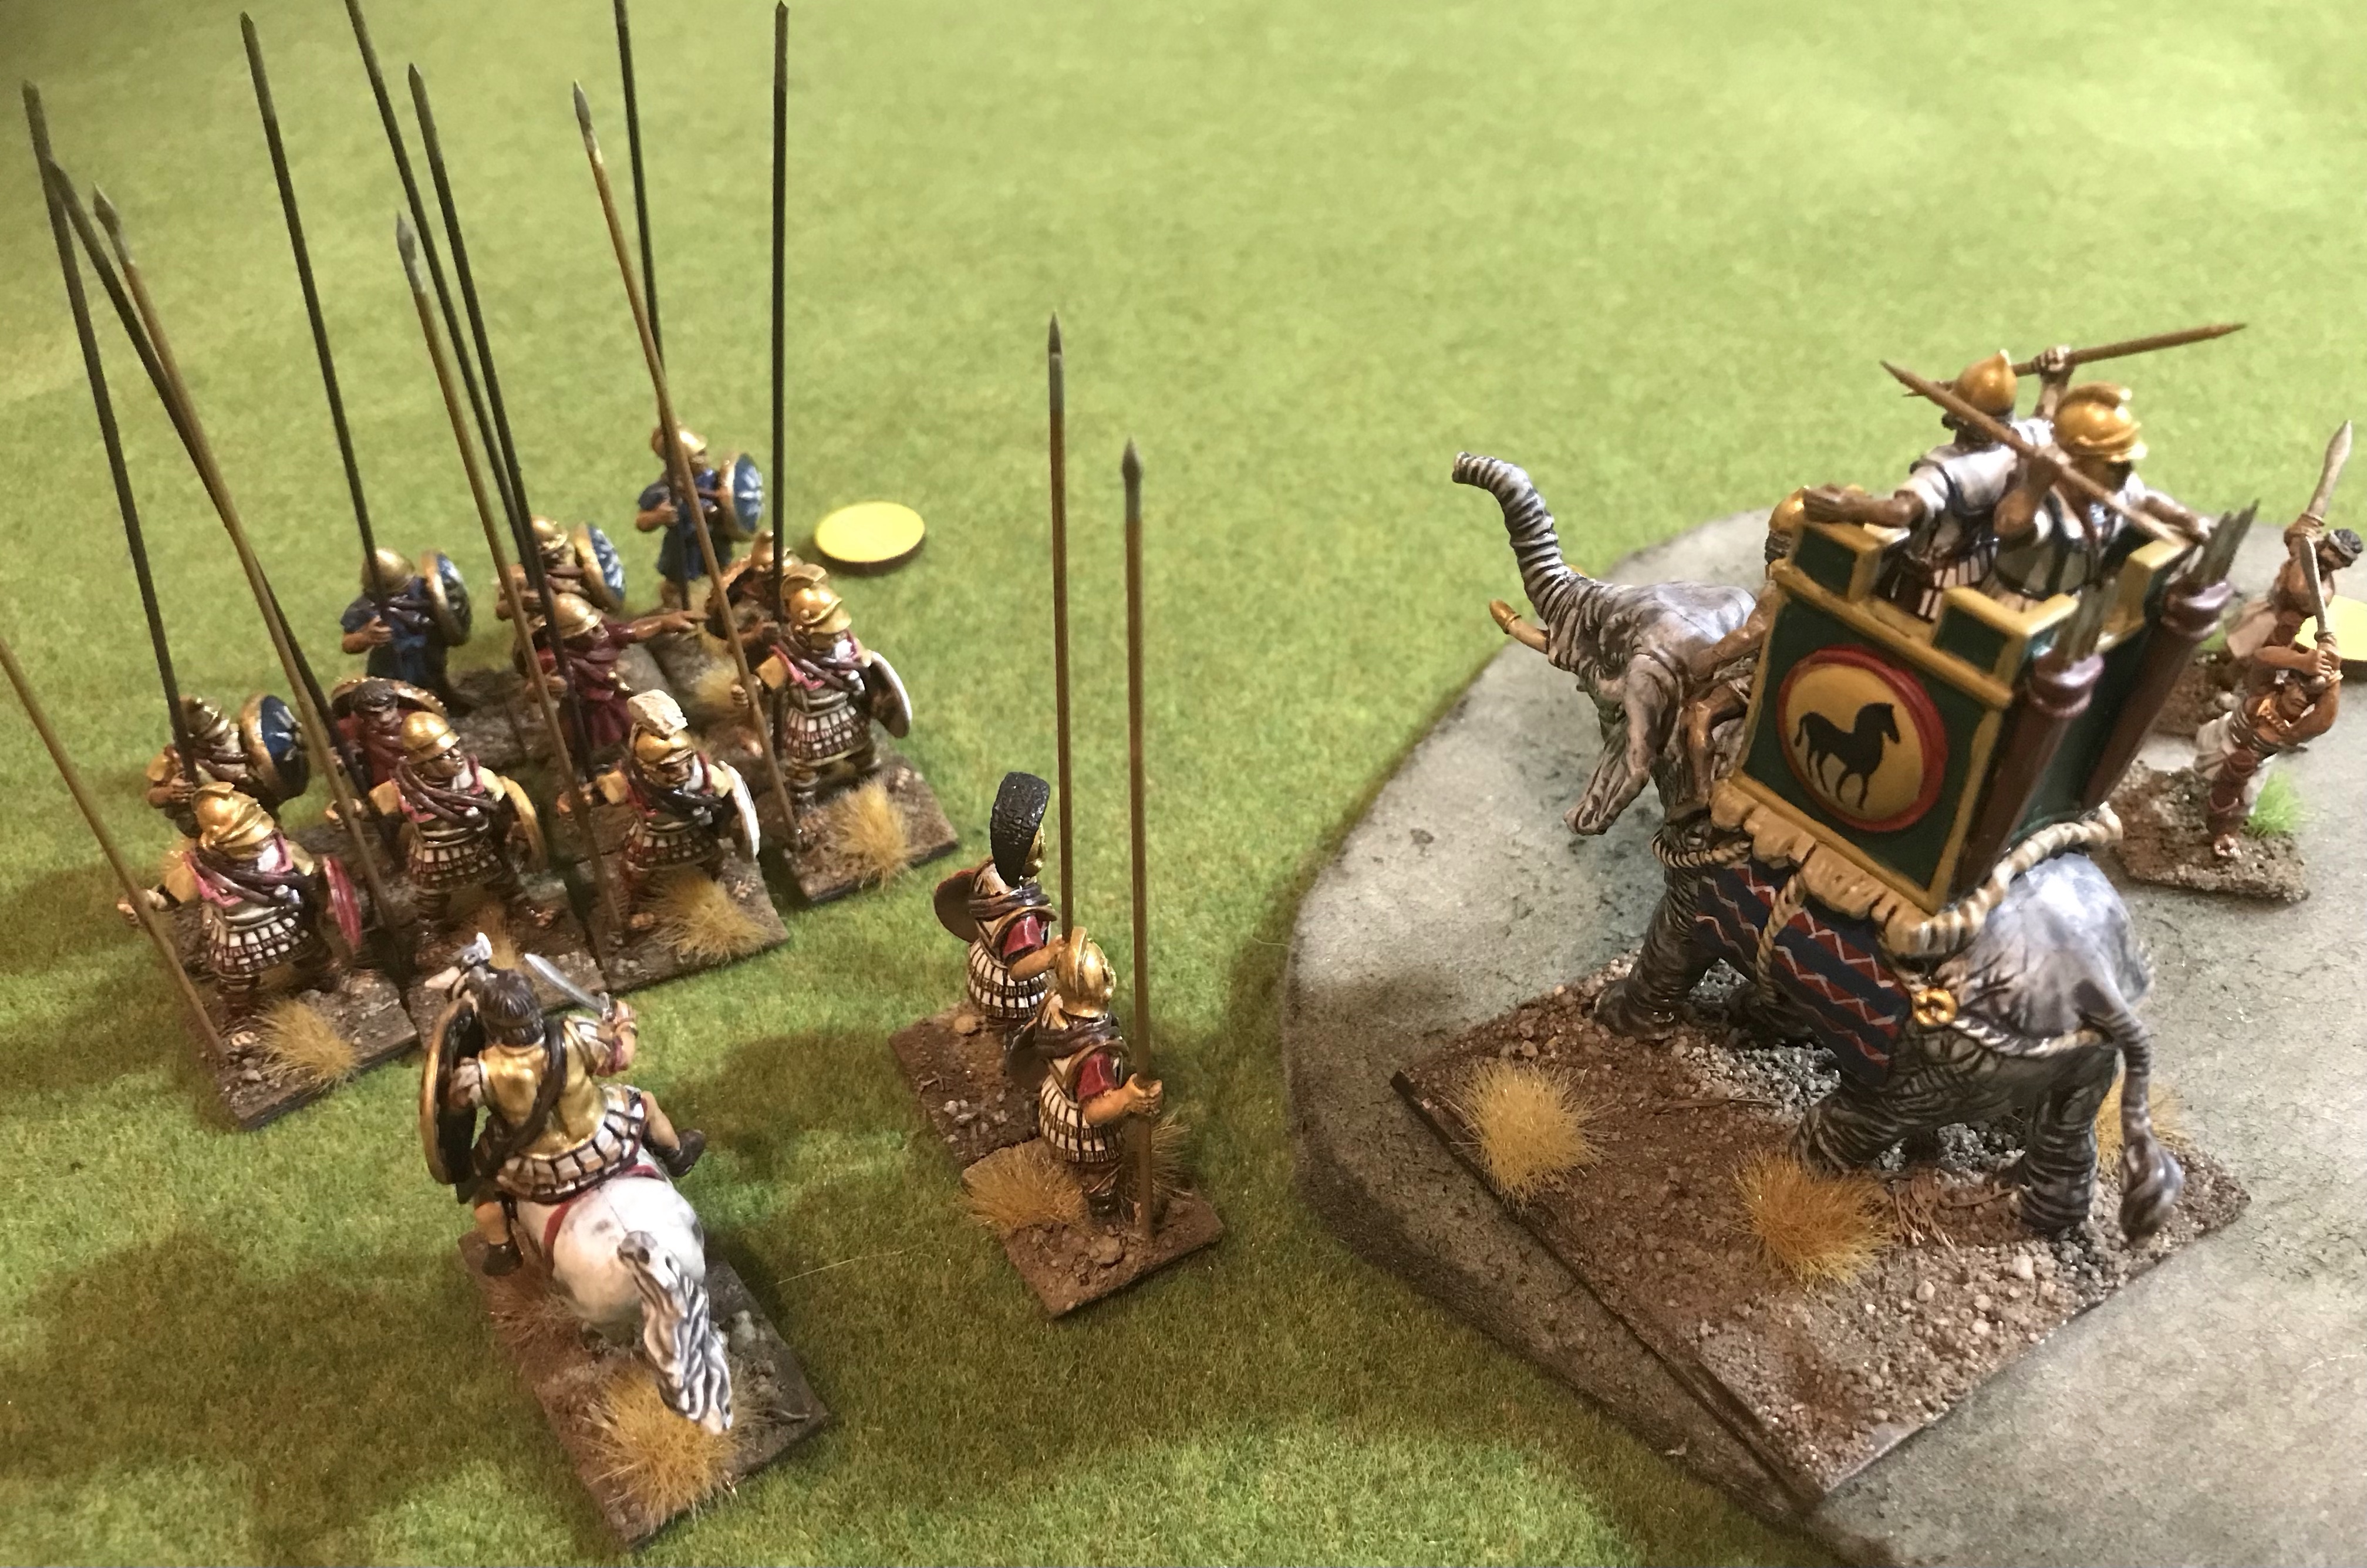
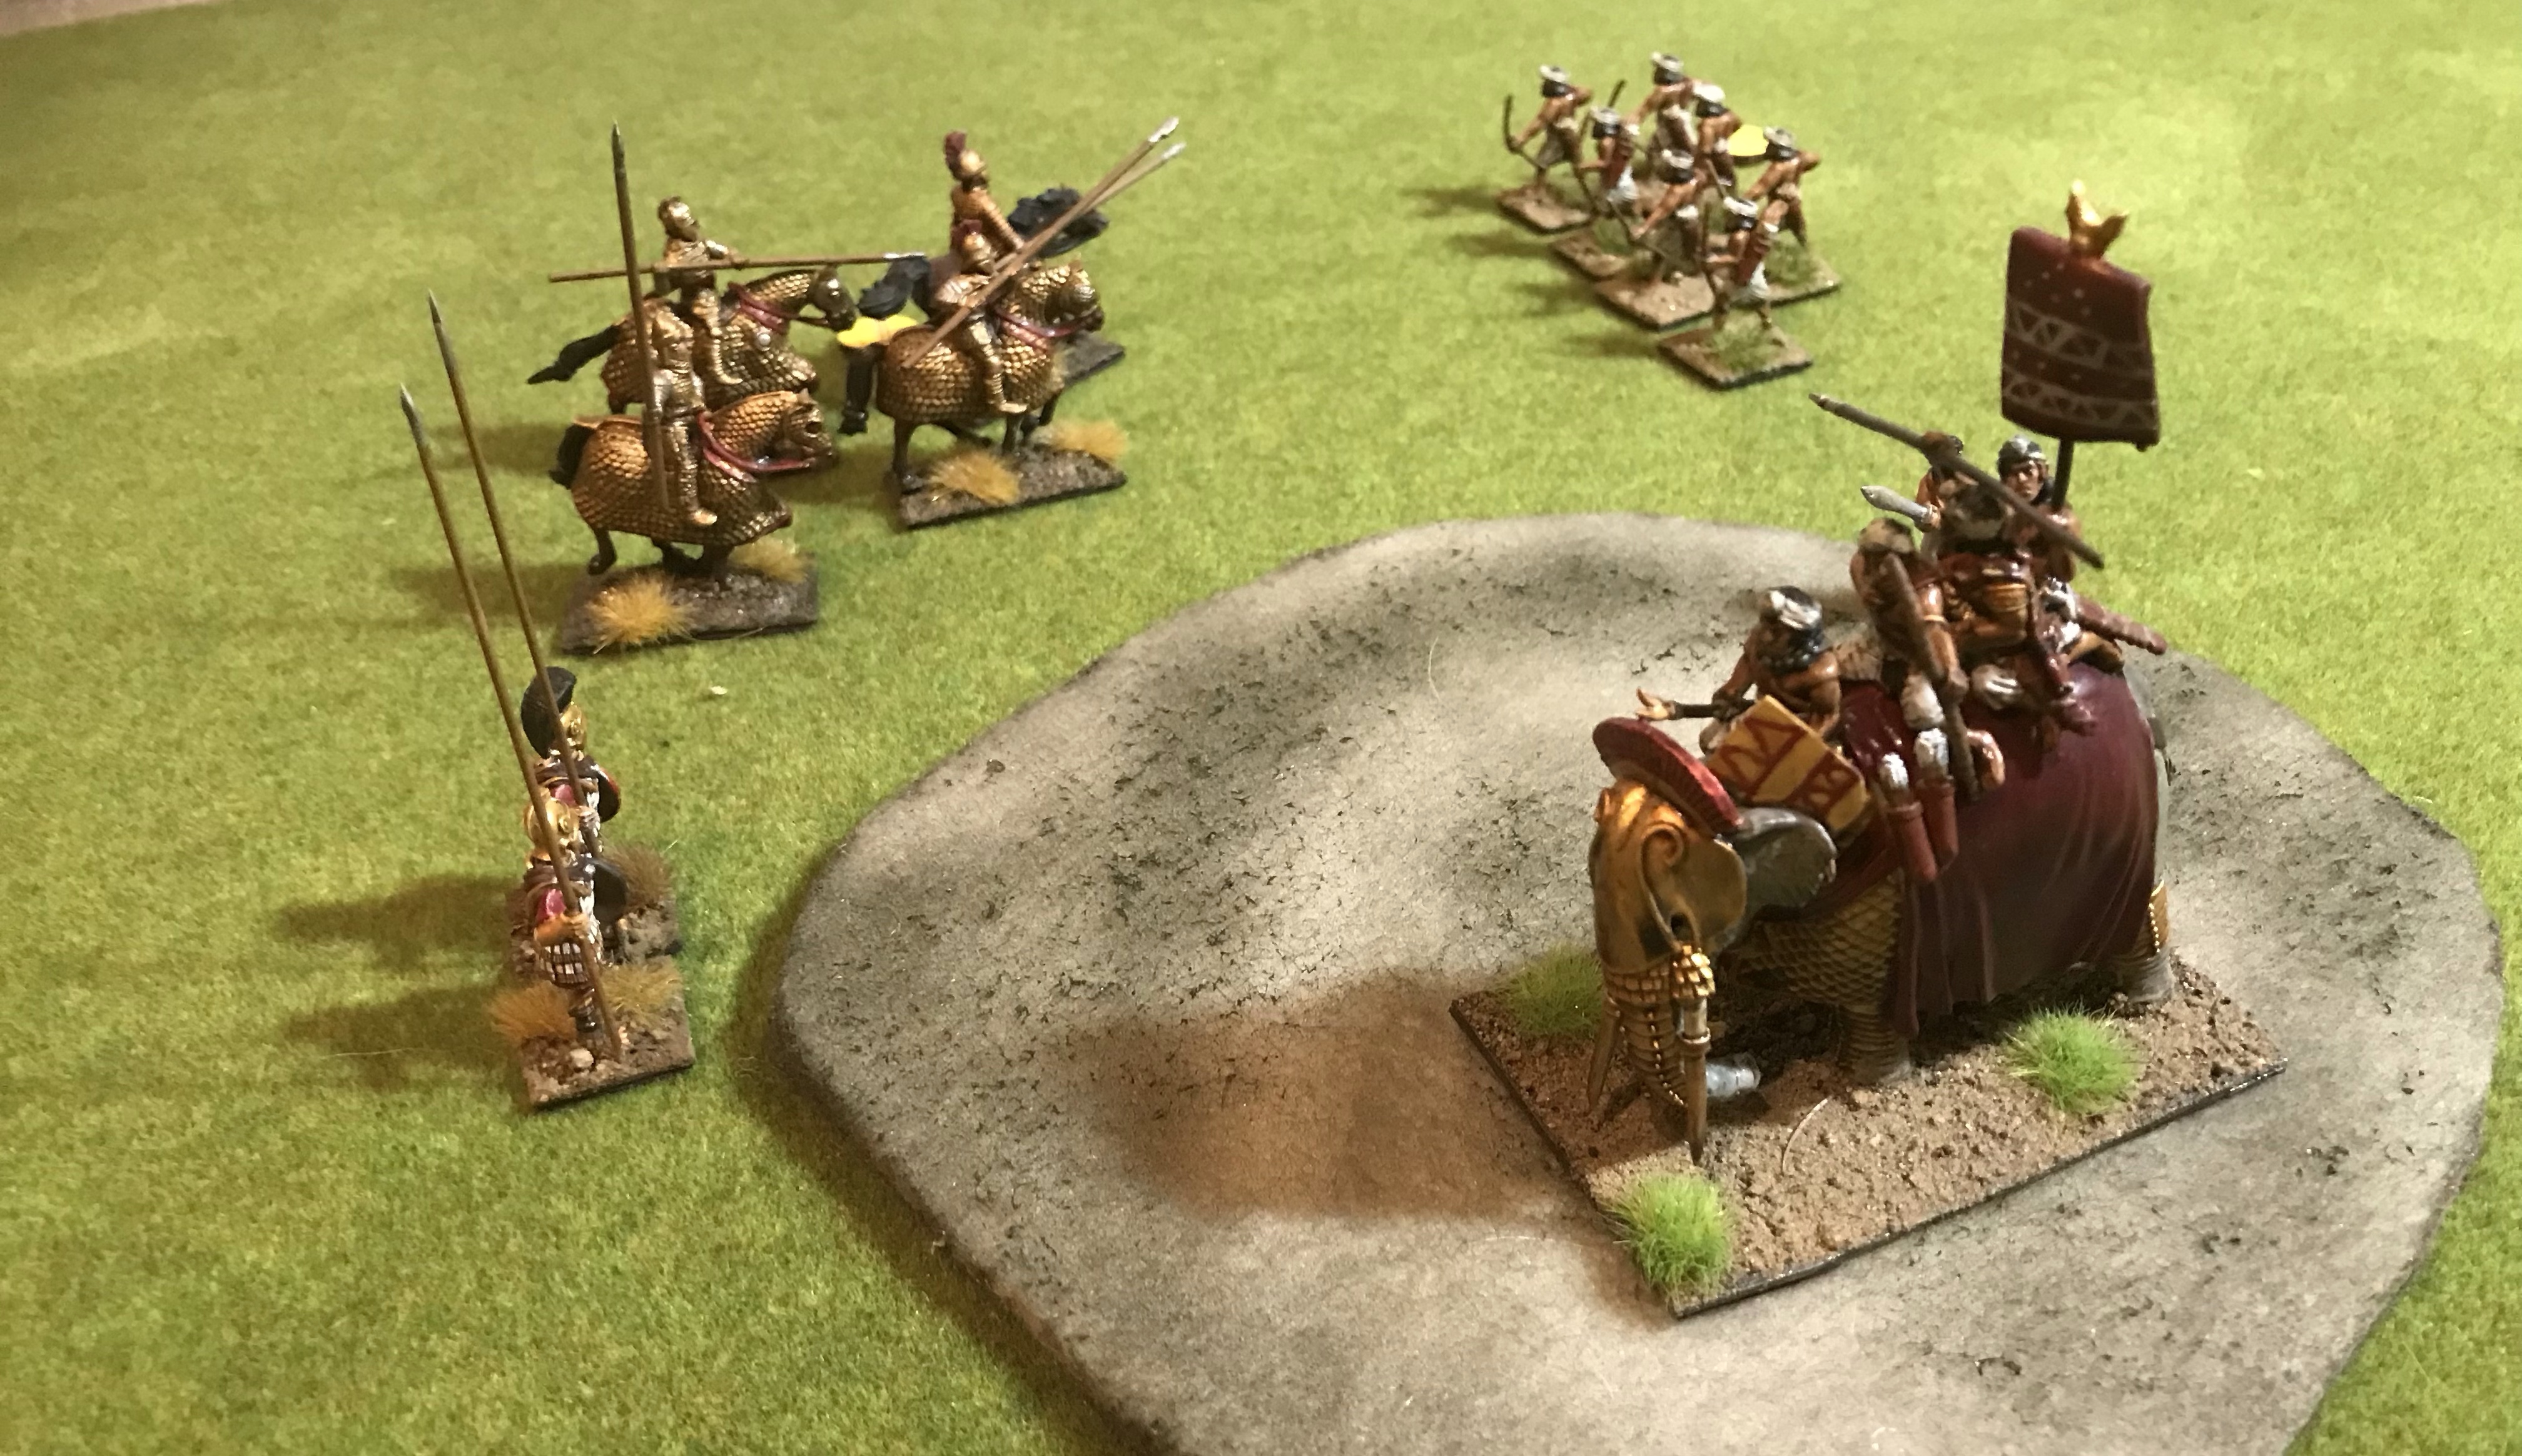
When the Persian Hearthguard do get in range of the Indian Levy they fail to cause enough losses to stop them generating a Saga die.
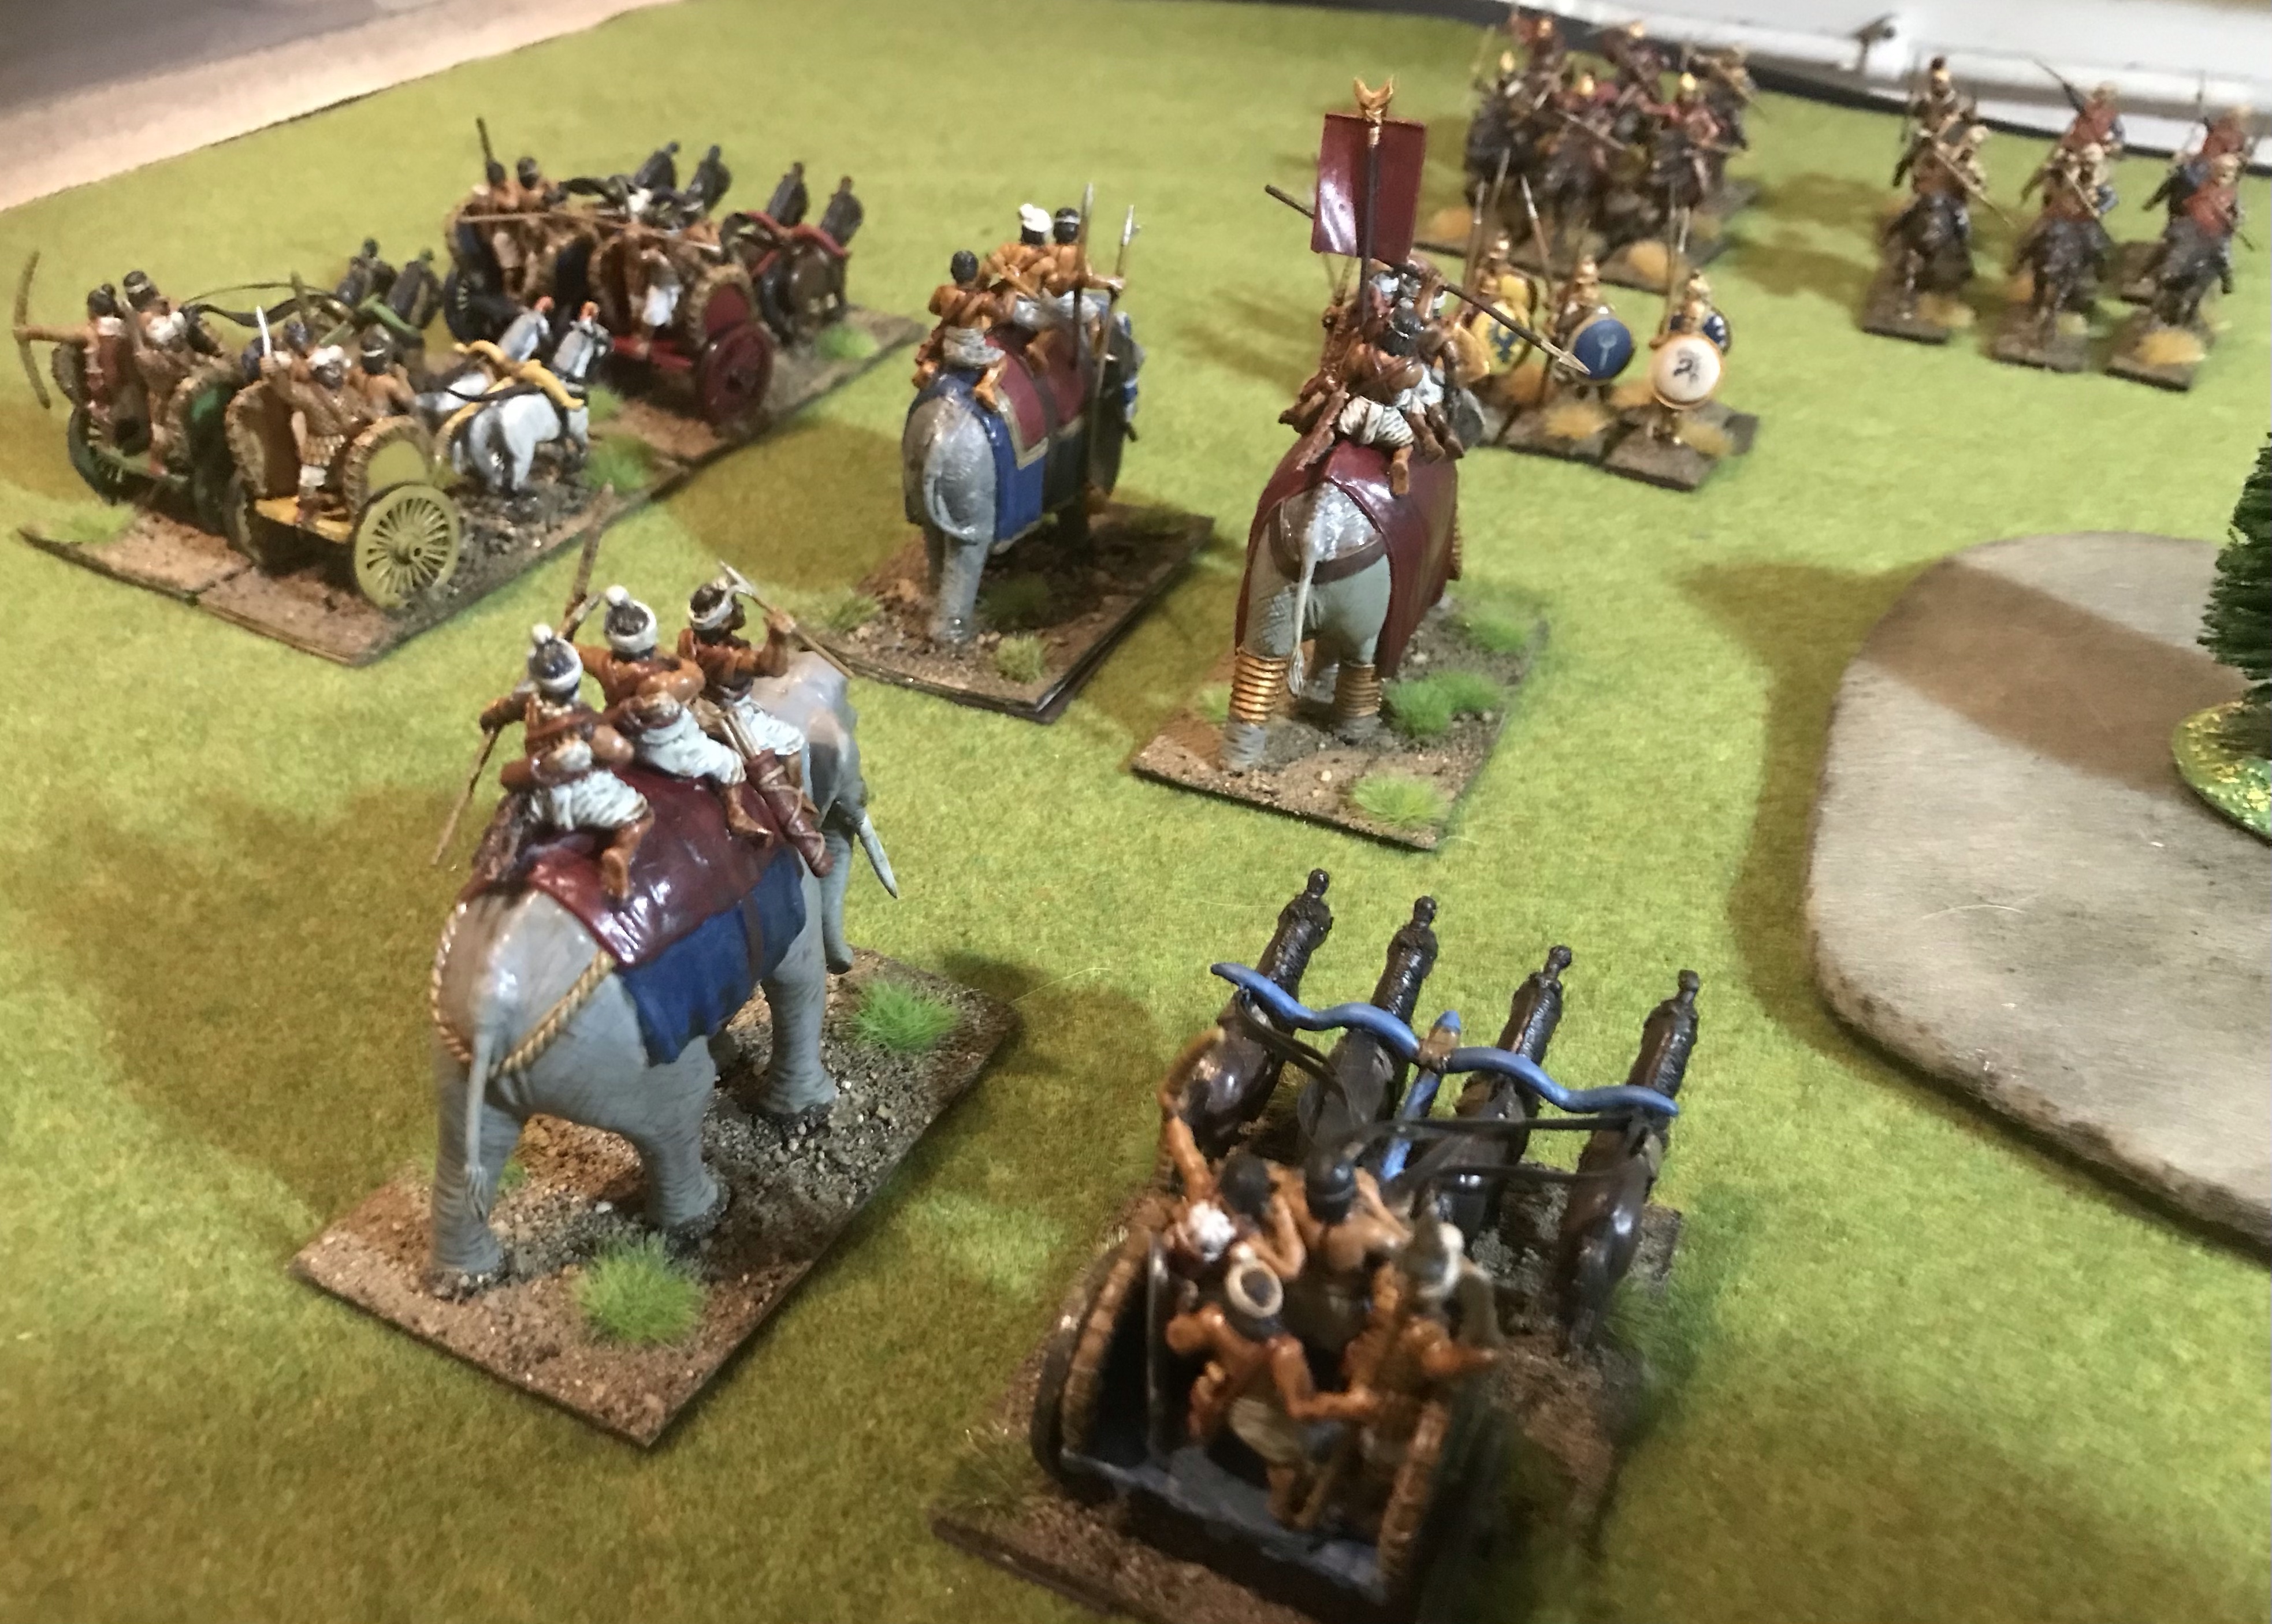
On the other flank the Indians are tearing the place apart.
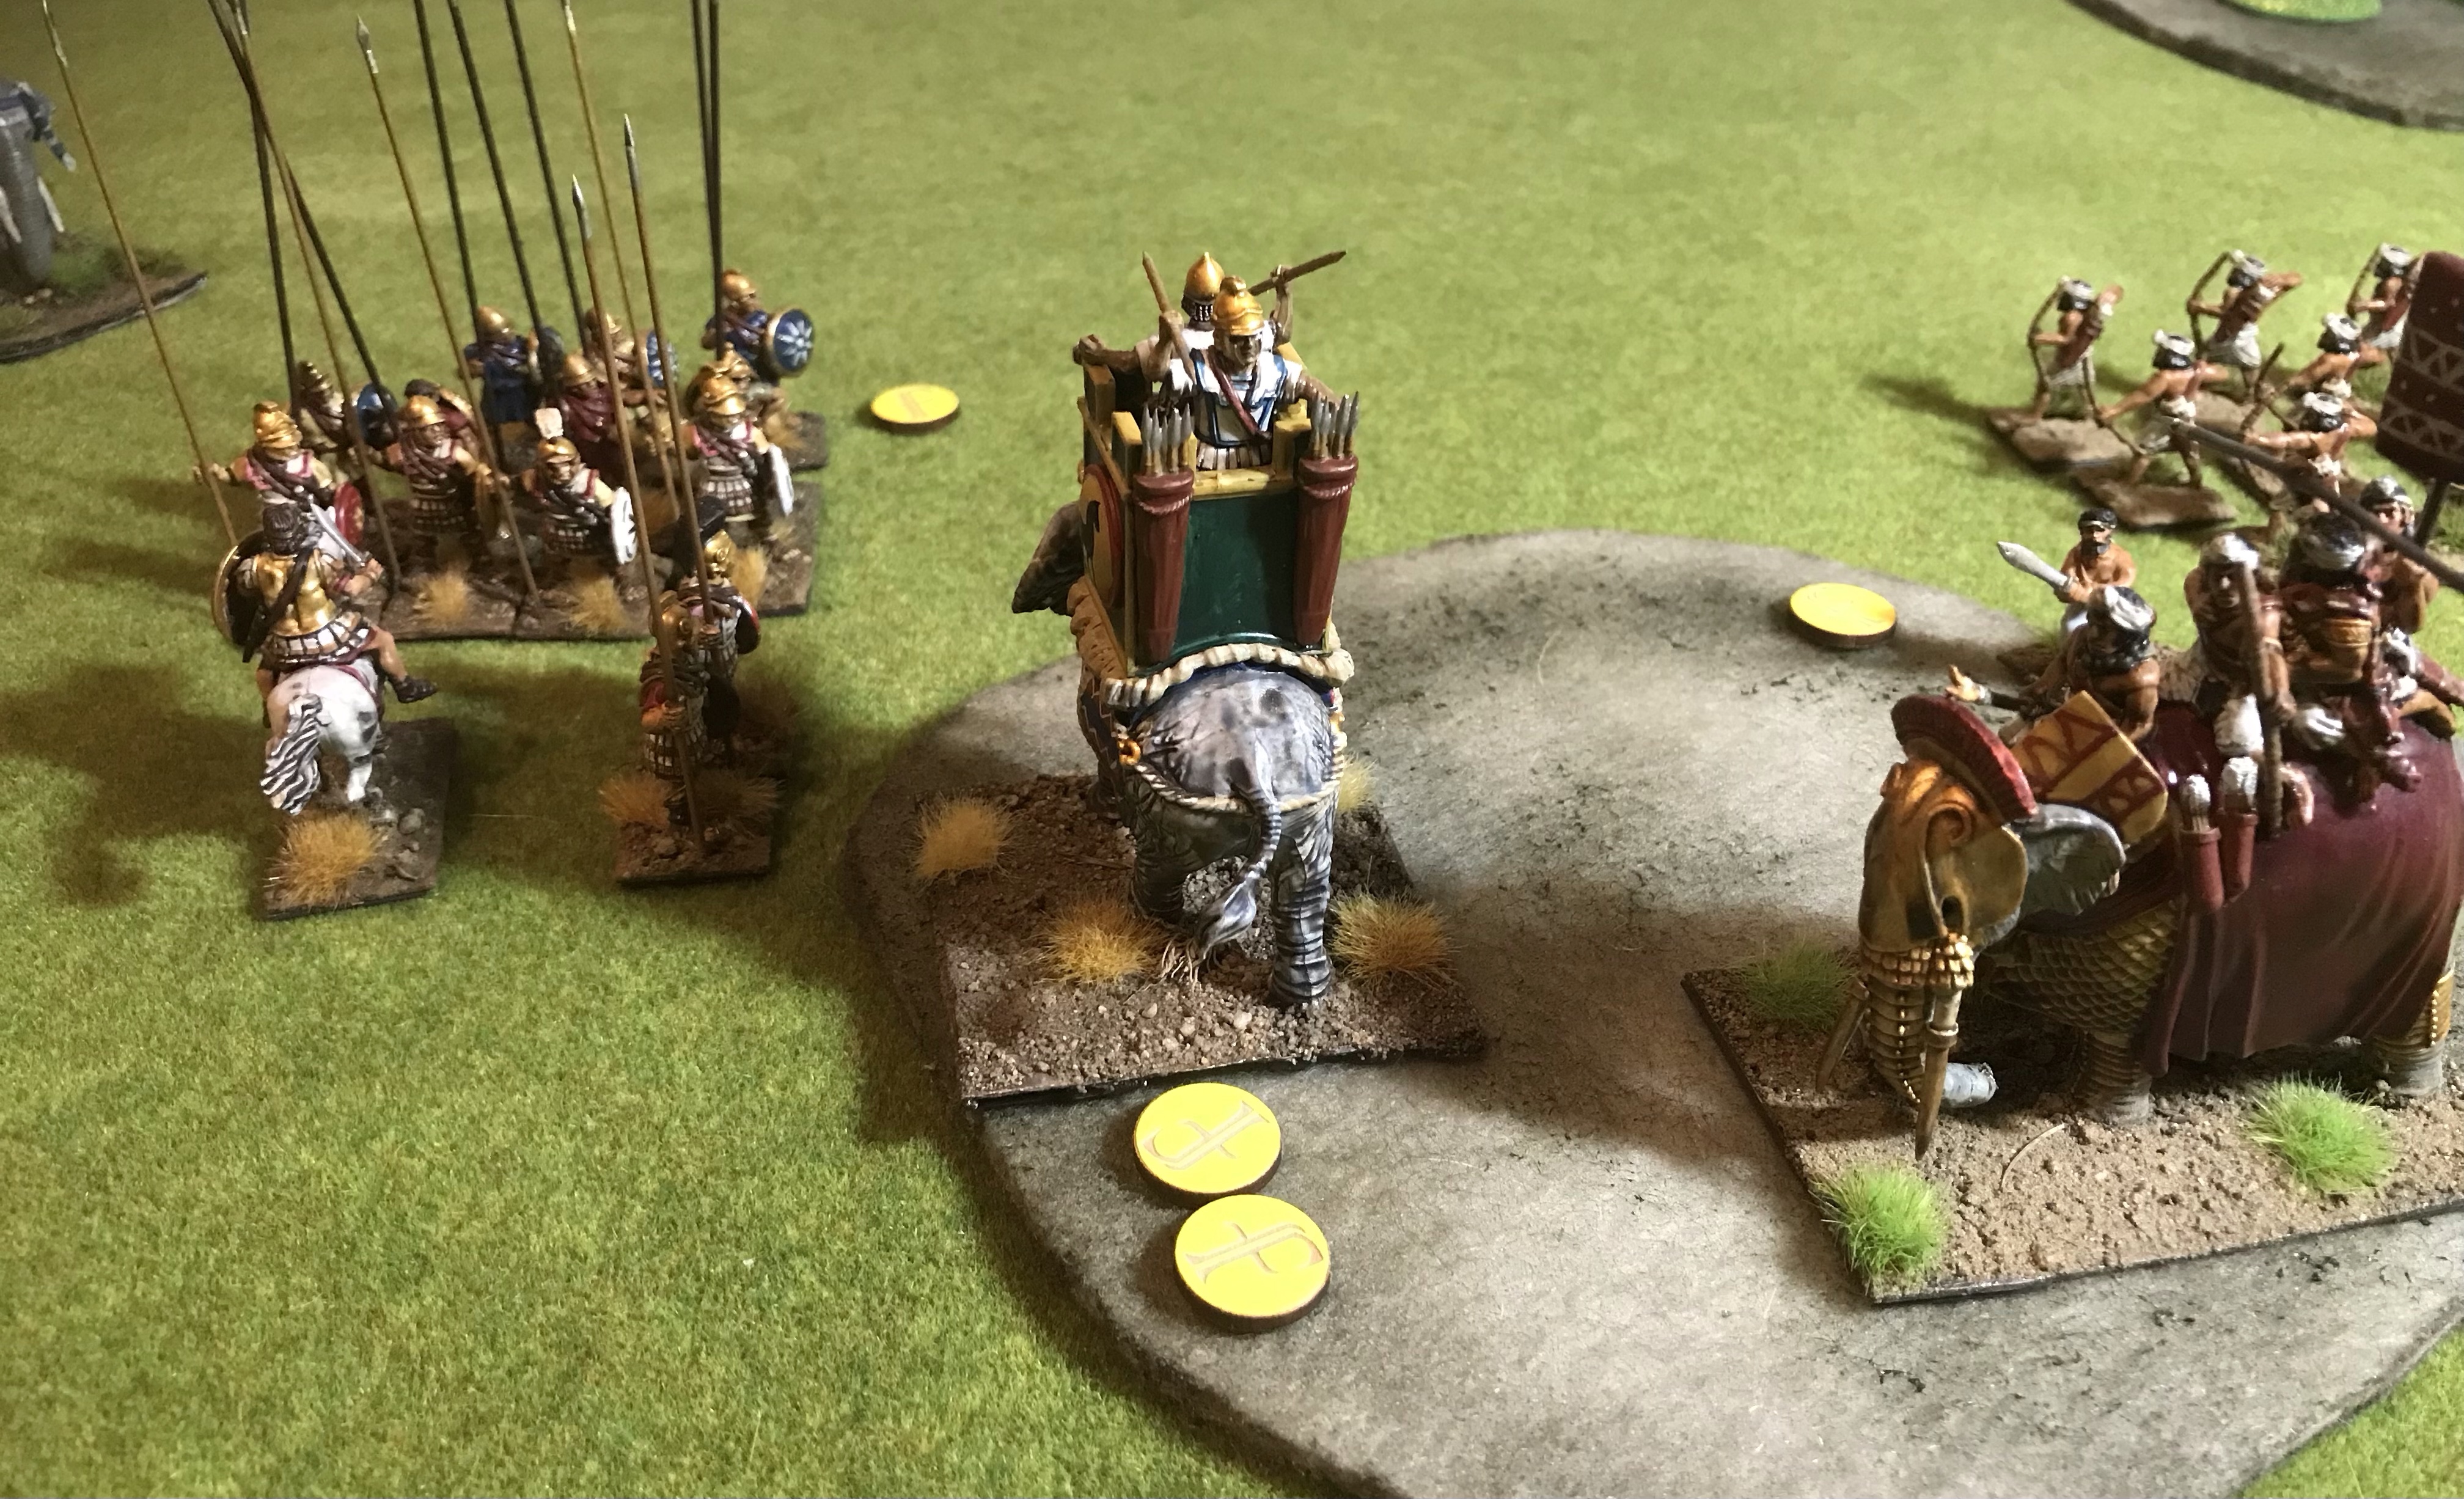
The Indian Levy are finally sent back to the locker room. Coordinated work from the hoplites and cavalry deal with the light chariots.
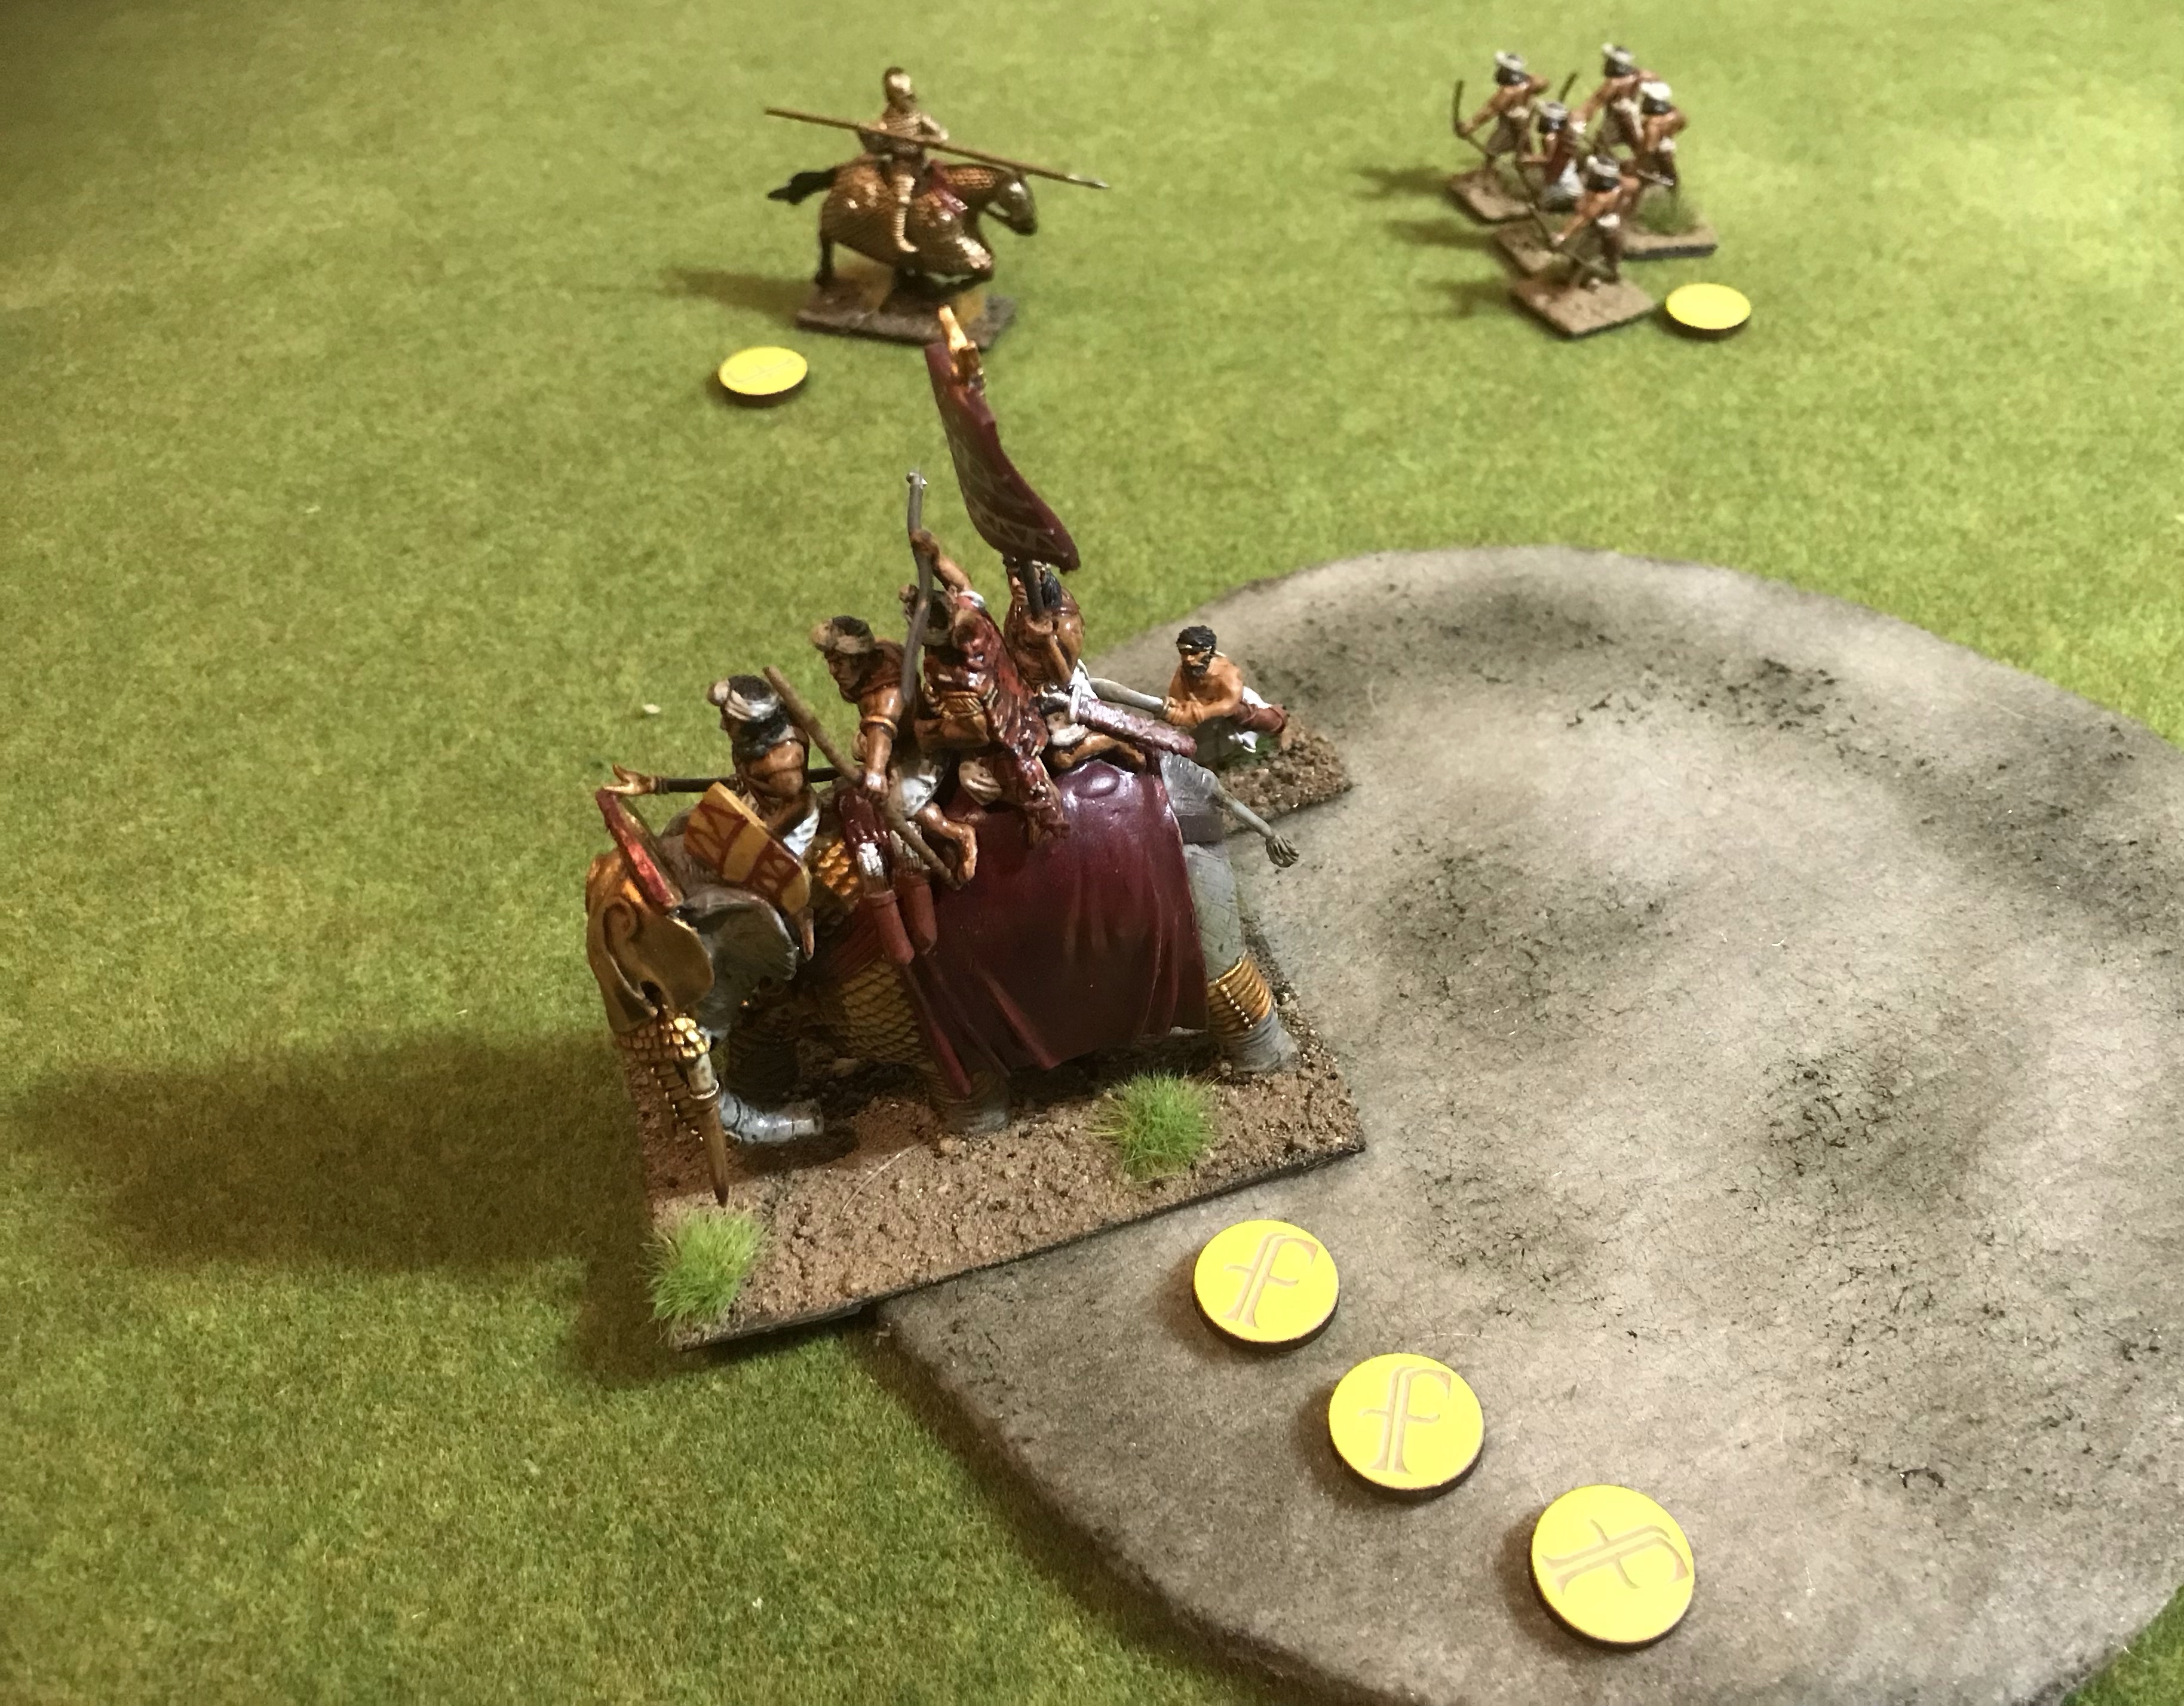
Cavalry do not last long against elephants, the hoplites are not doing well either.
The Persians pullback what they have left. Although the game continues for a few more turns the remaining Persian cavalry is wiped out and the only effective units left to them are the Hearthguard, Warlord and Levy. The Indians only need to stay out of the way to force a win.
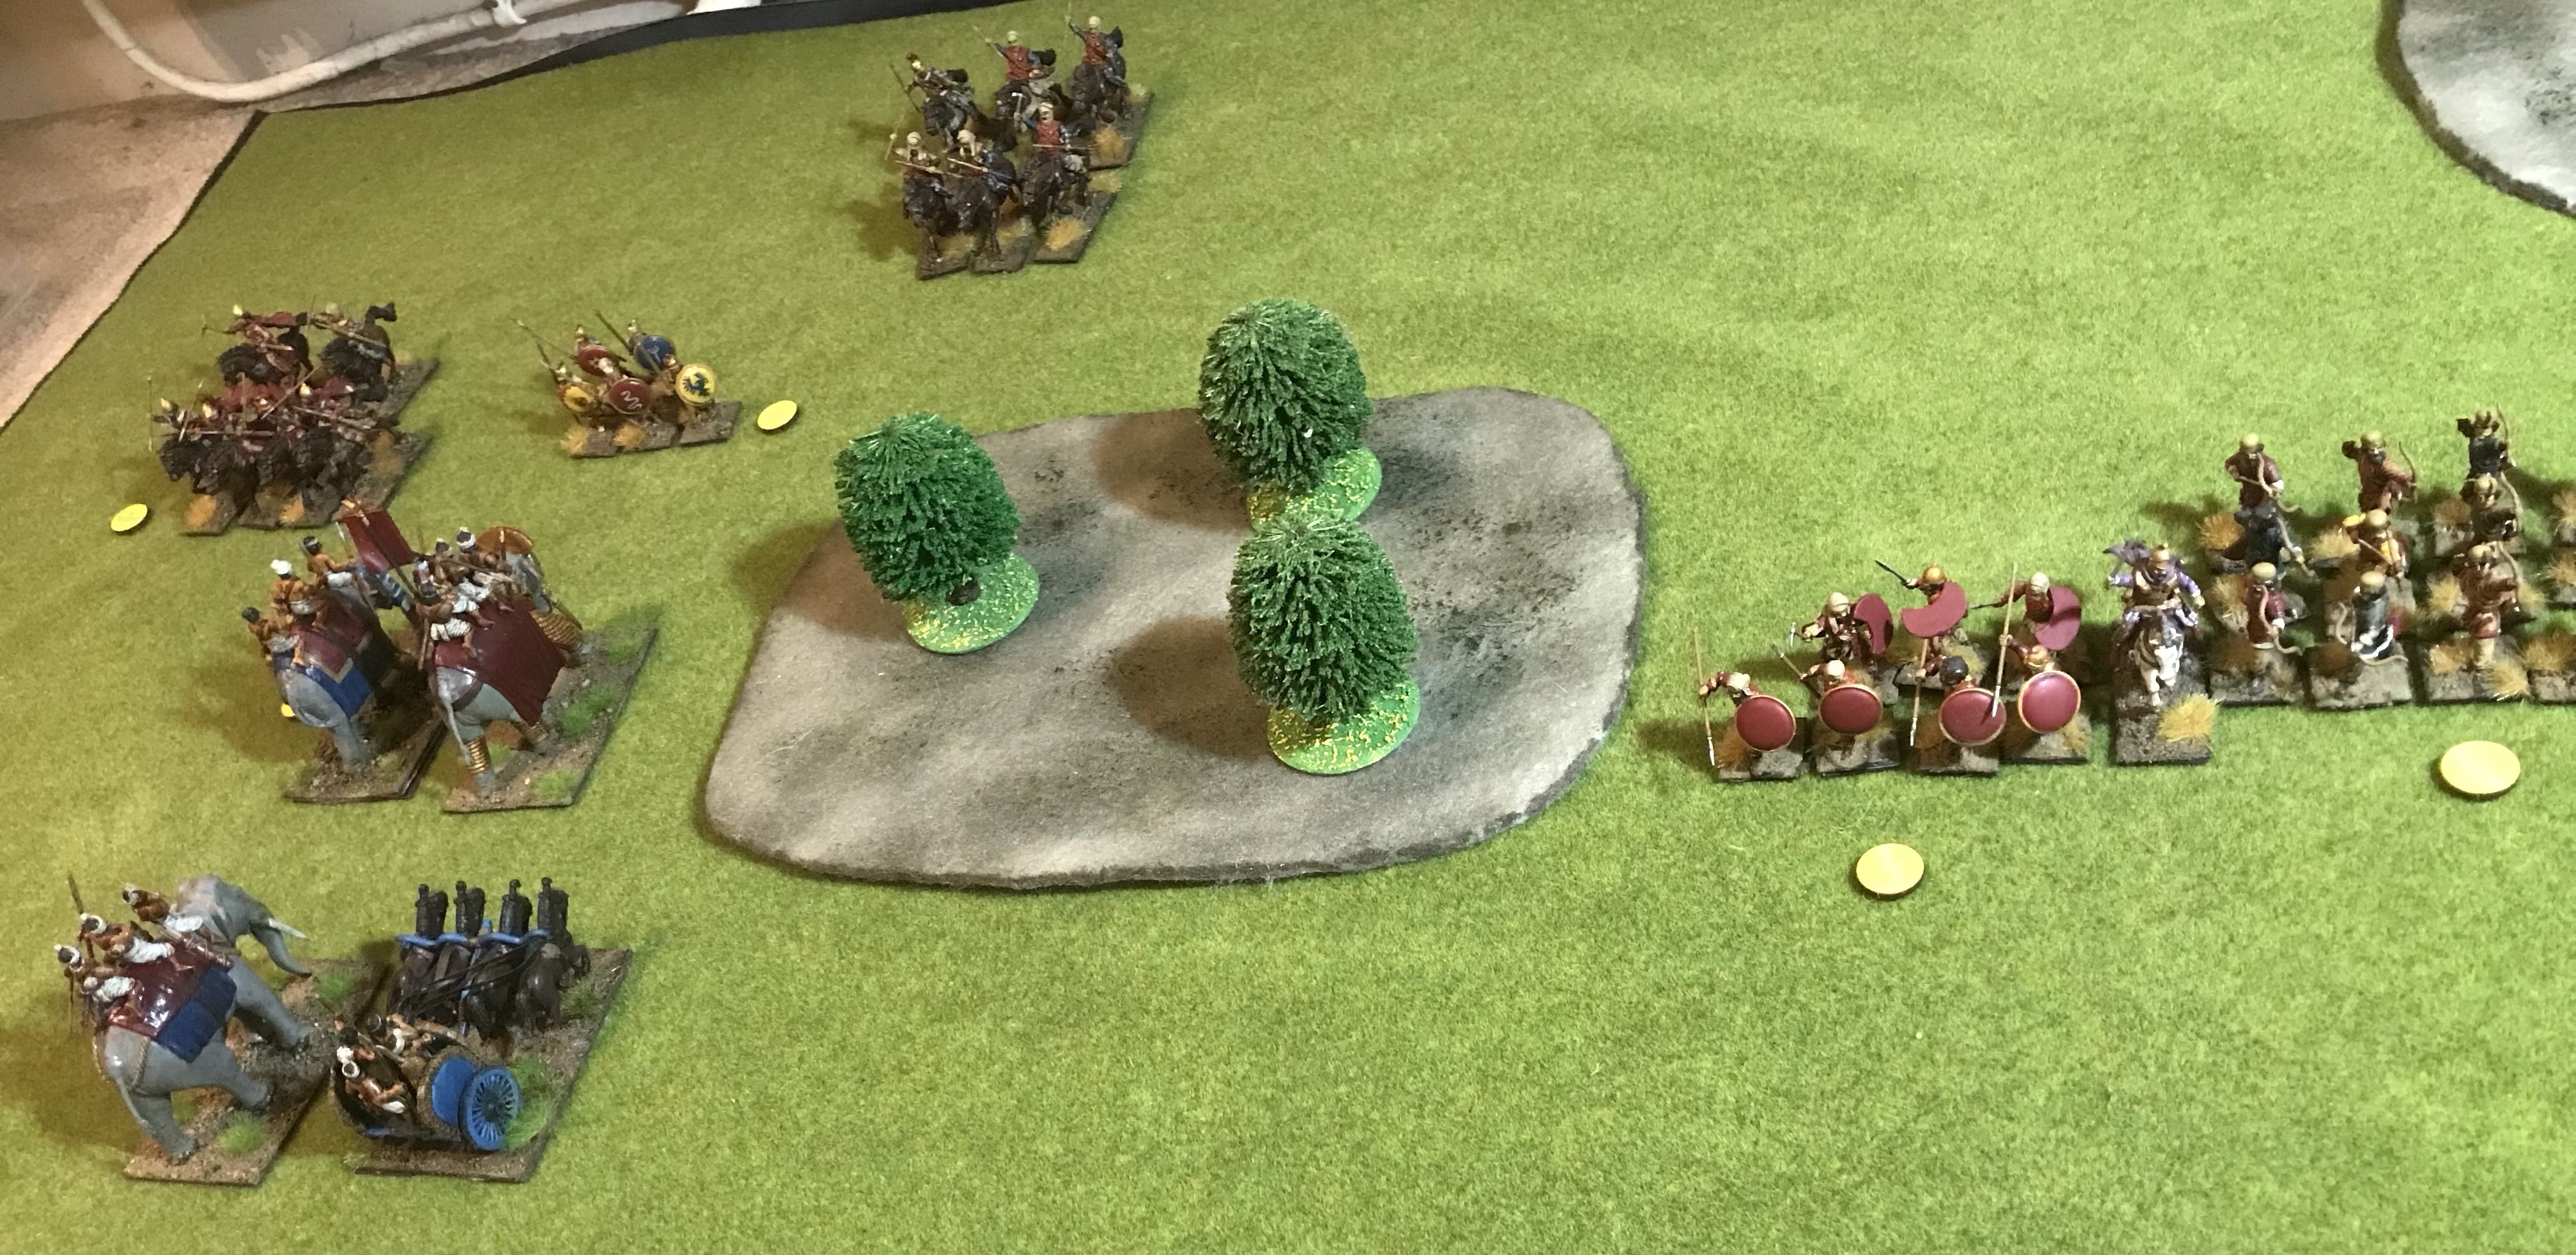
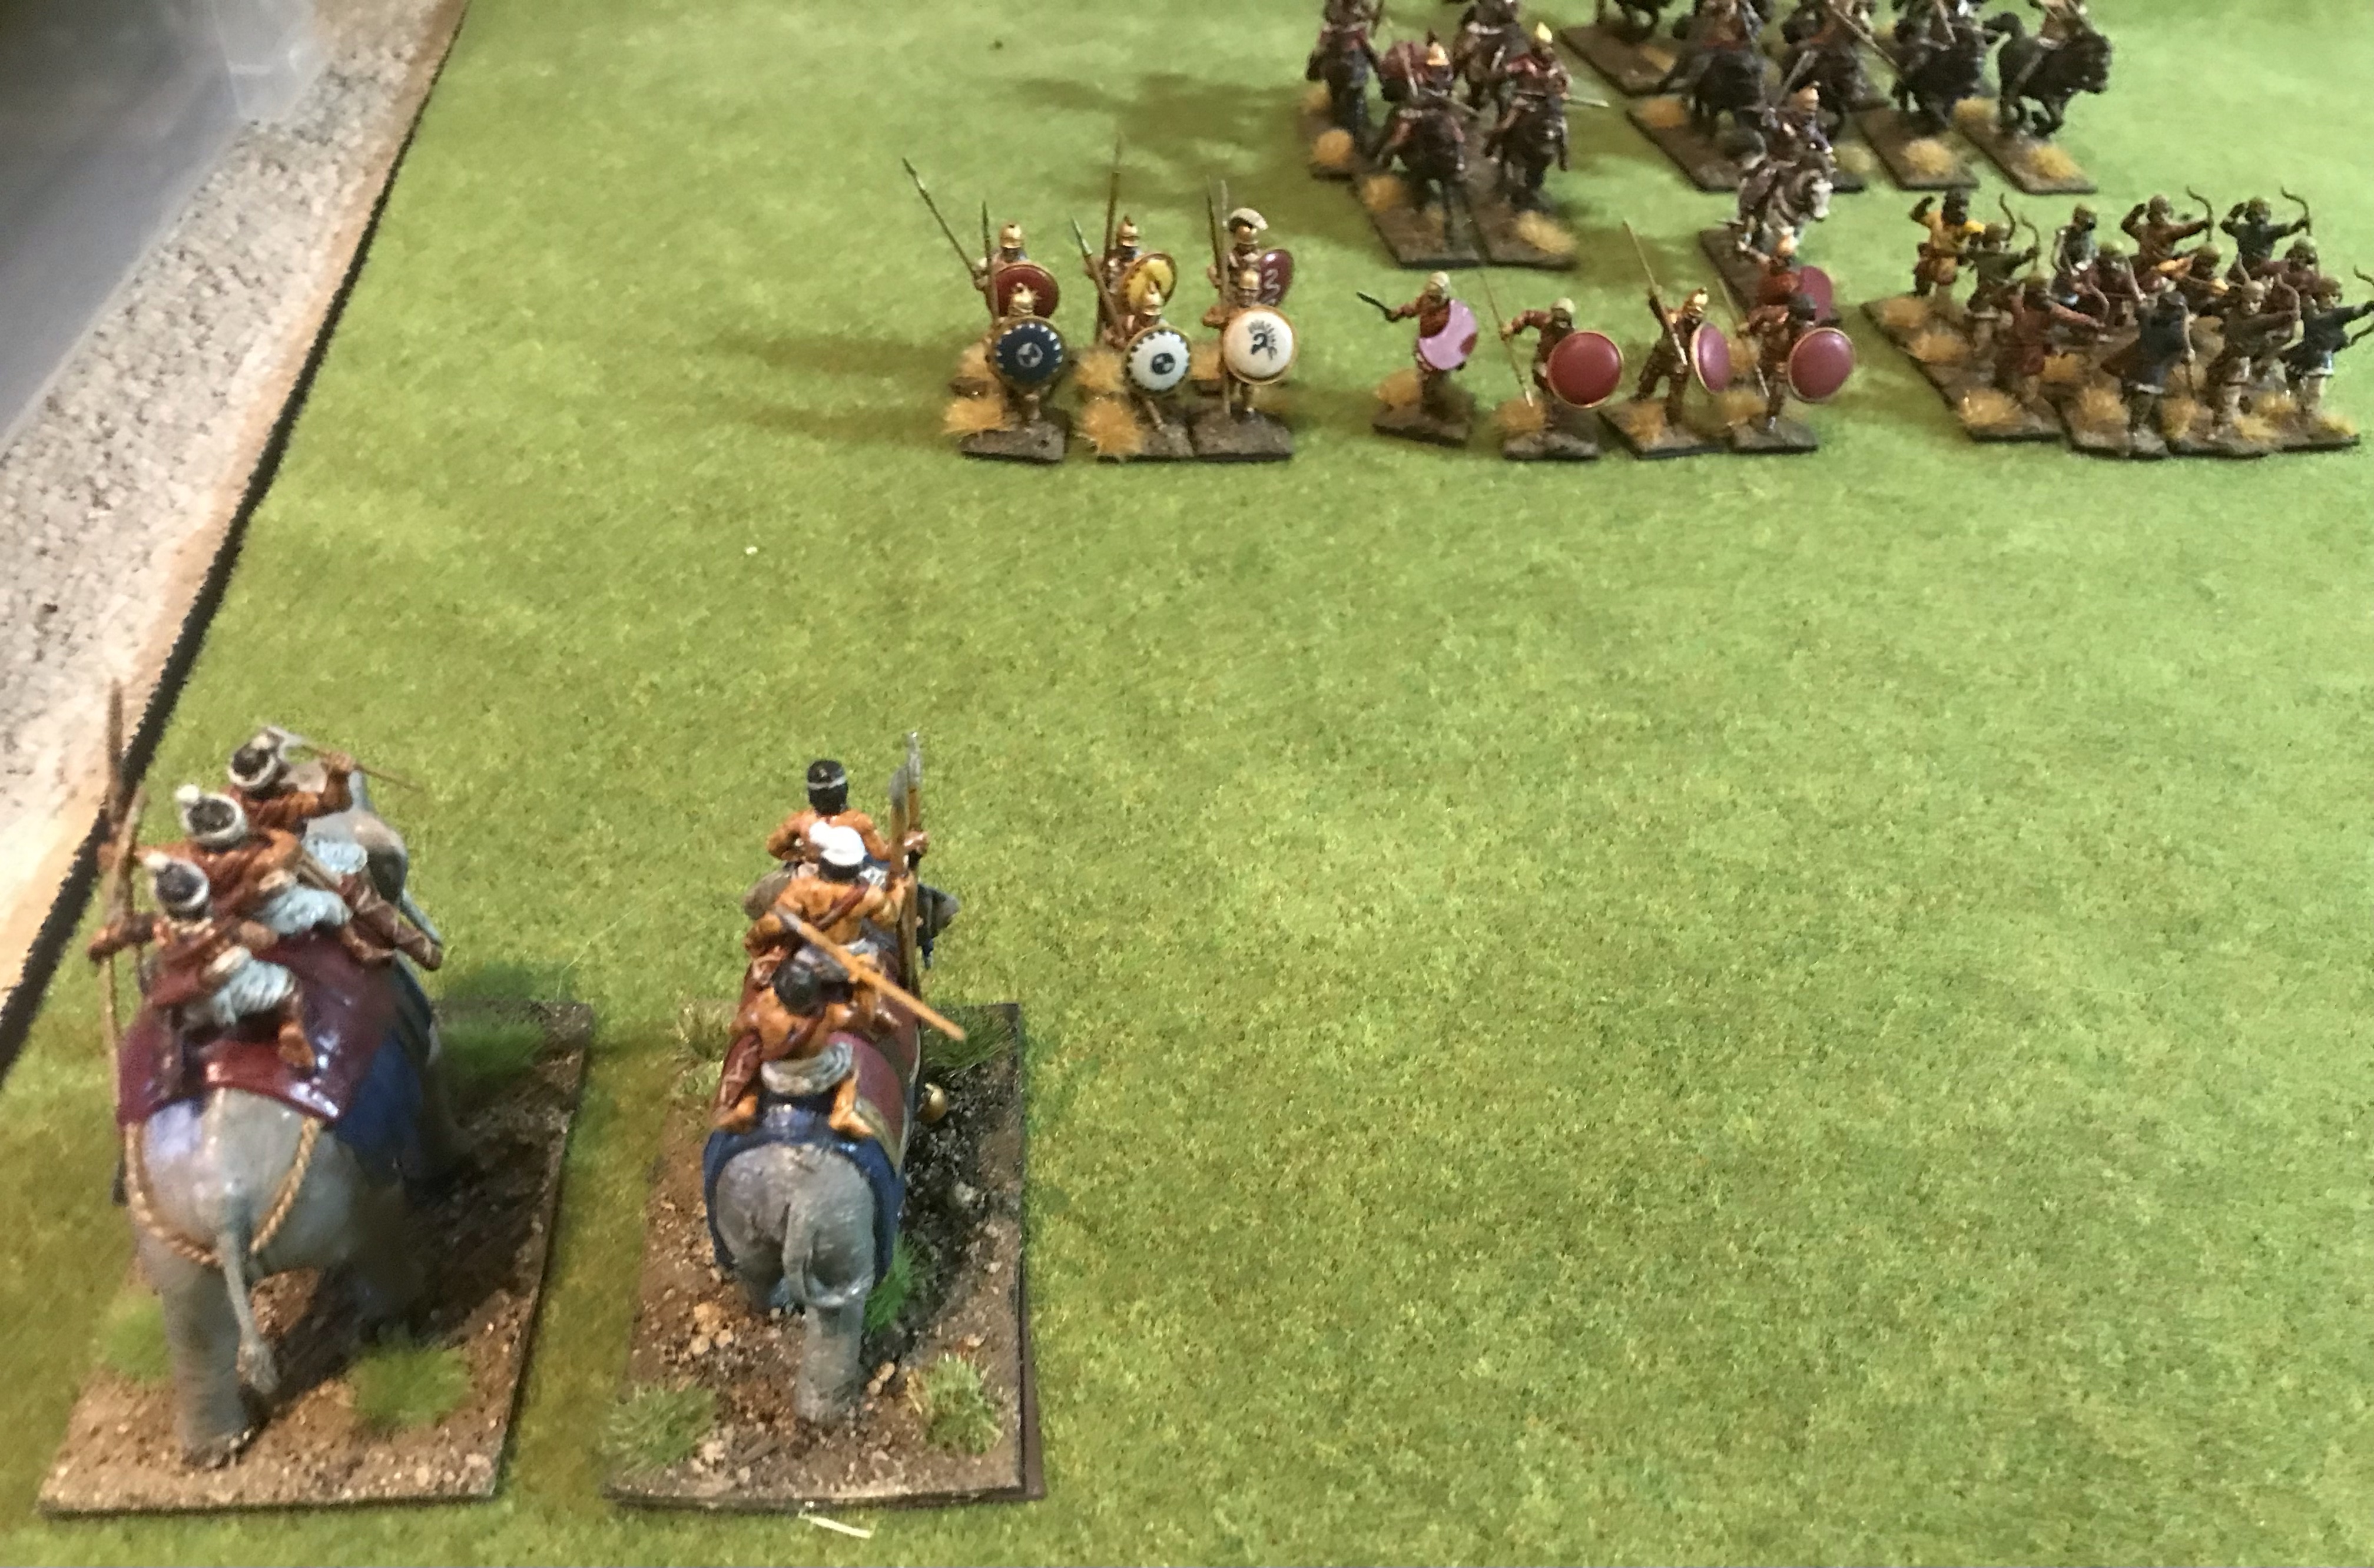
The game all seemed to go wrong starting with the Persian deployment so we’ll try again with much the same terrain, keeping the Indian as 1st player but changing the Persian army by dropping a point of Warriors in favour of 4 mounted Hearthguard. A useful bonus to the Indian load-out here is that if they are first player and need to deploy 4 units before the opposition they can choose the 3 rubbish Levy and the Warlord. This leaves putting the good stuff down until after the enemy is laid out.
The Persians put their shooters up front and hide the cavalry behind.
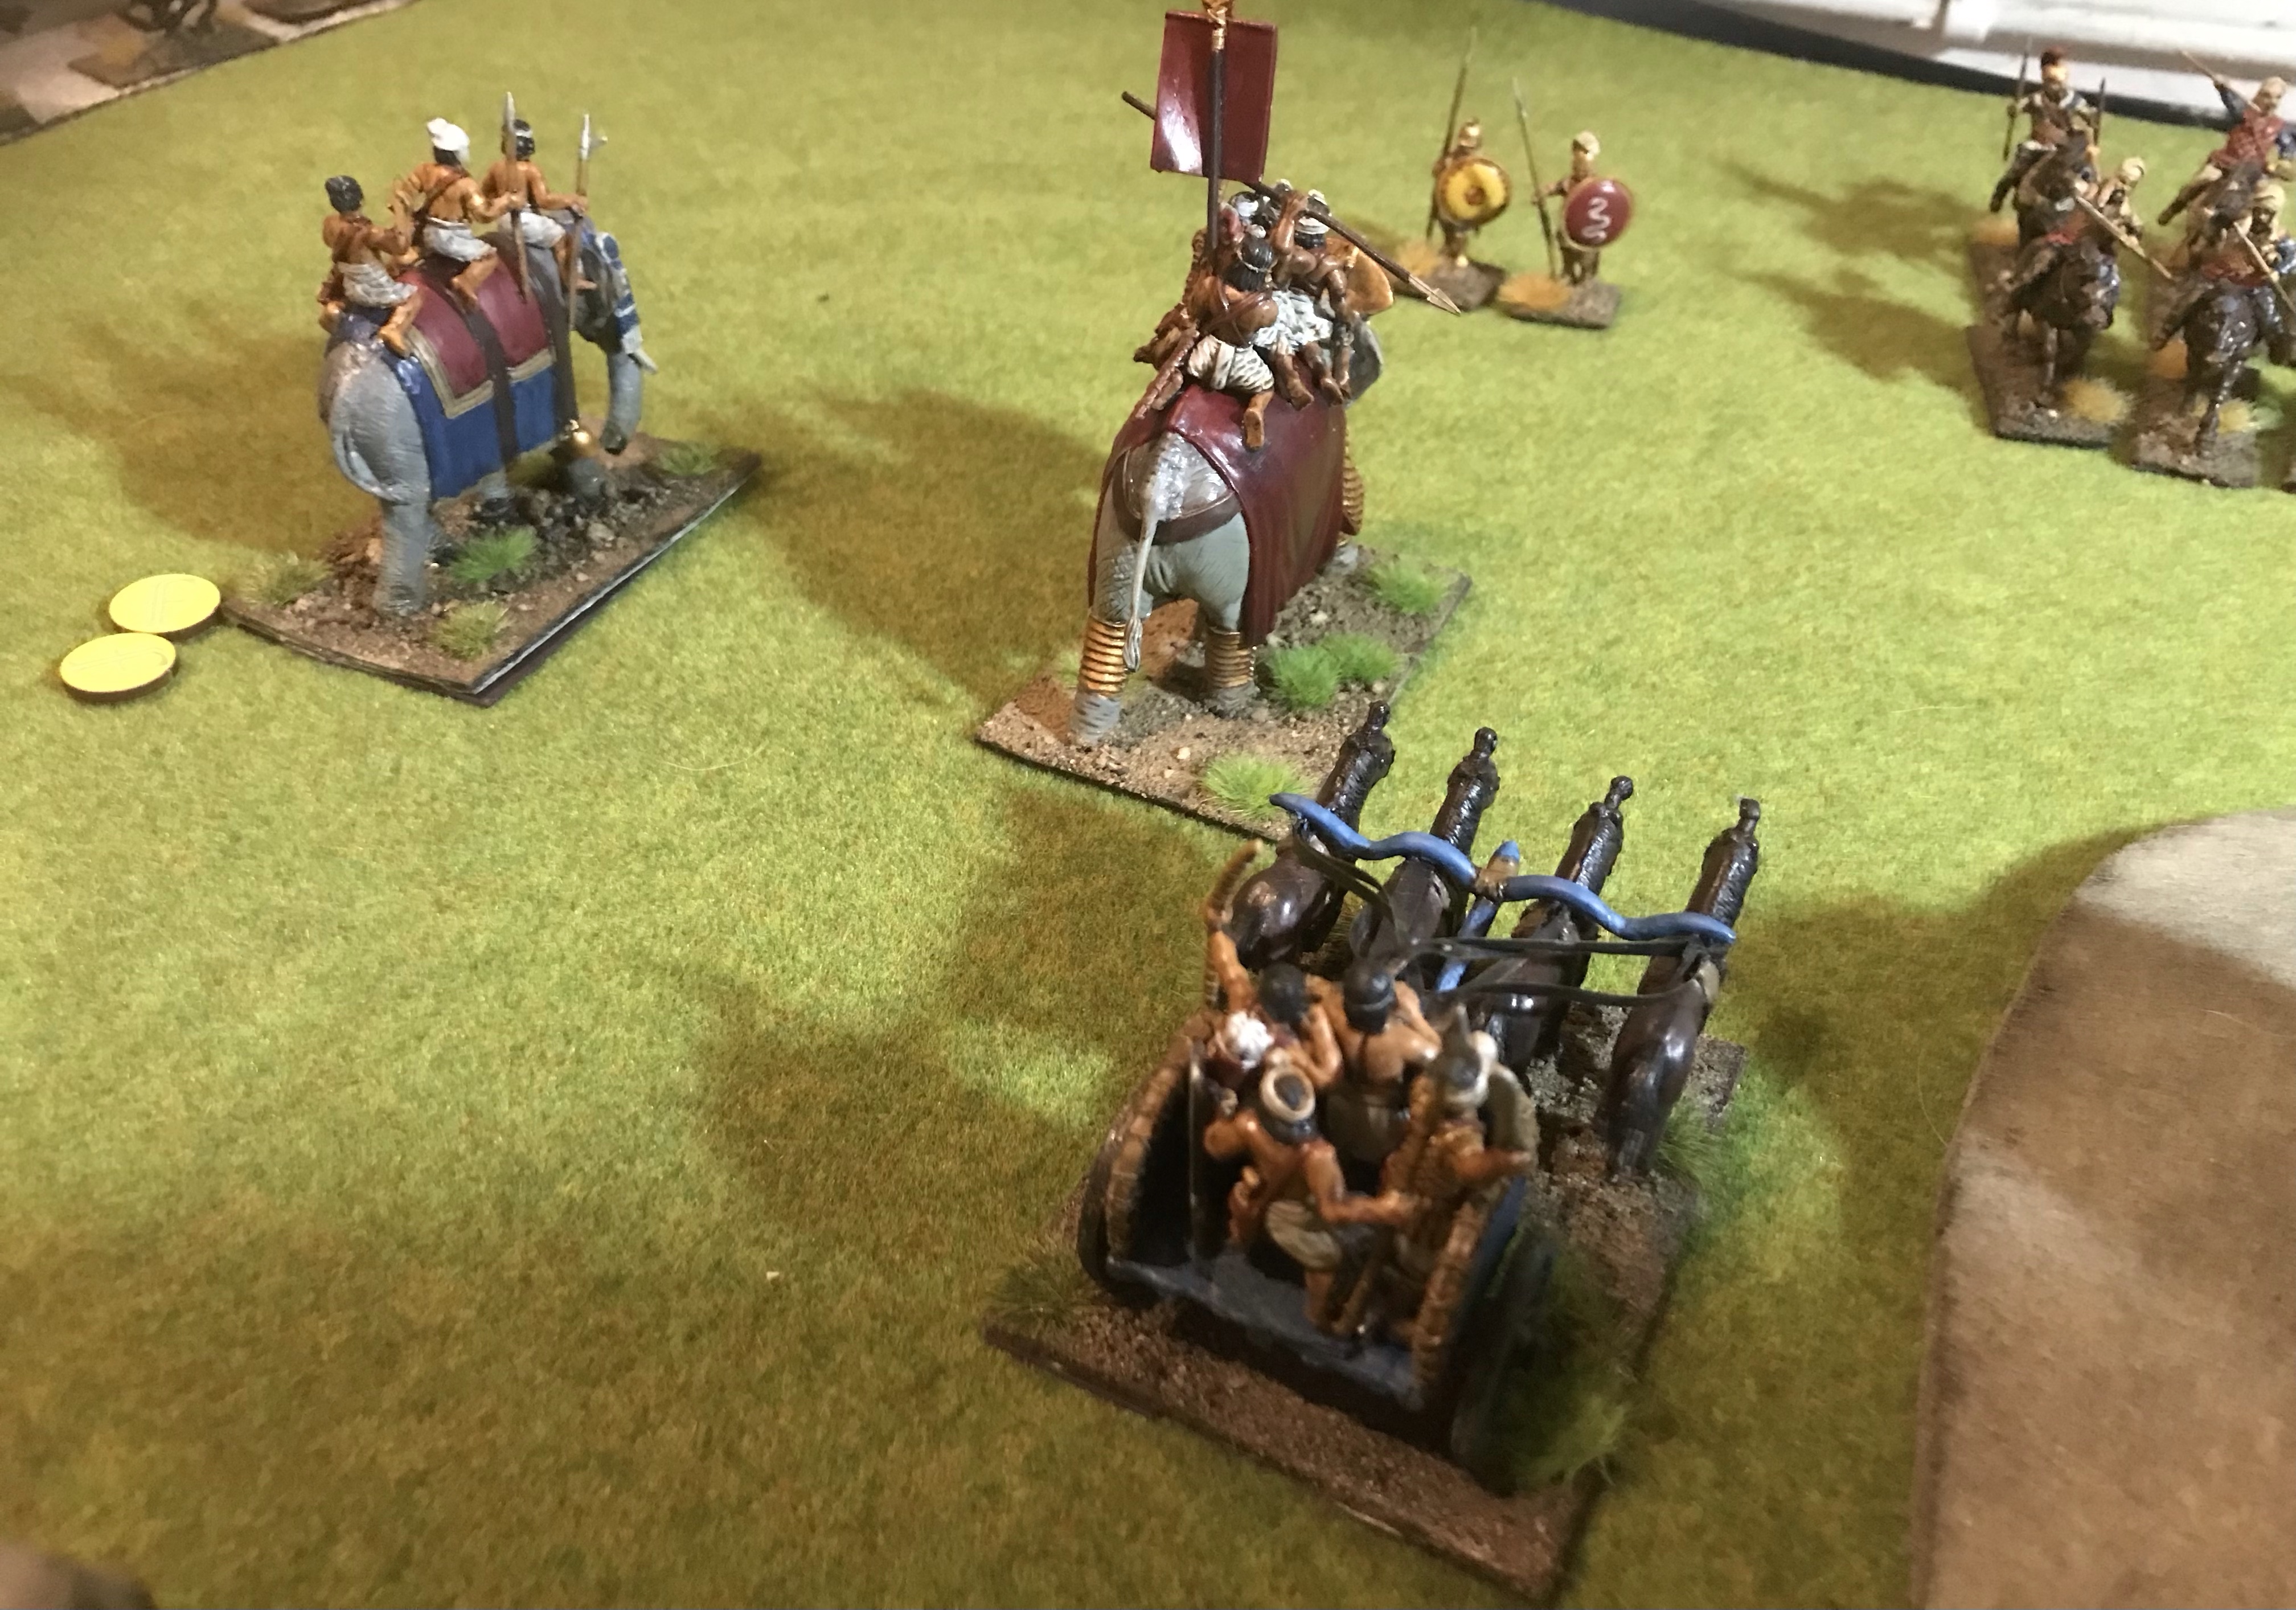
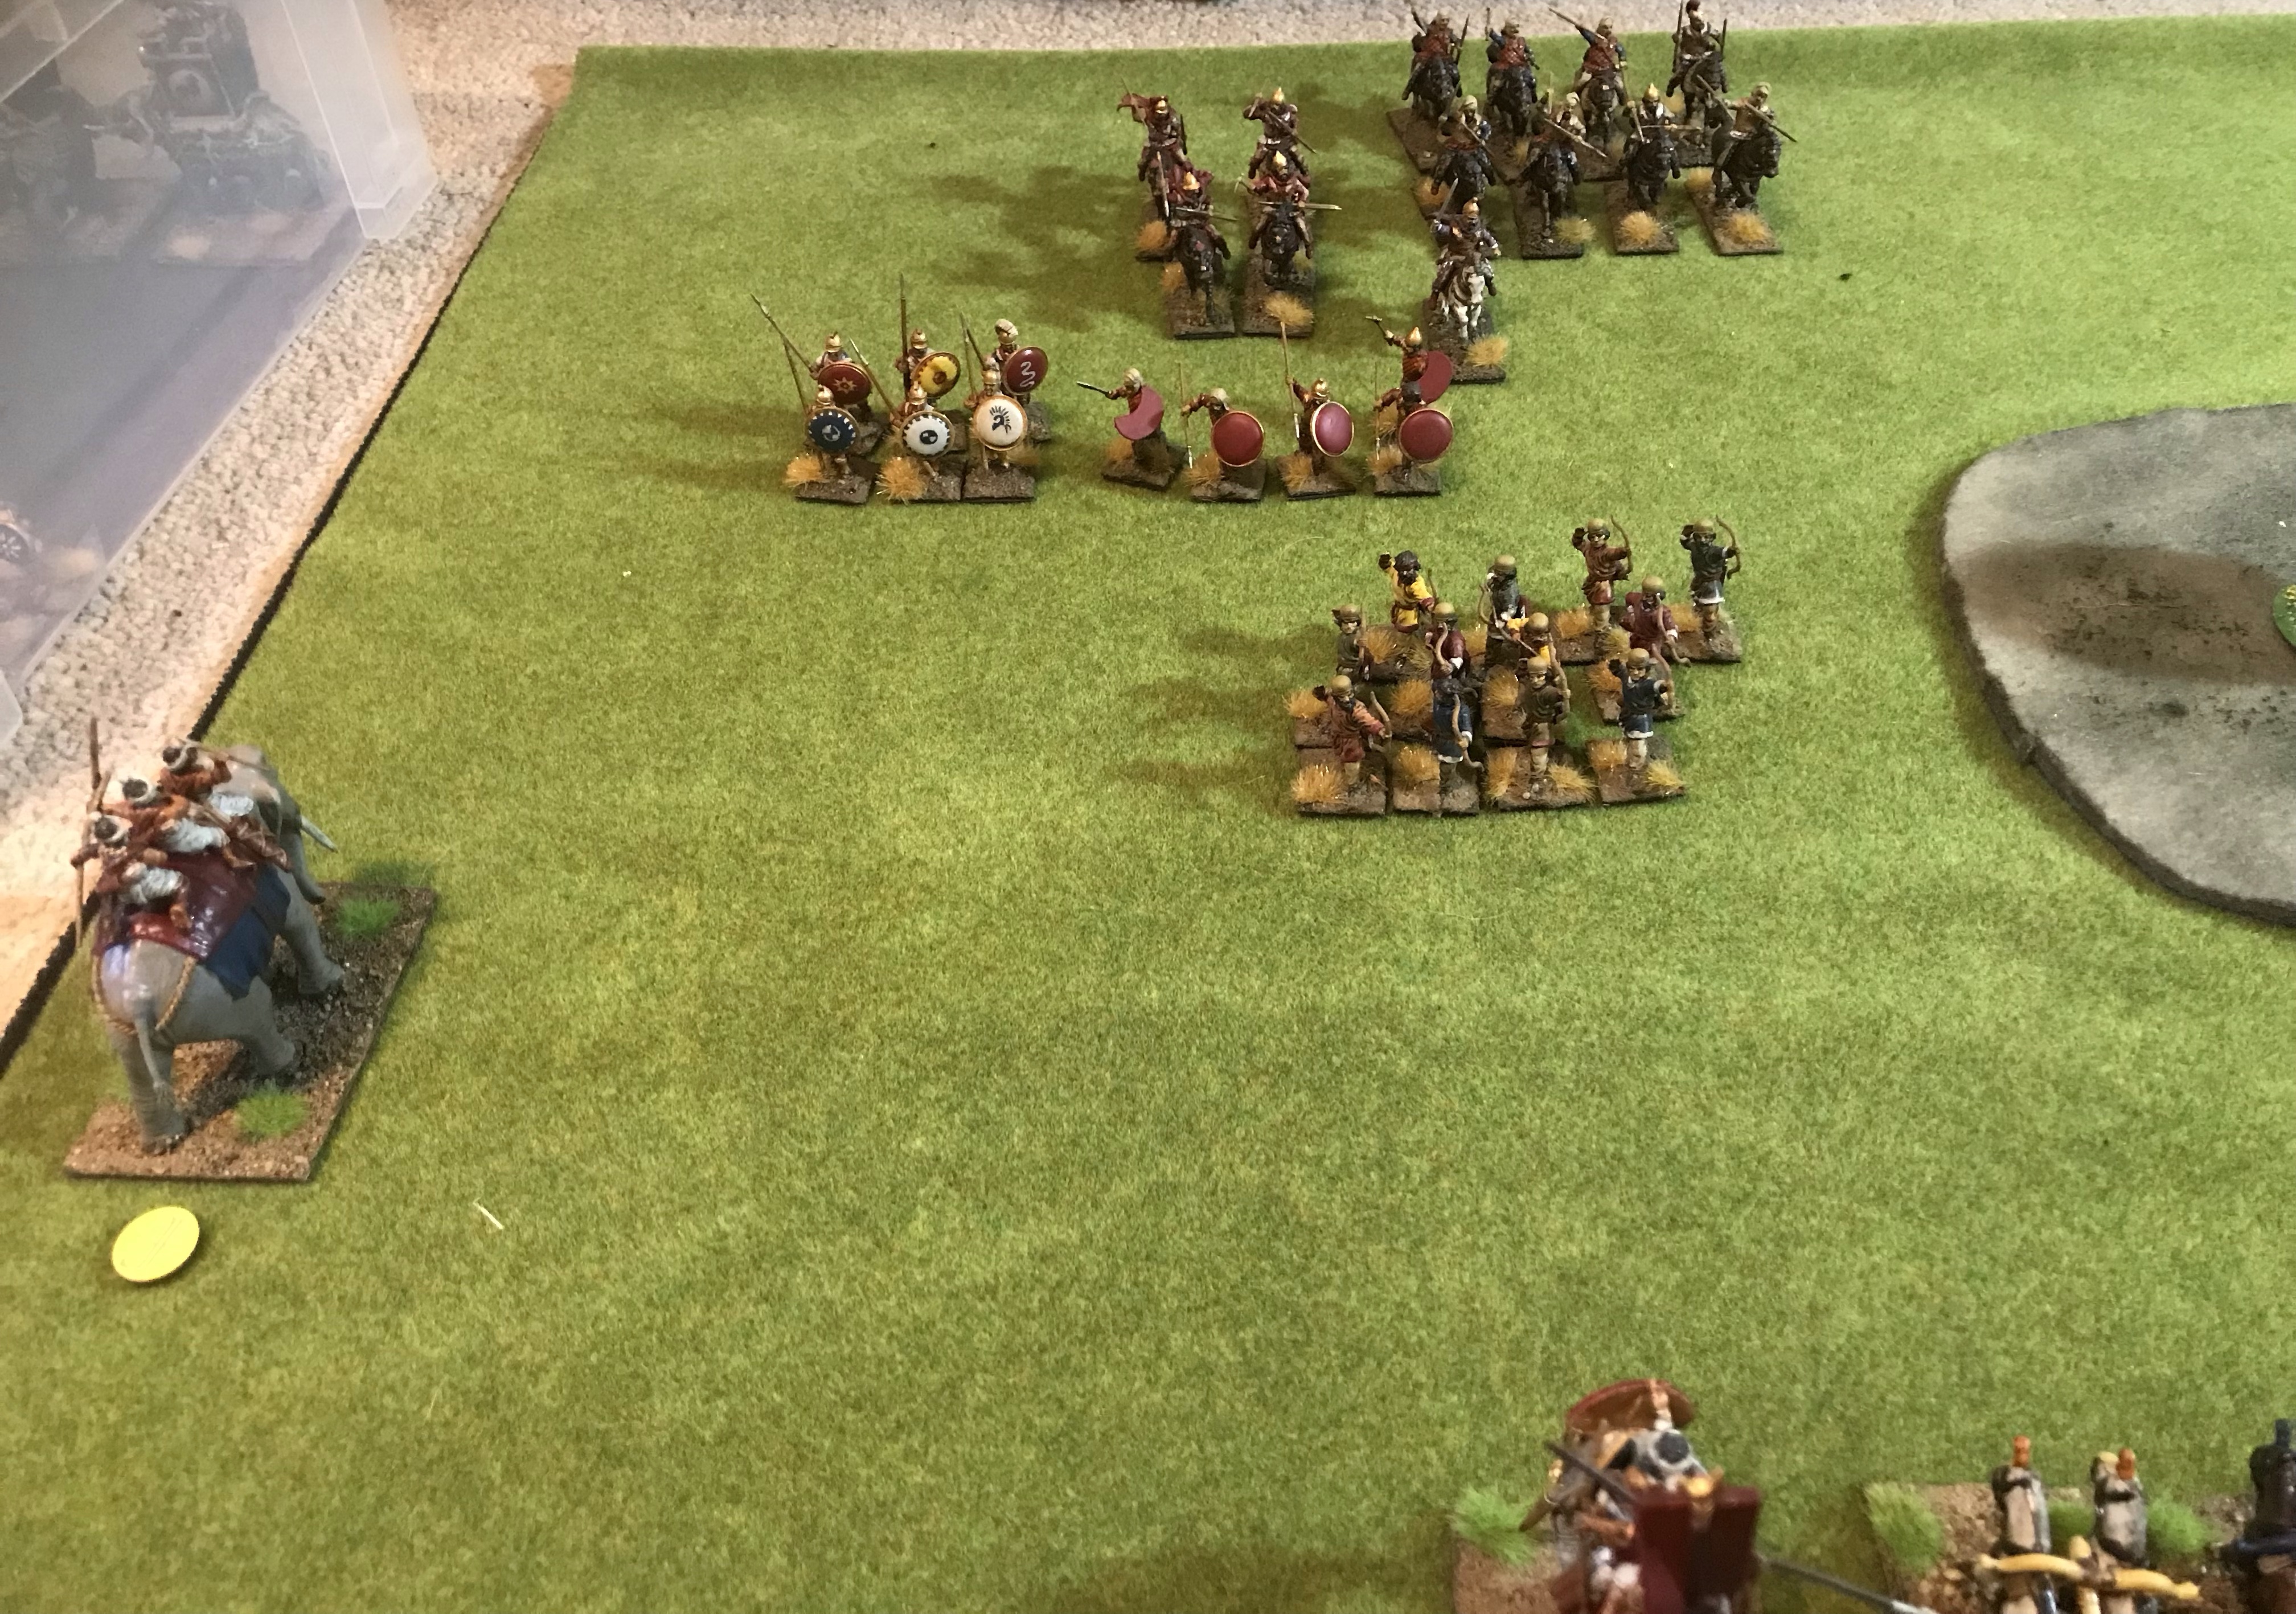
The Indians move elephants up and run the light chariots back and forth to shoot. Some solid die rolling sees 2 Hoplites and 3 Hearthguard back in the box.
Persian shooting back is none too sloppy. CONCENTRATED VOLLEY also helps as it puts an unsaveable hit on elephants with a 5+. Scratch 1 elephant.
A charge by the Indian Warlord knocks the Persian Levy down to 4 models. In retrospect this was a poor move.
The Persians knock out the Indian Warlord with some lucky shooting
The Indians still generate 6 Saga dice; they shoot as they move up.
The Persians use UNNUMBERED HORDES and find some more Levy behind the sofa. The original unit counts as lost but the new one can still shoot and is back to generating a Saga die.
The Indians kill 2 hoplite models, scarcely worth the trouble.
The Persian cavalry move out of the way.
An Indian elephant just fails to wipe out the Persian Hearthguard.
Another elephant is down. The last elephant is looking shaky.
Through careful Indian use of DYNASTIES the Levy are down to 8 models and the elephant has less fatigue than it started with.
Shooting and a final turn charge buy the Persian Warlord sees the last elephant go down. Final scores on the doors are 16 for the Indians and 21 for team Persia.
A much closer game this with several units doing absolutely nothing beyond contributing Saga dice to the battle. Missile combat played a major part in the game. The luck involved in shooting evened itself out with both sides getting some good and some poor results. The Persian Hearthguard might be better as 2 units of 6 combined arms as having more targets means that a single bad incoming shooting turn is less harmful. The 4 Hearthguard cavalry were chosen to get additional activations for the infantry through COMBINED ARMS. On the other side; by staying out of the way, running up, shooting and running back the light chariots did much better here.
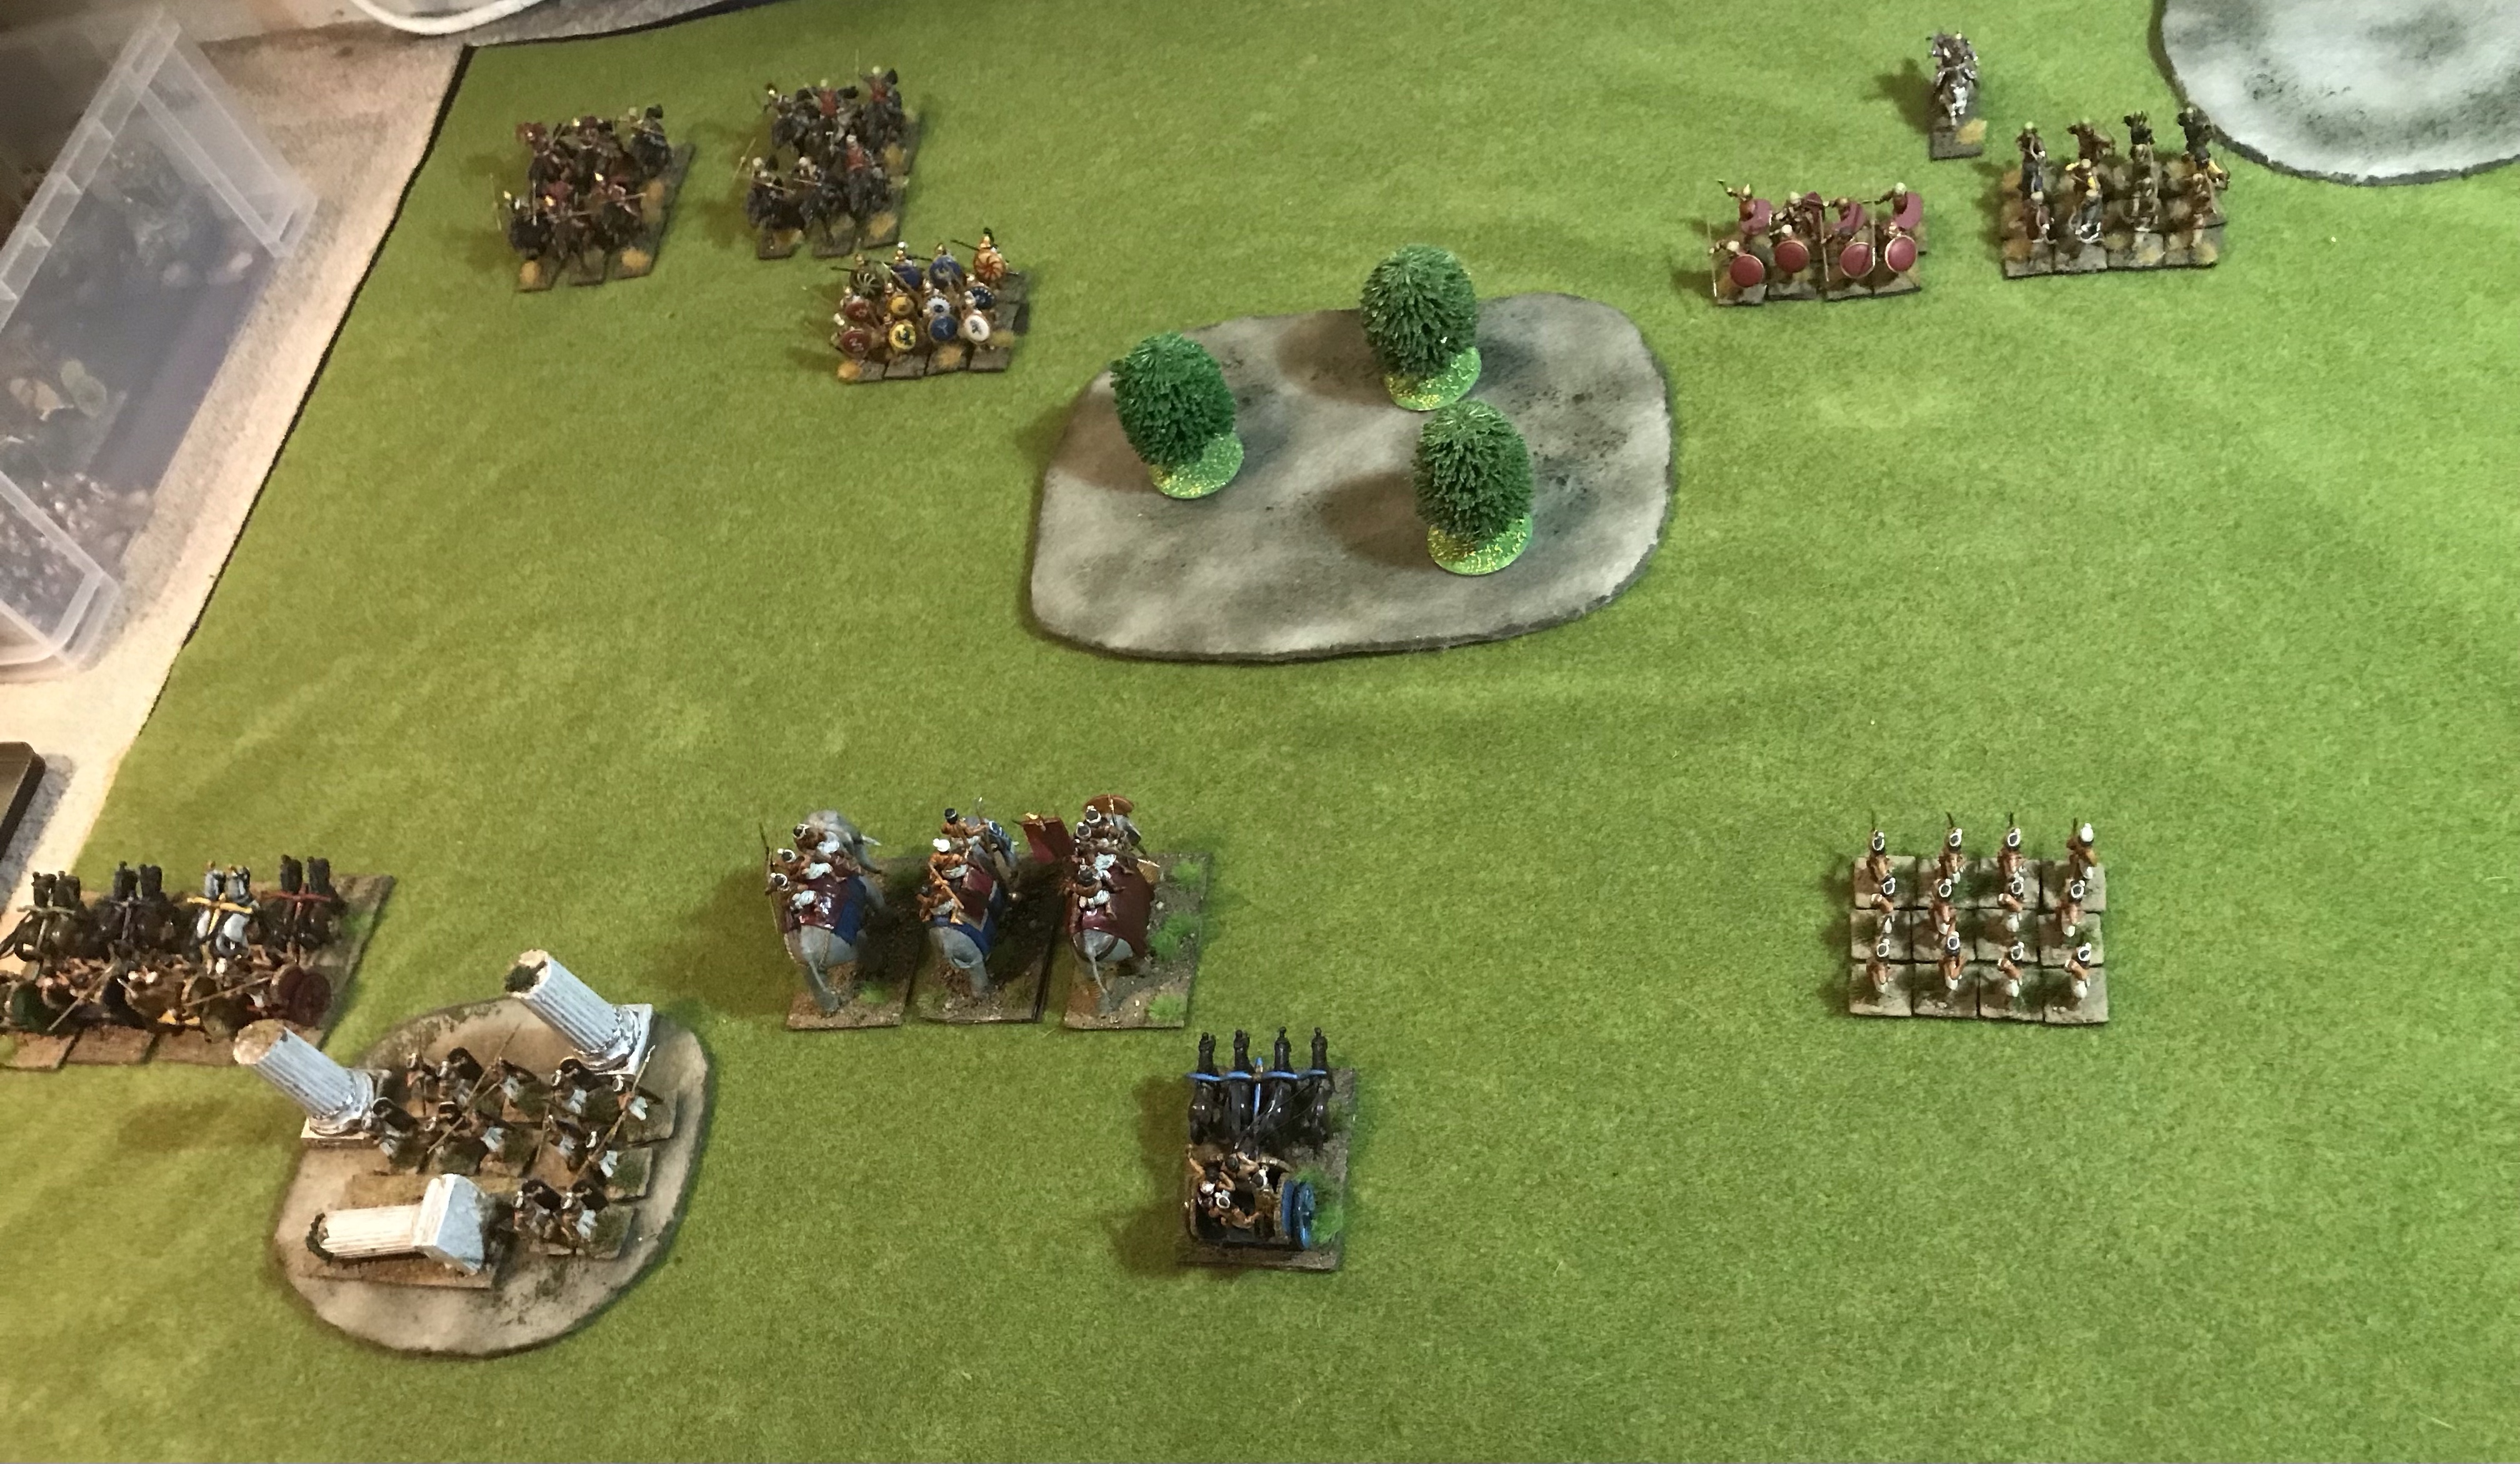
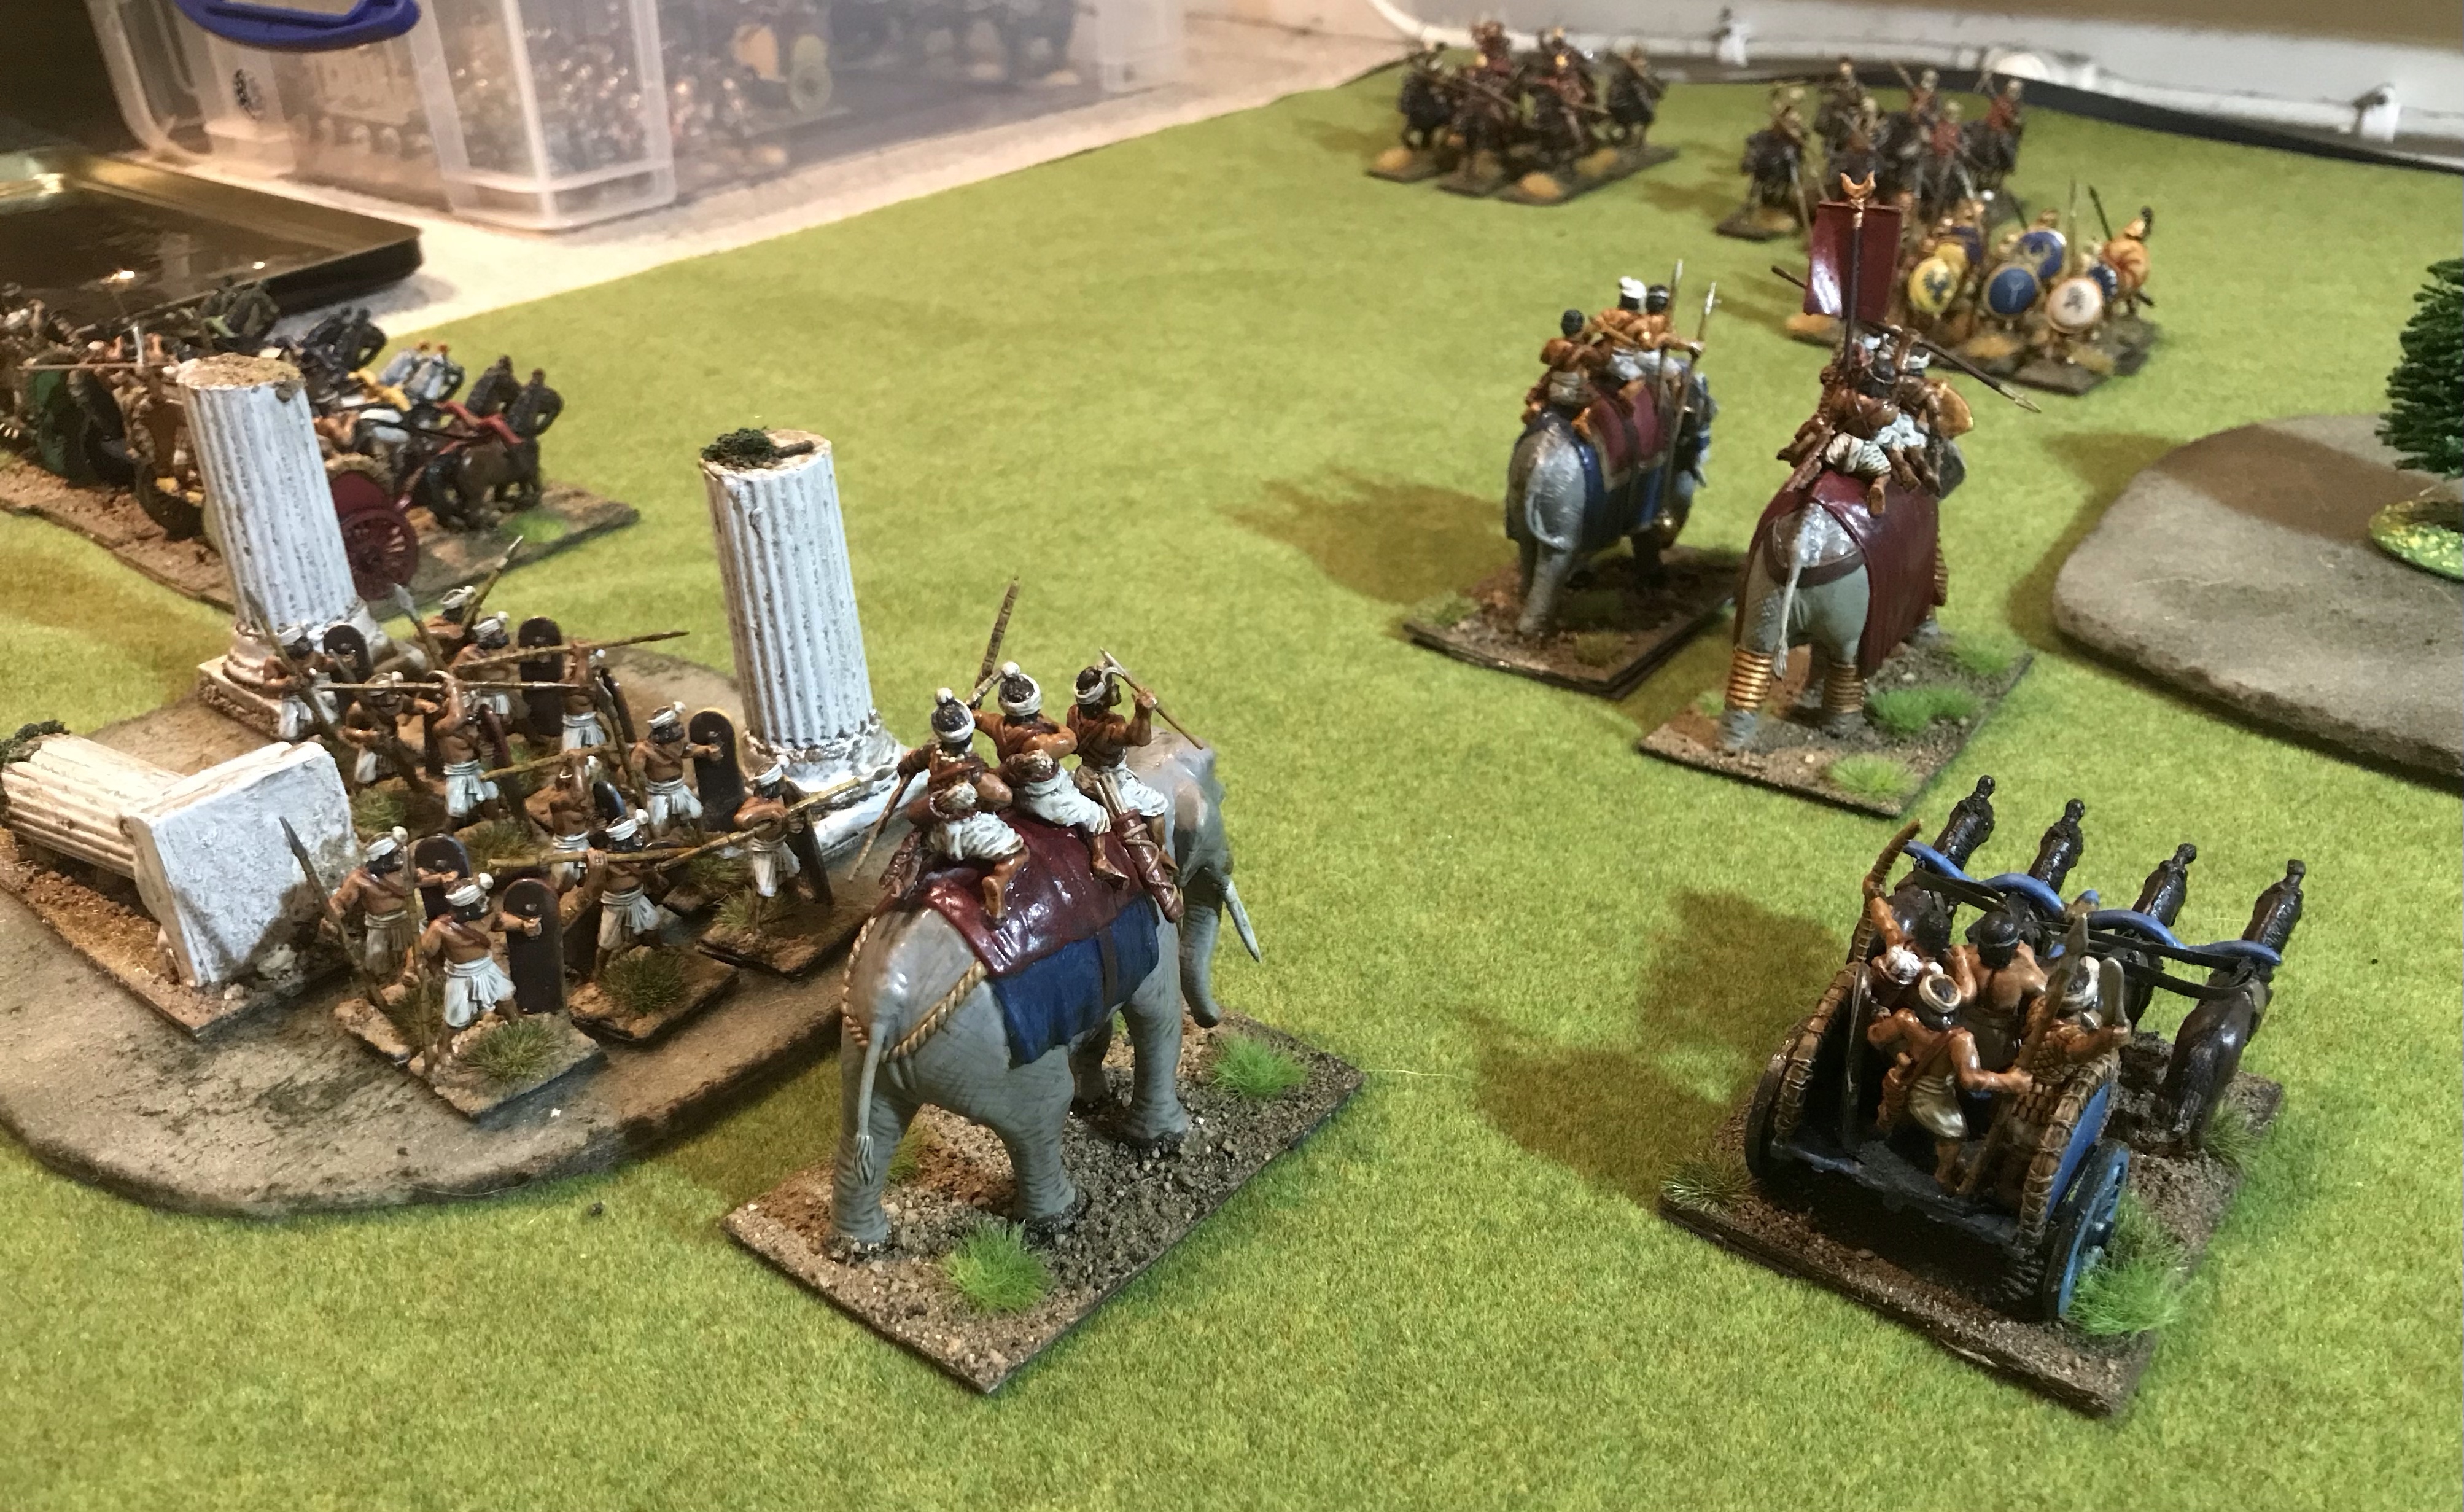
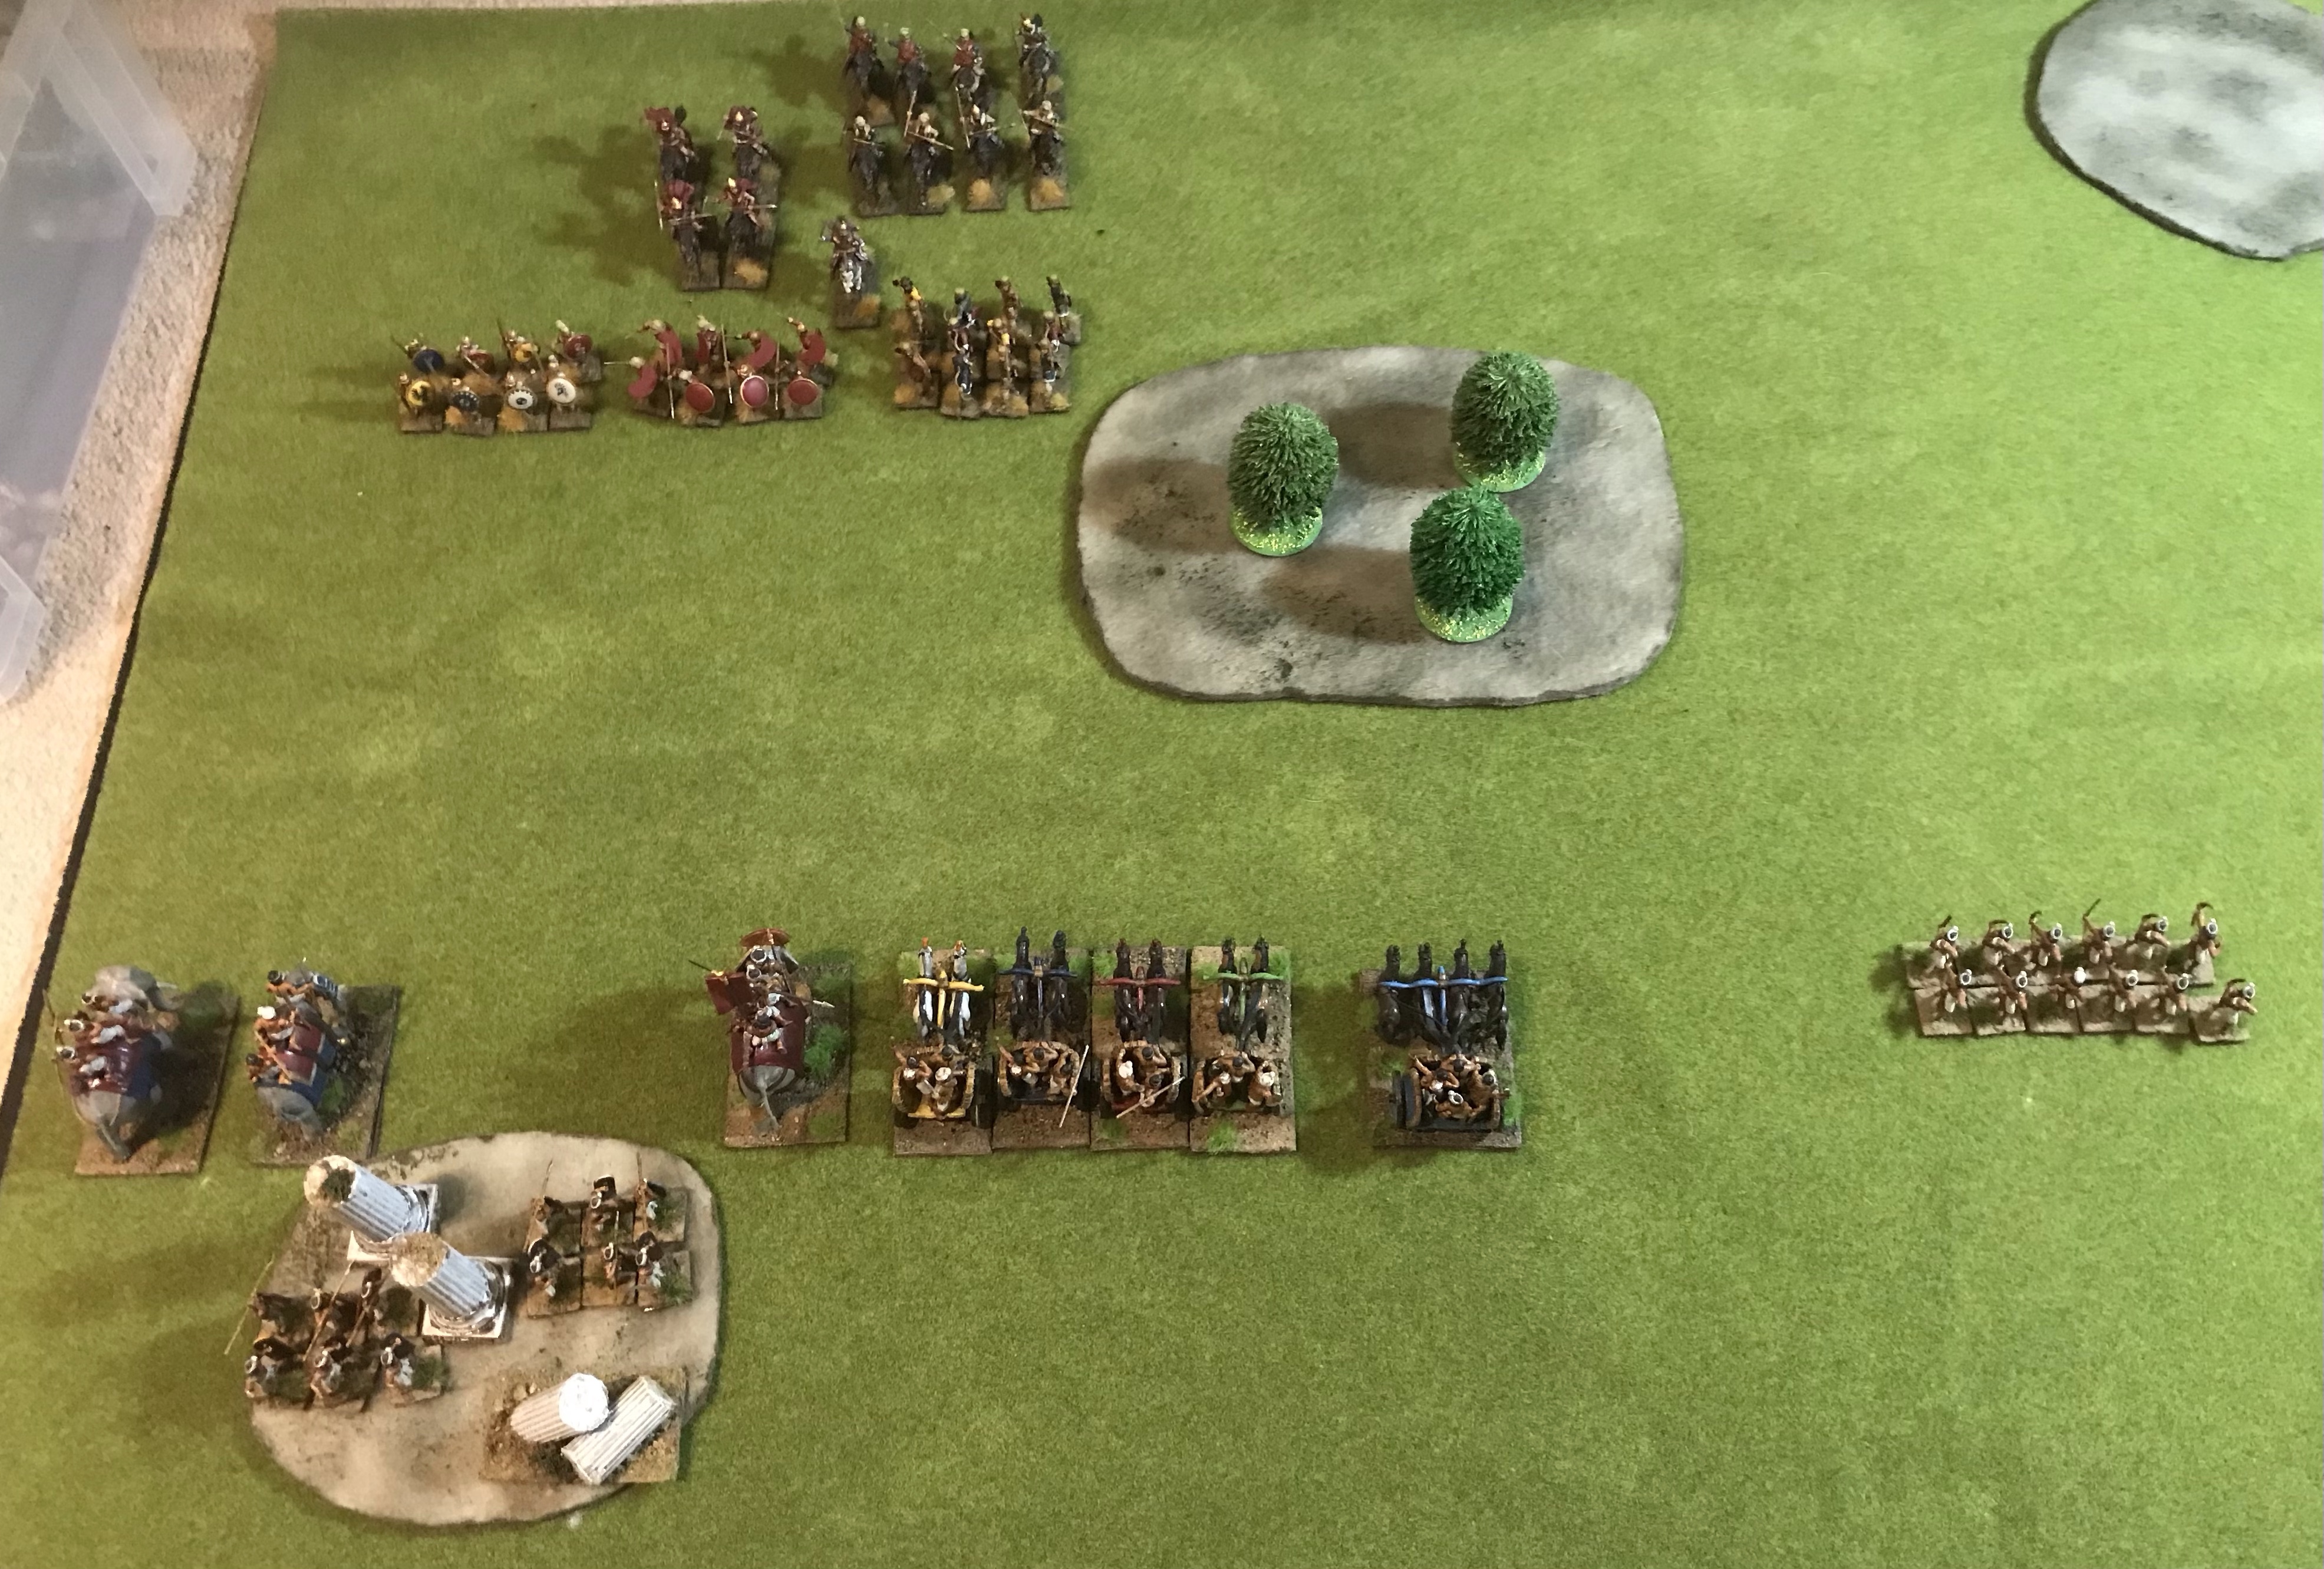
An inexpert run through of the armies of Age of Alexander reveals that 2 of the easier armies to do well with could be Classical Indians and Asian Successor. So here is a run through of a match up between them. Investment in the last NewLine sale sees the heavy chariots swapped out for a unit of 4 light chariots. 4 two-handed swordsmen from 1st Corps also show up for the fray. The Indians keep with a maxed-out 3 elephants including the super-hard Raja. Of the 6 units in play the chariots and 2 elephants ensure that the army rules of only up to half the total units (excepting the Warlord) have resilience.
The Indians are first player and aim to maximise low terrain as the Successors lose the Phalanx ability in it and it poses no problem to the Indian elephants and swordsmen beyond slowing them down. We see some woods, rough going and rocky ground with the Successors doing their best to squeeze between it.
There can be a lot of luck in playing Saga. The Indians benefit from VARJA allowing the re-roll of a single attack and defense die in each melee or shooting attack. Alas in this game they did not roll a single uncommon ‘ship’ face to activate it until turn 3.
The Indians move up. The light chariots move, shoot and move back to where they started from but only inflict 2 Levy losses.
The Successors manage to squueze through the gap into the green fields beyond.
Having rolled a solid bevy of rare dice the Indians charge an elephant into the closer phalanx. Although the phalanx are +1 versus hephalumps they dare not close ranks and are down to 2 models left. Alas this should not have happened. With perfect dice and SHOCK the maximum models an elephant can destroy is 9. The stats for the Raja elephant were wrongly used here. We must assume that the phalanx closed ranks; pushing the automatic elephant hits to 8 (doubled for close ranks and again for SHOCK) and that the phalanx rolled miserably in defense (which to be honest they did). Now back to our regular programming.
The Successors play the same game and take down the elephant with the intact phalanx.
The Successor elephant seems exposed but holds out against Indian attacks.
The Successors tidy up the flank and go after the other (non-Raja) elephant and the light chariots beside it using their remaining good phalanx, Warlord and Hearthguard. These are all looking a little tired but the bulk of the Indian army is either out of the game or suitably far away.
The Indians are down to 3 units and move up for optimum bowshot.
The cataphracts charge the Indian bow but fail to reduce them below 6; so they still generate a Saga die.
The Indians take out the 2-man phalanx and a Successor Hearthguard.
The Successors knock the Indian Levy below 6 but at some cost. Other Successor units stay out of the way. On their final turn the Indians, down to 2 Saga dice fail to eliminate the last of the Hearthguard. A Successor victory (25:15 massacre points) with no need to play out the last turn.
In all a poor performance for the light chariots. They managed one turn of running up, shooting and running back all with no fatigue. Several armies have advanced abilities to do this but to make the most of it requires additional buffs to the shooting dice. VARJA would do it, STEEL DHANU gives shooting re-rolls so is also good but it all means at least 3 activations or Saga dice to get a decent chance of success. It also helps to have a juicy target, neither Levy in cover nor Cataphract Hearthguard fall into that camp. The Raja unit also failed to play well. It costs an extra point to field over a basic Warlord and should be used like the pile of bricks it is. If the Warlord’s role is mostly supporting he might as well be on foot or in a fancy chariot.
The Eastern Successors are still looking to be the way to go with Sarissa as with fair dice they can move them twice without fatigue using HEGEMONY. If that is not workable they can strip fatigue with PANTODAPOI. Two moves many only be ‘Short’ + ‘Short’ for ‘Medium’ but they could substitute a charge of ‘Medium’ for the second ‘Short’ and that is a lot better than other armies’ phalanx crawling around or chugging up fatigue.